Learn to paint a night-time cityscape like a pro in this tutorial of Tokyo in the "dark"! Instructor William "Bill" Dunn captures Ginza's vibrant night life in this watercolor scene, and uses watercolor's unique transparency trait to make his painting glow. Want to watch the video version? The full tutorial is available to members of our Beeblys WatercolorPainting.com.
Materials Used In This Watercolor Class:
- Reference picture of Tokyo at night
- A block of Fabriano cold press watercolor paper (140lb, size 12″ x 18″)
- Pentel Graphgear 1000 automatic drafting pencil, 0.7mm lead size with 2B lead
- ½" Artist's or masking tape
- Painting palette for watercolor paints
- Auxiliary plate or palette
- A container of water
- Paper towels or a rag
- A tabletop easel or a box to prop your painting on
- A spray bottle with clean water
Paints (Holbein Artists' Watercolors)
- Lemon Yellow
- Brilliant Orange
- Cadmium Red Purple
- Permanent Alizarin Crimson
- Cobalt Violet Light (a.k.a. "Lavender")
- Cerulean Blue
- Cobalt Blue Hue
- Burnt Sienna
- Burnt Umber
- Indigo
- Neutral Tint
- Ivory Black
Winsor & Newton's Professional Watercolors
- Permanent Carmine
- Permanent Mauve (or Sennelier's Cobalt Violet Deep Hue watercolor paint)
- French Ultramarine
Brushes
- Neef Rigger Supreme Taklon Series: Long handle rigger brush (no. 10)
- Escoda Perla Joseph Zbukvic Series: Round brush (no. 8)
- Escoda Perla Joseph Zbukvic Series: Round brush (no. 20)
- Escoda Versàtil Kolinsky Sable Fiber Series: Pointed round brush (no. 12)
- Winsor & Newton's Sceptre Gold II Series 606: One stroke flat brush (size 1")
- Winsor & Newton's Series 7 Kolinsky Sable: Round brush (no. 1)
Step 1: Sketching A Night-Time Cityscape
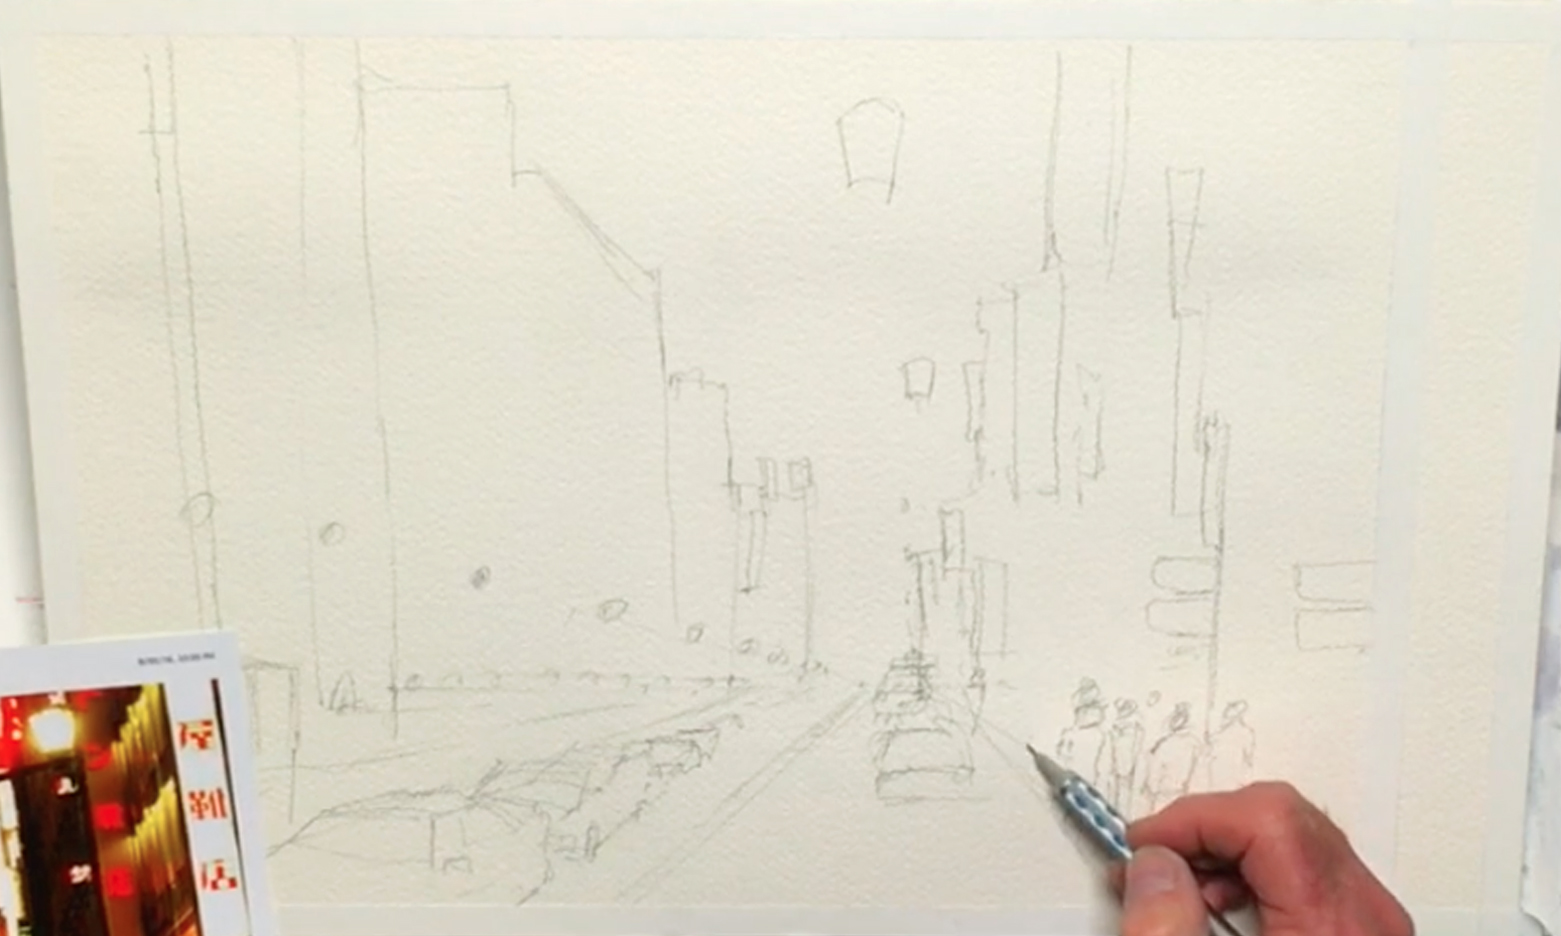 Painting night scenes are notoriously tricky, but Bill shows how to tackle such a scene in this lesson. Here, he introduces and breaks down his reference picture, which is a night-time cityscape of the Ginza district in Tokyo, Japan. Next, he does the usual by taping the edges of his watercolor paper and creating a border around his painting area that is to scale with the reference picture. This helps with framing purposes, and like Bill, you can also leave a strip of space to the right to test colors on when painting. Before sketching, he also sprays his paints with water to soften them and make them easier to paint with later. First, pencil in a horizon line, then start outlining the cityscape, beginning at the vanishing point. Draw from big to small shapes, and keep to the rules of this 1-point perspective composition! You don't need to make it perfect; just try to capture the impression of a busy cityscape. Add the road and some simplified vehicles, and draw them in perspective. Details like lampposts, signs, and people can also be added, but keep them to a minimum, as you can always draw with the paintbrush instead. It's also fine to change your composition to be more interesting than the reference photo! To finish off, pencil in the letters of the "Natsuzakaya" sign. This will help you get the right spacing in this particular sign. Below is a close-up of Bill's sketch:
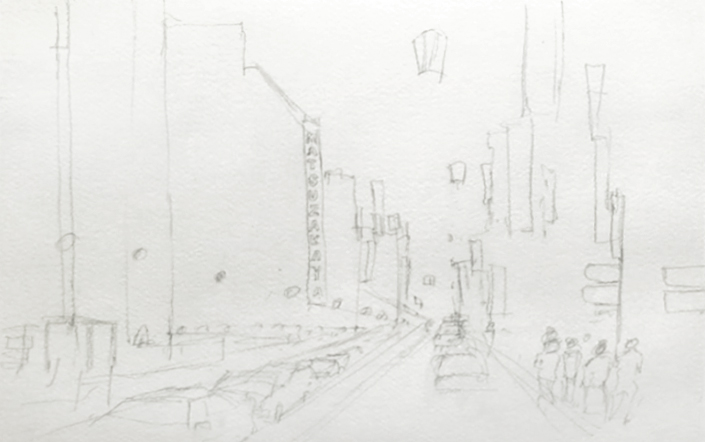
Step 2: Neon Undertones
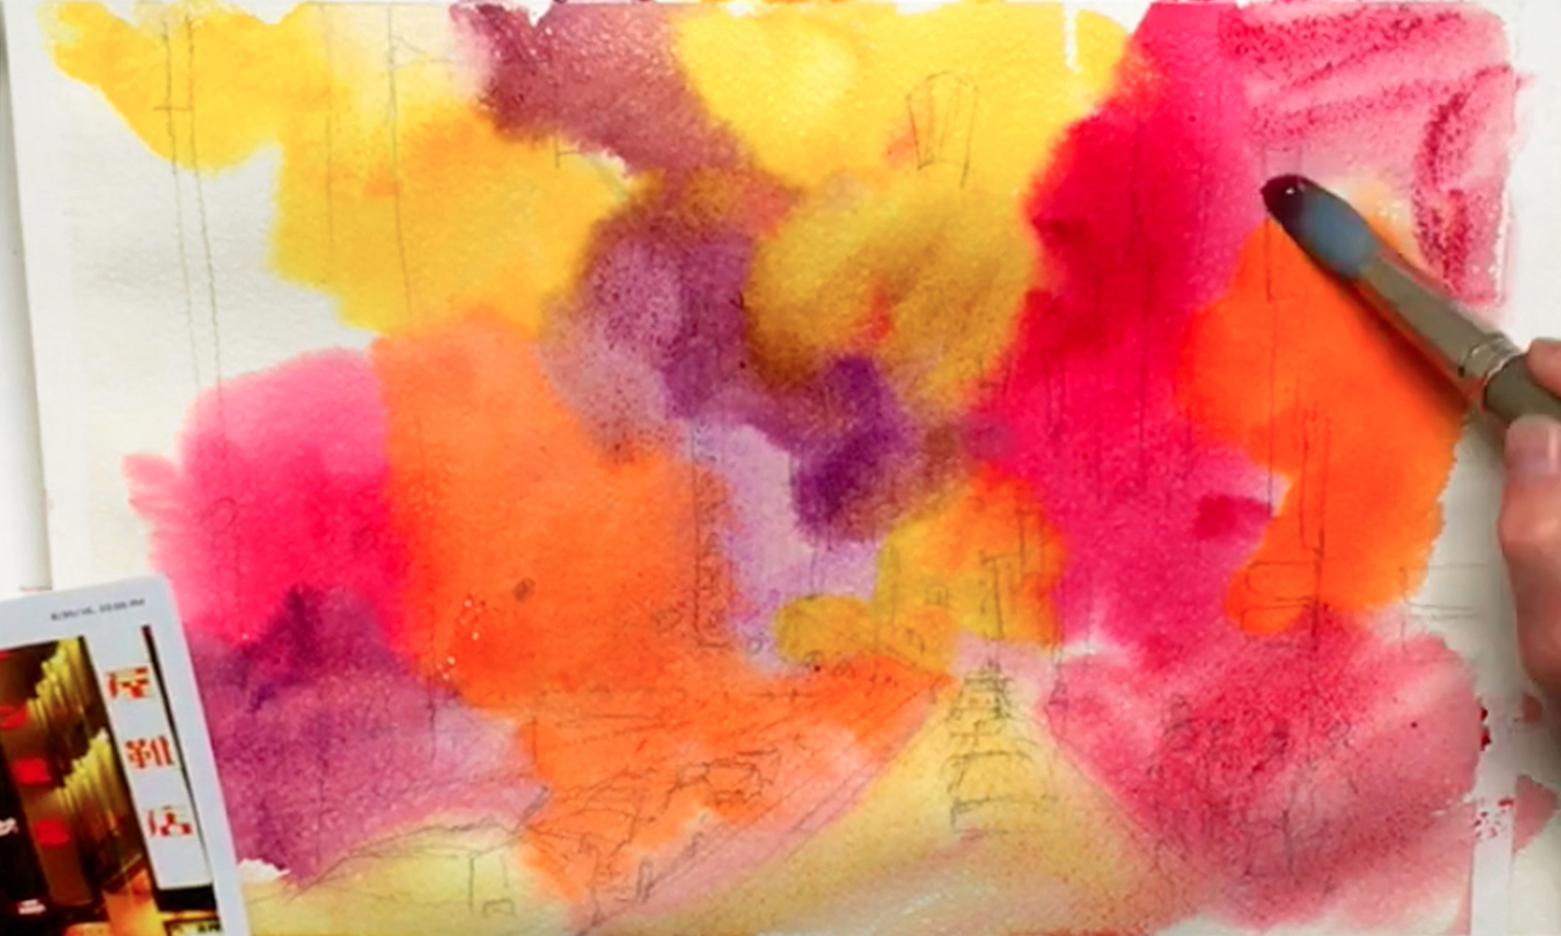 Design-wise, it will help to plan the colors in advance, as copying the photo directly will make for a boring painting. Bill decides to go with neon undertones and a dark purple night, as going with straight black won't give the vibrant effect he's going for. To paint these undertones, wet the whole painting area with clean water using the no. 20 round brush. While you give the paper time to absorb the water, prep some bright colors on your palette separately. Drop Cobalt Violet Light onto the wet paper, creating the "wet-in-wet" effect. You'll paint large patches of color next to each other, so leave room for other colors while allowing the edges of the paint to naturally bleed into one another. Next, use Permanent Carmine, and add this in places around the purple patches. Keep going with other bright colors like Brilliant Orange, Lemon Yellow, and Permanent Alizarin Crimson, flooding the painting with color. When you're done, leave the paint to dry, or use a hair dryer to speed up the process.
Step 3: A Dark Sky (Without Black)
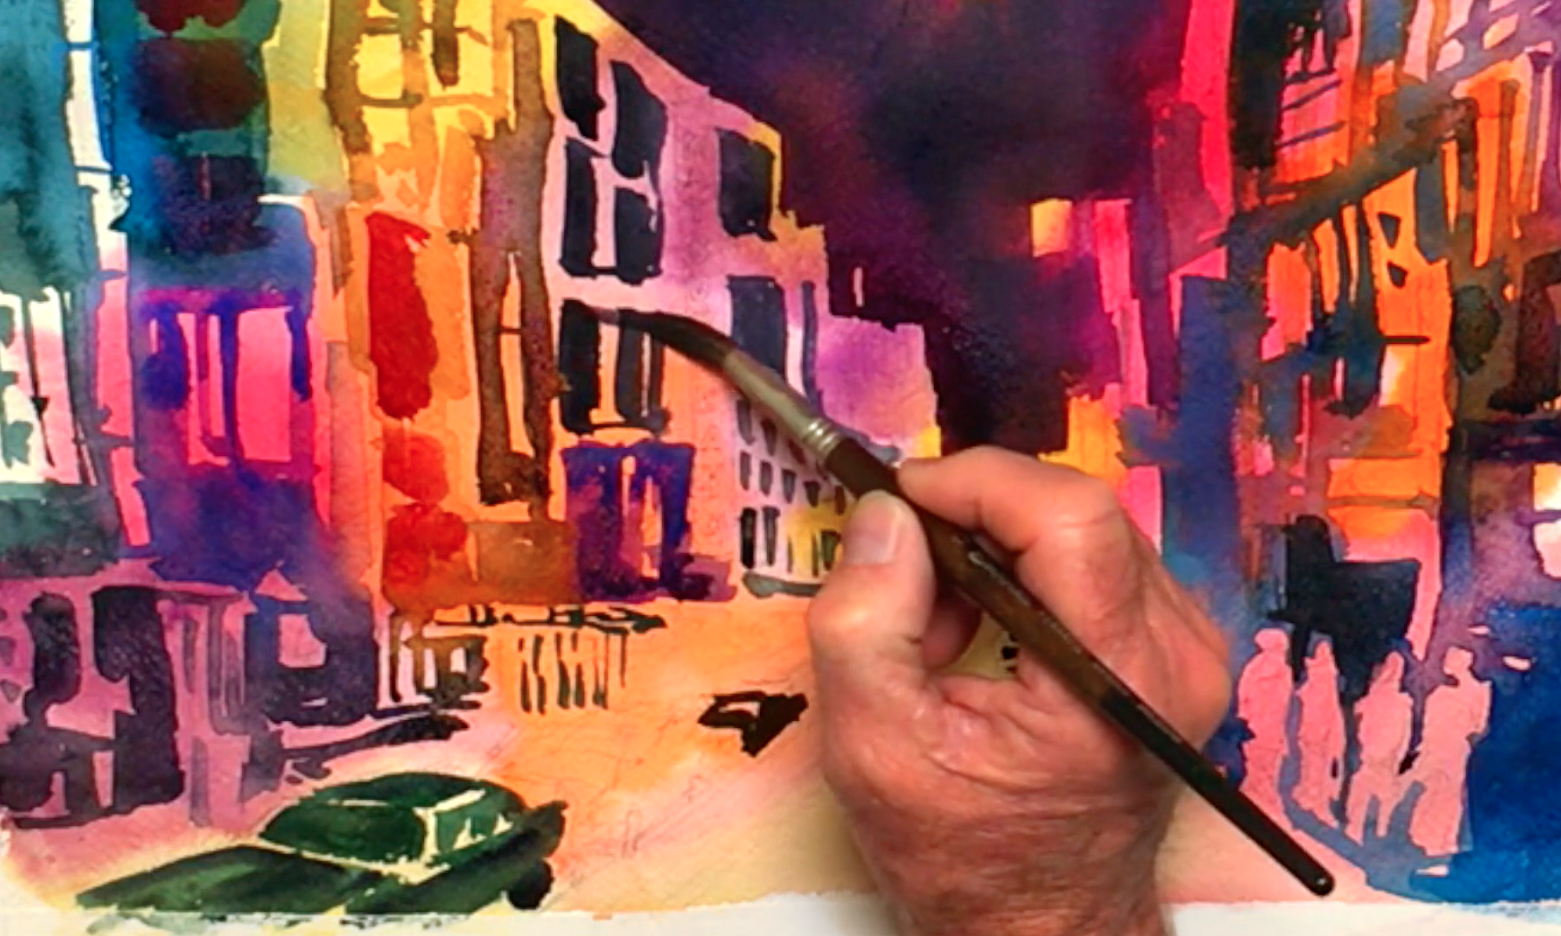
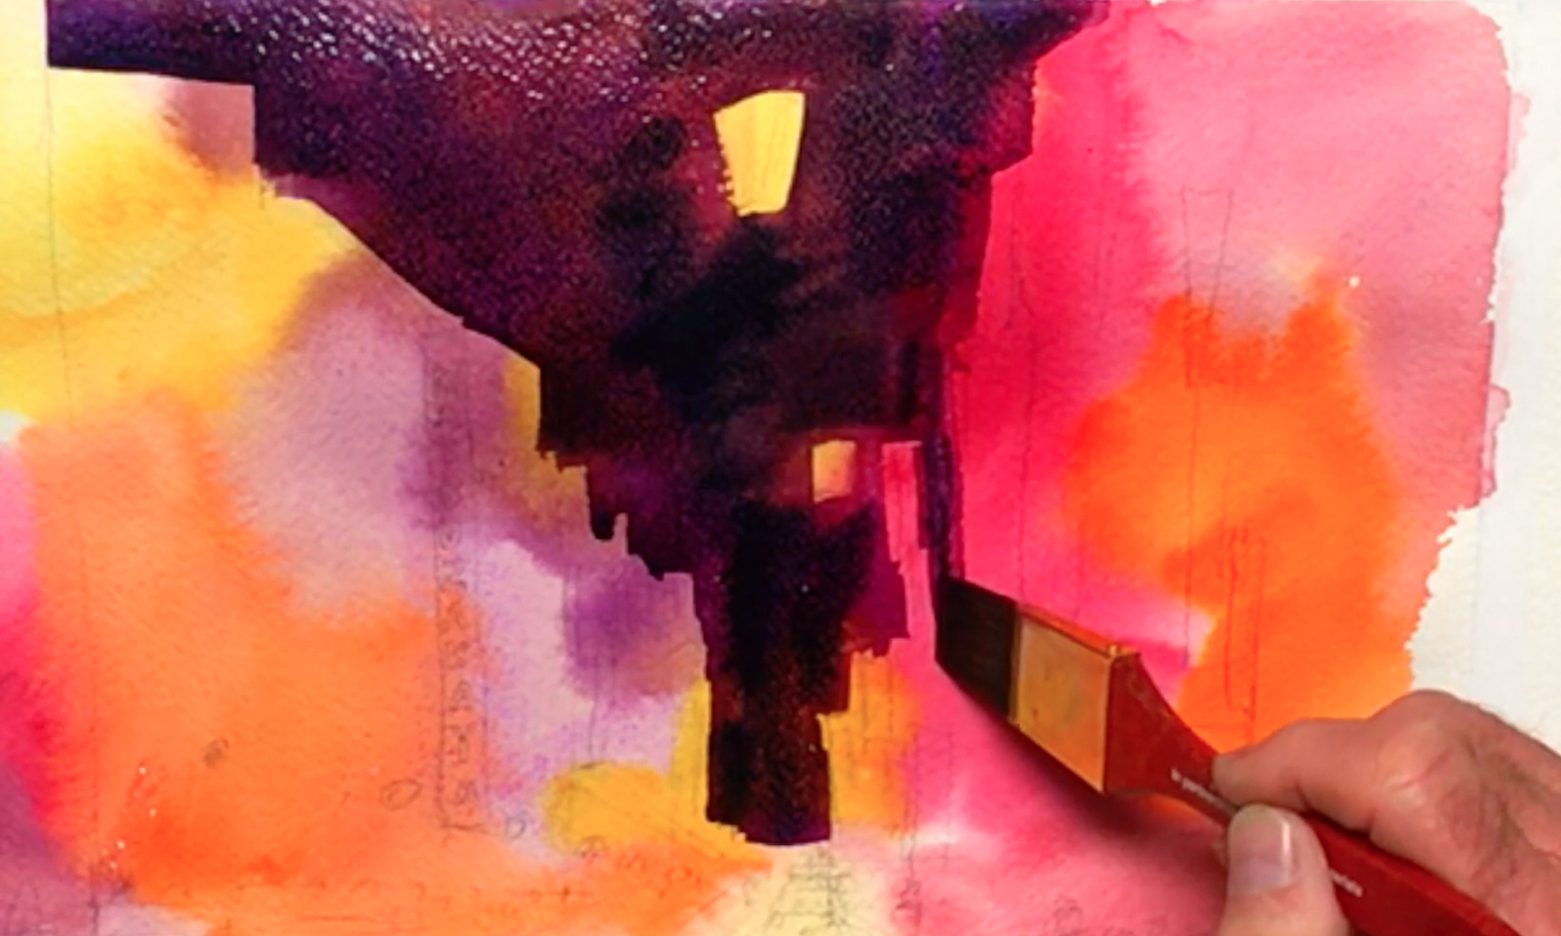 If there are any backwashes where too much paint was added too quickly, you can soften these marks using a no. 8 round brush and brushing over them with clean water. Make sure the paint is completely dry before moving on, as you're looking to create hard edges in this step via the "wet-on-dry" technique (i.e. wet paint on a dry surface). Break down the buildings and sky into shapes, and go over your outlines again with a pencil if necessary. With a 1" flat brush, prep a lot of Permanent Mauve on your palette. Then, block in the sky while avoiding the buildings and lamps. Use the edge of the brush to get narrow and straight lines, and paint quickly but carefully to prevent streaks from forming in your night-time cityscape. When you're done, add a layer of Indigo on top, allowing the paint to mix on paper.
Step 4: Painting Buildings In Perspective
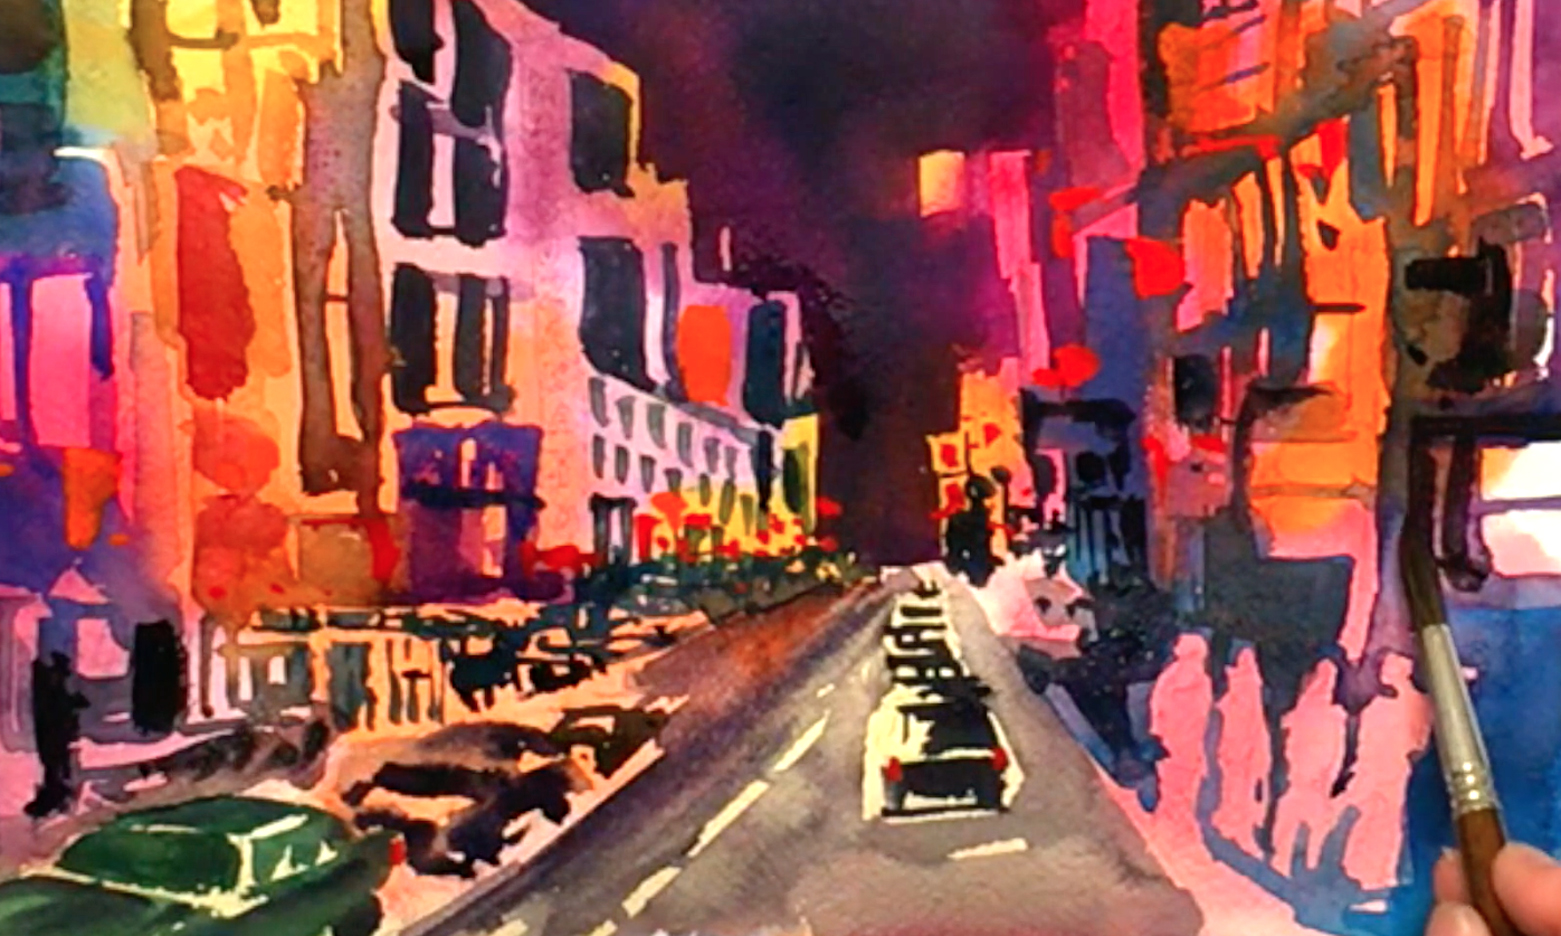
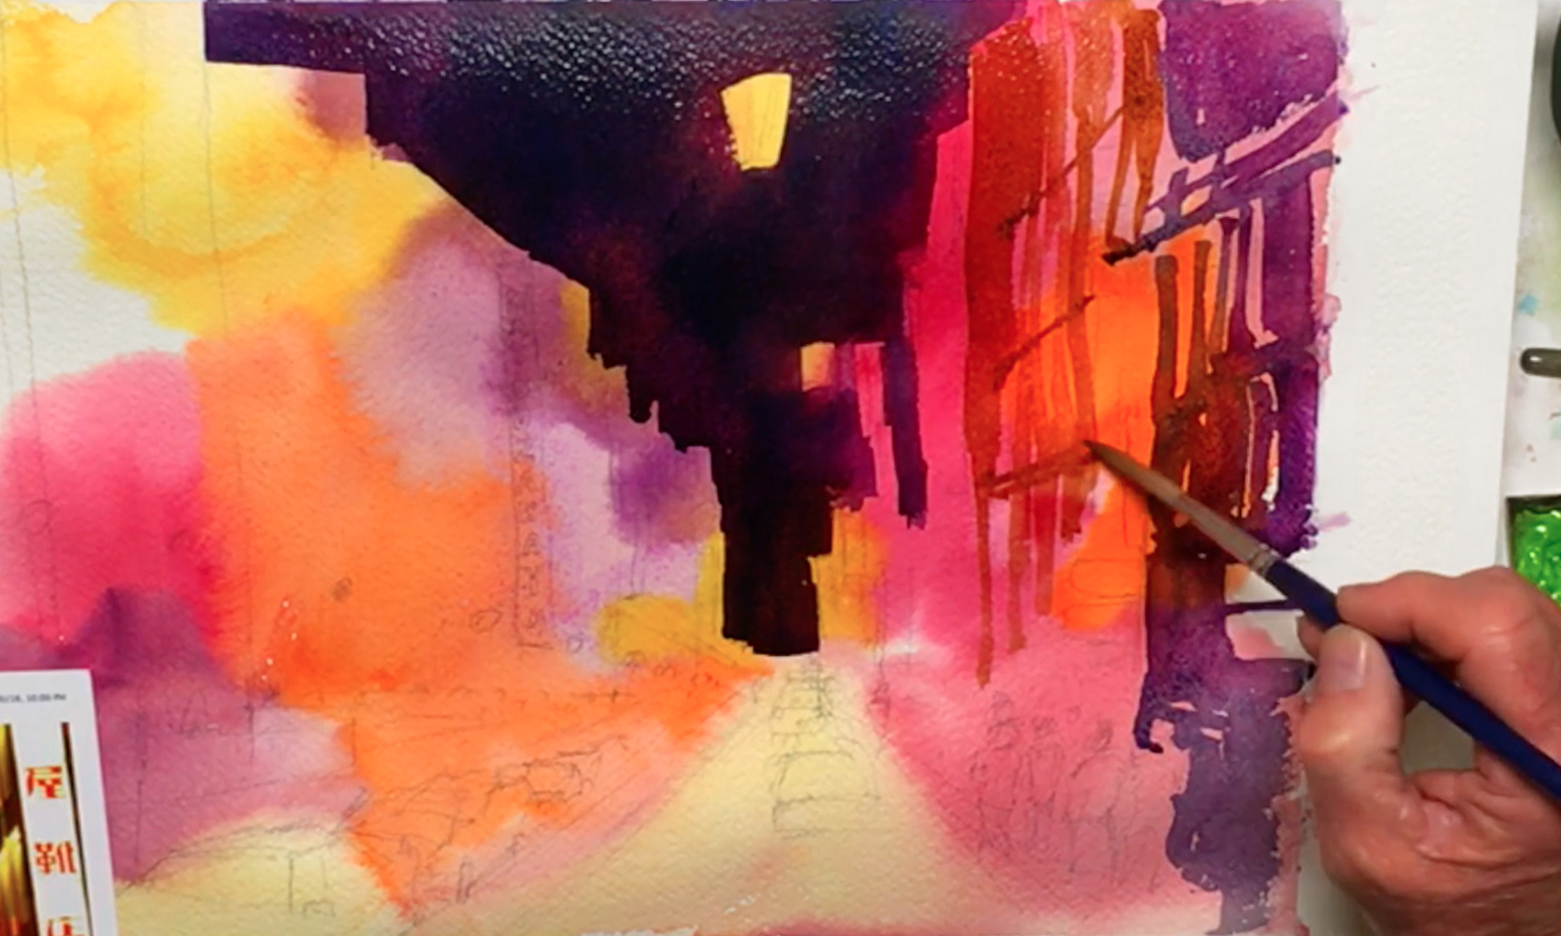 While you leave the sky to dry, work on a different area, such as the buildings. Adding Neutral Tint to your purple mix, use the no. 10 rigger brush to paint the rightmost building while creating architectural details by painting around them via negative space. Remember to stick to the rules of 1-point perspective! Paint around the outlines of windows and balconies, capturing the impression of a building in this night-time cityscape. Repeat the same process with the next building over, mixing purple with more Permanent Carmine and Mauve. Let some of the base layer's undertones show through for a neon glow, and while your paint is still wet, drop in darker colors for soft shadows. Add Burnt Sienna to your purple mixture, and paint the next building in this dark orange color. Streak your paint in vertically, and angle horizontal lines toward the vanishing point to keep them in perspective.
Step 5: Glazing For More Vibrant And Deeper Colors
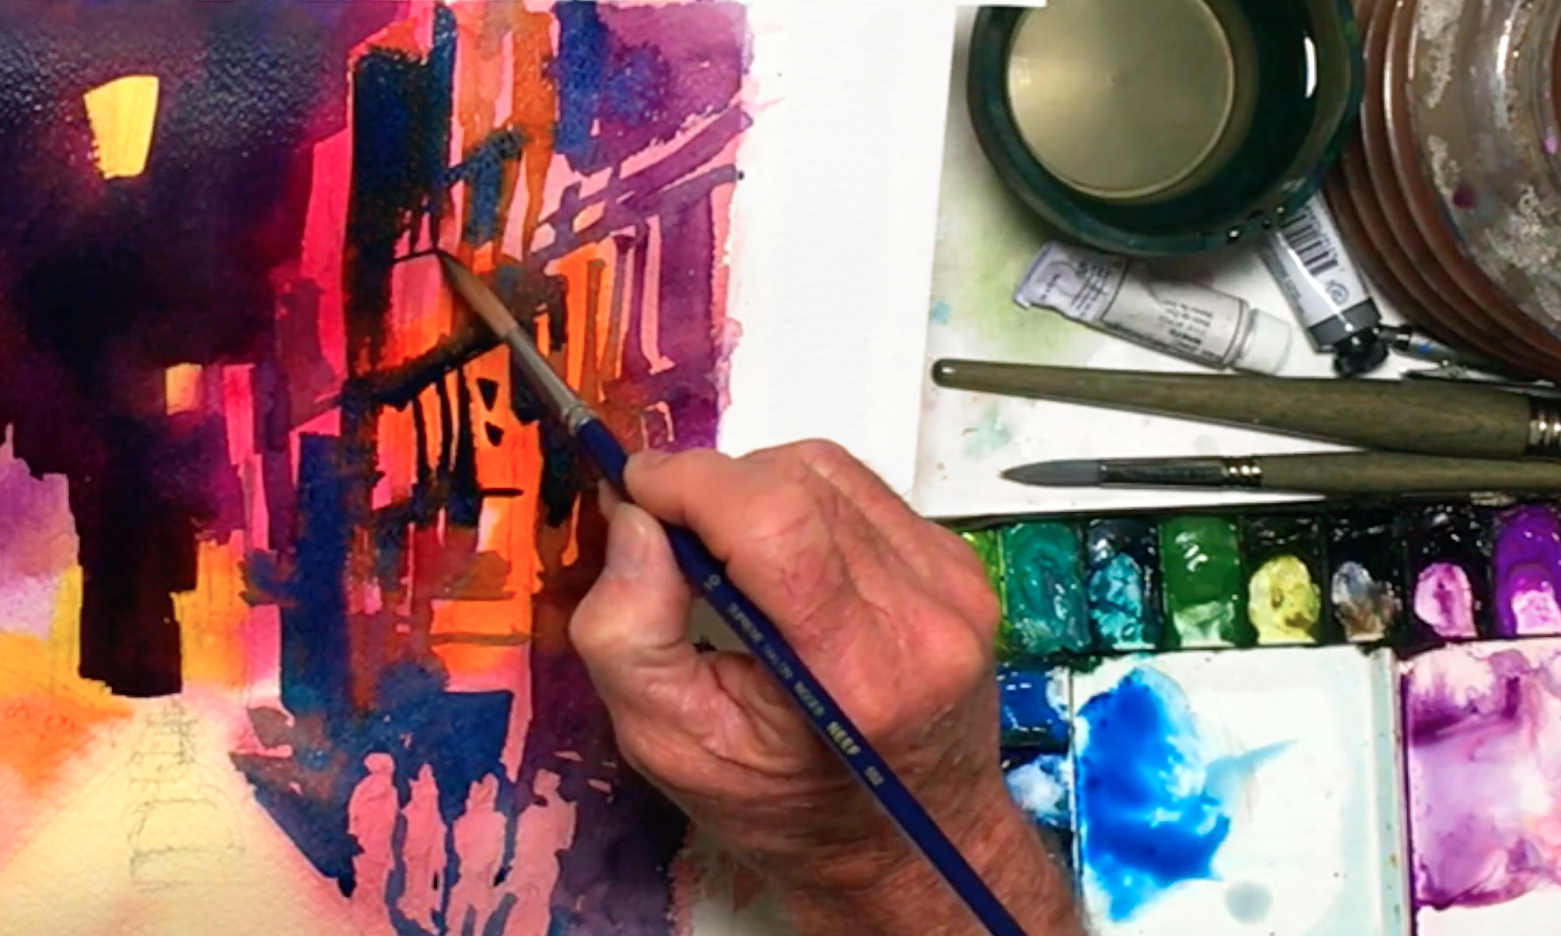 For color variation, add Cerulean Blue to the building next to the dark orange one, then add some darks among the lower area of the buildings. Gradually layer more saturated Cerulean for mid-tones, and add French Ultramarine for darker shadows between the people on the street. Keep your brushstrokes loose and impressionistic for a busy atmosphere! Drop more Ultramarine into the wet building areas (i.e. "wet-in-wet"), then mix in Indigo for an even darker blue, and straighten out some of the now-dry details (i.e. "wet-on-dry").
Step 6: Adding Colorful Buildings
 For the left side of your night-time cityscape, apply pure Burnt Sienna to the building next to the leftmost one. Use the same methods from step 4, and make sure to leave some light showing through the windows. Mix Neutral Tint and Ultramarine with the Burnt Sienna for a dark turquoise, then paint the leftmost building. The same color can be used for the windows on the buildings near the vanishing point, and for the shadows of the Burnt Sienna building.
Step 7: Incorporating A Glowing Effect
 With Neutral Tint, paint windows along the middle buildings on the left side. Paint around any signs and lights that will add interest to your night-time cityscape, and change to Cobalt Violet Light for other building details. While not accurate to the reference photo, these bright colors will help make your painting pop, and give it the night-life buzz. Blend some Cobalt Blue Hue into the light purple areas, and add more architectural elements. Lastly, use more Cobalt Violet and Neutral Tint for the finishing touches of these buildings, and to darken some of the details.
Step 8: Street And Vehicle Details
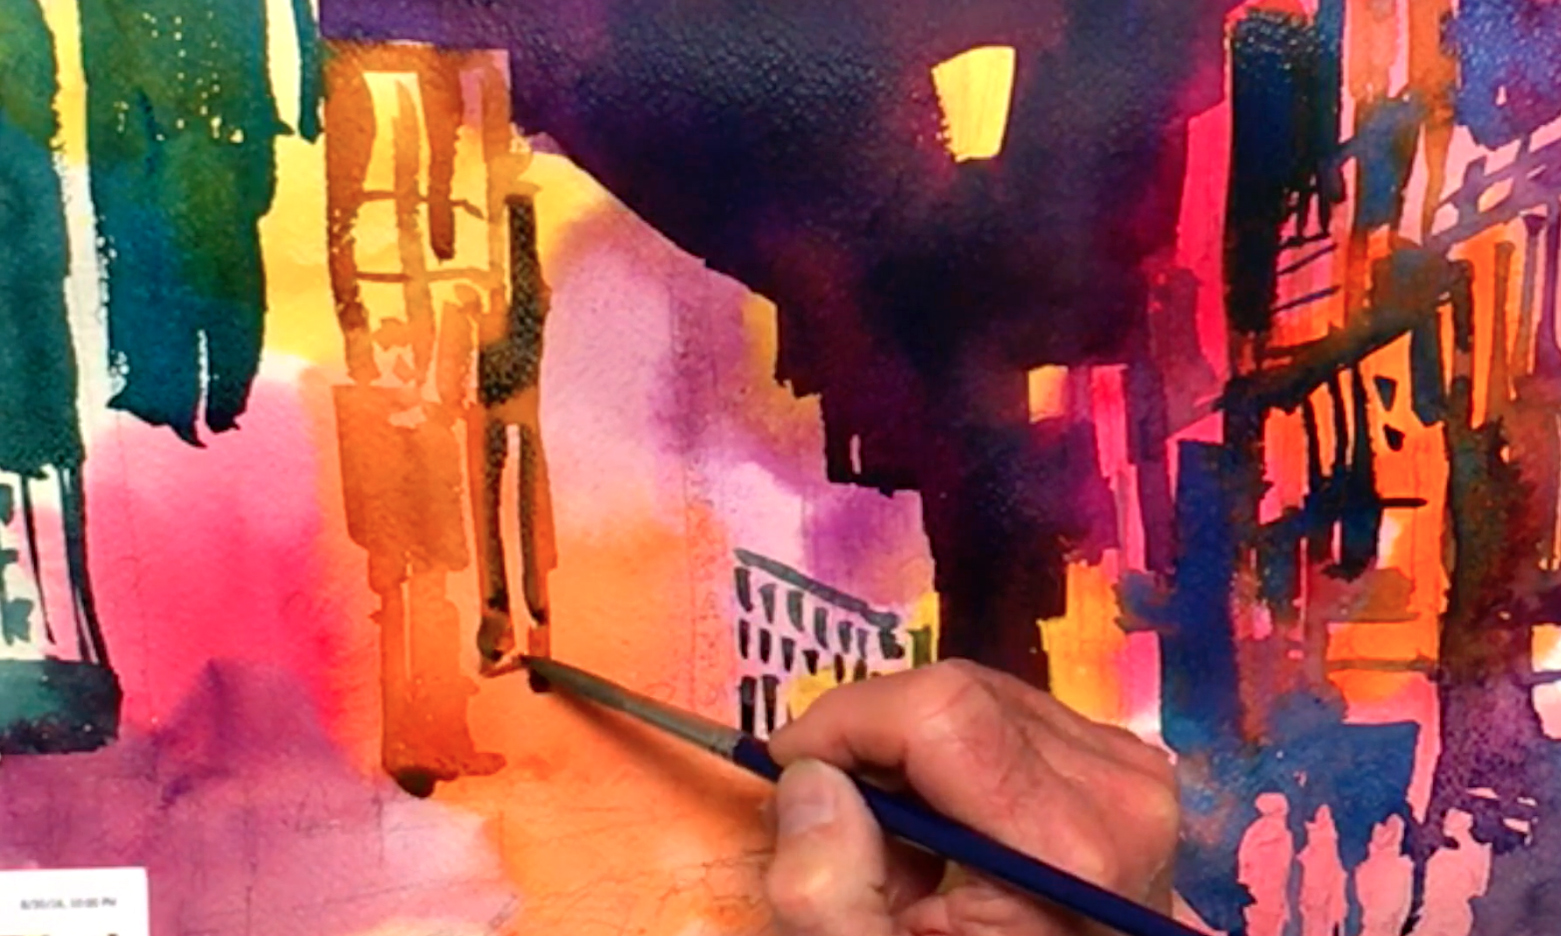
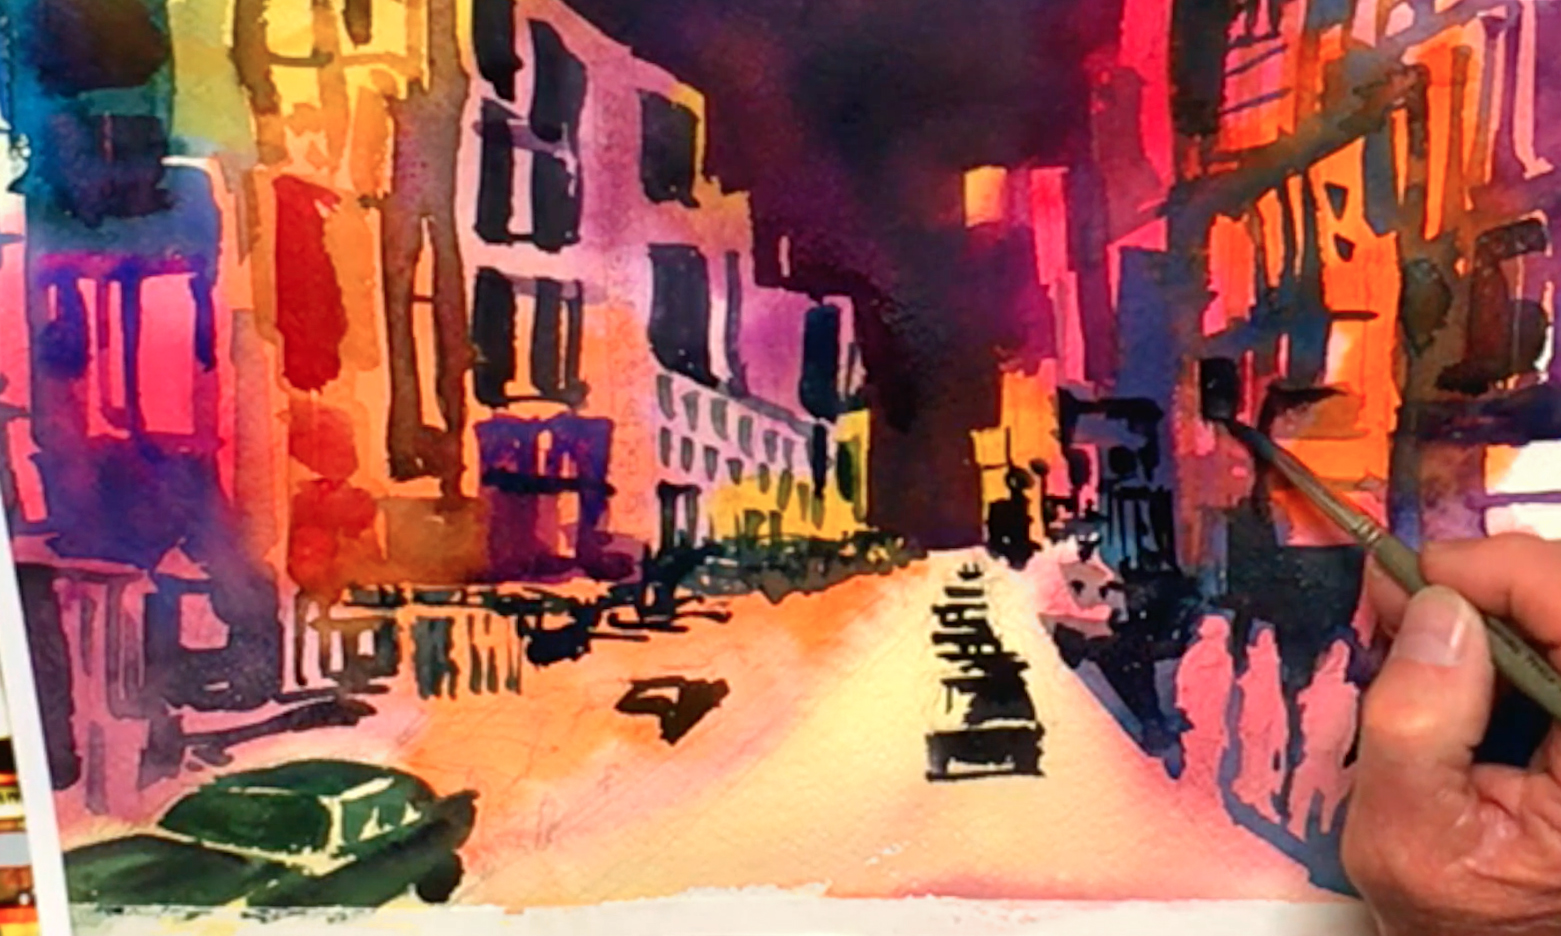
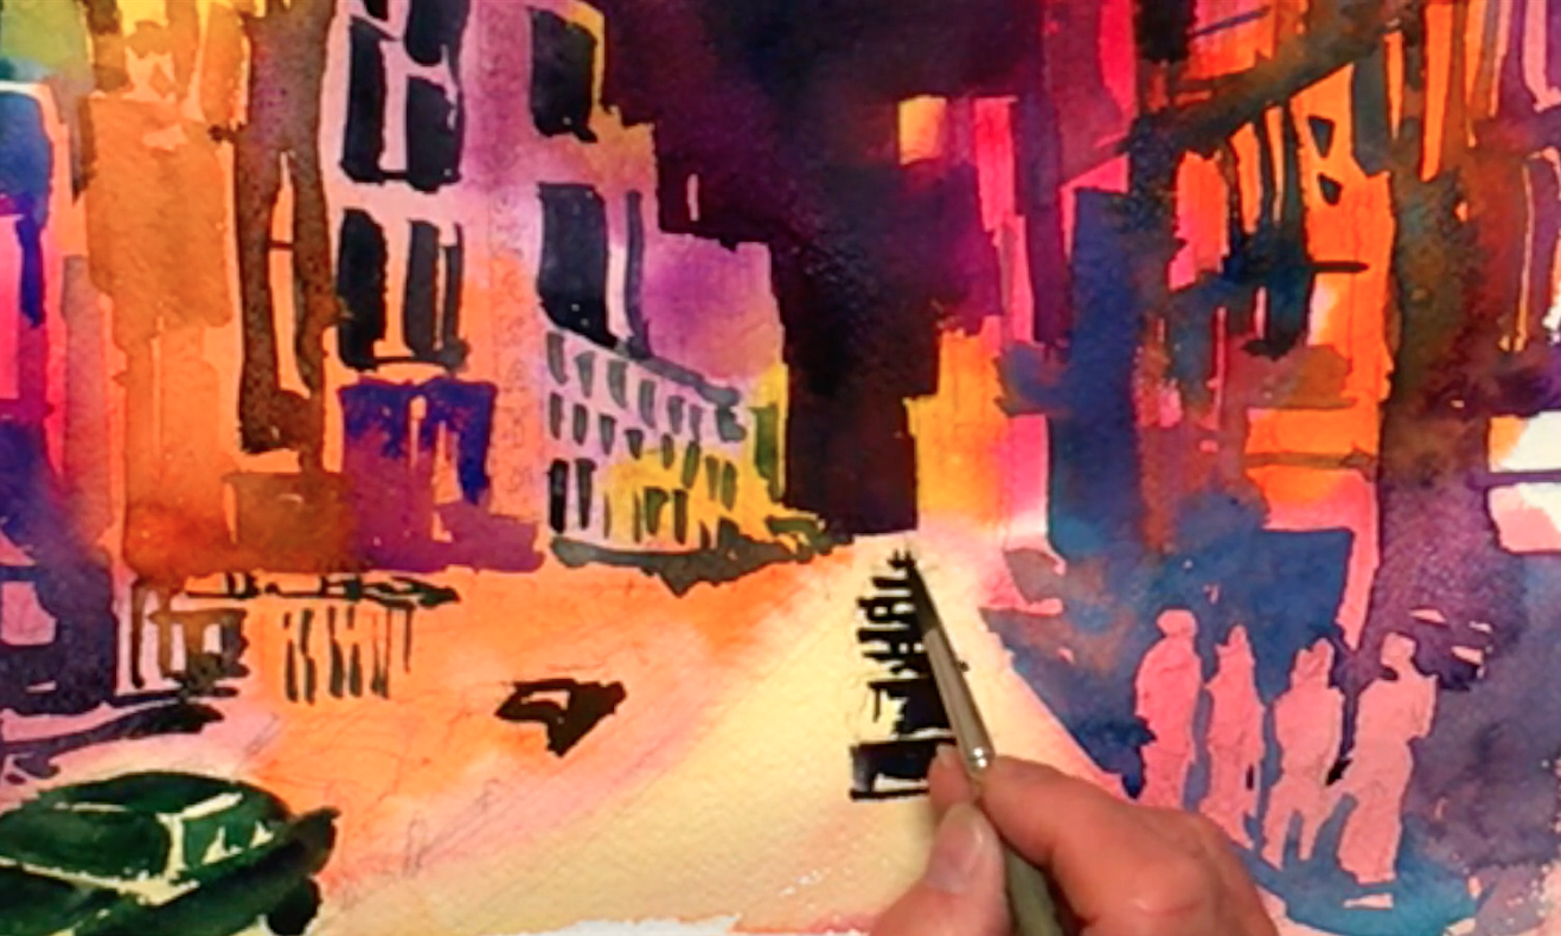 Moving on, use Neutral Tint to add the impression of store shops and windows along the street in the bottom left corner. Draw abstract shapes with your brush, before switching to the no. 8 round brush for smaller details. Mix Burnt Sienna, Indigo, and Ultramarine, then paint some awnings to the right, and the windows and roof of the closest car. Streak in some Neutral Tint to make this car look shinier, and to paint the wheels. Do the next car over, skipping the car in between to prevent the wet paint from bleeding into another wet area. Paint the middle car as well, and change your colors slightly each time, adding Burnt Umber for one, or more Neutral Tint for another, etc. Remember that the vehicles will look smaller as they near the vanishing point, so make sure to do this to create the proper tunnelling effect! Then, block in some dark shadows for the middle building on the right side before continuing.
Step 9: Layering And Glazing For More Glow
 Next, switch to the no. 12 pointed round brush, then use Ultramarine to block in the bottom right corner. Pick up some of the dark brown mixture used previously, and layer more dark details in the rightmost building. Keep touching up and adding layers to the buildings that need them, changing colors from Alizarin Crimson to purple and blue mixtures. As the underlying layers should be dry, you'll be glazing colors on top to create more subtle color effects without muddying them.
Step 10: A Party Of Colors In A Cityscape
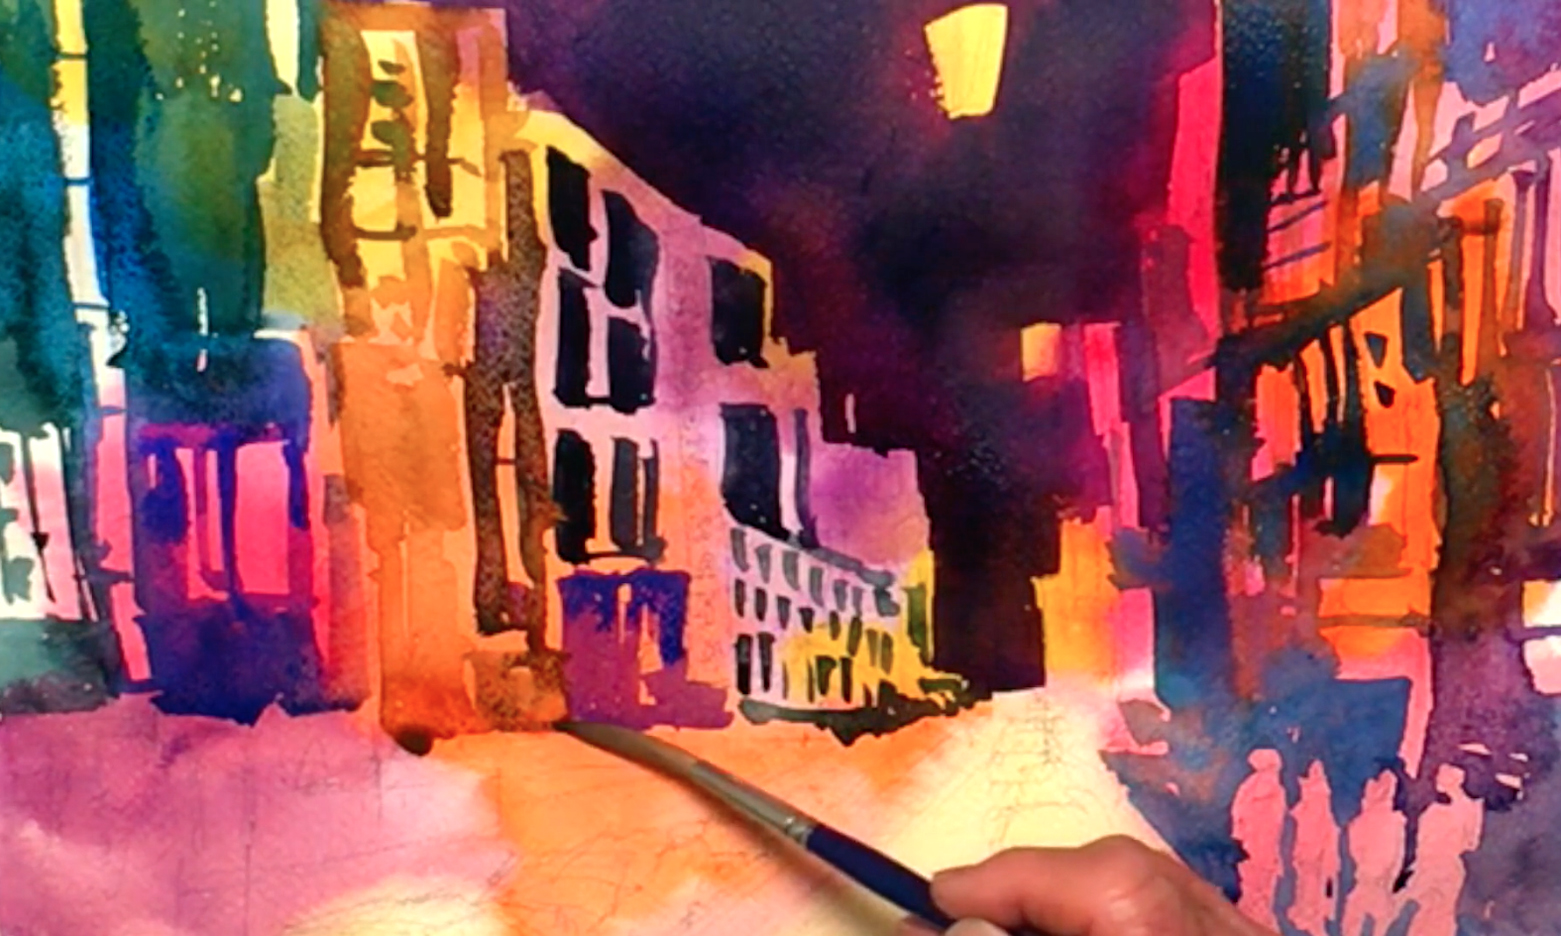
 Go back to the no. 8 round brush, then mix Ultramarine, Cobalt Blue, Indigo, and Burnt Sienna before painting the smaller details on the buildings. In addition, paint the silhouettes of patios, restaurants, people on the streets, etc. This adds more activity to this night-time cityscape! Use more Neutral Tint for details to the buildings on the right, adding Ivory Black for the darkest areas. Don't use too much though or else your colors won't look as vibrant.
Step 11: Bright Lights
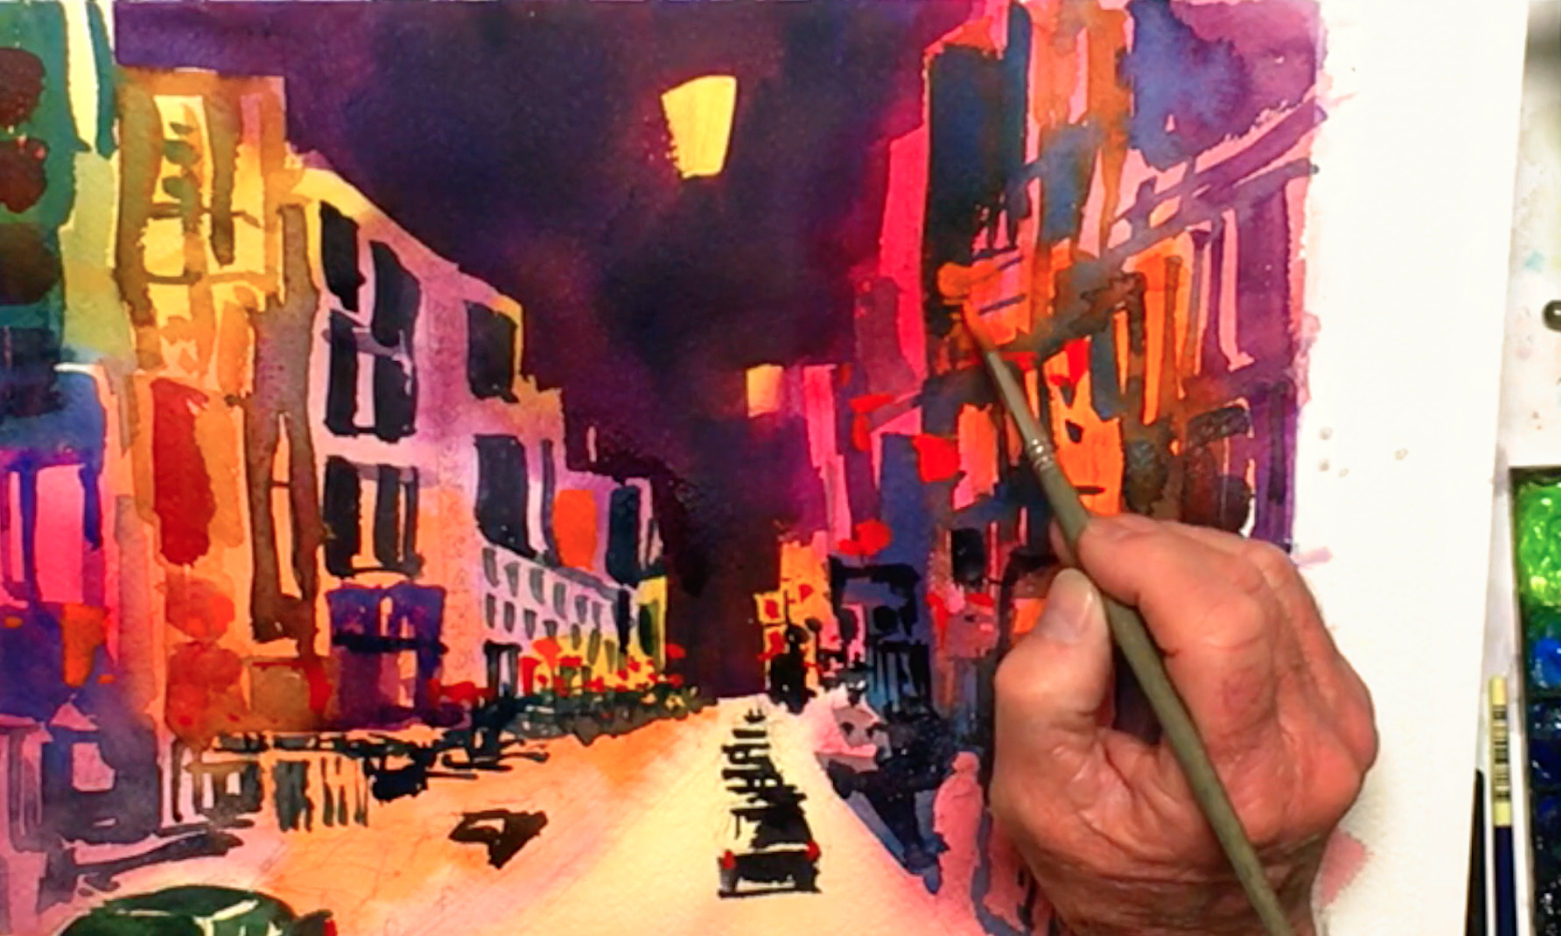 Mix a very saturated Cadmium Red Purple, and paint in some bright red details such as taillights, signs, and others. You can even paint in some lanterns, and switch to a saturated orange for different colored lights to brighten up your night-time cityscape.
Step 12: Painting A Road In Perspective And Adding Depth
 With the no. 12 pointed round brush, pick up the Neutral Tint/Black mixture, and dilute it a little before brushing over the road gently. Avoid the cars, and paint around the road markings. You can glaze over the rest, then drop in darker browns or blacks into the foreground area for more depth and contrast. Streak darker lines into the road as well to make the lines clearer. Pick up more black for a more intense color, then add an edge to the sidewalk and little architectural shadows on some of the buildings.
Step 13: Calligraphy And Lettering Signs
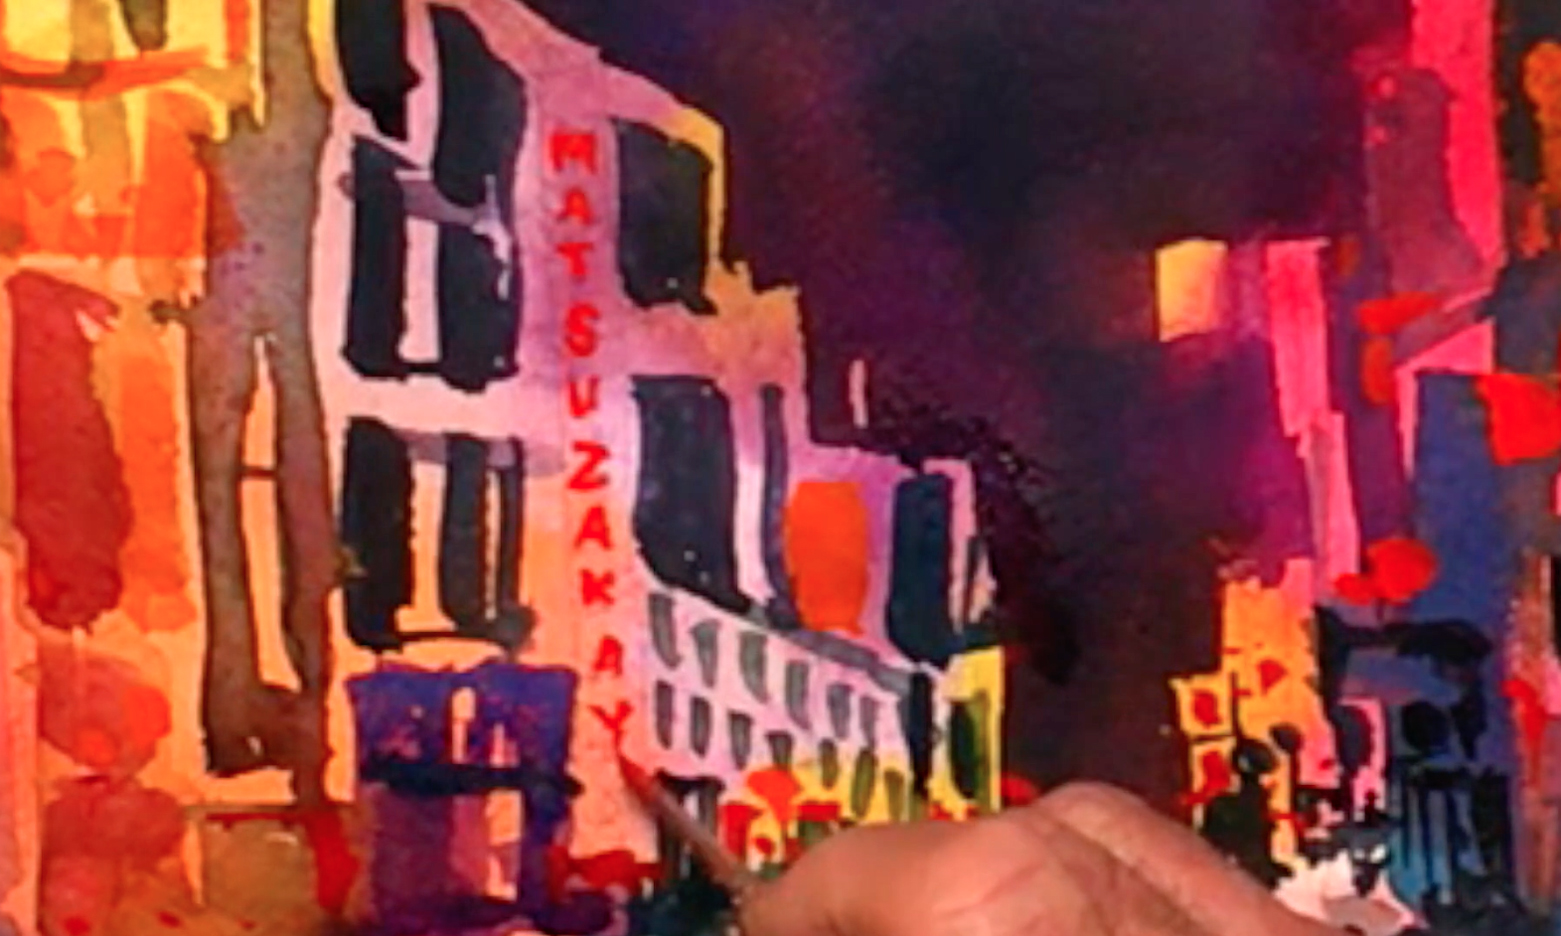 Use Permanent Mauve for more lantern details, and Brilliant Orange to brighten up the left side. Do more touch-ups and layering here, before moving on to the lettering. For this, use a small no. 1 round brush and pure Cadmium Red Purple, then paint the "Natsuzakaya" sign. If the paint under your hand is still wet, you can prop your hand up using your non-dominant hand for support. Paint slowly but steadily, as this sign will really help solidify your painting in a believable space.
Step 14: More Signs And Lights
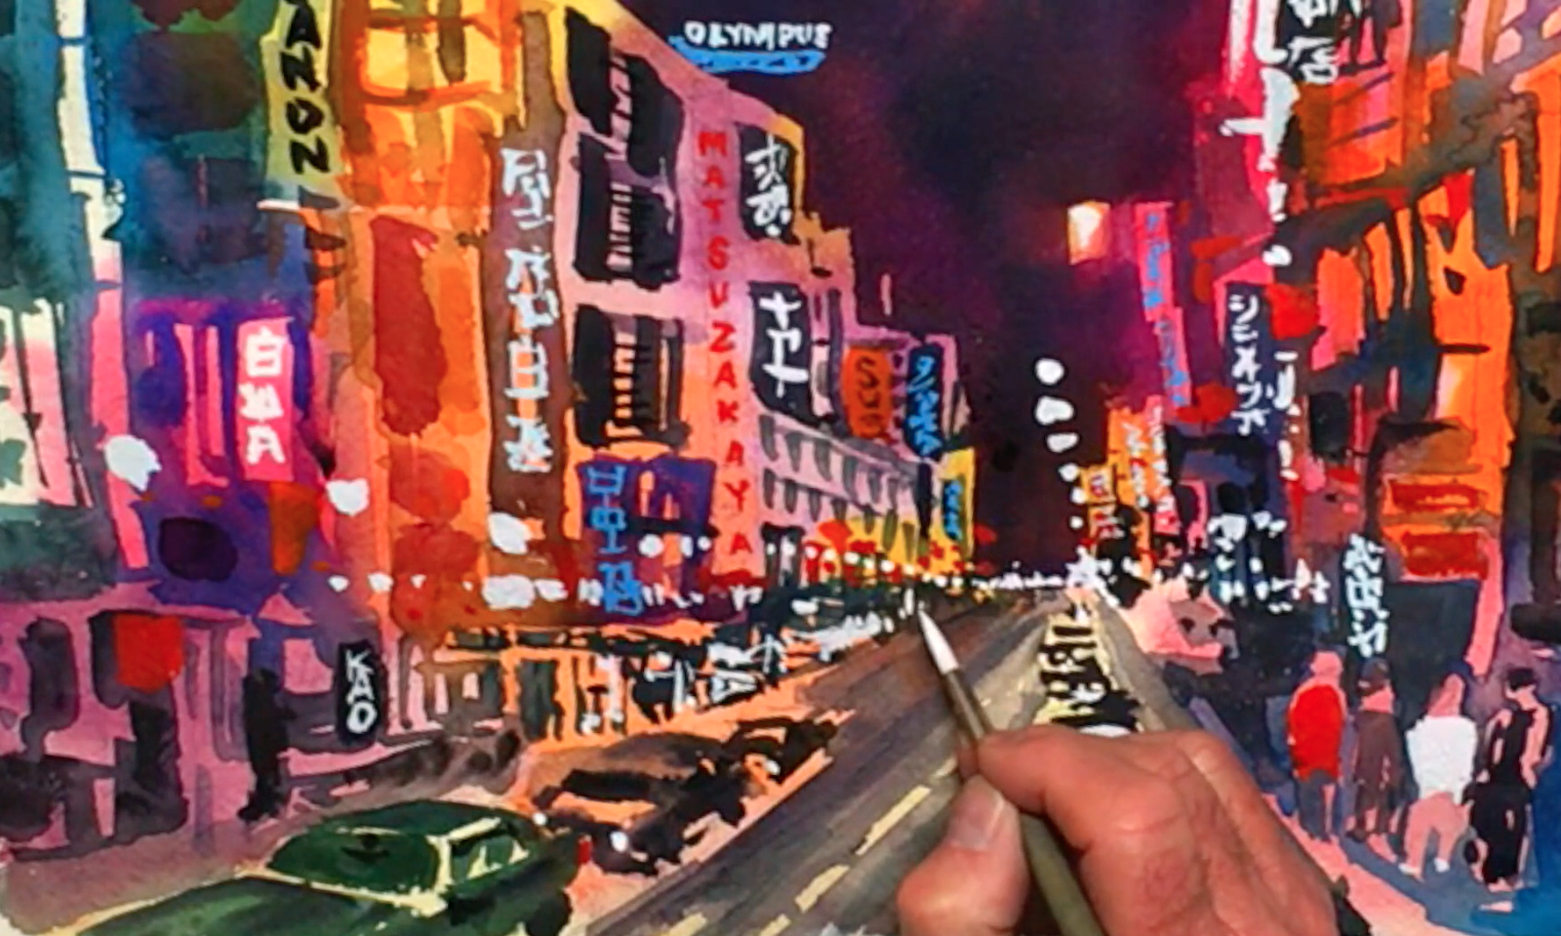
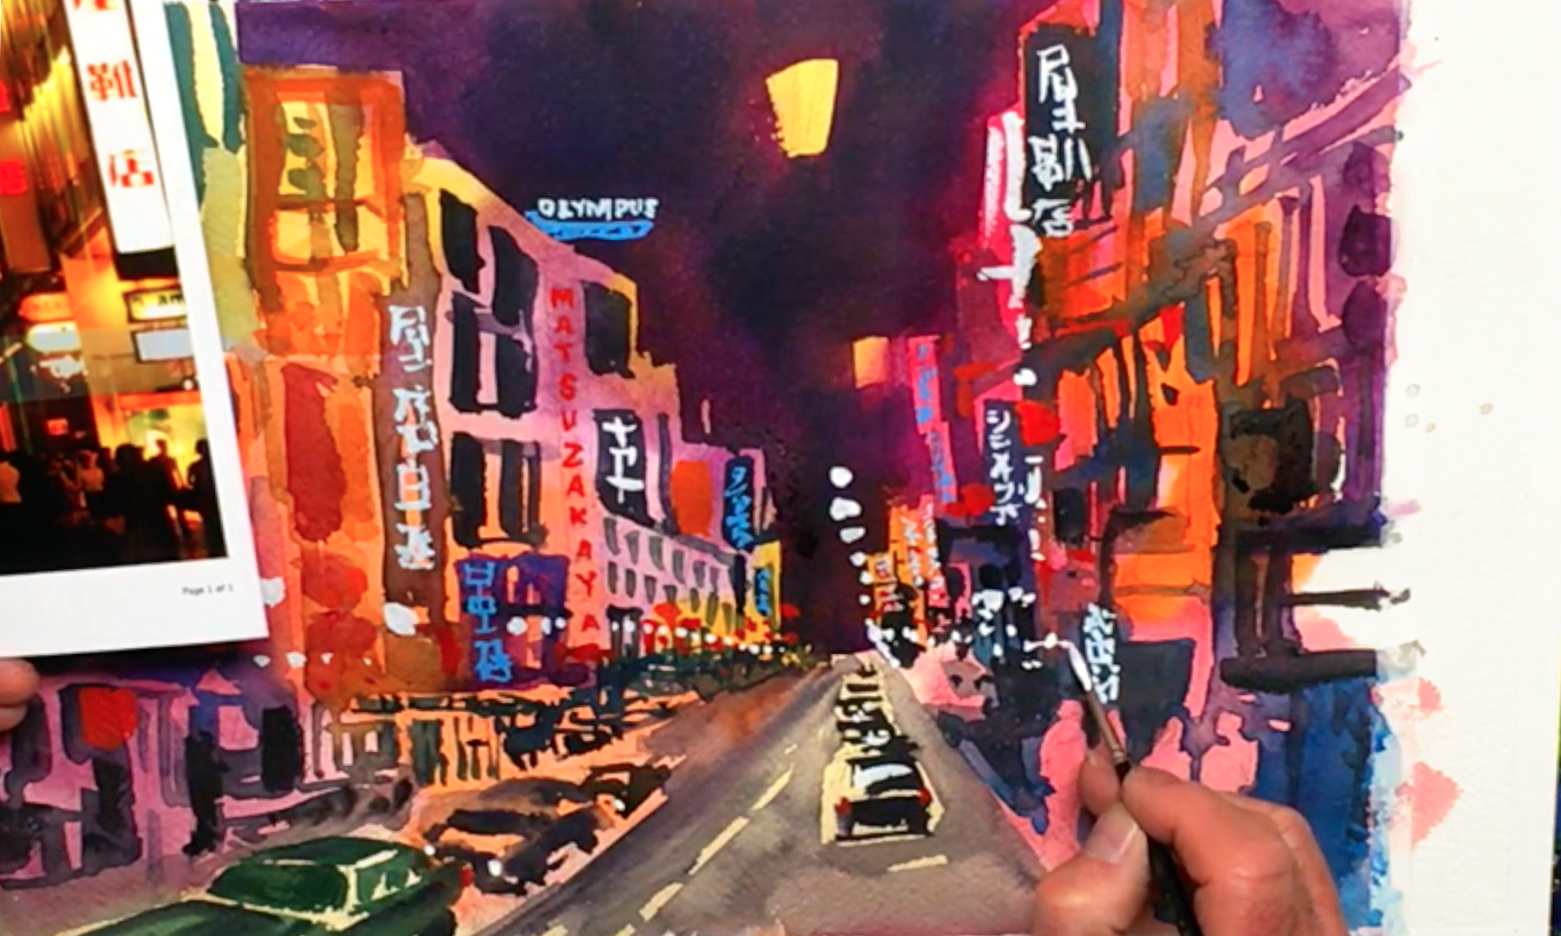 On another plate or palette, squeeze out Permanent White gouache paint. This will be used for other signs and lights throughout this night-time cityscape, since gouache paint is opaque and will cover underlying layers better. As you'll be painting thin lines, switch to the small no. 1 round brush, then carefully add some Japanese characters to each of your building and street signs. Fake them in if necessary, using references to help. Some signs can be in English, and if you get tired of the white, you can mix watercolors with the white gouache for a different color. For example, Bill adds French Ultramarine to get an opaque blue. The lettering effect is especially strong when added to darker areas, and keep the paint thick to make sure it shows up well. Dot in some lights as well, including streetlights, headlights, and reflections in the streets and windows. When doing the streetlights, remember that they will begin to get closer and smaller as they near the vanishing point.
Step 15: Crowd Control And Details
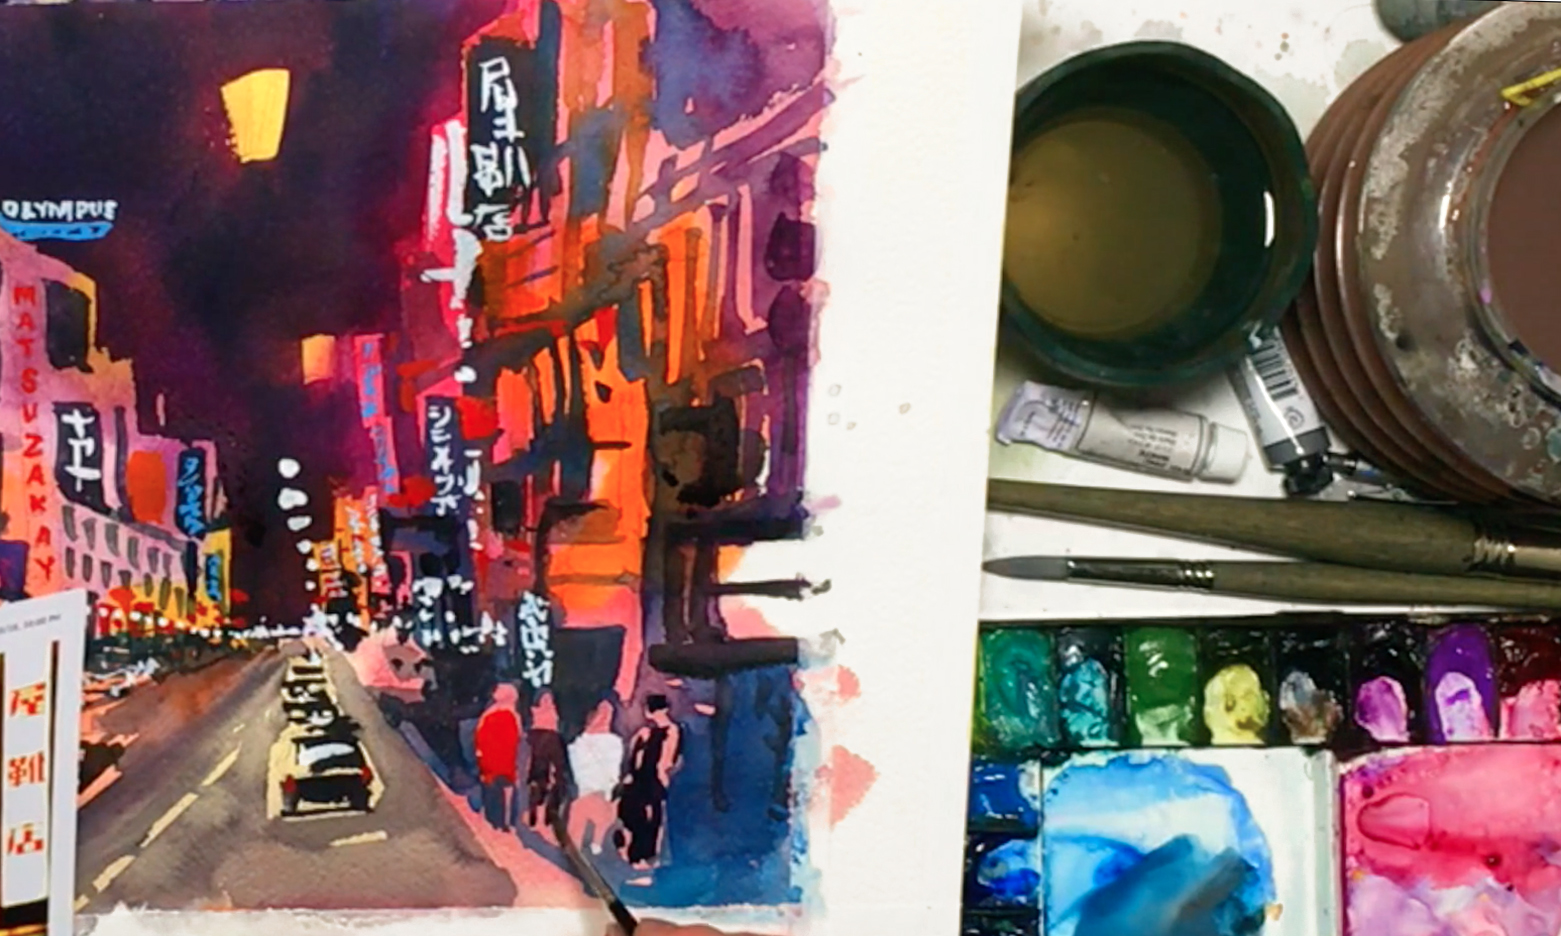 Paint the people on the right side, using a variety of different but strong colors for the clothes. Use Neutral Tint for dark clothing, Cadmium Red Purple for a brighter top, and blue for the impression of jeans. Play with the contrast, and feel free to change the colors as you see fit to suit your night-time cityscape.
Step 16: Adjusting The Atmosphere With Finishing Touches
 In this final stage, you'll be adding the finishing touches to your night-time cityscape. This means stepping back to see what your painting still needs, then adjusting it as you go along. For instance, you can use the black mixture to paint more details on the cars and shadows on the left side, or add more signs in light purple by mixing Cobalt Violet Light with the white gouache paint. You can also add more contrast and atmosphere by making the buildings near the foreground look busier, but take care not to overdo your painting! When you're satisfied with your cityscape, sign it in white, and let it dry before carefully peeling off the tape around the edges. Feel free to frame afterwards! And well done for completing this challenging but rewarding lesson.


