Immerse yourself in this quaint tutorial that shows you how to paint a window and some watercolor flowers. Artist and watercolorist William "Bill" Dunn shows how to reinterpret this scene and tell a much more colorful and creative version of this painted story. Want to watch the video version? The full tutorial is available to members of our Beeblys WatercolorPainting.com.
Materials Used In This Watercolor Class:
- Reference picture of a European window with flowers
- A sheet of stretched Arches cold press watercolor paper (140lb, size 20″ x 14″)
- Pentel Graphgear 1000 automatic drafting pencil, 0.7mm lead size with B lead
- ¾" Artist's or masking tape
- Painting palette for watercolor paints
- Auxiliary plate or palette for gouache paint
- A container of water
- Paper towels or a rag
- A tabletop easel or a box to prop your painting on
- A spray bottle with clean water
- Scrap paper
- Hairdryer (optional)
- 10" Hyde curved spring aluminum paint shield (or any paint shield)
Paints (Holbein Artists' Watercolors)
- Cadmium Lemon Yellow
- Gamboge Nova
- Brilliant Orange
- Pyrrole Red
- Cobalt Violet Light (a.k.a. "Lavender")
- Mineral Violet
- Leaf Green
- Olive Green
- Cobalt Green
- Viridian
- Cerulean Blue
- Prussian Blue
- Indigo
- Quinacridone Gold
- Yellow Ochre
- Burnt Sienna
- Burnt Umber
- Neutral Tint
Daniel Smith's Extra Fine Watercolors
Holbein Artists' Gouache
- Permanent White
Brushes
- Escoda Perla Joseph Zbukvic Series: Round brush (no. 20)
- Neef Rigger Supreme Taklon Series: Long handle rigger brush (no. 8)
- Neef Rigger Supreme Taklon Series: Long handle rigger brush (no. 10)
- Neef Rigger Supreme Taklon Series: Long handle rigger brush (no. 12)
- Winsor & Newton's Series 7 Kolinsky Sable: Round brush (no. 2)
- An old toothbrush
Step 1: Storytelling Via Sketching
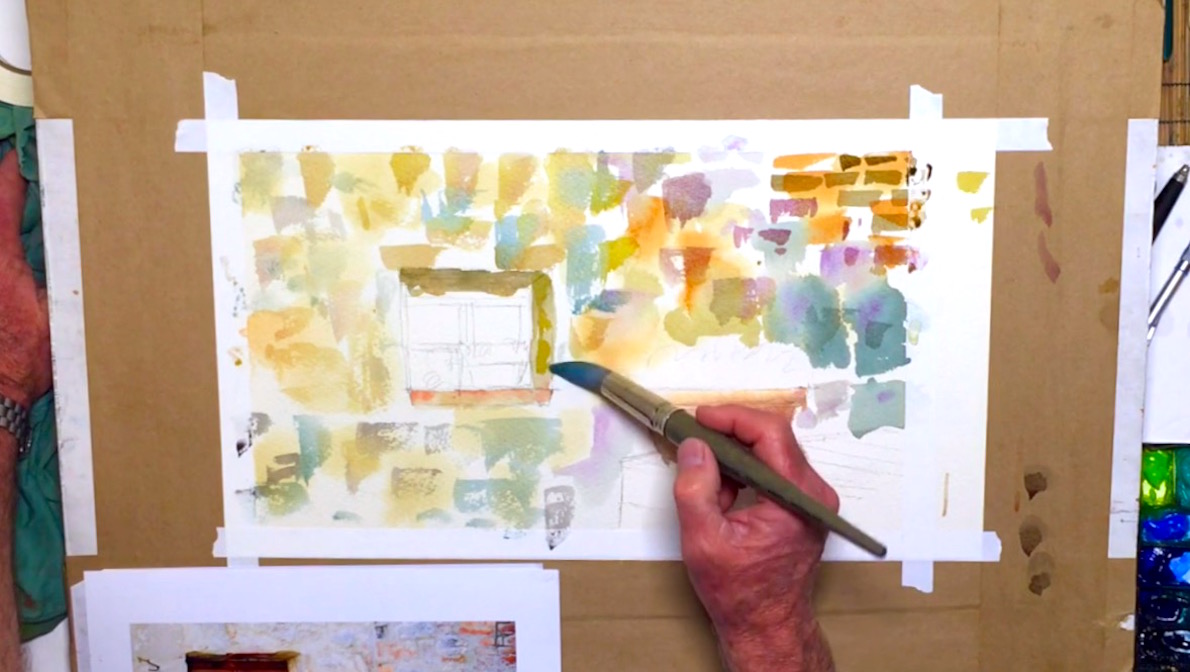
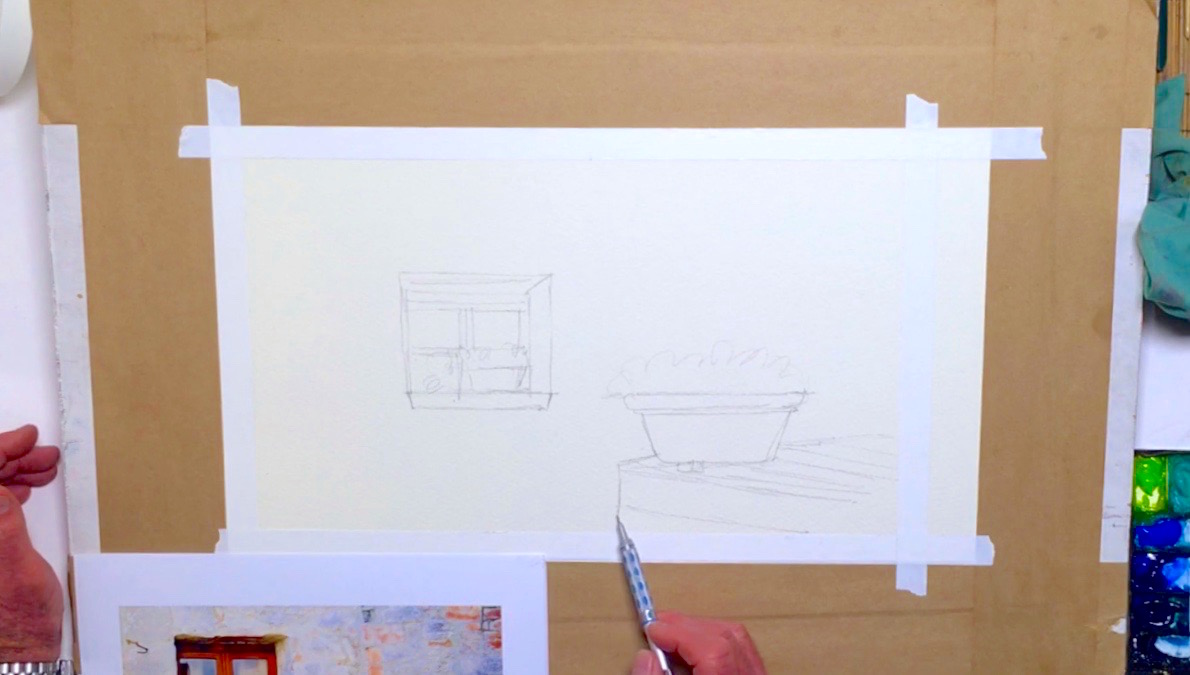 Ever wanted to tell a story through painting scenery? Bill shows how to do so in this tutorial featuring a European-style window and a bucketload of watercolor flowers. To start, spray your paints with clean water to make them easier to work with later. Then, use artist's tape to tape a border around the edge of your painting. You can tape off a little towards the side to make it narrower, and to create a strip of space to test colors on. Bill is using stretched paper here, where "stretching" is a technique to help prevent the paper from warping while painting on it. When you've finished preparing, you can focus on your composition. Plan out the textures you'll need, and what colors you could layer to make the most out of your painting. Start sketching the flowery scene as well, remembering not to center any of the main objects. You can also position each object by measuring the relative distance between each major point, such as making the windowsill line up with the lip of the flower trough. While you sketch, remember that you're just laying down some guidelines, so don't draw every individual flower or detail. You can draw a quick outline or impression instead, and fill in the remaining details with paint. Don't forget to add a little perspective to the stairs and ground, and to the opening of the window. Below is a close-up of Bill's sketch:
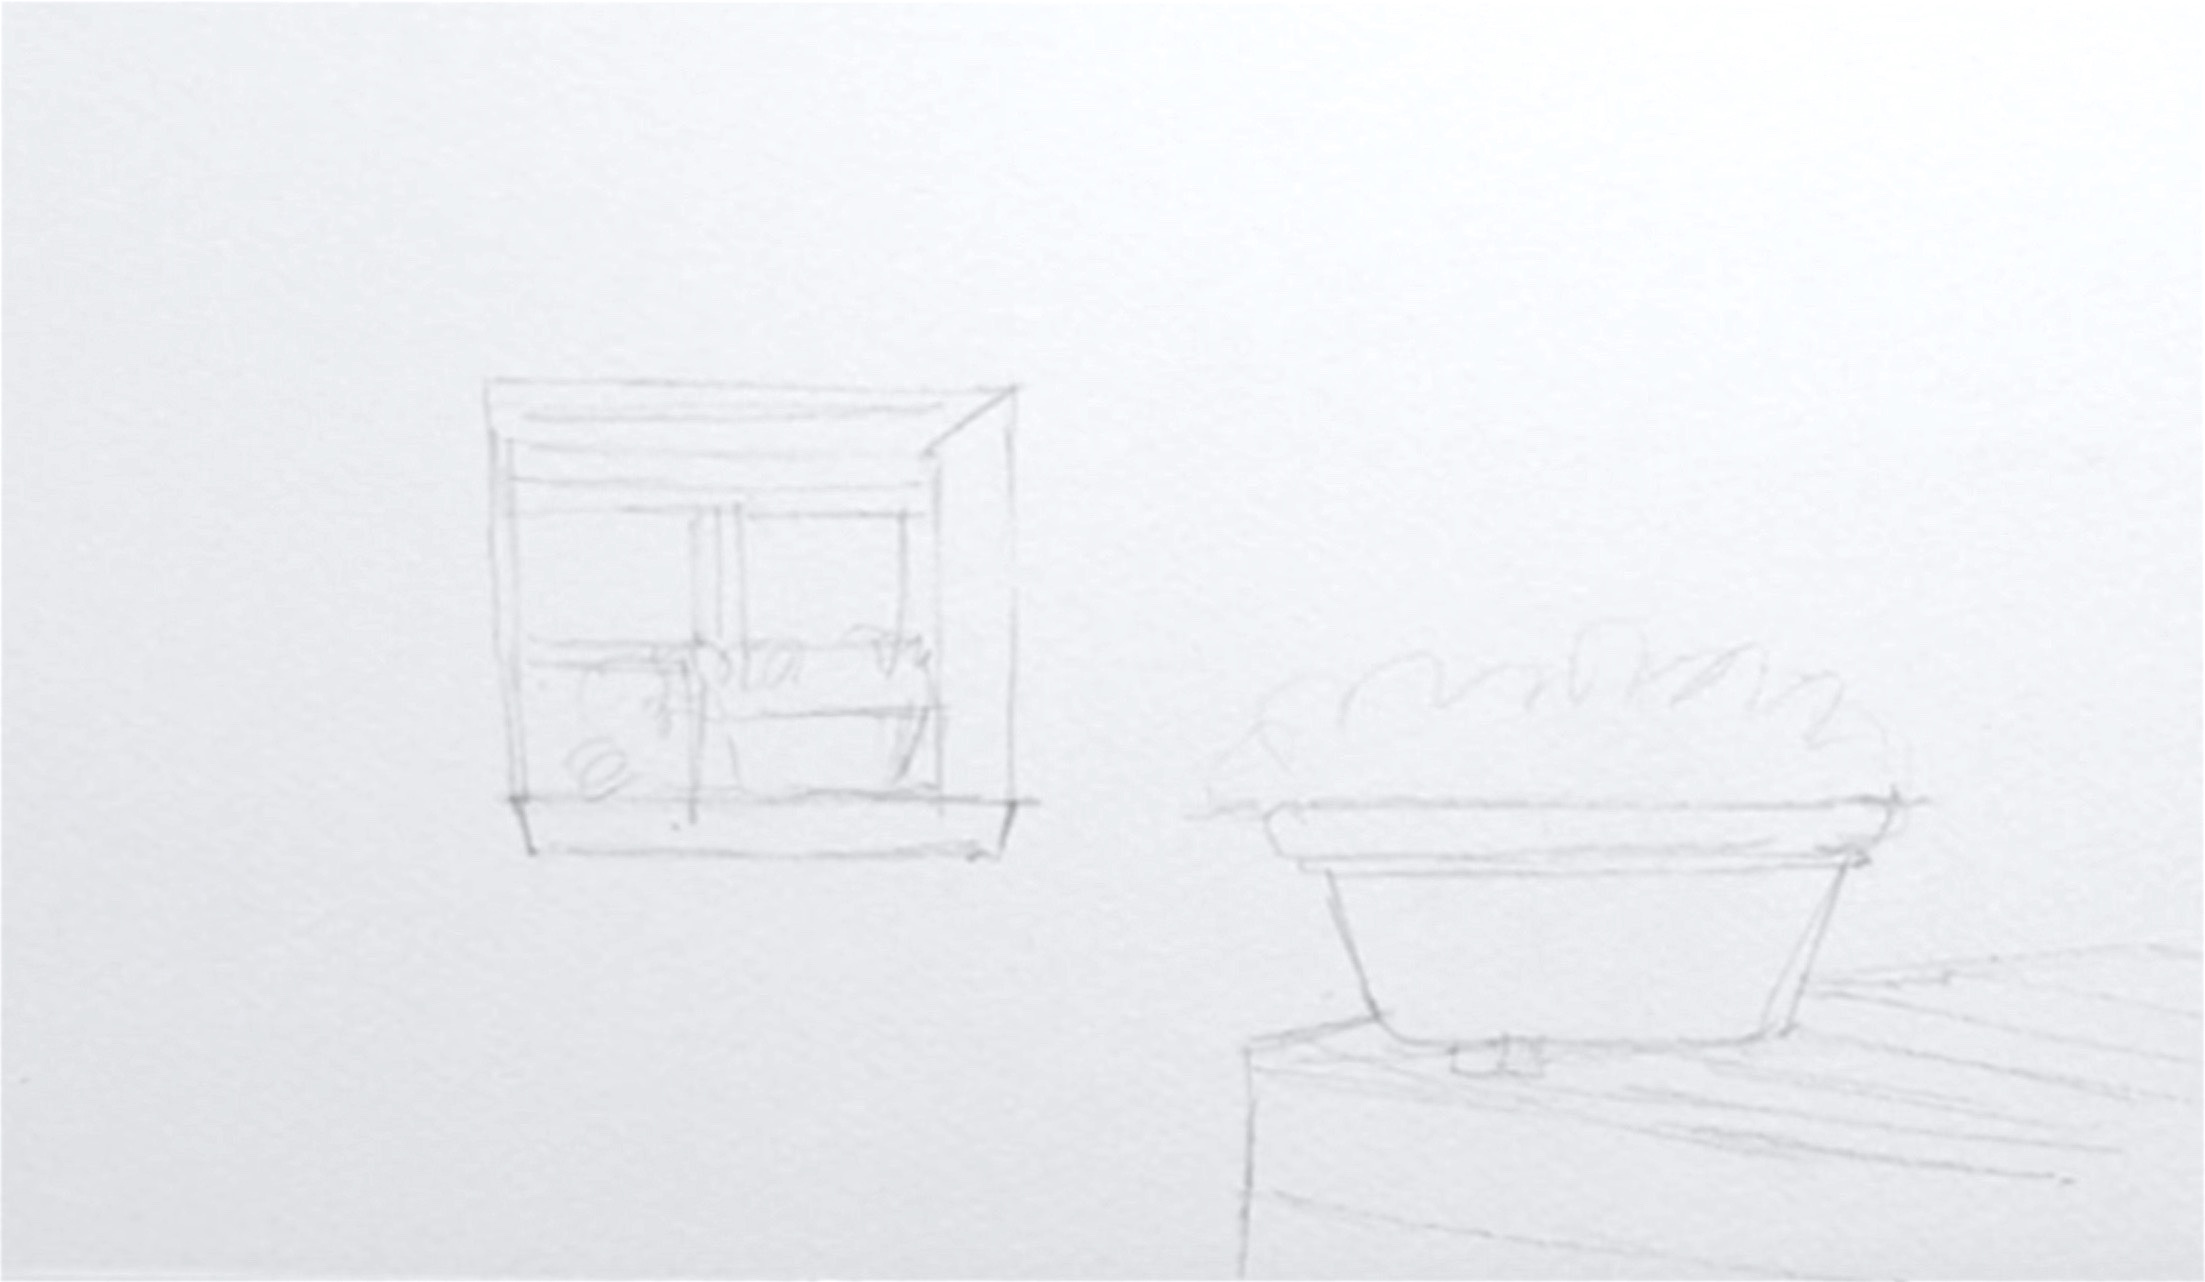
Step 2: Building A Stone Wall With The "Wet-In-Wet" Technique
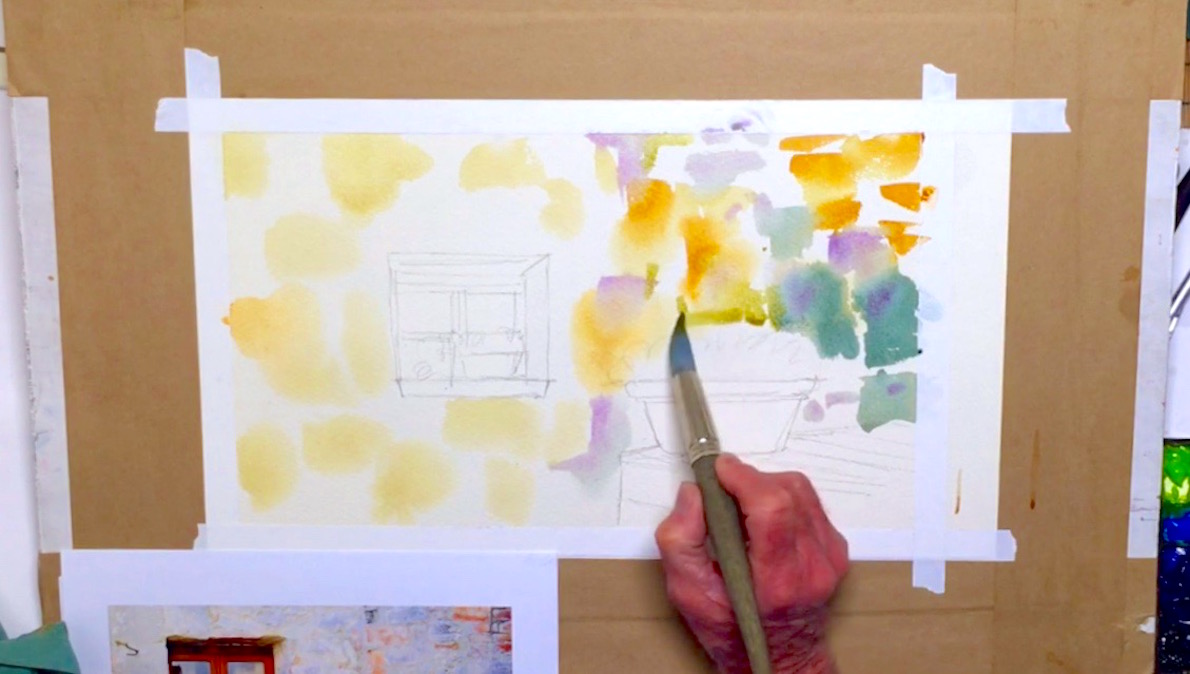 Begin with the stone wall first, using the "wet-in-wet" technique to add wet paint to a wet surface. To do this, use a no. 20 round brush to wet the wall area with water, then add diluted Yellow Ochre to create a base layer. The wet surface will help create soft edges and blends, which is ideal for the background of this painting. Paint different-sized blocky shapes for the impression of stones, and when you're done with the first layer, switch to Burnt Sienna. Be as random as possible, and try not to make your paint too watery. You can overlap some of your paint marks, but aim to gradually cover most of the white area. Mix Prussian Blue and Burnt Sienna for the next set of stones, then drop in Cobalt Violet Light for variation. Use a mixture of Burnt Sienna and Olive Green last. You can layer some of the colors so they mix on paper, and work quickly to maintain the soft blends. If the paper ever gets too dry, wet it again with water before putting more paint on top.
Step 3: Cutting Out A Windowsill
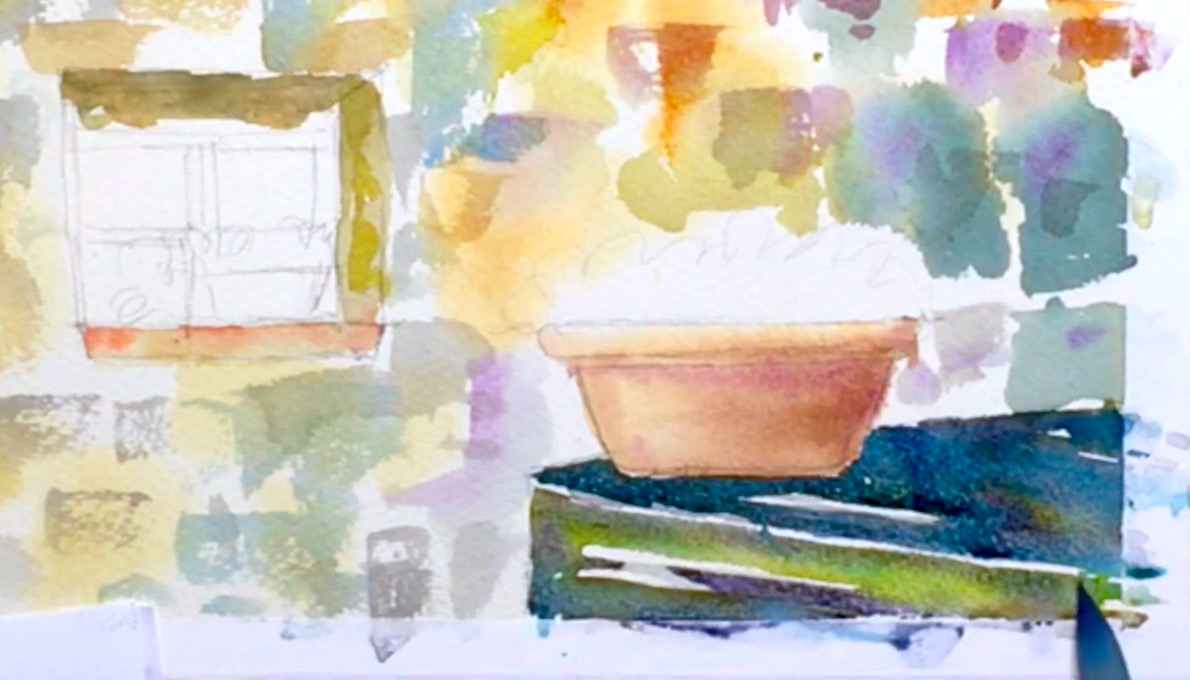
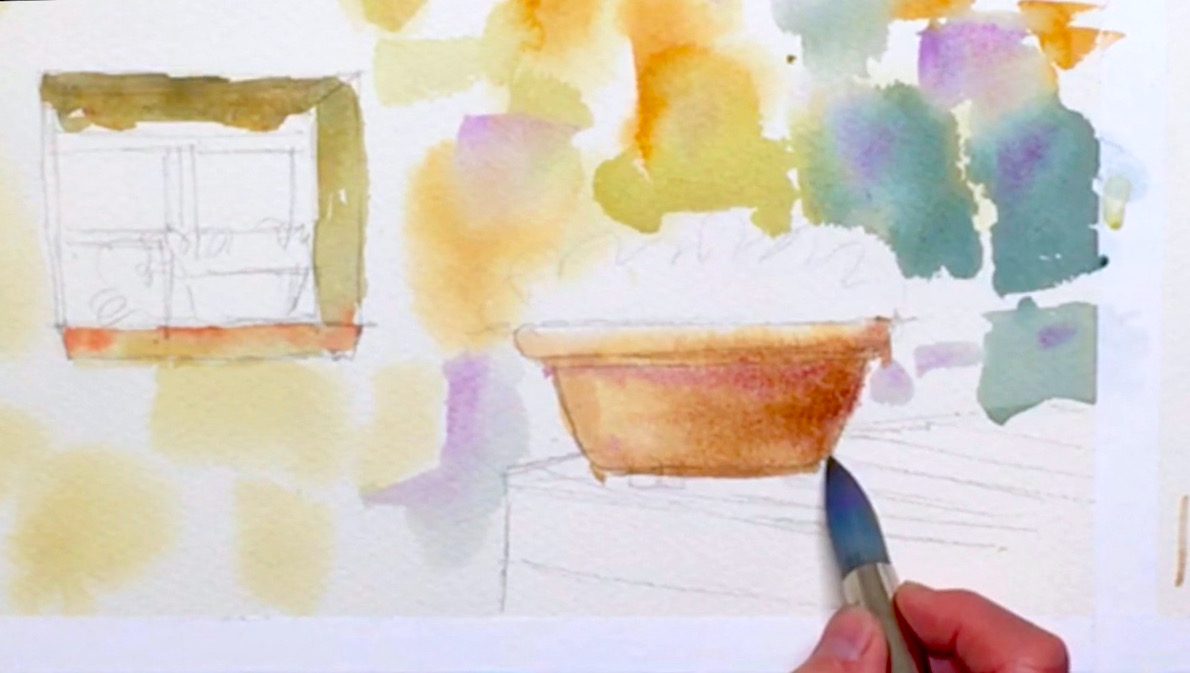 Use Burnt Umber to paint the shadowed ledge of the opening in the wall via the "wet-on-dry" technique for hard edges. Then, drop in Prussian Blue wet-in-wet to make the top edge slightly darker. Paint the windowsill with the wet-in-wet technique by wetting it before dropping a mixture of Burnt Sienna and Pyrrole Red for a rusty color. Only paint a little of the top edge so the paint runs downwards in a trickle effect. Paint the flower trough in the same way, dropping a mixture of red and Gamboge Nova for a soft orange. Leave some white for highlights, and use Cobalt Violet Light for shadows. Add Burnt Umber for the darkest shadows, and lift out any excess paint with a "thirsty brush".
Step 4: Textures On The Wall
 Once the previous layers are dry, work on the wall again, this time using the wet-on-dry technique. Use more of the gray-brown mix, and add more structure with some brick-like formations in a few areas. Don't make the bricks too regular though. Add Cobalt Violet Light to your brown mixture for a variation in tone, and use the roughness of the paper to create a rough texture. Bill does this by holding his paintbrush at its end, then lightly dragging it across the paper so the paint skims across the surface. Switch to Quinacridone Gold next with a touch of Olive Green mixed in, and paint another layer of stones for the wall. Next, add diluted Neutral Tint to the bottom area, and break up the regularity of your brushstrokes using one last layer of Cerulean Blue. Try not to make your colors too strong or colorful here, as you want the flowers to stand out from the background. Throughout this process, remember you can't rely on the reference photo alone to make your painting interesting. Use your artistic instincts and creativity to help you tell the story you want to tell through your paint, and to imbue your own style into your artwork.
Step 5: Grounding Your Scene
 With the diluted Neutral Tint, paint the ground next. Follow the direction of its angle, and let some white spots show for extra texture. Paint the riser of the stairs next with an even more diluted Neutral Tint, then use the same paint to add more texture to the wall. Wet the stairs with water to soften some of the edges, then drop in Olive Green, Prussian Blue, and Indigo for a little color in the riser. Leave a thin line of white between the riser and ground as well to separate the two. Next, use the gray-brown mix to paint the shadow under the bucket, then drop in more Indigo for more contrast. While painting all this, try not to make the colors too strong, and let the watercolor flow naturally for a more organic look.
Step 6: How To Paint Glass Like A Pro
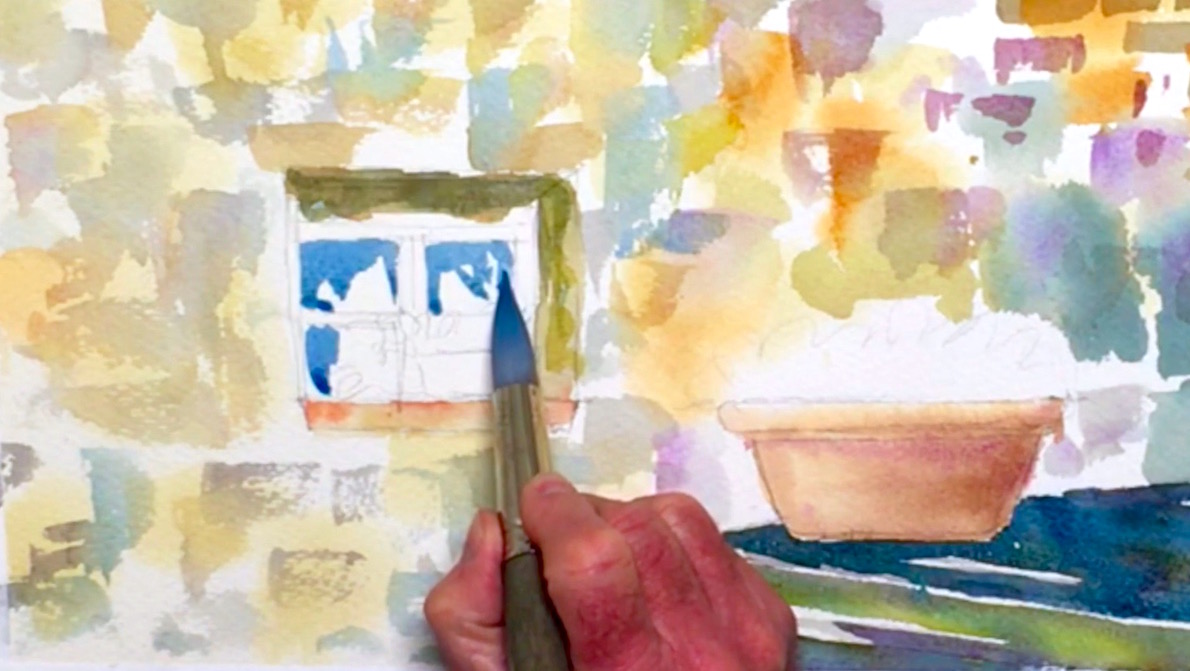 It's time to paint the windows next! For the glass, use the blue mix and the wet-on-dry technique for hard edges. Avoid the watercolor flowers and frame, and leave some streaks of white for reflective light. Add some of the same color to the ledges as well, and lift out any puddles to help the paint dry faster. When you're done, leave the painting to dry, or use a hairdryer to help speed up the process.
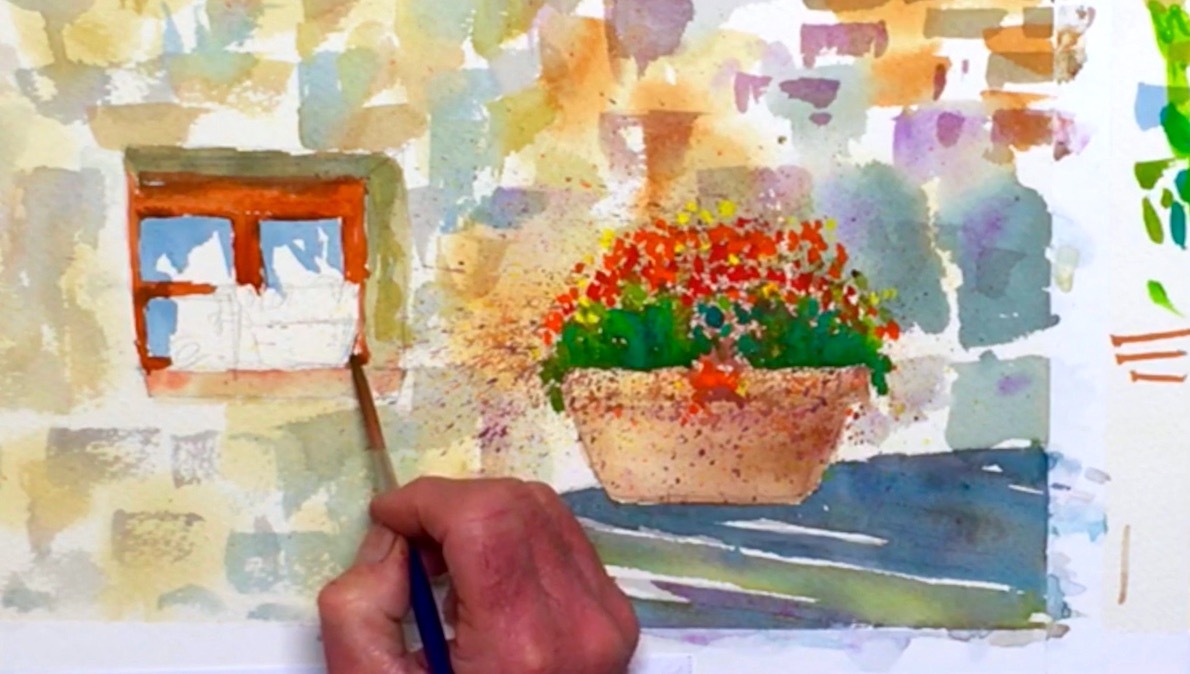
Step 7: Painting Watercolor Flowers With An Old Toothbrush
 To paint the watercolor flowers in the bucket, you can use an old toothbrush to create a fine spray of paint as a base layer. First, use artist's tape to tape around the flower trough's bottom edges, then tape a sheet of scrap paper below to protect this area from stray paint splatter. Don't press down too hard on the tape, as the surface may be damaged when you try to remove it later. With a no. 12 rigger brush, prep Cadmium Lemon Yellow on your palette, then pick some up using your toothbrush. Try to make it so the consistency of the paint isn't too watery or thick! To create the paint spray, run a thumb over the bristles while hovering over the area you want the spray to go. Use Brilliant Orange next for some brighter flowers, then switch to a mixture of Carbazole, Mineral Violet, and Olive Green for more contrast. When you're satisfied with this cluster of flowers, gently peel off the tape before leaving it to dry.
Step 8: Leaves And More Flowers
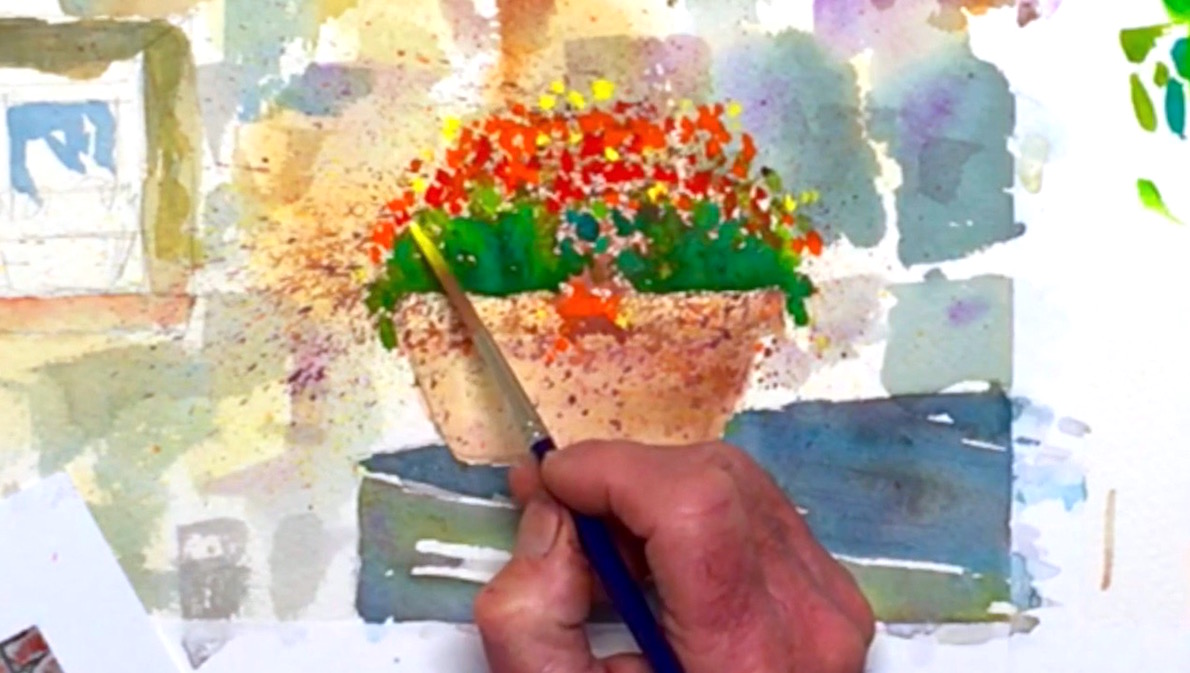 For details, it's better in general to use the wet-on-dry technique, as it gives you greater control over where the paint goes. Bearing that in mind, use the previous rigger brush to pick up Leaf Green mixed with a little Chromium Green Oxide and Olive Green, then paint a base layer of leaves in the flower trough. Dot them in quickly to get a more random and impressionistic effect. You can even add a few leaves cascading over the sides of the trough! Drop in Viridian next for some leafy shadows, allowing some to bleed into the lighter green to create different shades. Add dots of Cobalt Green for highlights, then use pure Leaf Green for the lightest highlights. For the watercolor flowers on top, switch to a no. 8 rigger, then paint using Pyrrole Red. Next, use a very saturated Brilliant Orange, sprinkling these flowers in the top and bottom for a more natural feeling. Lastly, use saturated Cadmium Lemon Yellow, this time adding fewer flowers so the colors won't be too confusing. Throughout this process, be bold with your application, and try not to let the colors bleed too much into one another.
Step 9: Framing A Window
 While the watercolor flowers dry, mix Burnt Sienna and Brilliant Orange, then paint the window frame. Feel free to leave some white highlights, and follow the direction of the grain of the wood. Paint in as few strokes as possible for a cleaner line, and avoid the flowers on the windowsill. Build up more color along the bottom edges of the frame for its shadowed edges, and darken these shadows even more with a Prussian Blue and orange mixture. Be careful here though, as you don't want the shadows to bleed too much into the base color.
Step 10: Varying Your Watercolor Flowers And Leaves
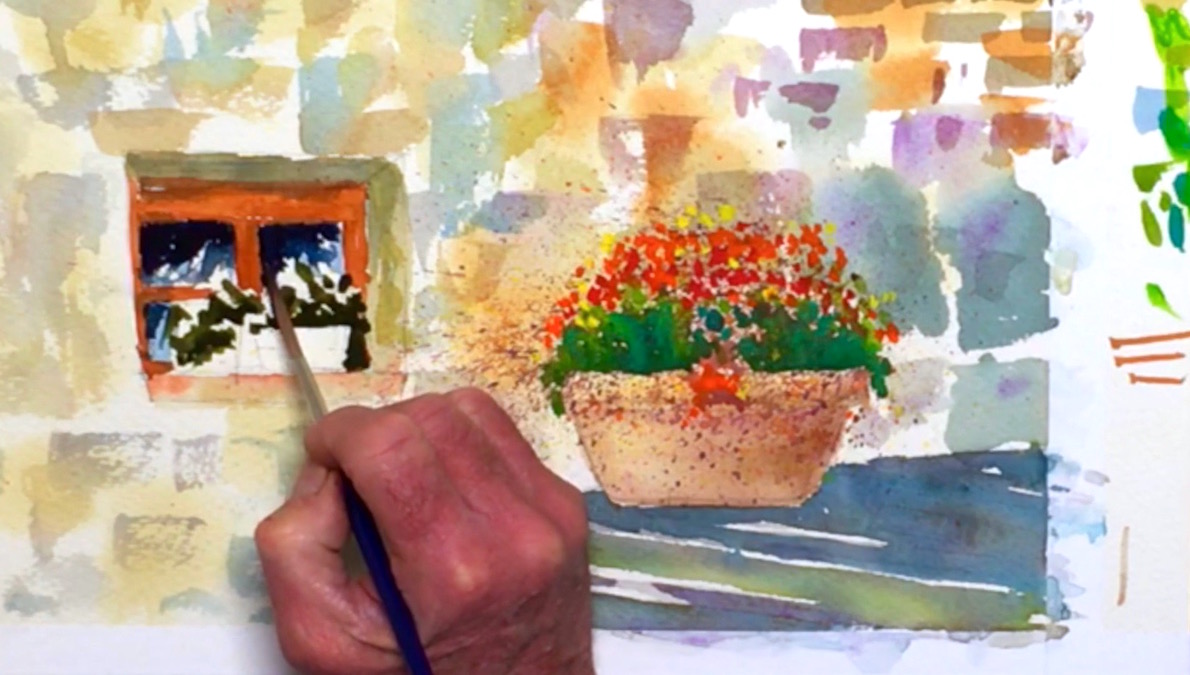 Use a no. 8 rigger brush to paint the flowers on the windowsill, this time starting with Olive Green to get a different base color for the leaves. Try not to be too careful, and leave some room for the flowers and pot. Use Indigo to darken the left windowpanes, and a mixture of Neutral Tint and Prussian Blue for the ones on the right. This should add more depth to this focal point. Again, leave the white streaks for reflective light. While the windowpanes are still wet, drop in pure Neutral Tint to the top part to make the shadows "pop"! And remember, always feel free to use your own creative instincts when painting, and don't feel like you have to follow Bill to the letter. When you're done, leave it to dry, or use a hairdryer again to speed up the process.
Step 11: Painting A Different Pot
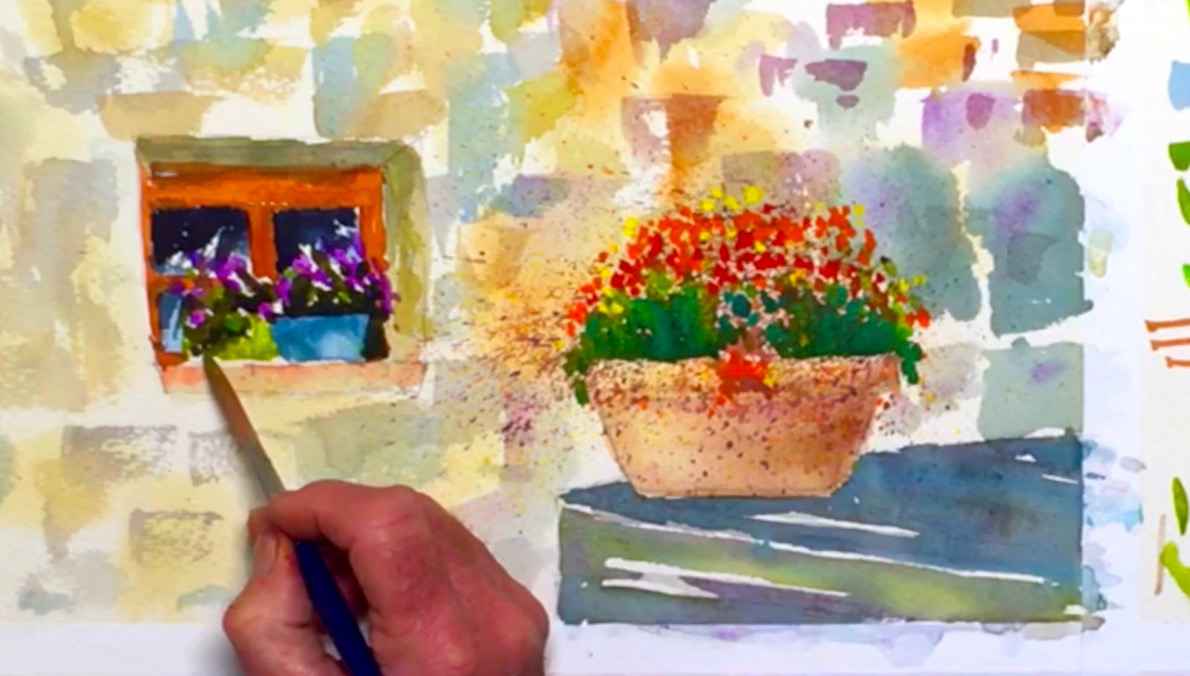 With the no. 10 rigger brush and Cerulean Blue, paint the flowerpot on the windowsill. Leave a sliver of white between the pot and sill to make them more defined. Touch in some Viridian wet-in-wet for a variation in tone, and for some shadows. As the watercolor flowers in the bucket are already very bright, you should opt for a different color for these windowsill flowers. Bill goes for saturated Cobalt Violet Light, and leaves some white spots for a more dappled look. You can also consider painting a different type of flower than the ones in the trough. When done, go back to your Leaf Green, and dot in some highlights among the leaves.
Step 12: Gouache White Highlights And Washes
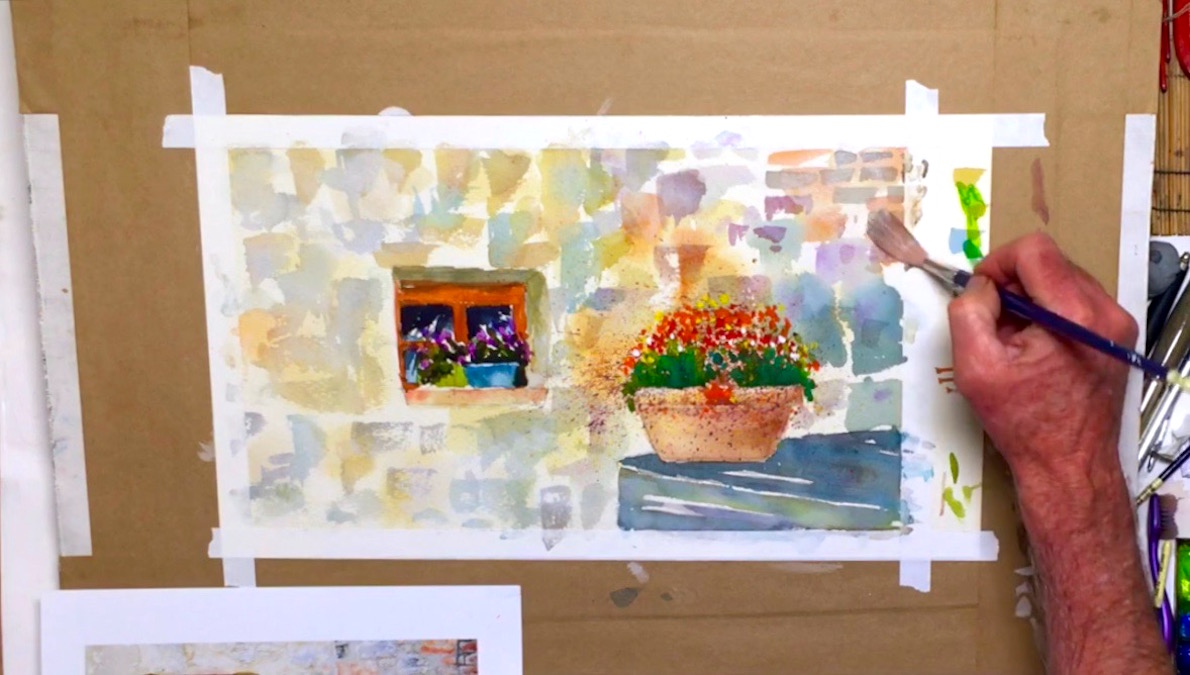 Time to bring back your whites! Squeeze Permanent White gouache paint onto your auxiliary palette, and with a no. 8 rigger brush, dot some saturated white paint among your watercolor flowers. The opaque nature of gouache paint will help it show on top of your previous layers. Next, water down the white, and paint a reflective line in the pot and trough's top edges. Water the white down even more for a milky consistency, and switching to the no. 12 rigger brush, add a quick wash over the wall area to tone down this colorful background. This will help bring your watercolor flowers to the front. Paint in a rough, random application to add some texture, but don't scrub too hard or the underlying layers may start to smudge. Add a little of this white wash to the stairs and window ledge as well.
Step 13: Ending This Watercolor Story
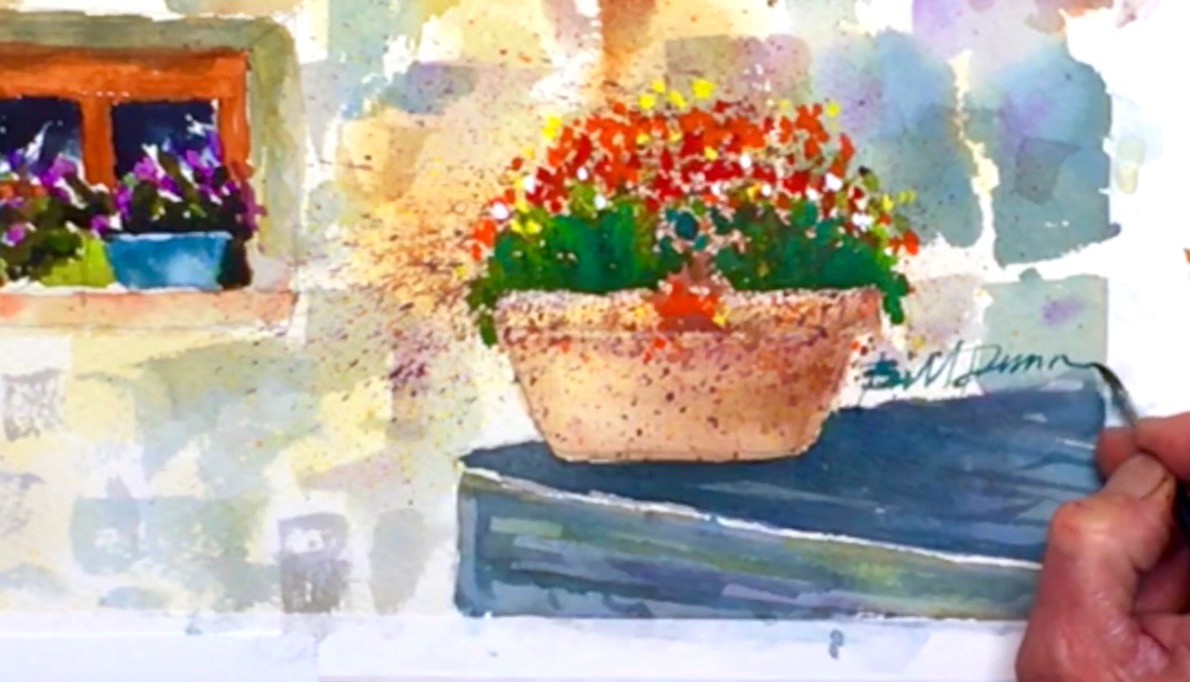 For the final few touches, use a no. 10 rigger brush to wet the area under the flower trough, then drop in a mixture of Prussian Blue and Neutral Tint with the dark brown mix for a soft, dark blue shadow. Add texture lines on the ground too for a brick-like feeling. Fill in any glaring gaps you see in your painting, and when you're satisfied with the results, sign your painting using a small no. 2 round brush and Viridian paint. Make sure to pick up enough paint to sign in one go! And when everything is dry, you can cut out your painting from the board for a very satisfying finish.


