Learn how to turn a fancy hotel into a watercolor building painting! Artist William "Bill" Dunn shows how to paint all those tricky building angles, and then adds some colorful flags to make the painting pop. Want to watch the video version? The full tutorial is available to members of our Beeblys WatercolorPainting.com.
Materials Used In This Watercolor Class:
- Reference picture of the Fairmont Hotel in San Francisco, California (click here for Bill's picture)
- A block of Fabriano rough watercolor paper (140lb, size 12″ x 18″)
- Pentel Graphgear 1000 automatic drafting pencil, 0.7mm lead size with HB lead
- ½" Artist's or masking tape
- Painting palette for watercolor paints
- Auxiliary plate or palette for gouache paint
- A container of water
- Paper towels or a rag
- A tabletop easel or a box to prop your painting on
- A spray bottle with clean water
Paints (Holbein Artist's Watercolors)
- Cadmium Lemon Yellow
- Brilliant Orange
- Pyrrole Red
- Permanent Alizarin Crimson
- Cobalt Violet Light
- Mineral Violet
- Leaf Green
- Olive Green
- Cobalt Green
- Cerulean Blue
- Cobalt Blue Hue
- Indigo
- Yellow Ochre
- Burnt Sienna
- Neutral Tint
- Ivory Black
Daniel Smith's Extra Fine Watercolors
Holbein Artists' Gouache
- Permanent White
Brushes
- Escoda Perla Joseph Zbukvic Series: Round brush (no. 8)
- Escoda Perla Joseph Zbukvic Series: Round brush (no. 12)
- Escoda Perla Joseph Zbukvic Series: Round brush (no. 20)
- Neef Rigger Supreme Taklon Series: Long handle rigger brush (no. 8)
- Neef Rigger Supreme Taklon Series: Long handle rigger brush (no. 10)
- Winsor & Newton's Cotman Brush Series 111: Round brush (no. 2)
- Winsor & Newton's Cotman Brush Series 333: Rigger brush (no. 1)
- Winsor & Newton's Series 7 Kolinsky Sable: Round brush (no. 4)
- Raphaël Softacryl Mixed Media Flat Brush Series 280: Flat brush (20mm, or ¾")
Step 1: Sketching A Fancy Hotel With Flags
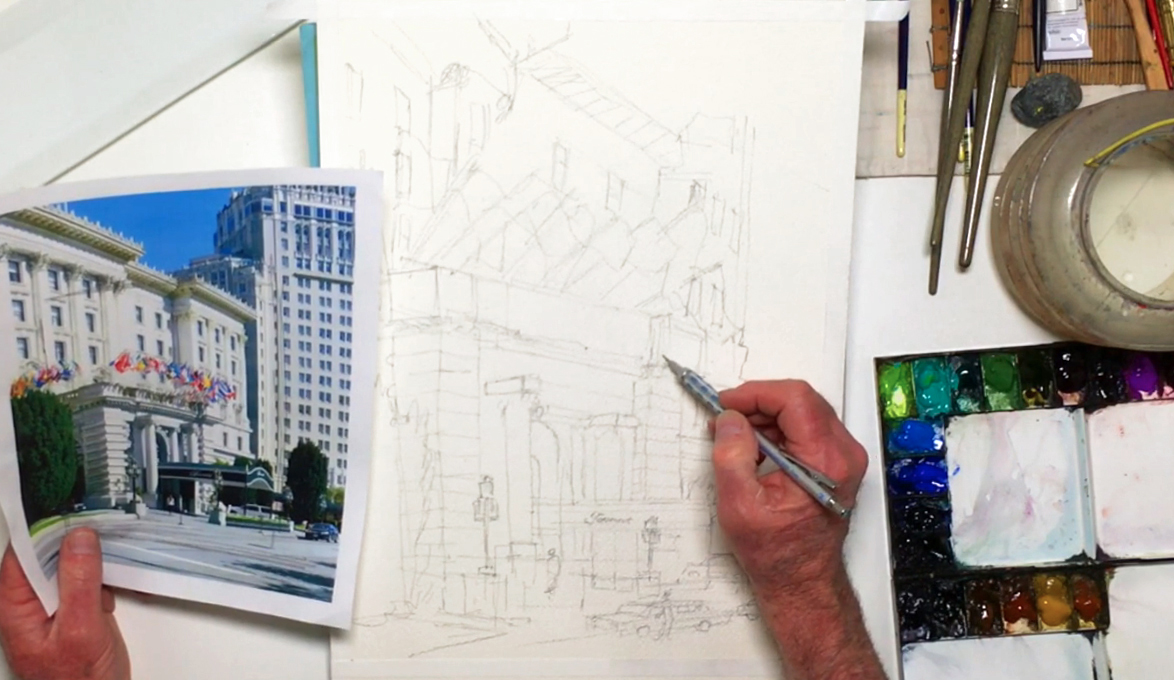 In this tutorial, we'll be painting the Fairmont Hotel and the lovely row of flags mounted along its balcony. While the hotel forms the foundation of this watercolor building painting, the focus should still be the flags due to their colorful nature. After analyzing the reference picture, spray your paints with water to help soften them and make them easier to use later on. You can also set up your tools like Bill does to make them more accessible during the painting phase. To prep your painting block, tape the edges with artist's tape. Then, tape off the bottom at about 15" so you get a 10" x 15" frame, which makes it easier for future framing purposes. You'll want to prop your painting at a 10º angle as well, so that gravity can help you get more even washes. When sketching, make sure not to divide the painting in half, so that you can get a better composition. This means placing the flags above the halfway point. To help with your proportions and perspective, mark off the major points of the hotel, then connect them before fitting everything else between those points. Make sure to follow the rules of perspective! Take your time to get the right measurements, but don't worry about getting a photorealistic drawing. You just want to lay down some loose guidelines for your painting process later. Also, try not to erase anything, as this may damage the surface of your paper. Include as many details as you need, and enlarge and exaggerate the flags for a more dramatic painting. Below is a close-up of Bill's sketch:
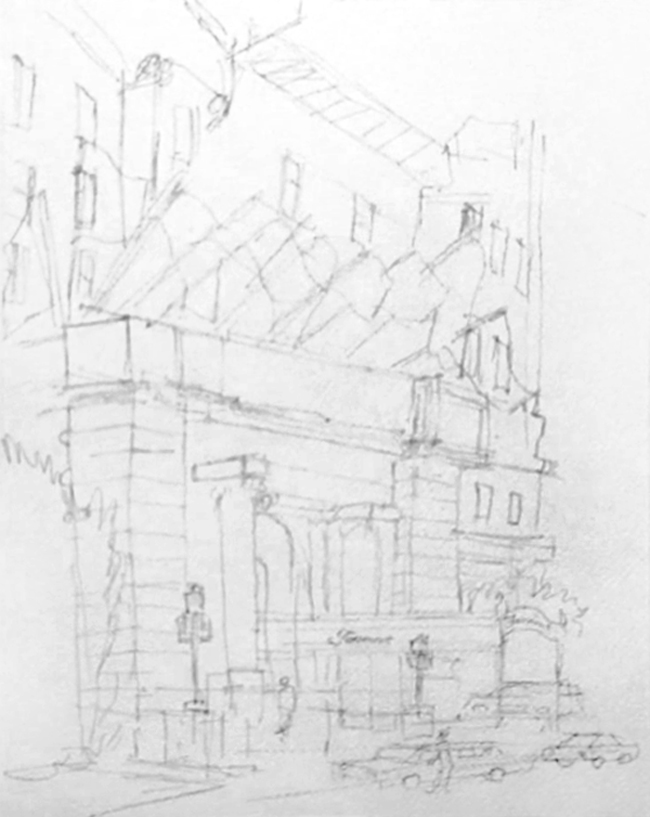
Step 2: Planning And Painting With The "Wet-In-Wet" Technique
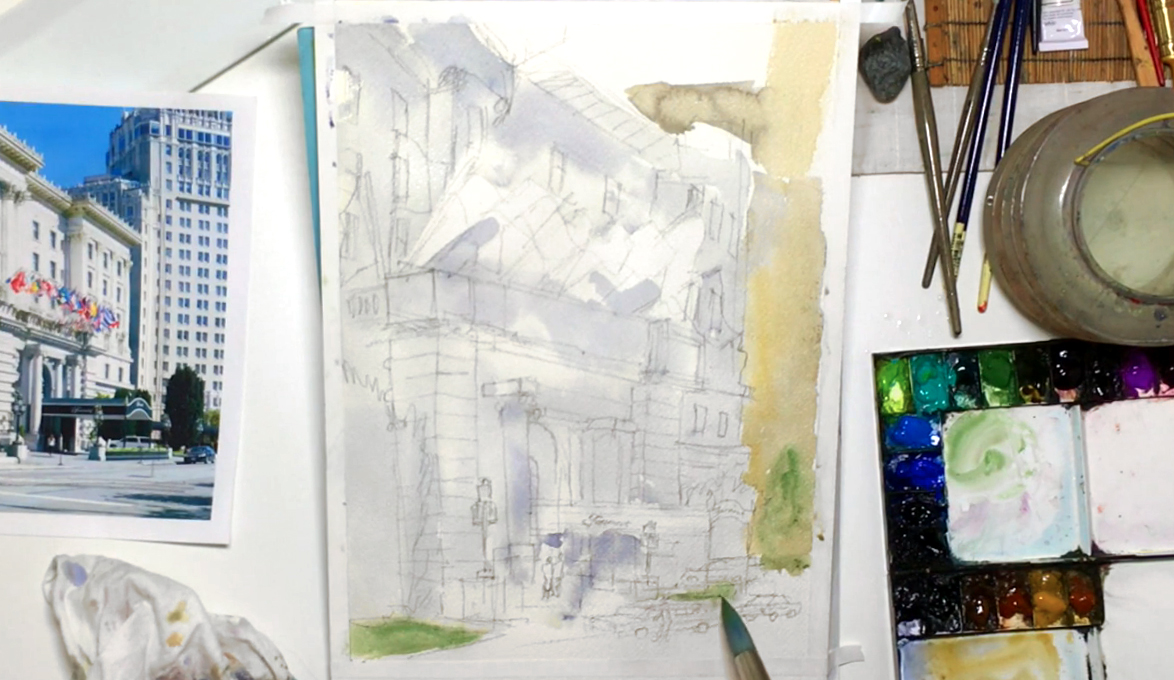 Before painting, you can plan out some of your colors, and tweak the composition until it's to your liking. Remember that as with any painting, you're trying to tell a story using line and color! This will help with deciding the parts you'd like to emphasize, and how to emphasize them. As the "story" here is about the bright flags, Bill decides to reserve the brightest colors for them, while the rest of the painting will mostly be in gray. Starting with the lightest values (i.e. light vs dark tones), use the no. 20 round brush to wet the building areas. Allow the water to soak in a bit before dropping in a diluted mixture of Neutral Tint and a touch of Cobalt Blue Hue. This is the "wet-in-wet" technique, which will help create soft blends. Avoid the flags for now, and focus on building up the values needed in the hotel area. Add some Yellow Ochre and more Neutral Tint to your gray mix, then paint the building to the right with this warm gray. You can drop Yellow Ochre directly onto the paper for a stronger color. Next, drop Chromium Green Oxide for the lawn in the bottom left corner and in the ground under the limousine.
Step 3: Raising Flags With The "Wet-On-Dry" Method
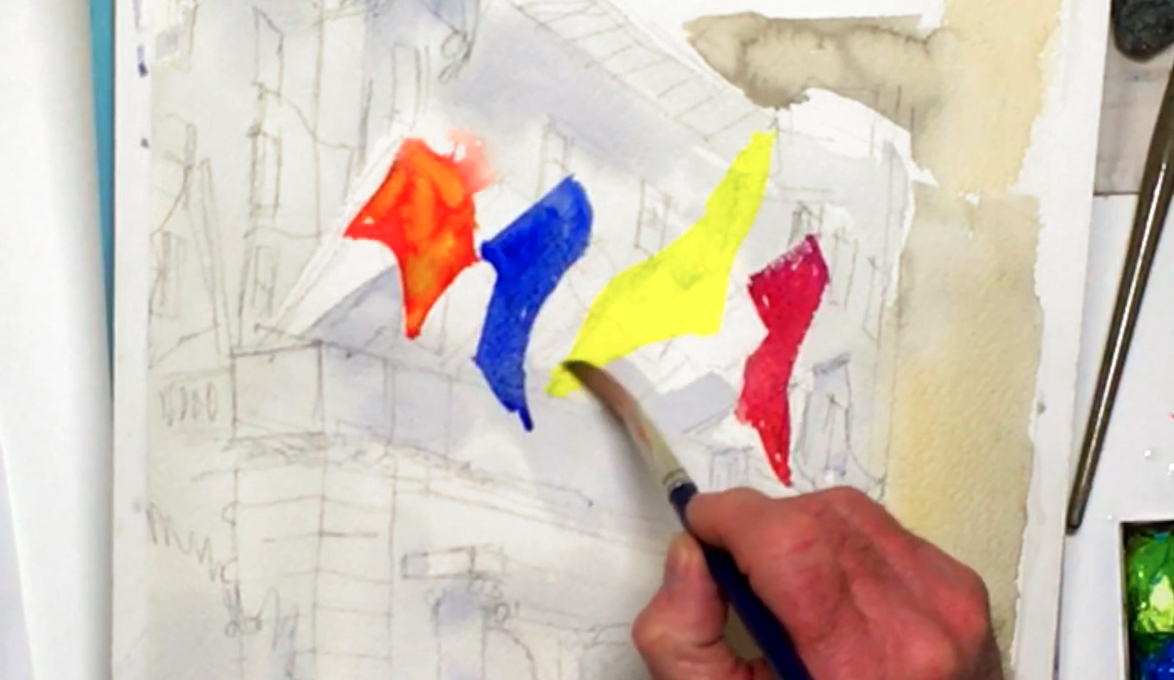 Change to a no. 10 rigger brush, then pick up some saturated Pyrrole Red. Paint the first flag on the left using the "wet-on-dry" technique, which is adding wet paint to a dry surface. This will give you the hard edges you need for more defined shapes of color. Mix in Cobalt Violet Light with the red for the rightmost flag, then switch to Cobalt Blue for the second flag to the left. Be careful not to touch the wet paint, as you don't want the colors to bleed. Use Lemon Yellow for the last one, and vary the shape of each flag to capture the way they move. You can drop in the same yellow to the red flag for a brighter color, using the wet-in-wet method to mix the colors on paper. When you're done, leave the whole watercolor building to dry.
Step 4: Building Layers Of Shadows And Values
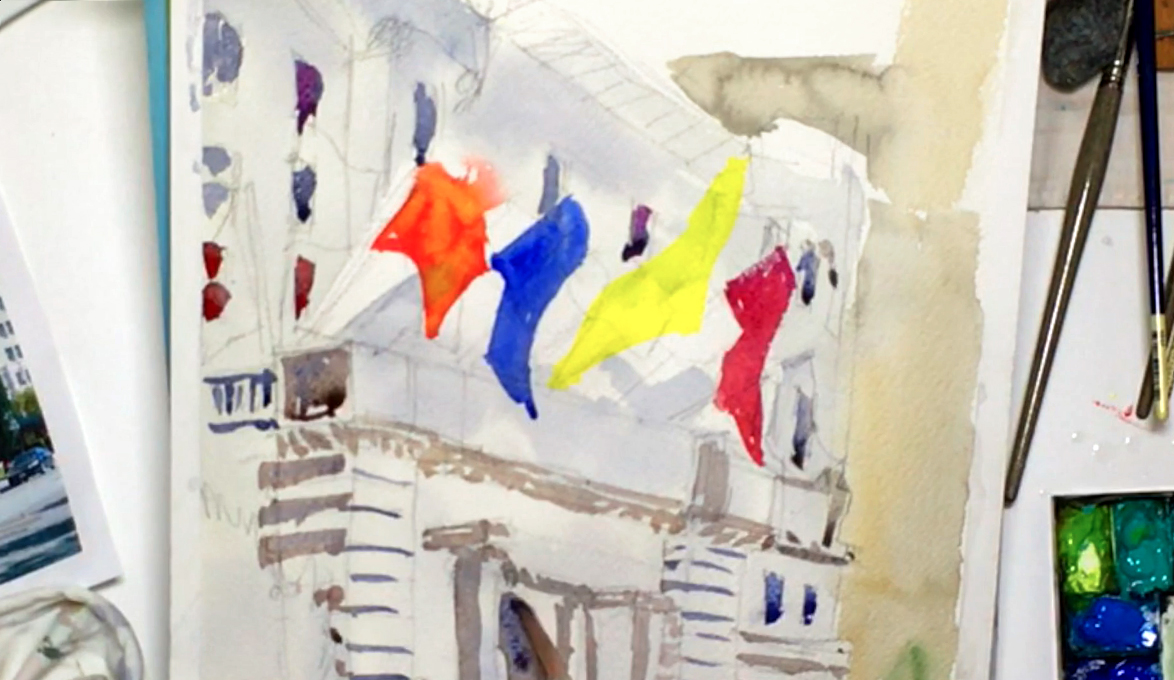 Mix Neutral Tint with a touch of Pyrrole Red, and add to all the shadowed sides of the hotel building. Paint any patterns in the pillars and columns, including the details along the walls and ledges. Then, add a touch more Neutral Tint before painting the archway that leads into the hotel, avoiding the highlights and people. Mix more Neutral Tint and Cobalt Blue, and darken the pattern on the pillars even more. Add more architectural details as well, such as painting some windows in the top half of the hotel. While the paint is still wet, you can switch between dropping Cobalt Violet Light, Pyrrole Red, or Cobalt Blue to tint the windows and archway with a different tone. In this way, build up your dark values, using the reference picture to help. The extra colors also make for a more interesting painting.
Step 5: A Gold Trim And Impressionistic Details
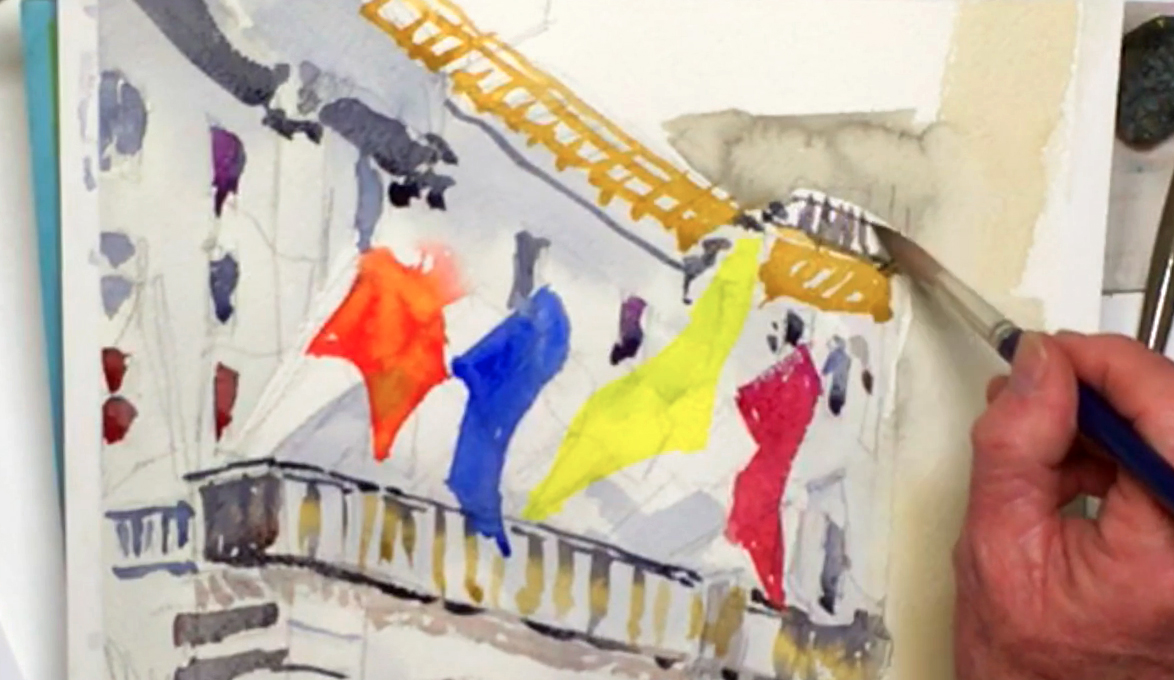 With Yellow Ochre, paint the gold trimming along the top of the hotel and the beam just under the flags. With the Neutral Tint mix, paint the edge of the same beam, and add more architectural details to the top half of the hotel. While painting, feel free to simplify the details, and paint loosely for a more "impressionistic" look. You can always come in later with a darker, more detailed layer for extra contrast.
Step 6: Painting Architectural Features For A Watercolor Building
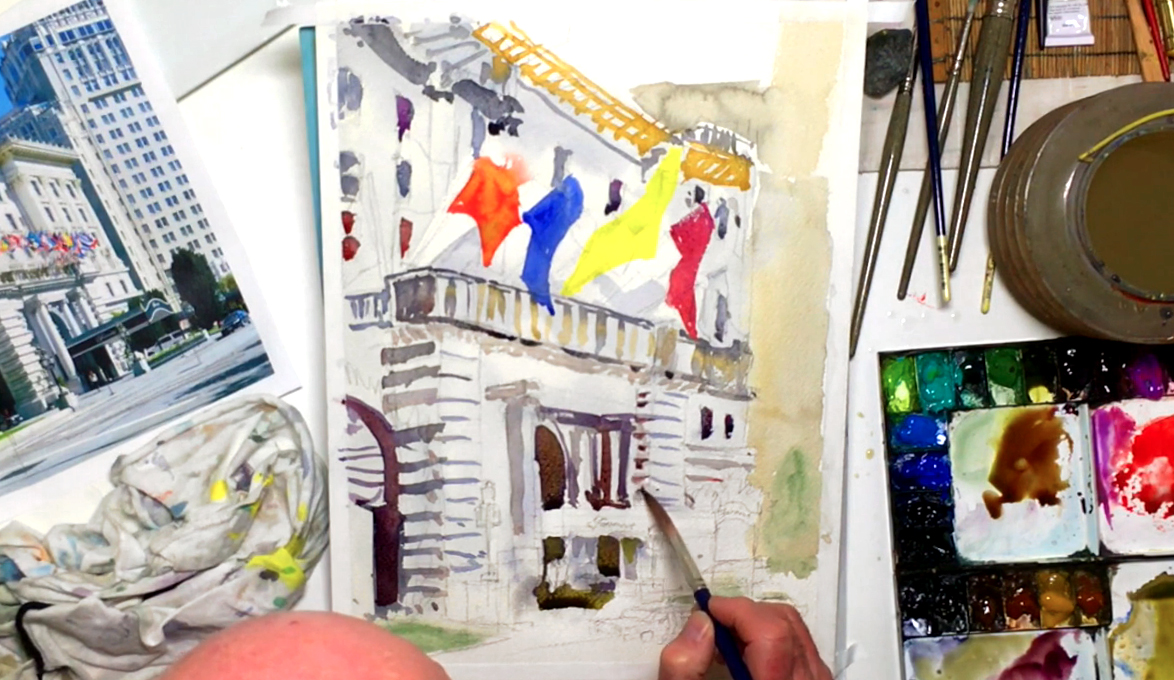 Darken the leftmost pillar with more Neutral Tint, ignoring the tree that covers that area. Mix in Mineral Violet, then add a layer to the archway before deepening the shadows and lines in the same area. Mix Olive Green with a touch of Mineral and Carbazole Violet, and drop into the purple-tinted shadows wet-in-wet. The paint will mix on paper, producing a softer transition in color. You can also touch in some Burnt Sienna to warm up the tone. With this burgundy mixture, paint the railings along the balcony as well, and add more details along the bottom of the buildings.
Step 7: Being Bold And Building Mid-Tones
 Dilute some Yellow Ochre, and paint the mid-tones for the left wall of the hotel. Be bold with your brushstrokes and colors here, as this will help make your painting look more dramatic! Add Cobalt Blue to your light brown mix, then paint some architectural lines to the neighboring watercolor building while keeping to the rules of perspective. With this grayish-blue, darken the shadowed edges as well, and add a light wash over the gold trimmings wet-on-dry to tone down that area.
Step 8: Adjusting Values To Make A Painting Pop
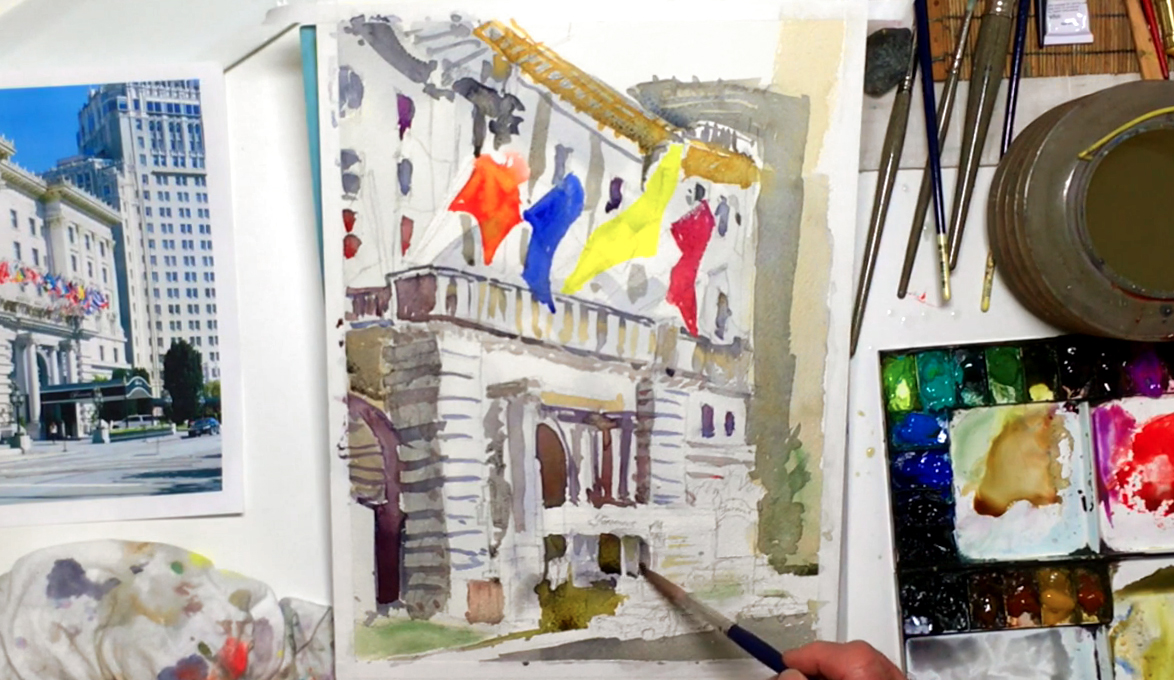 Throughout this whole process, remember that value is always more important than color, although color makes the painting more interesting. With that in mind, mix Neutral Tint and Yellow Ochre, then paint the road and pavement area while avoiding the cars. With diluted Neutral Tint, paint the left side of the pillars for more shadows, and to build up any other shadows where needed to get the right values. Add some columns in the top half of the hotel as well.
Step 9: Adding A Fancy Entrance
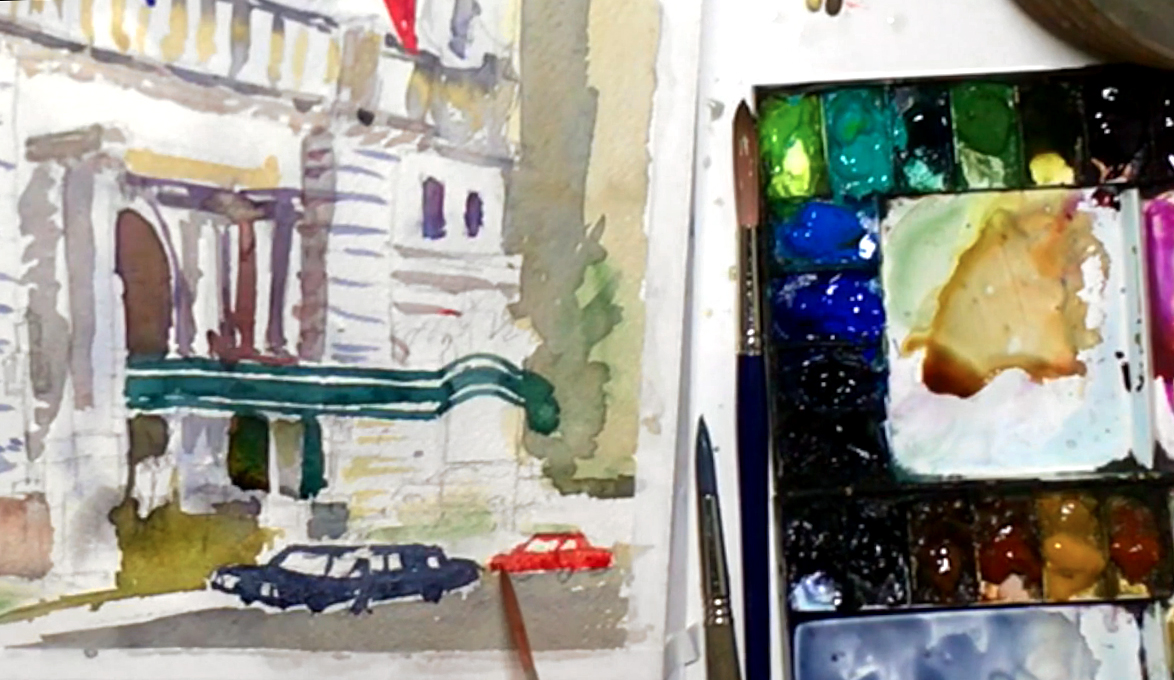 For the hotel's awning, switch to the no. 12 round brush, mixing Neutral Tint and Viridian and painting it wet-on-dry. Leave the white stripes, but paint over the lettering, as you can use white paint to paint it in later. Paint the limo next, using a no. 8 rigger brush and Neutral Tint to paint the body of the car. Avoid the highlights, headlights, windows, and wheels, and try to capture the impression of a shiny, metallic surface. Paint the driver standing in front as well. For the car behind the limo, use a lighter Pyrrole Red for variation. Go back to the no. 12 round brush, then use Ivory Black to add an extra punch to the darkest of shadows in your watercolor building.
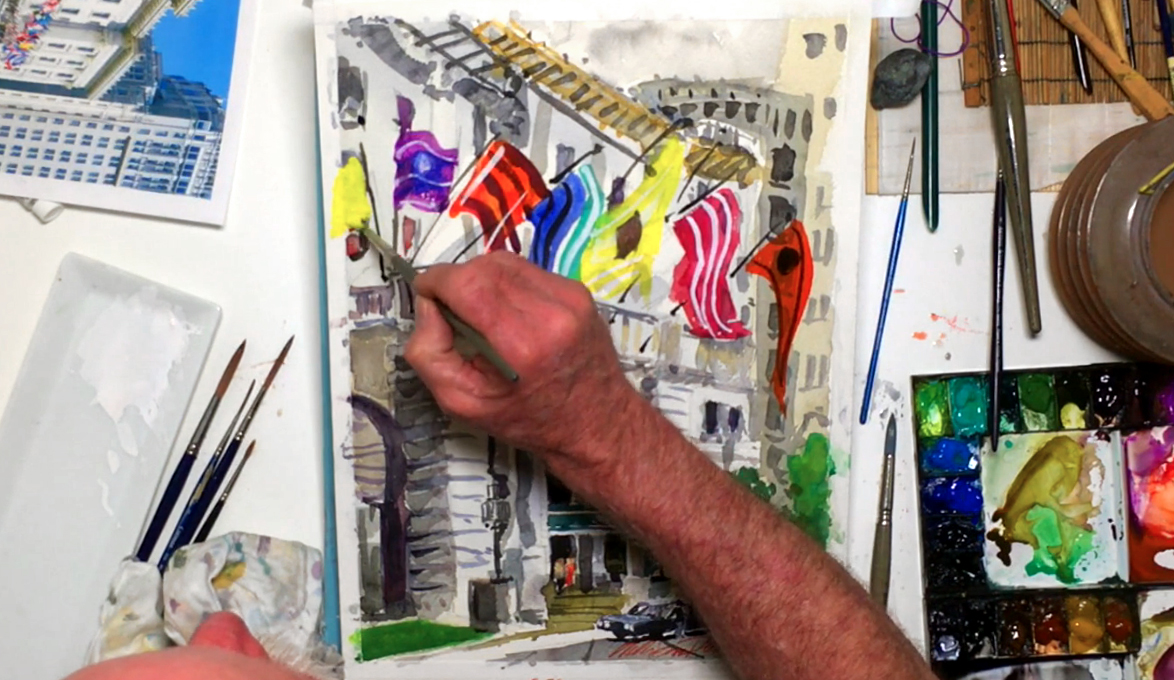
Step 10: Spicing Up The Flags
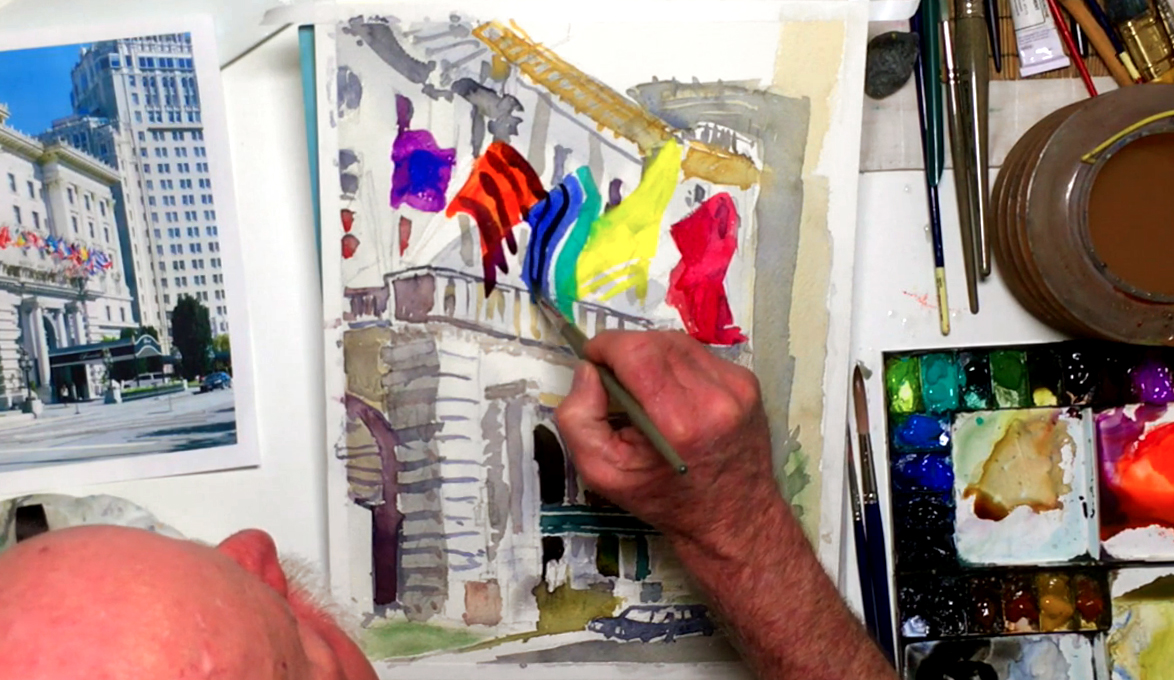 It's time to upgrade the flags! To do so, use a flat brush, and mix Brilliant Orange with a little Pyrrole for the red flag. Next, layer more Permanent Alizarin Crimson for the rightmost flag, then add more Lemon Yellow for the yellow flag. Paint a Cobalt Green stripe for the blue flag, using the edge of the brush to get a thinner line. Mix Mineral and Carbazole Violet next for some stripes along the now orange flag, then use pure Cobalt Violet Light to paint a new flag to the left. For a stronger coverage, use the no. 12 round brush and saturated Lemon Yellow to go over the yellow flag again. After that, switch to Cobalt Blue to add a design to the purple flag, then Ivory Black for a design on the blue flag. These extra layers will help brighten the tones in the flag, which in turn will bring them to the forefront of your watercolor building.
Step 11: Painting Foliage
 With more Ivory Black, paint more windows along the neighboring watercolor building, then mix Cobalt and Leaf Green to paint the hotel's lawn and the bush in the bottom right corner. While the foliage is still wet, drop in Lemon Yellow to get some highlights. Mix Olive Green, Viridian, and Indigo, then paint a tall bush behind the awning. If needed, use the same color to tone down the lawn, then use Ivory Black to layer stronger shadows in your watercolor building. If paint starts pooling on your paper, you can lift it out via soaking it up with a "thirsty brush". Paint the inner shadows of the windows as well, and add more details along the top of the hotel. Keep adjusting the saturation of your paint to match the value of whatever you're painting!
Step 12: Tidying Up The Vehicles
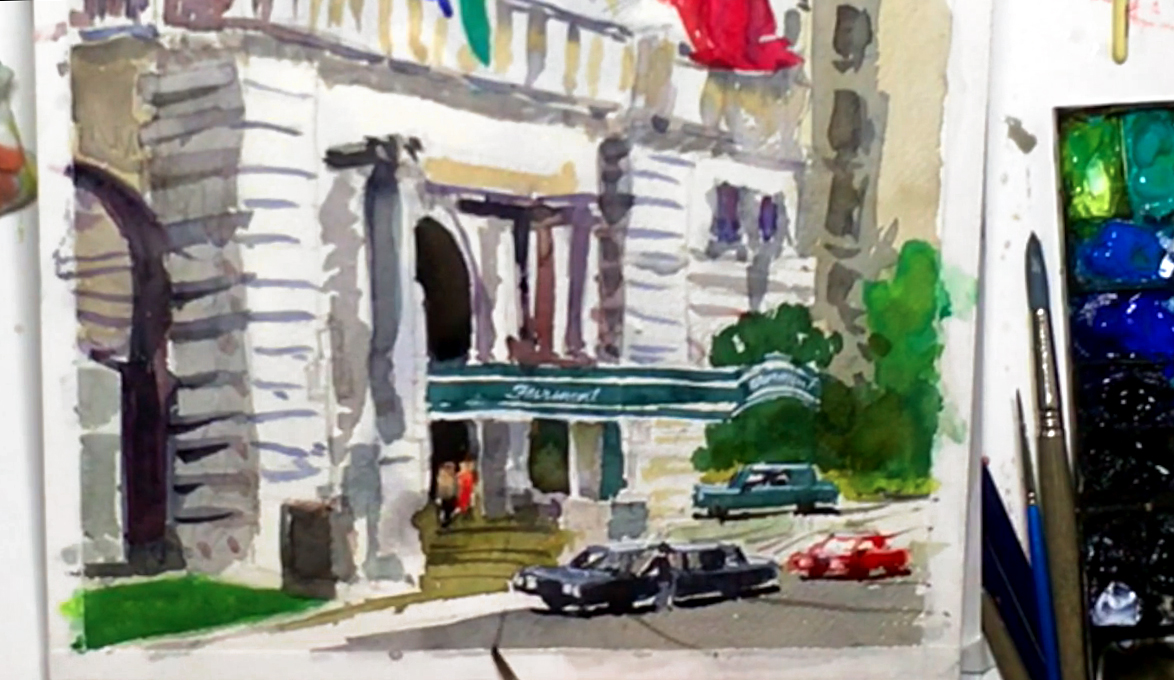
 Next, mix Neutral Tint and Ivory Black to paint the shadows in the limo, and use a more saturated Pyrrole Red for the shadows in the red car. For the car behind, change to the no. 8 round brush, then mix Cerulean Blue with your green mixture for a turquoise car body. While you wait for this to dry, use pure Ivory Black to paint the wheels, the reflective windows, and the cast shadows under all three vehicles. Be careful not to touch any of the wet paint! Switch to a mixture of Ivory Black and Olive Green, and darken the foliage areas. Dot in some Lemon Yellow for some flowers below the rightmost bush for extra detail as well.
Step 13: Lettering And Filling In The Gaps
 To bring back the lettering on the awning, squeeze out some Permanent White gouache paint onto another plate or palette. With a no. 2 round brush, write "Fairmont" on the awning's side and front via the wet-on-dry technique. Find any edges that have been lost among the different greens as well using this opaque paint. With the white, add other highlights as well, such as headlights and on car roofs, and to paint the reflective shine in the windows. At any point, you can also use the appropriate colors to fill in any empty gaps in your painting. Next, change to Ivory Black, and paint the shadows inside the vehicles and on the limo driver. Switch to a no. 4 round brush, then paint around the tiny people using the same black. For a quick skin tone, dilute some Yellow Ochre. You can paint their clothes in any color you want, but be careful not to touch the surrounding wet paint, or the colors will bleed into each other. Try not to make their clothes too dark either, else they won't stand out against the background. Fill in more gaps in the foliage to the right, then paint the pavement below with a diluted black. Paint the road between the cars, and add road markings in a darker gray tone.
Step 14: Finishing Touches For A Watercolor Building And Flags
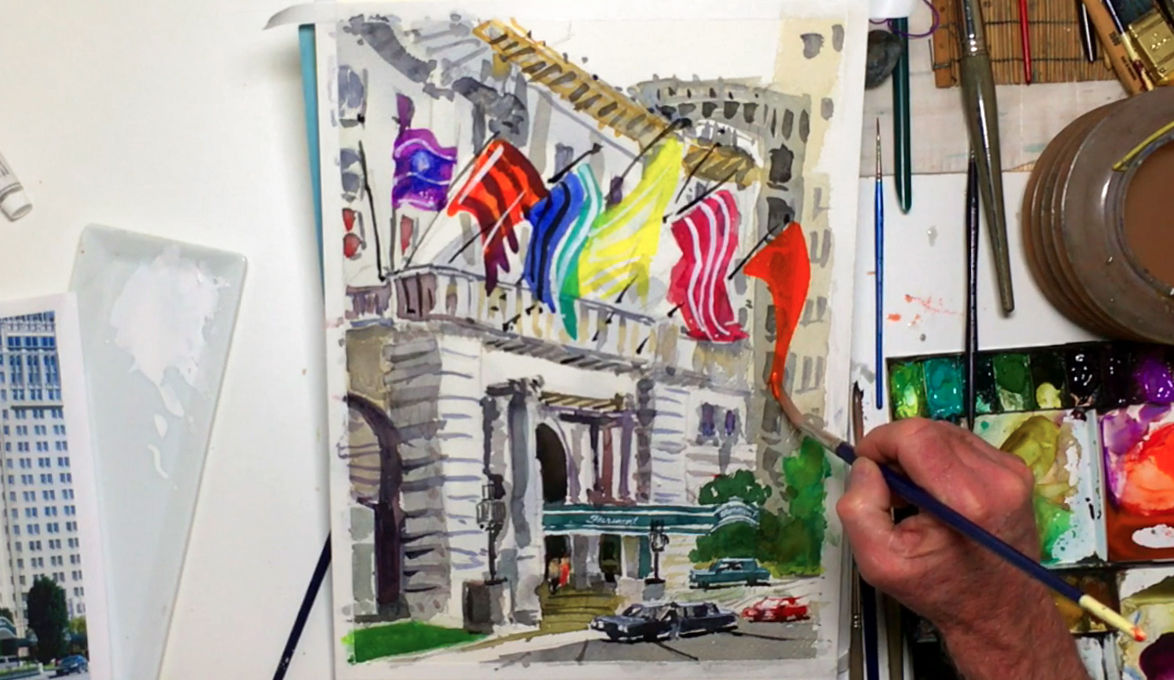 With a no. 10 rigger brush, dilute a mixture of Neutral Tint and Ivory Black to paint more architectural details along the top of the hotel. Add windows to the rightmost watercolor building, then switch to a no. 8 rigger brush and darken your mixture. Add lampposts along the street level using the wet-on-dry method, using the reference photo to help. Don't go too overboard with these details though! The focus should still be on the colorful flags. Paint the flag details next, using the same white gouache paint from before. Add some white stripes for the red flag, and highlights and other designs for the rest. Change to Ivory Black to paint the flagpoles, angling them differently so they don't look too regular. Then, go back to the no. 10 rigger brush to paint one last flag at the very right using Brilliant Orange.
Step 15: Tying Up Loose Ends And Finalizing Details
 To help you tie up any loose ends, step back to see your overall painting. If there's anything that needs adding or fixing, go ahead and do so, using your artistic instincts and creativity to help. Like Bill, you can use more Ivory Black to add more details, or even paint the small patch of sky via the wet-in-wet technique. Don't make it too colorful though, and leave some white spaces for clouds. After the last flag you painted is dry, you can switch to a no. 8 round brush, then add a design on it in Ivory Black. For the yellow flag, use the purple mixture for a better contrast. In this way, make all the flags as interesting as possible without overdoing them. When you're done, sign your painting with a no. 1 rigger brush and saturated Pyrrole Red paint before leaving the whole painting to dry. You can then carefully take off the tape on the edges to reveal a clean white border, framing your watercolor building in a professional manner. That's it for this tutorial! We'll see you again in the next one soon.


