Paint a cool "tunneling effect" in this perspective painting featuring a vibrant cityscape of San Francisco's Chinatown. In this more challenging tutorial, artist William "Bill" Dunn teaches how to combine different watercolor techniques to capture the bustling atmosphere of the city. Want to watch the video version? The full tutorial is available to members of our Beeblys WatercolorPainting.com.
Materials Used In This Watercolor Cityscape Class:
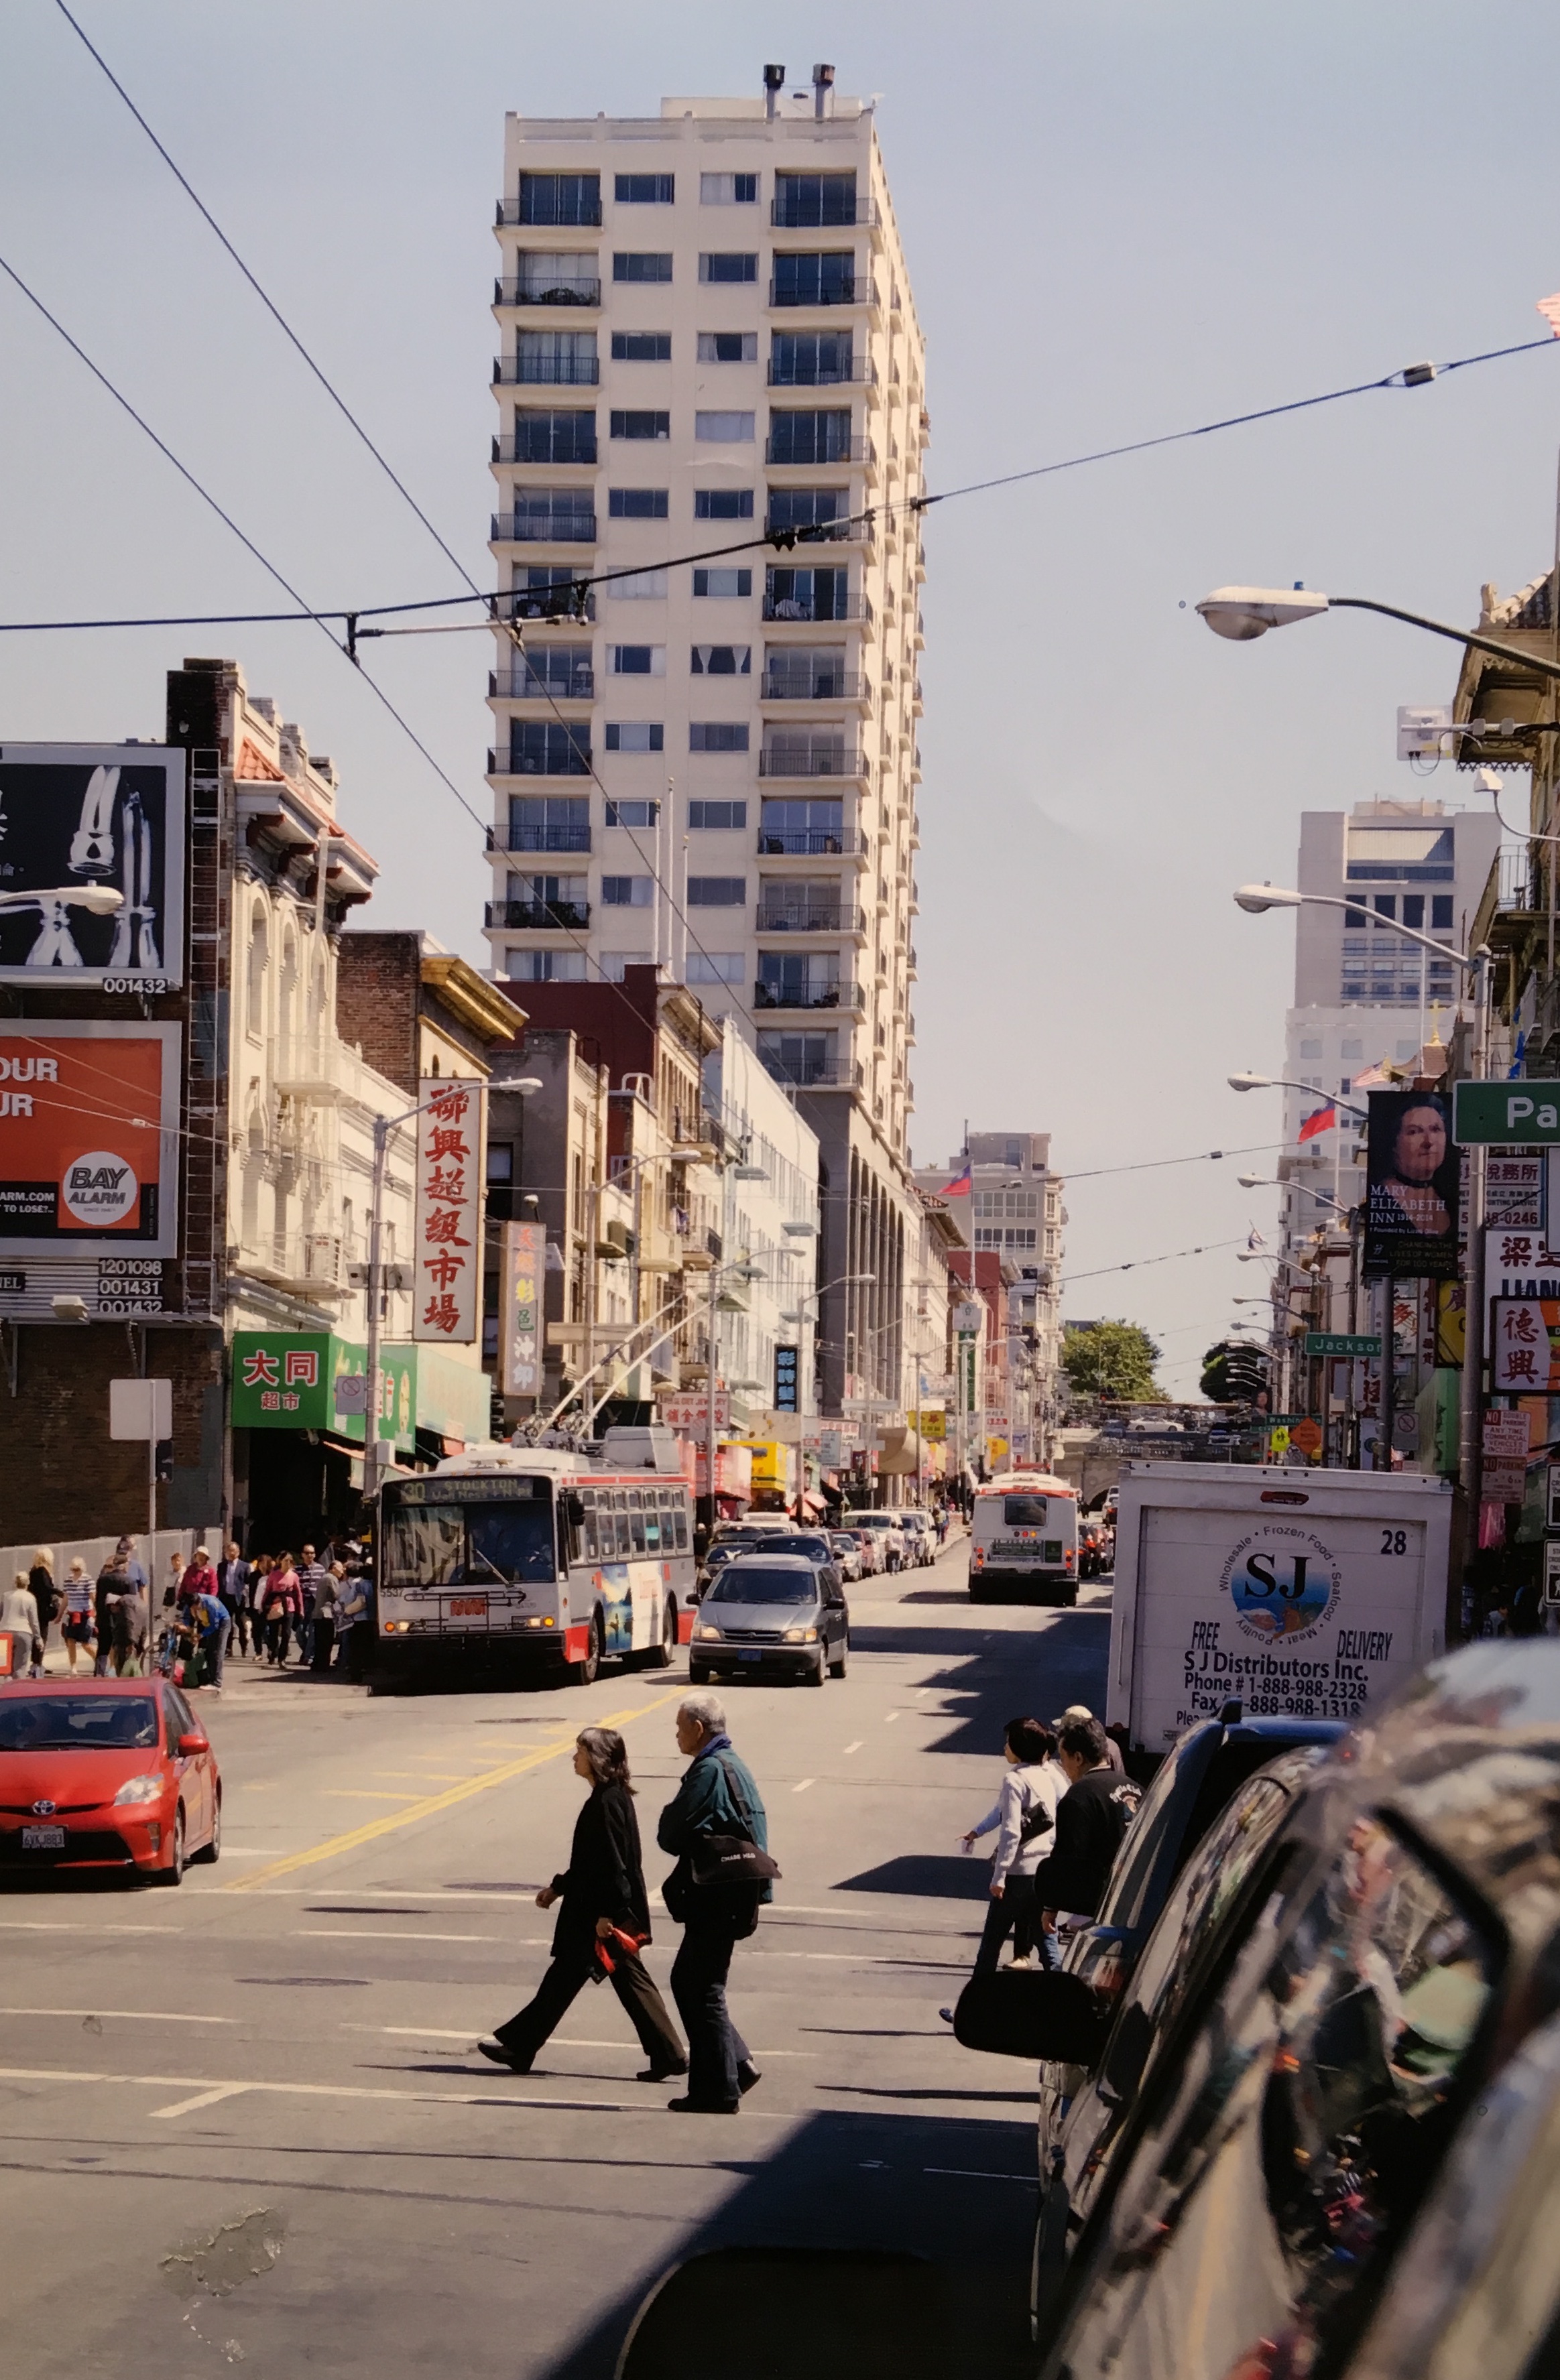
- Reference picture of a street in Chinatown, California (click here for Bill's picture)
- A sheet of Arches cold press watercolor paper (300lb, size 15″ x 11″)
- Pentel Graphgear 1000 automatic drafting pencil, 0.7mm lead size with B or 2B lead
- Kneaded eraser
- 1" Artist's tape
- Painting palette for watercolor paints
- Auxiliary plate or palette for gouache paint
- 2 containers of water
- Paper towels or a rag
- A tabletop easel or a box to prop your painting on
- Mr. Clean Magic Eraser (original)
Paints (Holbein Artists' Watercolors)
- Lemon Yellow
- Cadmium Yellow Deep
- Brilliant Orange
- Cadmium Red Purple
- Cobalt Violet Light (a.k.a. "Lavender")
- Mineral Violet
- Olive Green
- Sap Green
- Viridian
- Cobalt Green
- Leaf Green
- Peacock Blue (a.k.a "Cerulean Blue")
- Cobalt Blue Hue
- Indigo
- Quinacridone Gold
- Yellow Ochre
- Burnt Sienna
- Burnt Umber
- Neutral Tint
- Ivory Black
Winsor & Newton's Professional Watercolors
- Permanent Carmine
- Permanent Mauve (or Sennelier's Cobalt Violet Deep Hue watercolor paint)
- French Ultramarine
Winsor & Newton's Designers' Gouache
- Permanent White
Brushes
- Neef Rigger Supreme Taklon Series: Long handle rigger brush (no. 6)
- Neef Rigger Supreme Taklon Series: Long handle rigger brush (no. 8)
- Neef Rigger Supreme Taklon Series: Long handle rigger brush (no. 10)
- Neef Rigger Supreme Taklon Series: Long handle rigger brush (no. 12)
- Escoda Perla Joseph Zbukvic Series: Round brush (no. 8)
- Escoda Perla Joseph Zbukvic Series: Round brush (no. 12)
- Escoda Perla Joseph Zbukvic Series: Round brush (no. 20)
- Da Vinci Spin-Synthetics French Watercolor Brush: Round mop brush (no. 4)
- Winsor & Newton Sceptre Gold II Series: Short handle round brush (no. 4)
- Winsor & Newton Sceptre Gold II Series: Short handle rigger brush (no. 1)
- Winsor & Newton Artists' Watercolor Sable Brush: Contoured handle round brush (no. 3)
- Old toothbrush
Step 1: Preparations For A Perspective Painting
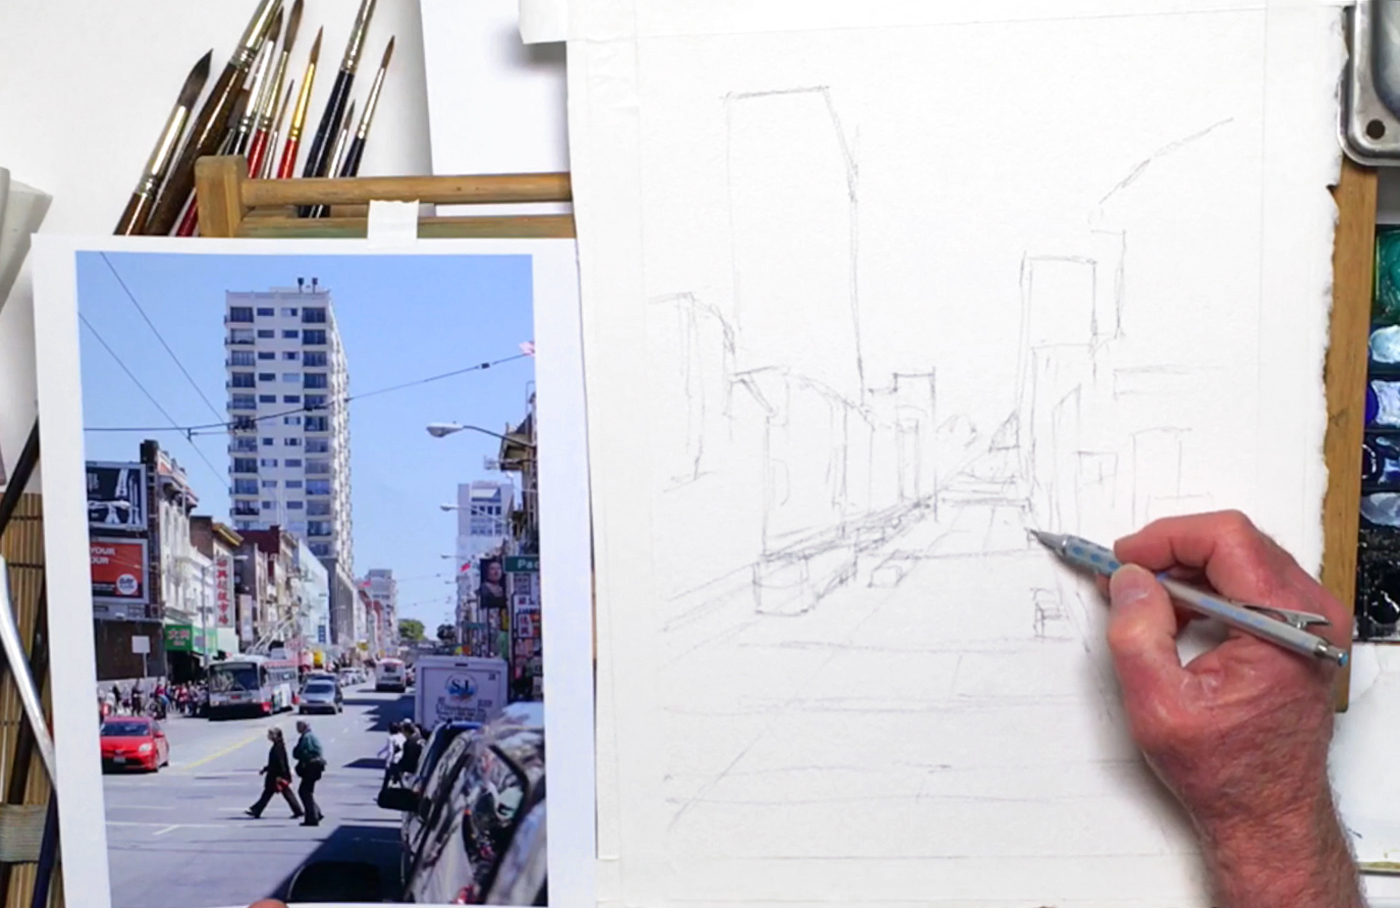 Bill begins by giving quick self-introduction, his basic setup, and the purpose of each tool. He stresses on the importance of knowing the reason behind each painting, as this will determine what your focus is. Here, Bill has a picture of a street in Chinatown, and wants to capture its busy yet colorful and exciting nature. In turn, the way he paints will hopefully reflect the impression he wants others to get from looking at this cityscape. To start, tape the edges of your paper with artist's tape, which will give you a 1" margin for framing purposes. Then, use your pencil to sketch a simple outline of your perspective painting. Big shapes like buildings should be drawn first, while small shapes such as vehicles and signs come last. Try to avoid centering the focus of your composition, which in this case is your vanishing point. This means that as you draw things in perspective, make sure the "tunnel effect" ends somewhere off-center for a more interesting composition. As you continue to prepare, remember that you can always add or take away certain details for a better design. Think about what you want to emphasize, and the minimum elements needed to get a good composition. Feel free to think ahead and plan your colors and layers while you draw. Keep your lines in perspective and proportion, and leave space for adding details with your paintbrush. Most importantly, have fun with your composition, and focus on capturing the right impression rather than getting an exact copy. Below is a close-up of Bill's sketch:
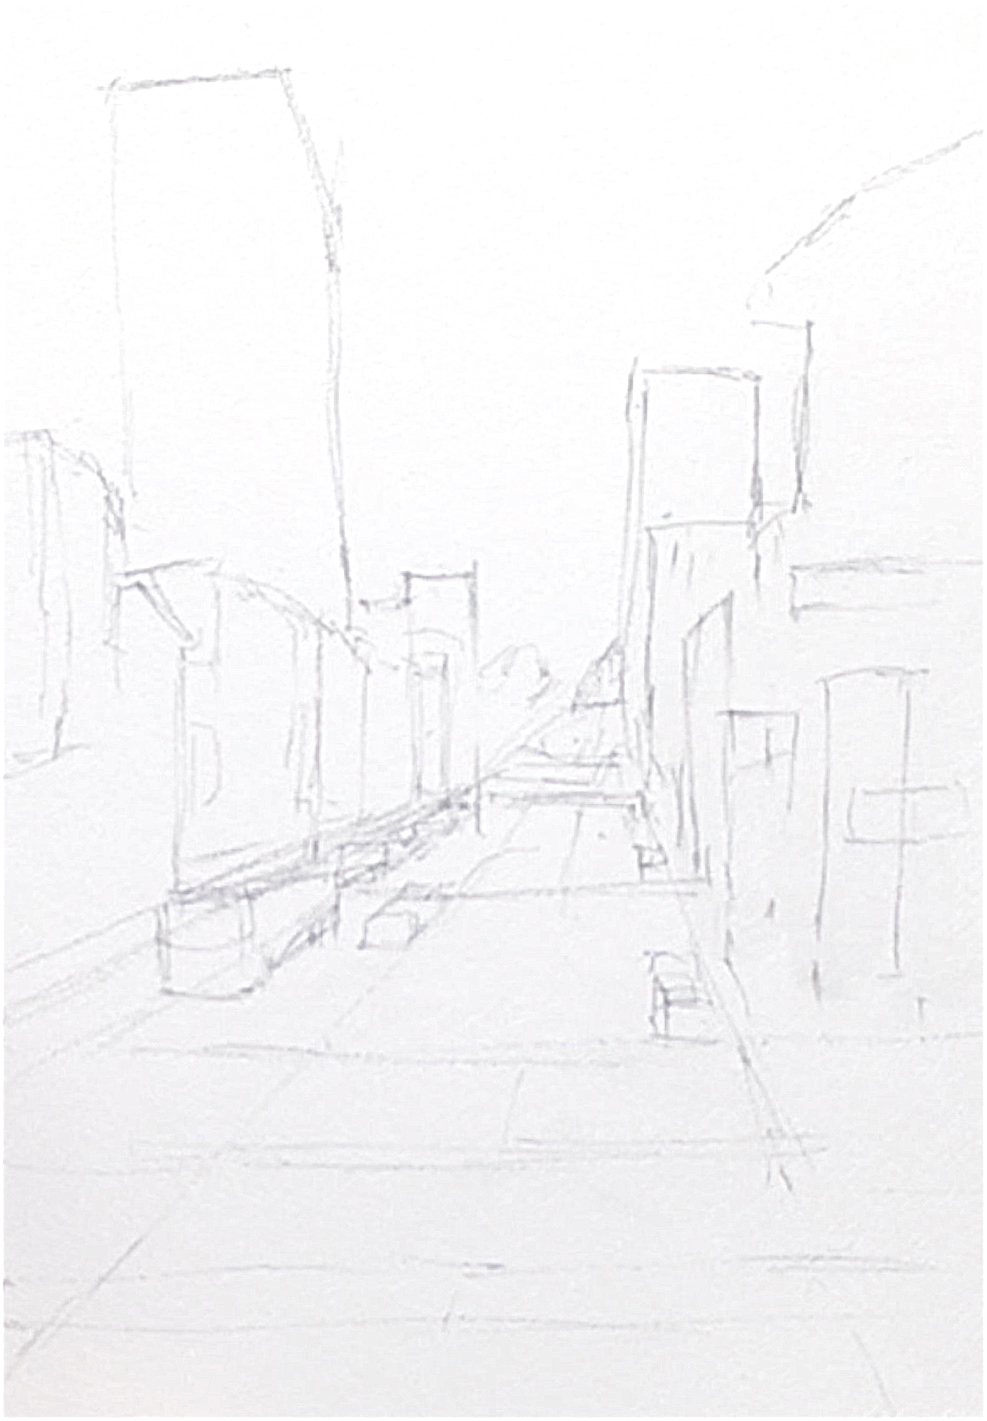
Step 2: Building A Building Base Using The Wet-On-Wet Technique
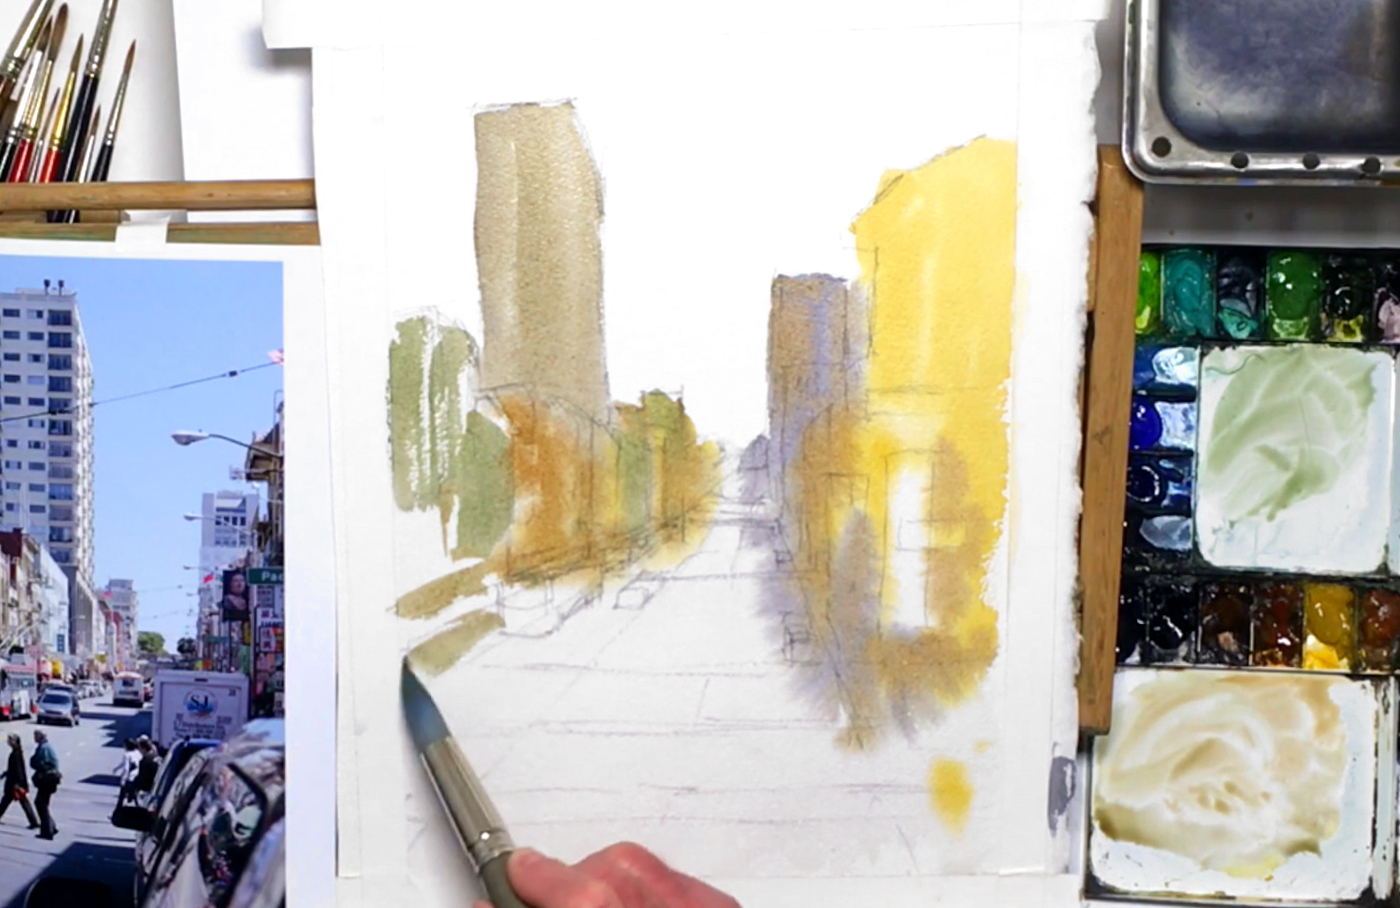 Prop your paper on the tabletop easel, and with the Escoda round brush (no. 20), apply water to the buildings and road in preparation for the wet-on-wet technique. Water control is crucial here, as this determines whether you get hard or soft edges in your perspective painting. Try not to make the paper too wet as well since this may cause the paint to run. Let the water soak into the paper before prepping your paints. Then, apply Yellow Ochre to the rightmost buildings without diluting it too much as your paper is already wet. Remember to leave certain areas white to help brighten the overall effect of your perspective painting. Next, drop in diluted Neutral Tint to your buildings, especially in the shadowed areas and the buildings on the left. Watercolor paint dries lighter than when it's wet, so keep that in mind while you paint. On your palette, mix Yellow Ochre and Neutral Tint, and paint the tallest building in the background. Add Burnt Sienna to this mixture, then paint the lower left buildings and some shadows for the rightmost buildings. By this point, some areas may be quite dry, so simply rewet the paper with clean water whenever you need. Next, use Sap Green and paint the shadowed sides of the buildings on the left. You can darken these shadows by adding the brown mixture where needed. Don't worry about the details for now; the first layer of paint always looks rough and messy. It will get better as you add more layers and tighten the overall lines, shapes, and values.
Step 3: Streaking In A Road With The Variegated Wash Technique
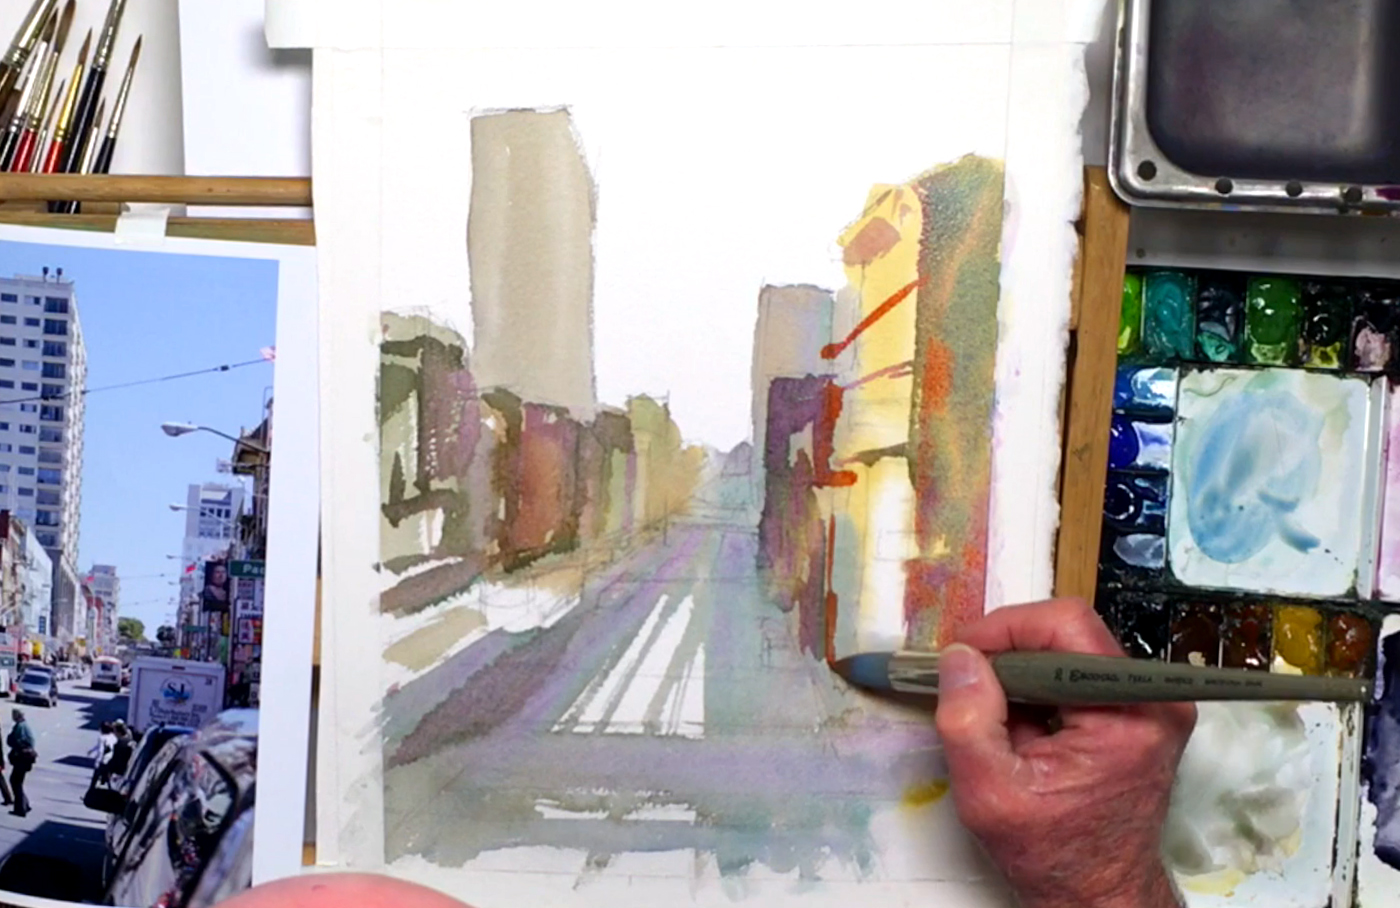
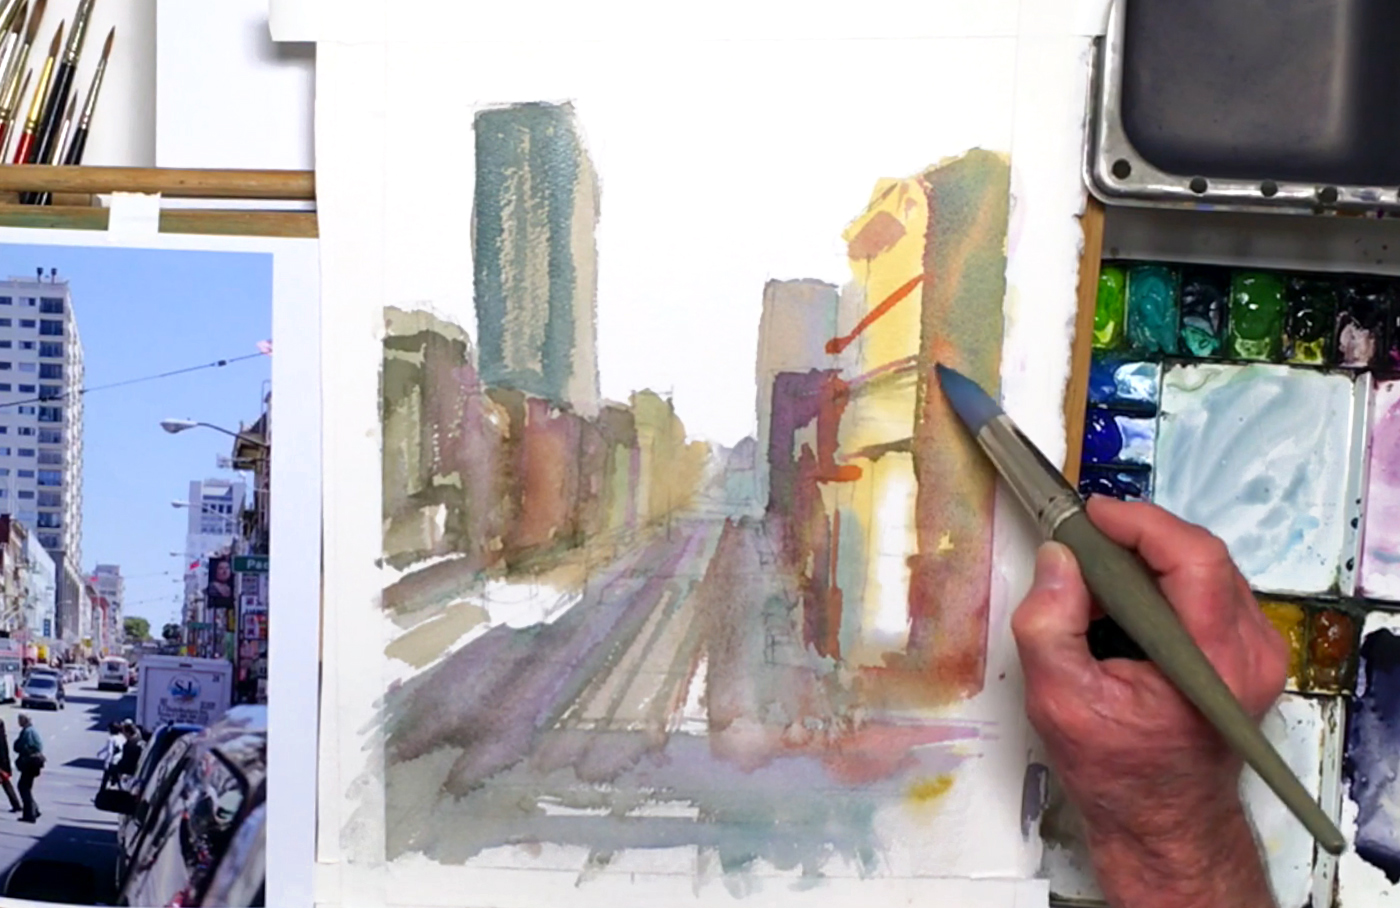
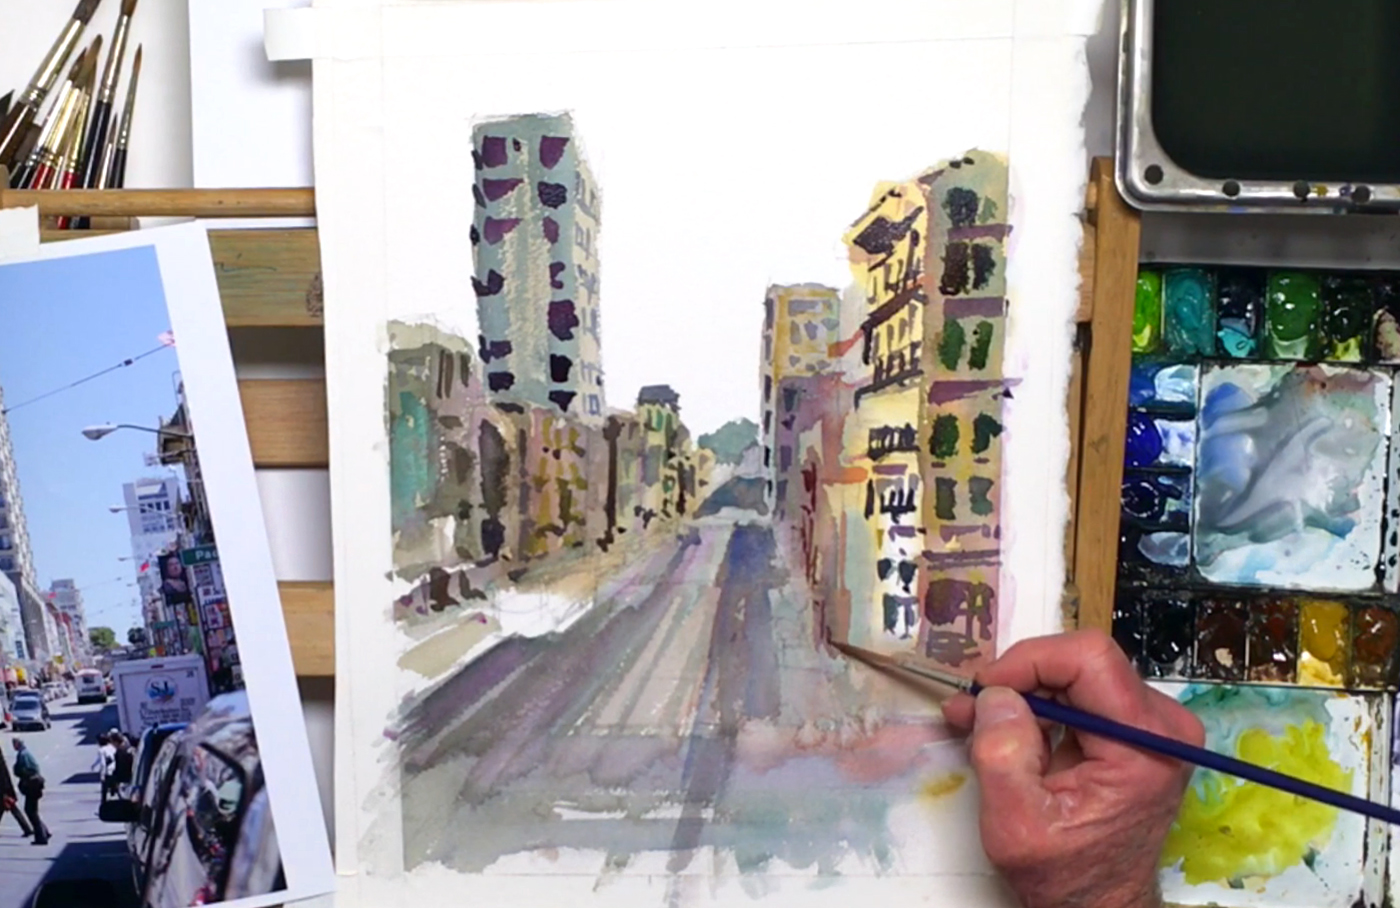
 Normally, a road is gray in color. However, this would make for a lifeless perspective painting, so add some color by blending Yellow Ochre and Cobalt Blue Hue with the dark brown mixture. Use the resulting blue-gray color to paint the road, brushing in the same direction as your perspective lines. Leave some white lines for lane markings, and to add some "sparkle" to the overall painting. For intersections and crosswalks, add some horizontal brushstrokes that cut across the road. To get more color variation, mix in Cobalt Blue Hue or Cobalt Green for a different gray tone. Streak these colors into the road while it's still wet, again following the angle of perspective to build on this illusion. You can use the Cobalt Green mixture to add an edge to the wet buildings as well, which will help differentiate one building from another. Be careful not to add too much, and switch to Cobalt Violet Light for a warmer variation. Work quickly as you still want the soft blends created by the variegated wash technique (a variation of the wet-on-wet method), so if you find the surface is too dry, simply wet it a little before painting again. Continue using Cobalt Violet Light to paint the shadow of the outcropping on the rightmost building. For this shadow, it's fine to use the wet-on-dry technique for a harder edge. This means using wet paint on a dry surface, which will help define the foreground and add more depth to this perspective painting.
Step 4: Adding Contrast To A Perspective Painting
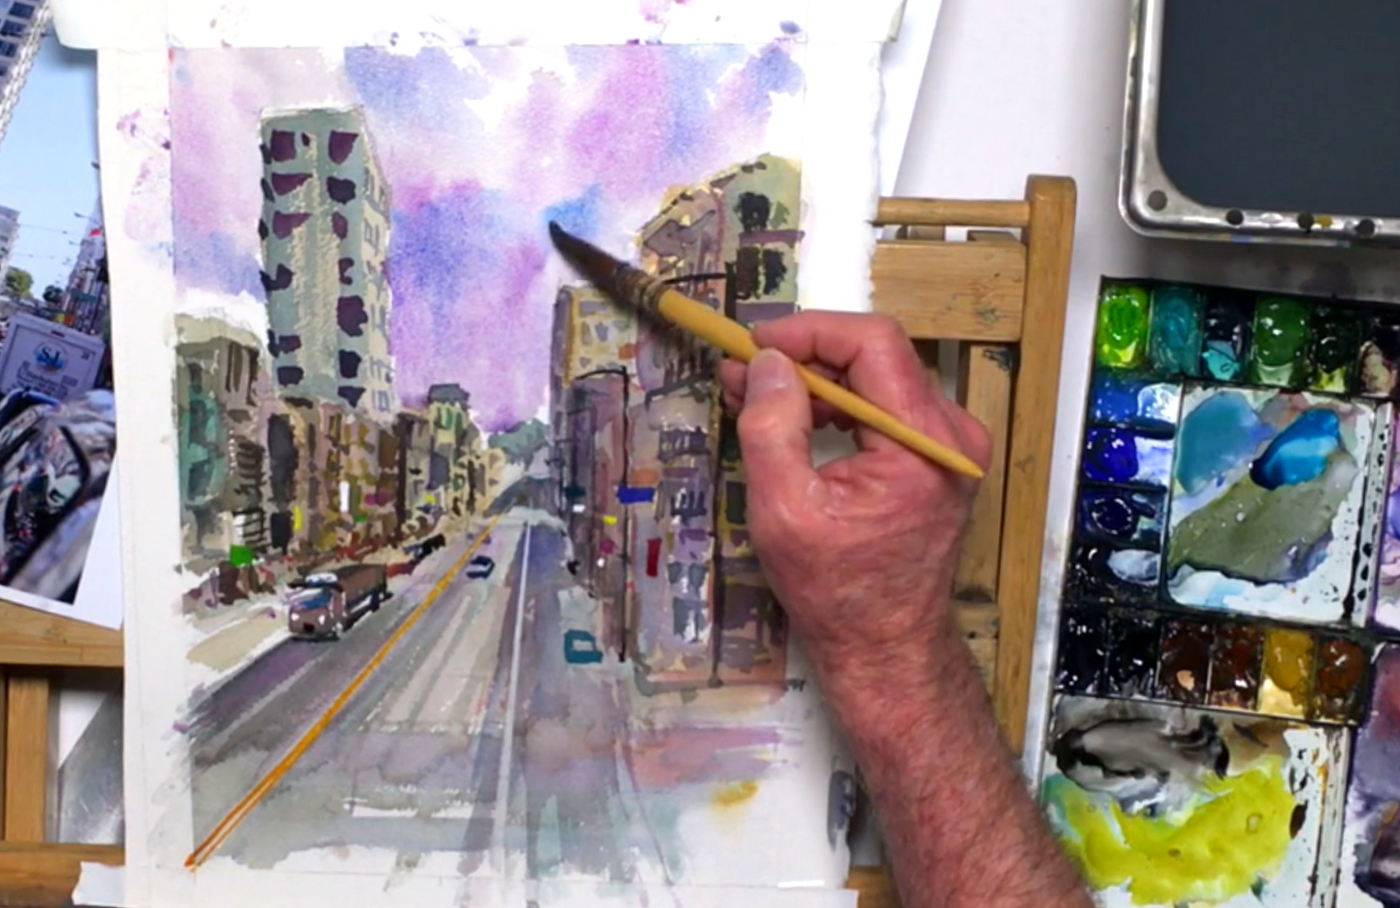
 With Burnt Umber and a touch of French Ultramarine, paint a second layer along the shadows of the left-side buildings. You can also draw in a few architectural details with your brush. Use Peacock Blue to liven the rightmost building wall, and touch in some Permanent Mauve next to cooler areas in your perspective painting. Keep alternating between warm and cool colors for a good color contrast! Next, streak in more Permanent Mauve under the vehicles for their cast shadow, and switch to Brilliant Orange to brighten the rightmost building and some of its details. Use the tip of your brush for this, as even a big brush can come to a small point if it's of good quality.
Step 5: Getting A Concrete Texture Using The Dry-On-Dry Technique
 Tone down the white strips in the road by brushing over them gently with a diluted version of the brown-gray mixture. While adding all these layers is necessary, try not to "overflood" the paper, as this will create a granulated rind texture. Keep a rag or paper towel handy to lift out any mistakes, and soften strong colors with a clean wet brush. Next, take French Ultramarine and a touch of Cobalt Blue Hue, and tone it down with Brilliant Orange. This works as blue and orange are complementary colors; i.e. opposite colors on the color wheel. Wipe off some of the excess liquid in your paintbrush on a rag, then quickly brush over the the tallest left-side building. This is the dry-on-dry technique that's often used to create rough-looking textures, which is perfect for this cityscape.
Step 6: Painting Windows And Architectural Details In Perspective
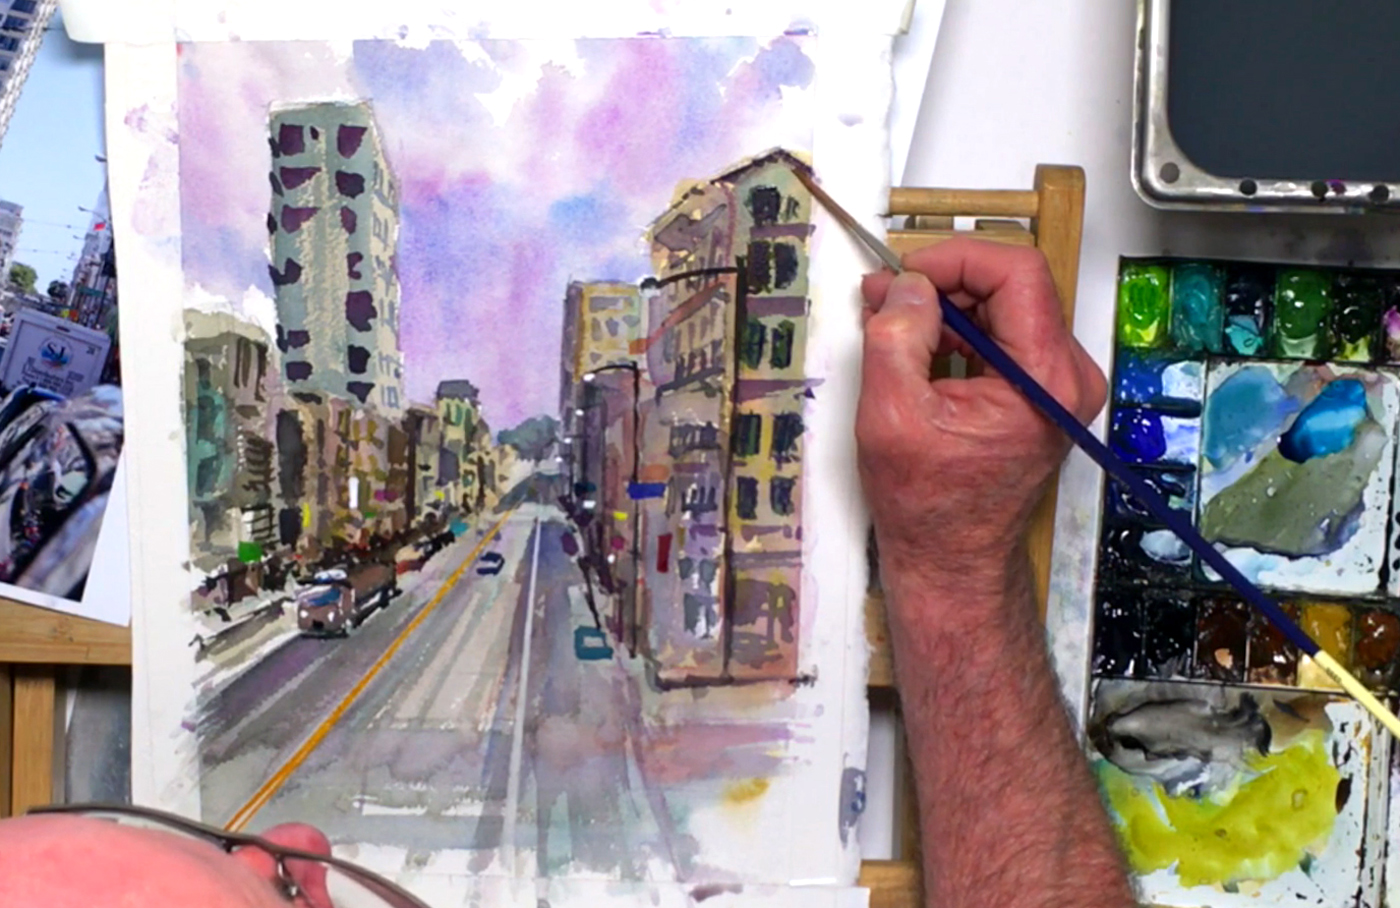
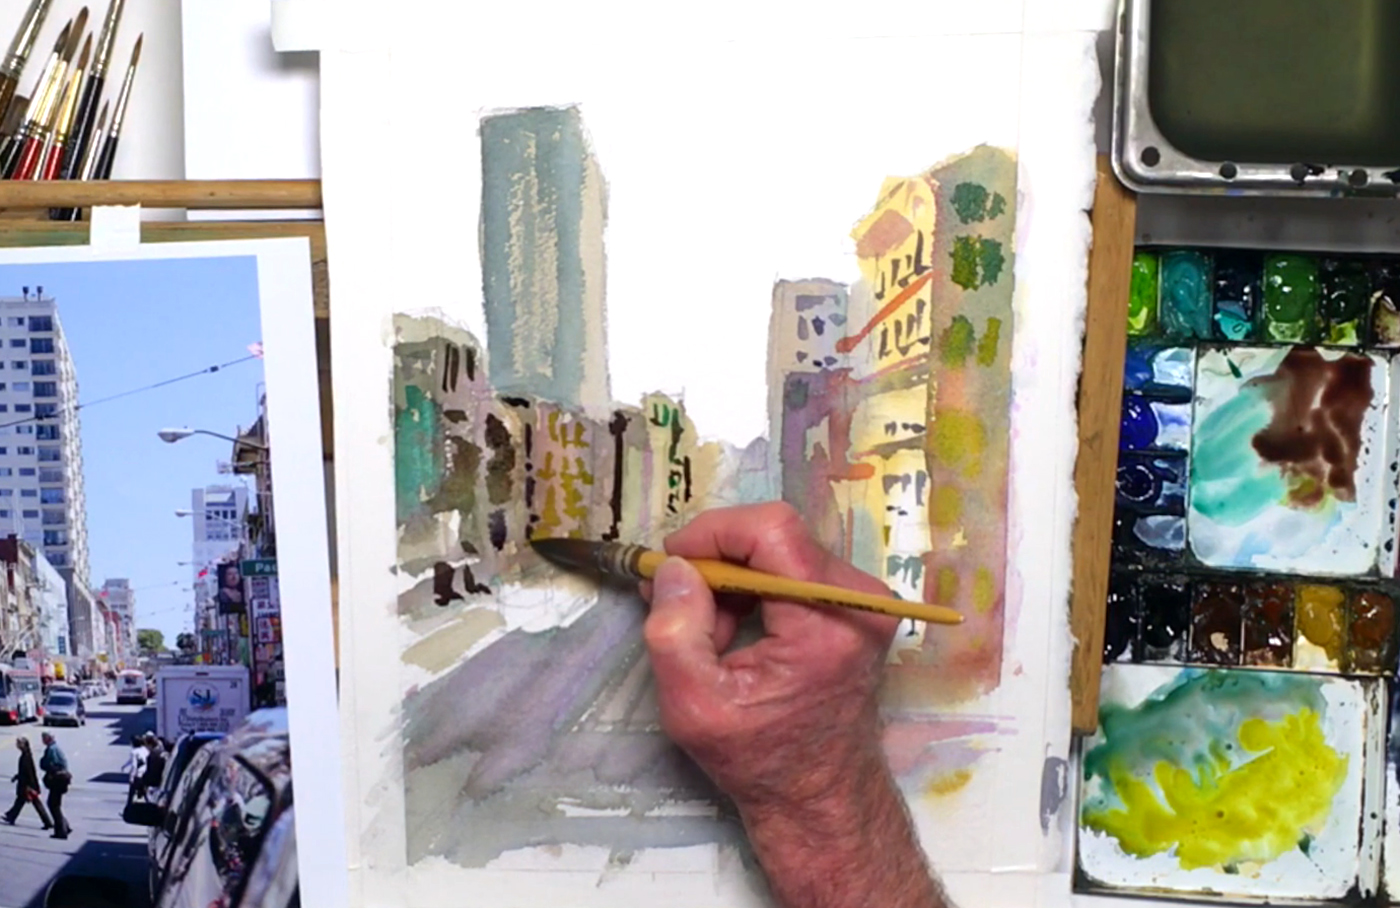 Switch to the Da Vinci mop brush, and use the same gray-blue mix to add windows to different buildings in the background. By this time, your paper should be dry enough to use the wet-on-dry technique, giving you the hard edges needed for detailed work. Combine Burnt Sienna with French Ultramarine for a different window color on the rightmost building, then add some Neutral Tint for yet another color variation. Touch in Cobalt Violet Light where needed, and keep the windows' shapes in perspective. This means windows facing the road on the right side will appear long and narrow due to the "tunneling effect". Continue to paint window details and switch colors, and remember to vary their shape and size to keep the painting interesting. Don't forget to apply the rules of distance and perspective as well by making details smaller as you near the vanishing point. Mixing in a touch of Quinacridone Gold will brighten and add a surprise of color to the windows. You can also use a small dose of Viridian and Peacock Blue for smaller windows, or Olive Green and Mineral Violet to get a dark brown variation. Paint ledges and other details to add to the architectural impression, and to help differentiate the cluster of buildings on the left.
Step 7: Atmospheric Perspective And Painting Around A Vanishing Point
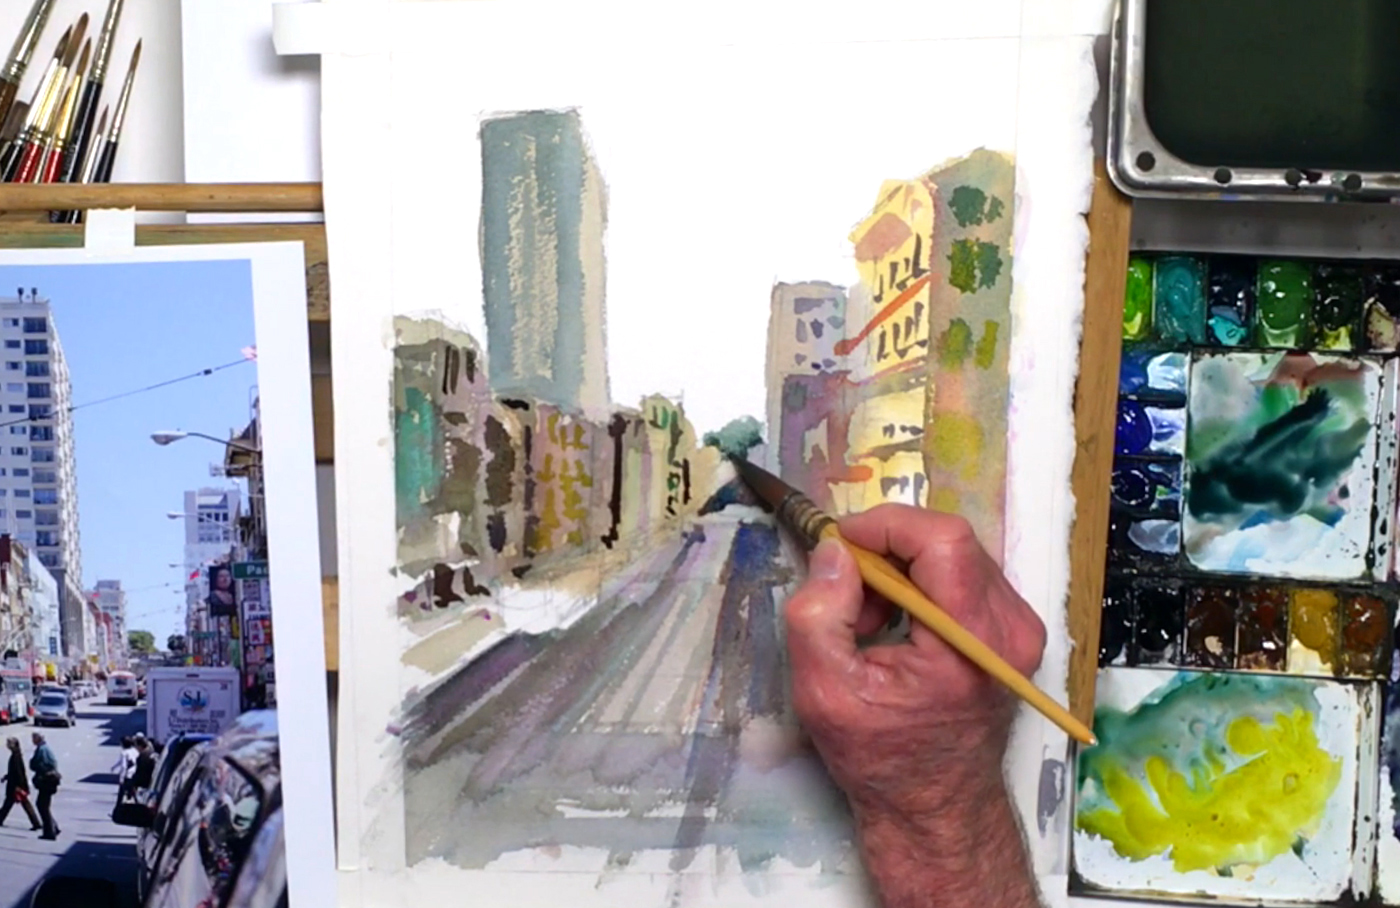 Return to the dark brown mixture and add a touch of Permanent Mauve, working quickly in this next section to get the wet-on-wet effect. To start, paint in the far back of the road under the vanishing point, then streak downwards under the vehicles to the left. Touch in some Neutral Tint as you near the bottom area of the perspective painting, and continue to vary the colors. Drop in colors like Cobalt Violet Light or Blue Hue while the paint is still wet, building up these layers as you go. For the trees in the far distance, atmospheric perspective should be considered when mixing your greens. This means choosing a lighter, bluish color to make them look more distant. You can dilute Sap Green, French Ultramarine, and some brown to paint a cluster of trees above the vanishing point. For the trees' shadow, mix Olive Green and a touch of French Ultramarine and Neutral Tint. Drop this color lightly at the base of the tree area. If the paint starts to bead, wipe your brush to create a "thirsty brush", then touch the puddle to soak up the excess.
Step 8: Adding Darker Details
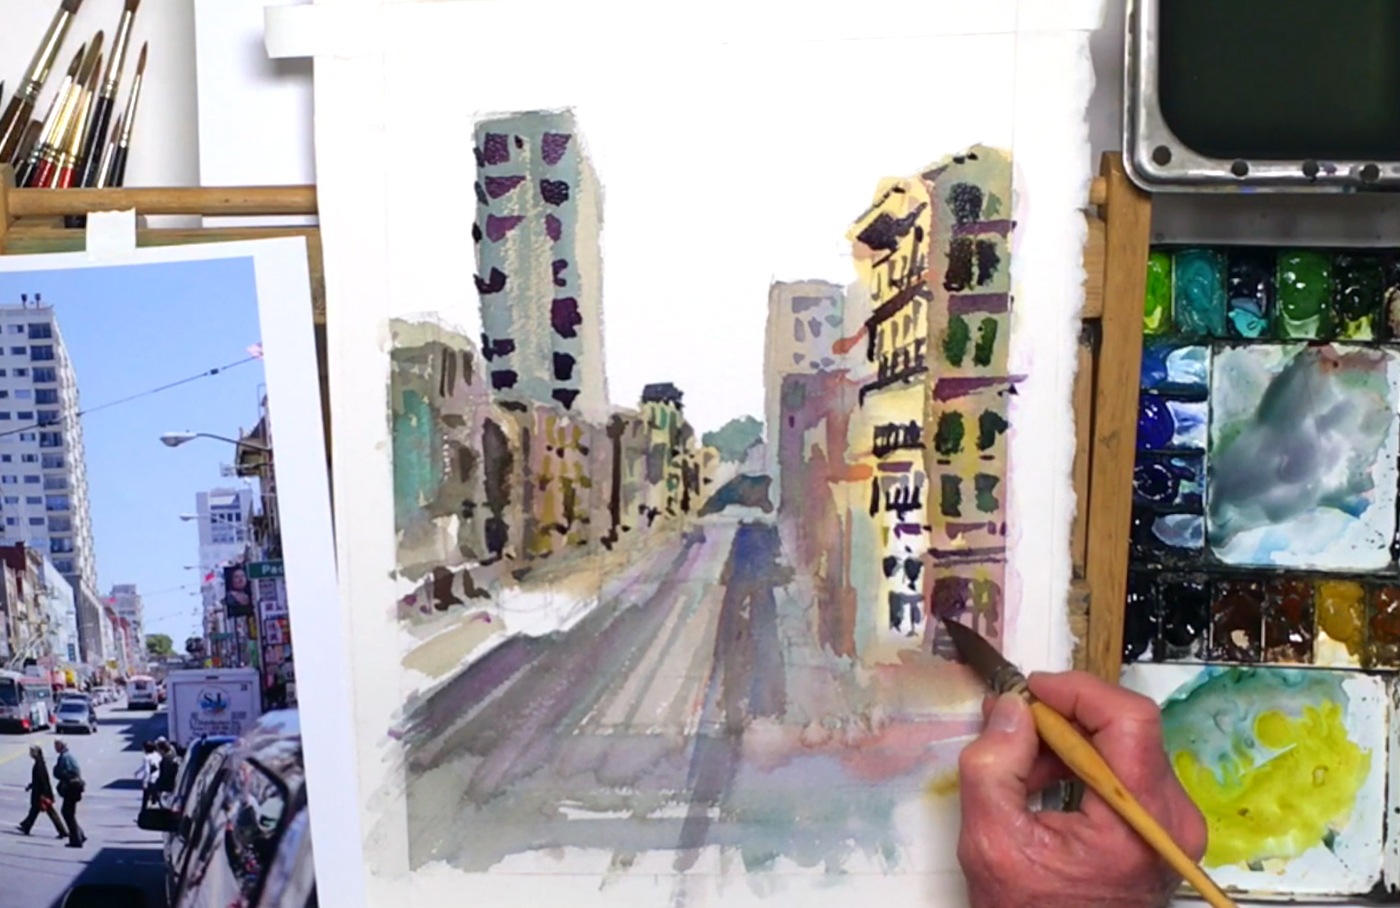 With the same color as the trees' shadow, add another layer of windows on the rightmost building to darken them. Add Permanent Mauve for some different shadows, but don't muddy the paint with too many colors. Use Neutral Tint to paint some landings and other architectural details on each storey of a few buildings. Try to draw from your past experiences of observing buildings, and improve your artistic instincts through practice and careful observation. While dark values are usually painted last, this isn't a strict rule you have to follow. So use Permanent Mauve to paint the windows on the tallest building on the left, again using irregular rectangle shapes for more interest. Add a jutted edge for details, then paint some rooftops and tighten any splotchy window shapes for the rest of your perspective painting. Darken the color by adding more Permanent Mauve and Neutral Tint, and always keep track of what's wet and what's dry. TIP: Keep your painting fresh by using fewer brushstrokes, and use a large brush in order to prevent yourself from overworking the details.
Step 9: Utilizing The Unconventional Black Paint
 Use the no.6 Neef rigger brush and French Ultramarine color to paint tiny windows on the tall left-side building. Apply perspective angles, and prop your hand above the wet paint to avoid smearing your hard work. It's also good to add a light Yellow Ochre wash to some of the underlying layers, but try not to overdo it. For an intensely dark color, mix Ivory Black and Neutral Tint to give your perspective painting more impact. Add a little to the side of the building to the right of the vanishing point, being sparing with this color as too much will deaden your painting. Next, mix Neutral Tint and Cadmium Red Purple for other details and touch-ups.
Step 10: Painting A Bus And Glazing Buildings
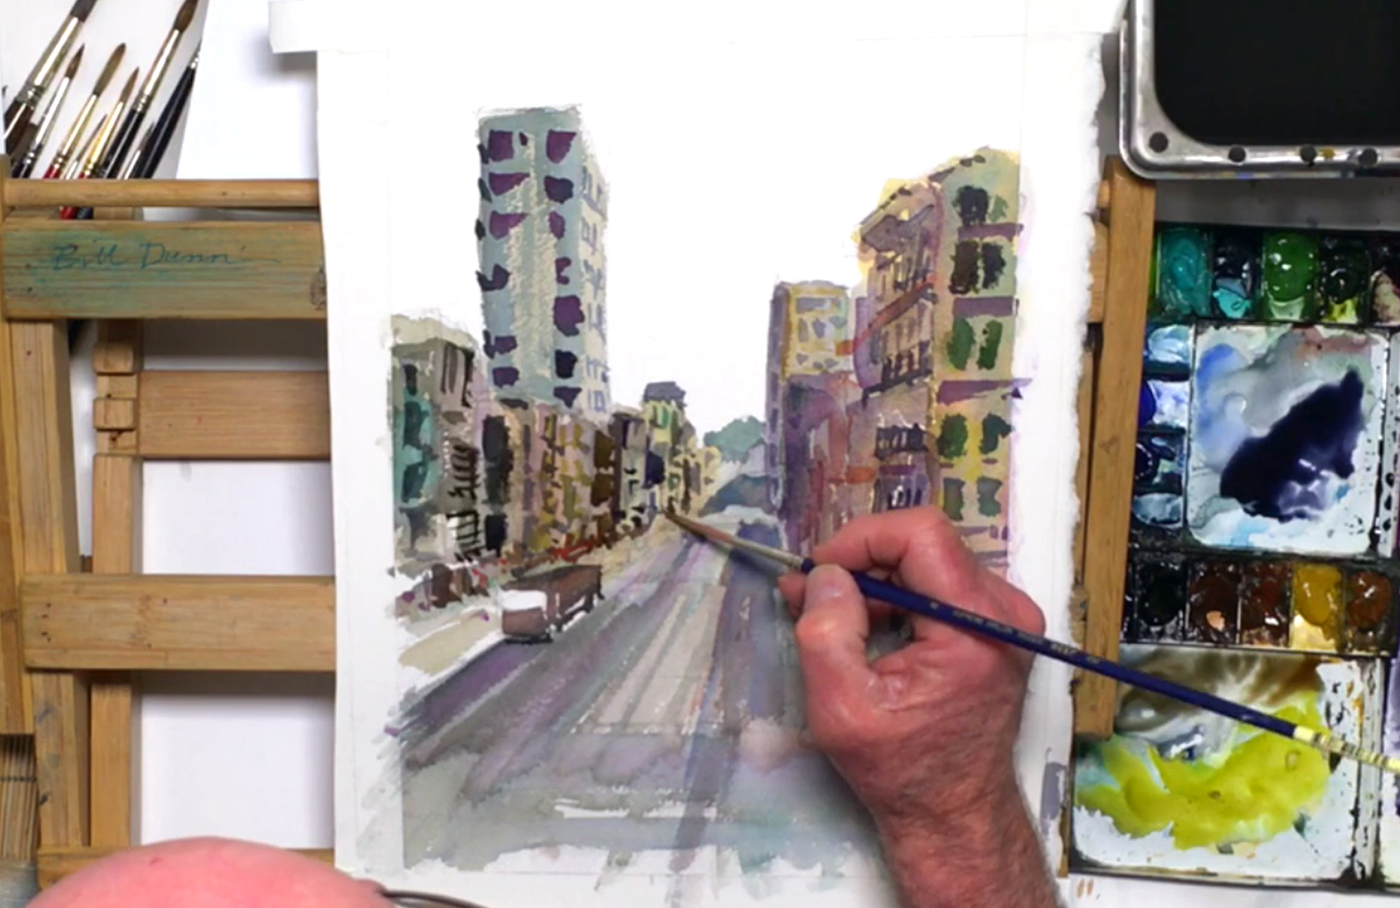 Switch to the no. 12 round brush, and mix Permanent Mauve and Cadmium Yellow Deep for a dark brown color. Use this to fill in the bus to the left of the road while painting around the windshield and roof. With Ivory Black, drop it in along the top front of the bus, then paint the wheels in perspective (i.e. the front one should be bigger). All vehicles will also have a shadow under them, so dilute the Ivory Black, and paint the bus' shadow. Next, apply Burnt Umber along the sidewalk where the buildings meet the ground to give some life to this area. Add pure Cadmium Red Purple to this area too for a more vibrant feeling. Darken the right-side buildings with Neutral Tint mixed with a touch of Permanent Mauve and French Ultramarine. This is important to make the buildings look like they're in shadow. In addition, due to the position of the light source in this cityscape, you'll need to darken all the surfaces facing left even more. To do this, dilute the previous mixture before painting "glazing" these surfaces with a light wash. This technique helps add another layer of paint while allowing the underlying layer to show through. It works especially well if you leave some highlighted areas alone, like building edges and corners. With the Neef no. 8 brush, dilute some Neutral Tint and paint more windows. Drop in saturated Neutral Tint or Indigo to the windows' edges to add more contrast and dimension to your painting, especially when placed next to a light shape. In addition, remember to paint with purpose! Even when you're painting loosely, a confident painter will have a painting that looks intentional, even if he or she makes a mistake.
Step 11: Lifting A Line In A Perspective Painting
 When the road area is dry, you can use a lifting technique to lift out the markings on the road. While you can use plain water and a brush, Bill shows a better method to get a cleaner, lighter result. First, use the artist's tape to tape around the area you want to lighten. Don't forget to keep this in perspective, so the line marking should be thinner at the top and wider at the bottom. Next, wet the Mr. Clean Magic Eraser sponge, then gently scrub the painting within the taped area. When you're done, carefully pull the tape off to reveal a lightened line on the road. Repeat this process for the other markings, and you'll find that this really helps add to the illusion of depth in this perspective painting.
Step 12: Adding Life To A Busy Street
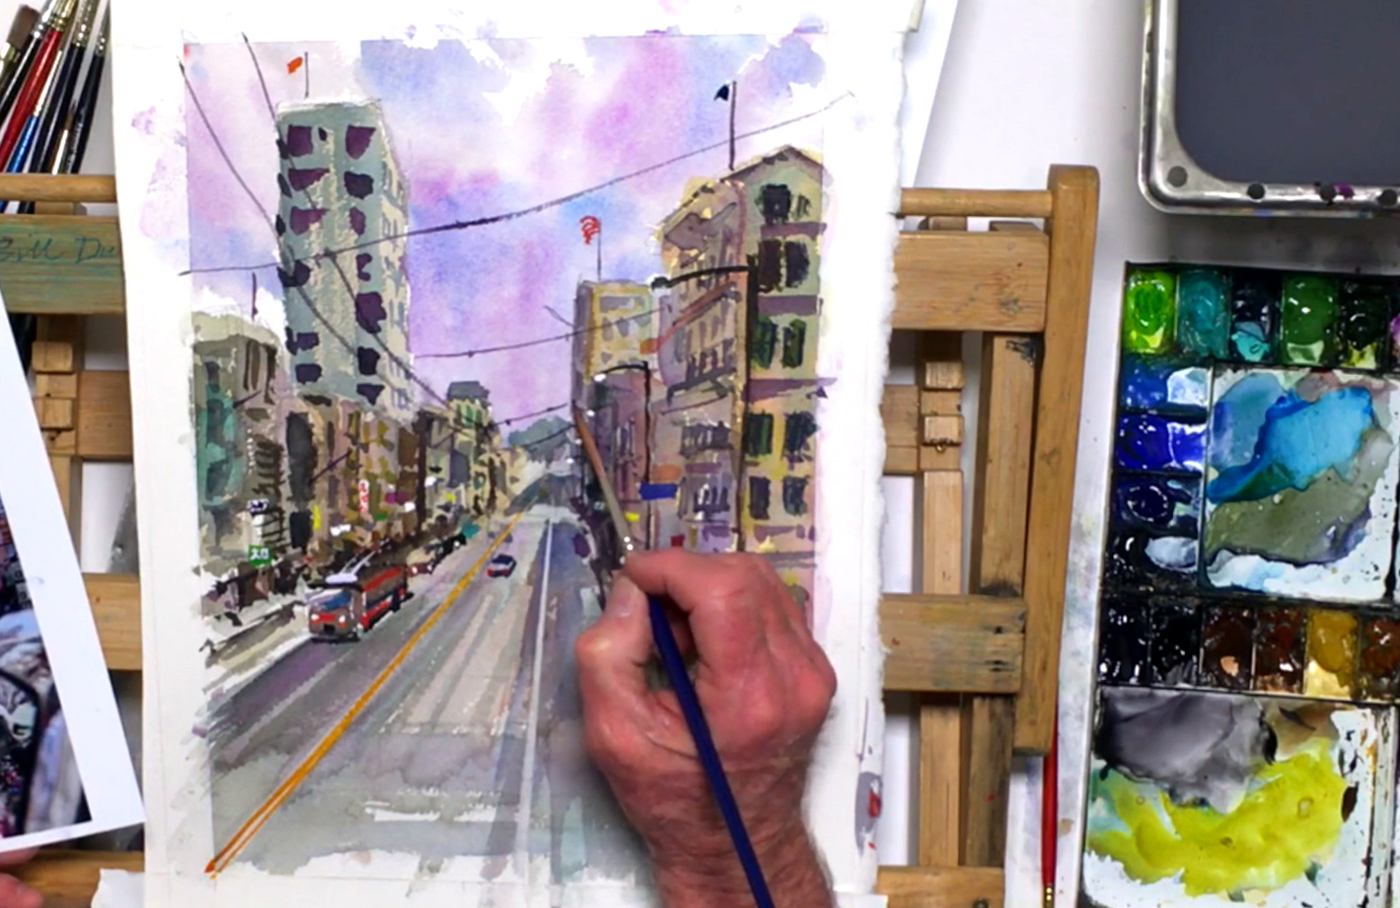
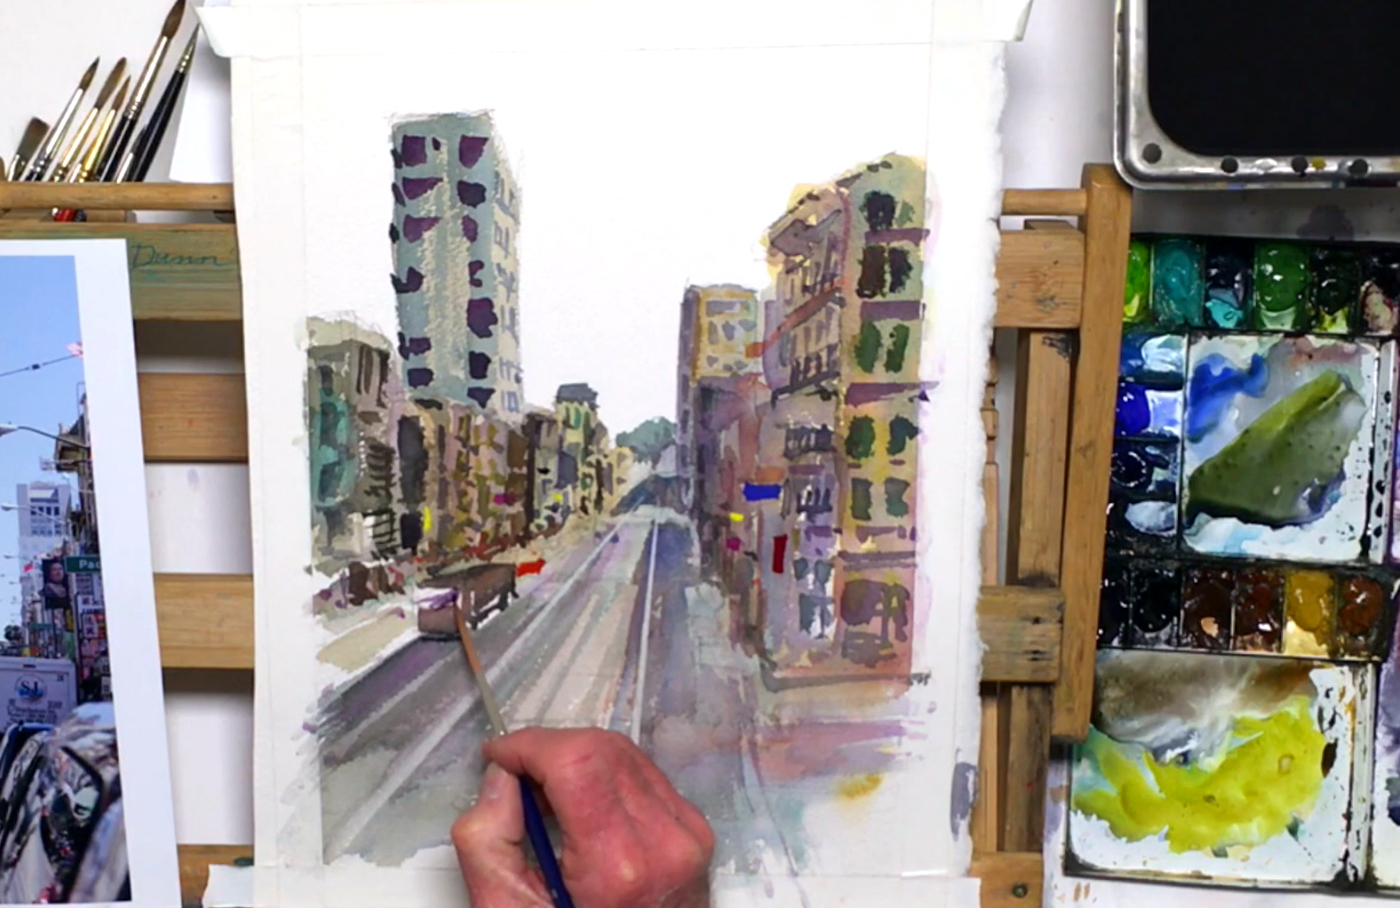 Leave the lines to dry, and use the no. 12 Escoda brush and the dark purple mix to darken the area around the vanishing point. Mix Indigo with Olive Green to touch up details and add more contrast to the shadows. Switch to the no. 10 rigger brush, and add more vehicles to give the scene more of a city feel. While Bill uses Cadmium Red Purple for his first car, you can choose the colors yourself as long as it enhances the rest of your perspective painting. He also recommends starting with objects in the front and building towards the back to make sure you won't run out of space for the more crucial foreground elements. For the signs among the buildings, mix a saturated Cobalt Blue Hue and a touch of Permanent Mauve. To ensure these signs will show, put all the paint at the tip of your brush so it comes off opaque enough to see clearly. Don't paint too many signs though, and make sure the surface is dry before painting so the paint doesn't bleed. Place the signs randomly, and switch to different colors while you paint, such as using Lemon Yellow, Permanent Carmine, or mixing in Cobalt Violet Light. Add a dark purple windshield for the bus, leaving some reflective lines for a shiny effect, then reapply black to touch up the wheels.
Step 13: White Gouache Paint And Other Bright Colors
 To get opaque but light-colored details, squeeze out Permanent White gouache paint on your auxiliary palette. Use the no. 6 rigger brush and the gouache paint to add white details to your perspective painting. This includes painting the illusion of Chinese characters on the signs, or headlights on the vehicles and for the bus' route display. However, try not to overdo the white paint, and make sure the underlying layers are dry before painting. For other road markings, mix Brilliant Orange and Cadmium Yellow Deep, and fill in the left line that you previously lightened with the sponge. Try to get as straight of a line as possible without using the artist's tape. It helps if you don't hesitate, and if you paint the line in one go. With the no. 8 round brush, add more cars to the left and right side of the road. This is your chance to brighten your perspective painting, and use different livelier colors. For example, Bill mixes Cobalt Blue Hue and Cobalt Green to paint a car on the right side, which adds more contrast as the buildings on the right are quite warm-colored while the turquoise mix is cool-colored. Keep lighting in mind, and leave the roof of the car blank to paint with a lighter color later. Take care when painting cars next to each other as well, as the wet paint will bleed into one another and ruin your colors.
Step 14: Painting Lampposts And Streetlights In Perspective
 Switch to pure Leaf Green to paint a few more signs, then move on to paint the streetlights while the signs dry. Use the no. 10 rigger brush to mix Ivory Black with the dark purple mixture, and paint the lampposts lining both sides of the road. Start from the background this time and paint towards the foreground, applying perspective as you go. This means the lampposts gradually get taller and further away from each other as you near the foreground of your painting. They also get darker in value, so add a little more Ivory Black each time to get this effect. While you still have the dark color, you can finish off this part by painting a small storm drain along the front of the sidewalk.
Step 15: Swirling In A Sky Using The Wet-On-Wet Method
 As you wait for the lampposts to dry, you can work on the sky. Although it's possible to leave it white, Bill finds it more appropriate to use vibrant colors. So bring out the Da Vinci mop brush, and prepare for the wet-on-wet technique by wetting the sky with water. You can leave some areas dry for clouds, and it's fine to overlap some of the roofs of the buildings. Again, work quickly with this technique, as you don't want the surface to dry before you start painting. Prep some Cobalt Violet Light and brush the general area, being careful not to touch any wet paint as you go. Leave white areas for clouds, and add some Peacock Blue for tone variation. The important thing is not to overwork the sky, so once you're done, leave it alone!
Step 16: Giving Life To A Bustling Street
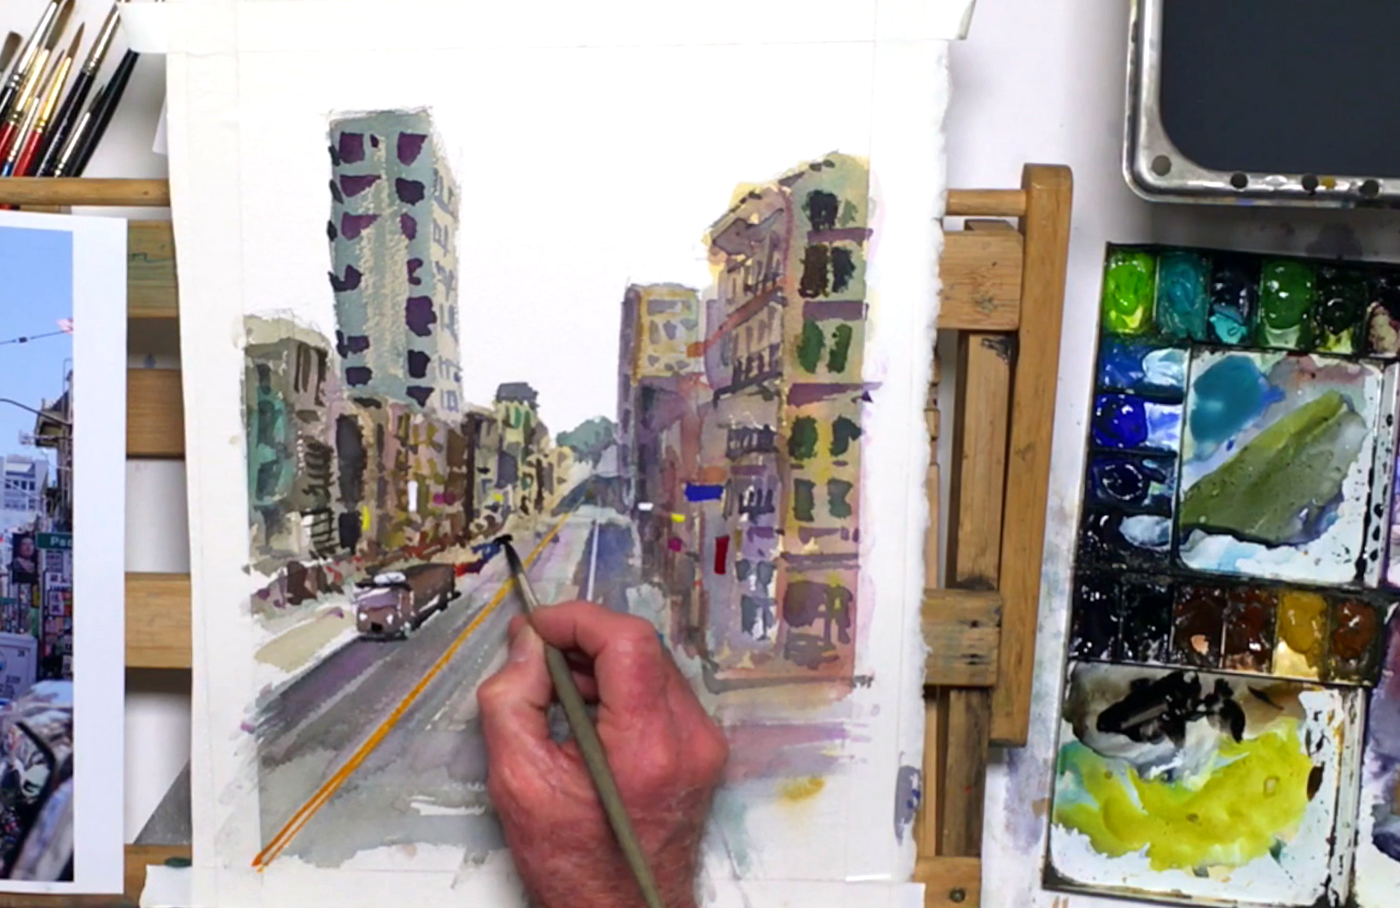
 Go back to the no. 10 rigger brush and dark color tones, and add some silhouettes of people on the left side of your perspective painting. Try to get the impression of a busy sidewalk, and add some life to the pedestrian area. With Ivory Black and Cobalt Violet Light, do the same on the right side, but narrower and with less detail due to the tunneling effect. Next, touch up some cars with the no. 8 round brush, and add a Cobalt Green car in the far background. Add a Mineral Violet one in front, and lift out any excess paint with a small round brush if necessary. With the Permanent White paint again, paint the bulbs of the streetlights. Then, mix French Ultramarine, Cobalt Blue Hue, and Mineral Violet, and darken with a touch of Neutral Tint and Yellow Ochre. Use this dark color and the no. 6 rigger brush to add grating over the windows on the rightmost building. You can use the same color for painting the shadow under the overhang of this building as well, and soften it with clean water. These are all small details, but they help add another layer of interest to your perspective painting.
Step 17: Flags, Filaments, And Finishing Touches
 As the painting is nearing its final stages, now is the time to do some finishing touches. Add simple details like satellite antennas, flags, banners, and additional signage. You can use the dark purple mix for the antennas and flagpoles, while the flags themselves should be more colorful. Bill uses Cadmium Red Purple for one, French Ultramarine and Cobalt Green for another, and Brilliant Orange for the last one. He also emphasizes on getting the right impression of fabric waving in the wind. TIP: Do not aim for symmetry or perfection! To complete the cars, use Permanent White for headlights and Cadmium Red Purple for taillights on the vehicles that have already dried. For the bus' taillights, use Brilliant Orange instead, and add a red stripe across the front and sides for decoration. Touch up anything that needs more contrast or looks out-of-place, and remember to occasionally take a step back and look at the overall painting to see what you need to do.
Step 18: Painting Words And Wires In One Breath
 Switch to the Winsor & Newton no. 4 round brush, and with pure Cadmium Red Purple, add some words to the dry white signs. Even if you don't know how to write Chinese, fake them as best you can as they're simply added for the Chinatown atmosphere, not for readability. Use other strong colors like French Ultramarine, Sap Green, or Permanent Mauve to mix up the lettering in other areas of the painting. Next, paint the cables coming out of the top of the bus using the white gouache paint. Use the rigger brush (no. 6) for this, angling the cables diagonally upwards to the right. Once they're done, paint two white cable lines across the lower levels of the buildings on the left, and connect the bus' cables to these ones. For more cables and wires commonly seen in a cityscape, use diluted Neutral Tint and a touch of Permanent Mauve, and paint them across the buildings. Again, don't hesitate and paint in one go, adding little "nodules" in the wires afterwards. The previous detail layer should be dry by now, so with the no. 1 rigger and no. 3 round brush, finish off the lettering and flags.
Step 19: A Splatter, And A Signature
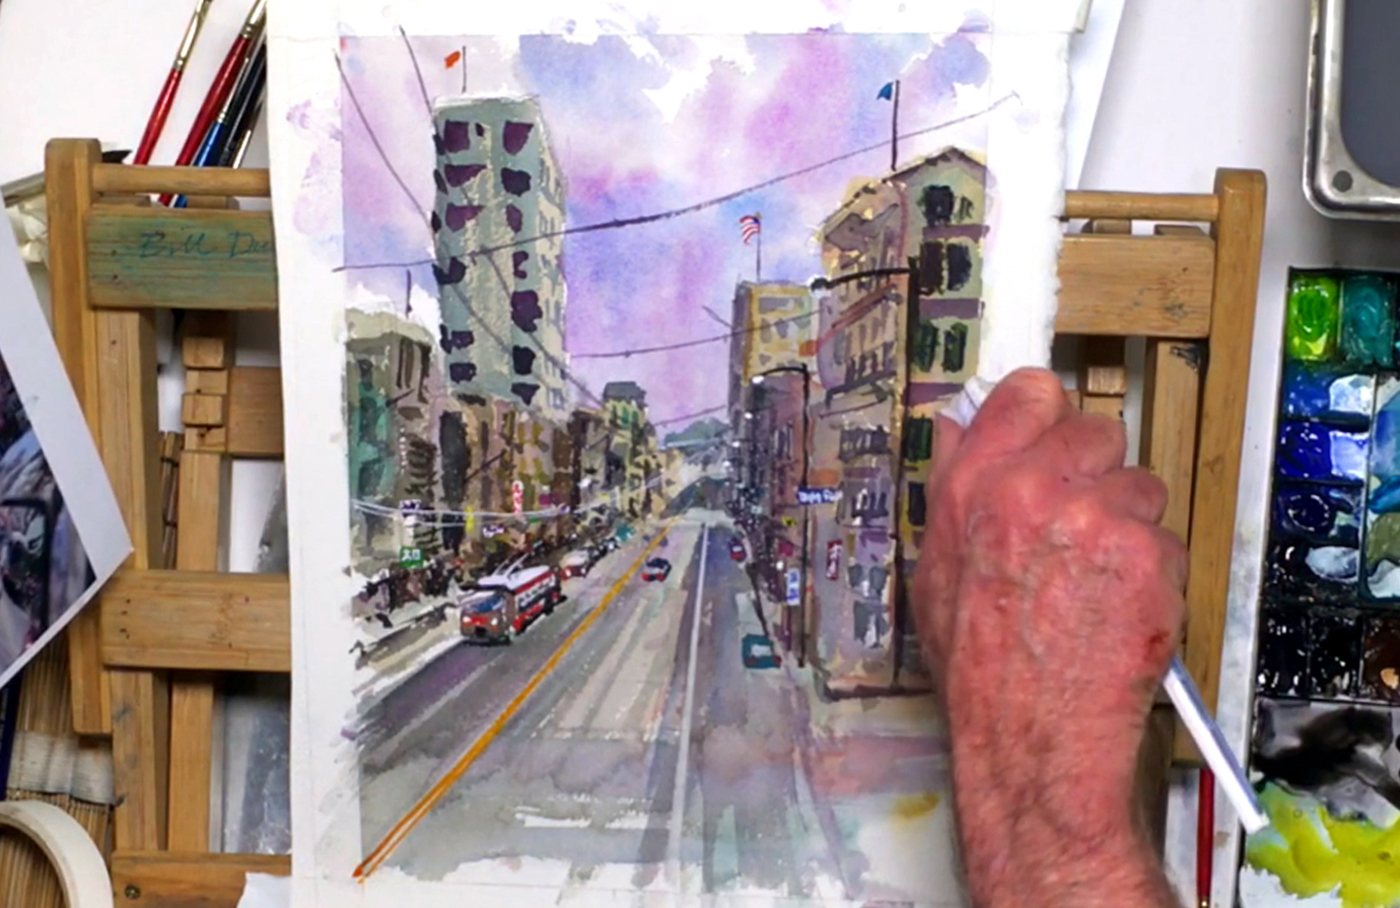 With most details complete, it is up to you when you feel like you're finished. The last thing for your perspective painting is tweaking any colors or details you feel could use improvement. To demonstrate, Bill wants to add an intersection, so he uses the same tape-and-sponge technique to lift one out in the middle of his painting. For extra credit, use an old toothbrush and white gouache paint to create a white splatter. This is done by running your thumb across the paint-filled bristles while hovering around the street area. When you're finally done, sign your perspective painting and take off the tape around the edges. And when the painting's dry, congratulate yourself as you've just completed a very ambitious work of art!


