Learn from the award-winning painter, Steve Curl, on how to paint a still-life painting from scratch. In this virtual watercolor class, he uses 2 simple objects to help you compose an interesting still-life: a glass of wine with all its reflections and refractions, and a textured, shiny lemon. Want to watch the video version? This tutorial is also available to members of our Beeblys WatercolorPainting.com.
Materials Used In This Watercolor Class:
- A glass of red wine and a lemon
- A block of Arches cold press watercolor paper (140lb, size 6" x 9")
- HB or 2B pencil
- Kneaded eraser
- Painting palette for watercolor paints
- A container of water
- A towel or rag to rest brushes on
- Tissue or paper towel
Paints (Holbein Artist's Watercolors)
- Cadmium Yellow Light
- Aureolin
- Cadmium Yellow Orange
- Cadmium Red Deep
- Opera
- Permanent Alizarin Crimson
- Quinacridone Magenta
- Mineral Violet
- Ultramarine Deep
- Cobalt Blue
- Cerulean Blue
- Peacock Blue
- Sap Green
- Yellow Ochre
- Burnt Sienna
- Vandyke Brown
- Payne’s Grey
Brushes
- Stratford & York Warwick Series: Round sable brush (size 10)
- Stratford & York Warwick Series: Round sable brush (size 4)
Step 1: Compositional And Value Sketch
 Set up a still-life scene using the glass of wine and the lemon, arranging them in a position that you find interesting. Then, do a thumbnail compositional sketch of the objects, using a viewfinder if necessary. You can play around with the placement and vary the positions to find what works and what doesn't. Pay attention to the proportions and perspective of the glass and lemon, working on the shapes and patterns you see rather than working off a preconceived idea of what a glass of wine or a lemon should look like. When you're finished with the outlines, do a quick shading of the main values (i.e. light and shadow) to make them clearer. Below is a close-up of Steve's value sketch:
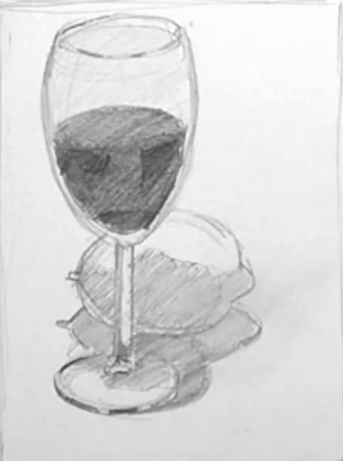
Step 2: Transferring The Basic Outline
 On the Arches watercolor paper, draw in a border around the edge to frame your painting, then lightly draw in the outlines of your composition by following your value sketch. Try not to place your objects right in the middle of the paper; it's better to break up the rectangular paper in an asymmetrical way. To check the symmetry of the glass, you can turn your paper upside-down, or draw a faint line down the middle of the glass and use it as a guide. Note that due to the perspective, the glass' rim, base, and the wine's surface will all form the shape of an ellipse. Erase any unwanted pencil lines with the kneaded eraser when you're ready to paint. Below is a closeup of Steve's sketch:
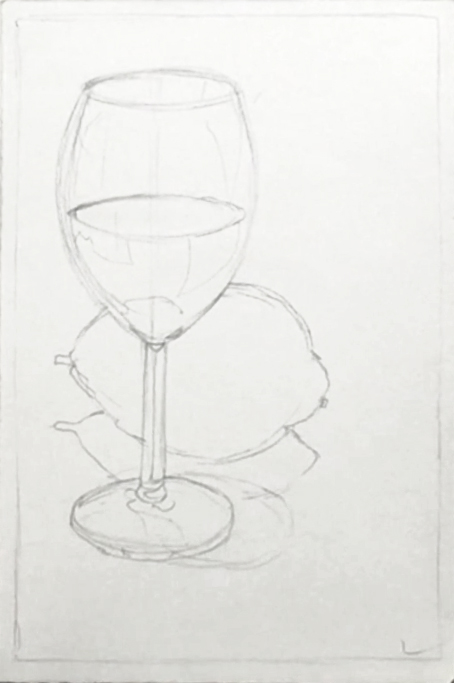
Step 3: Painting The Lemon
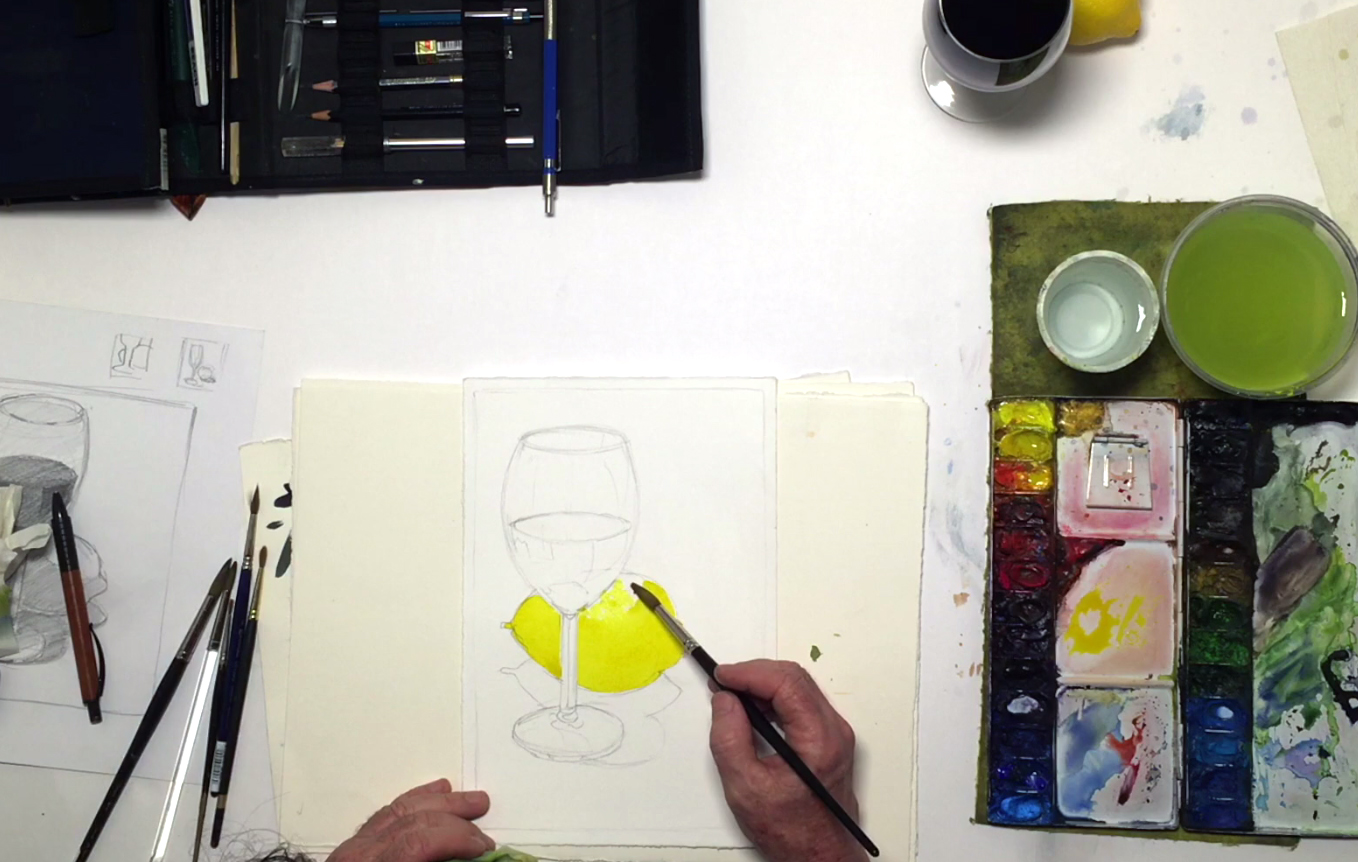 Make sure your palette is clean before mixing the color of the lemon with the size 10 brush: Cadmium Yellow Light with a touch of Aureolin. Add a little more water than usual so the paint isn't too saturated, then start painting the lemon. To get the dimpled texture of the lemon in the highlighted area, take some of the excess moisture out with a paper towel and "skip" the brush across the paper. The roughness of the paper (referred to as its "tooth") will help create the dimpling effect. When done, use a little clean water to soften the area where yellow transitions to white.
Step 4: Wet-In-Wet Shadows
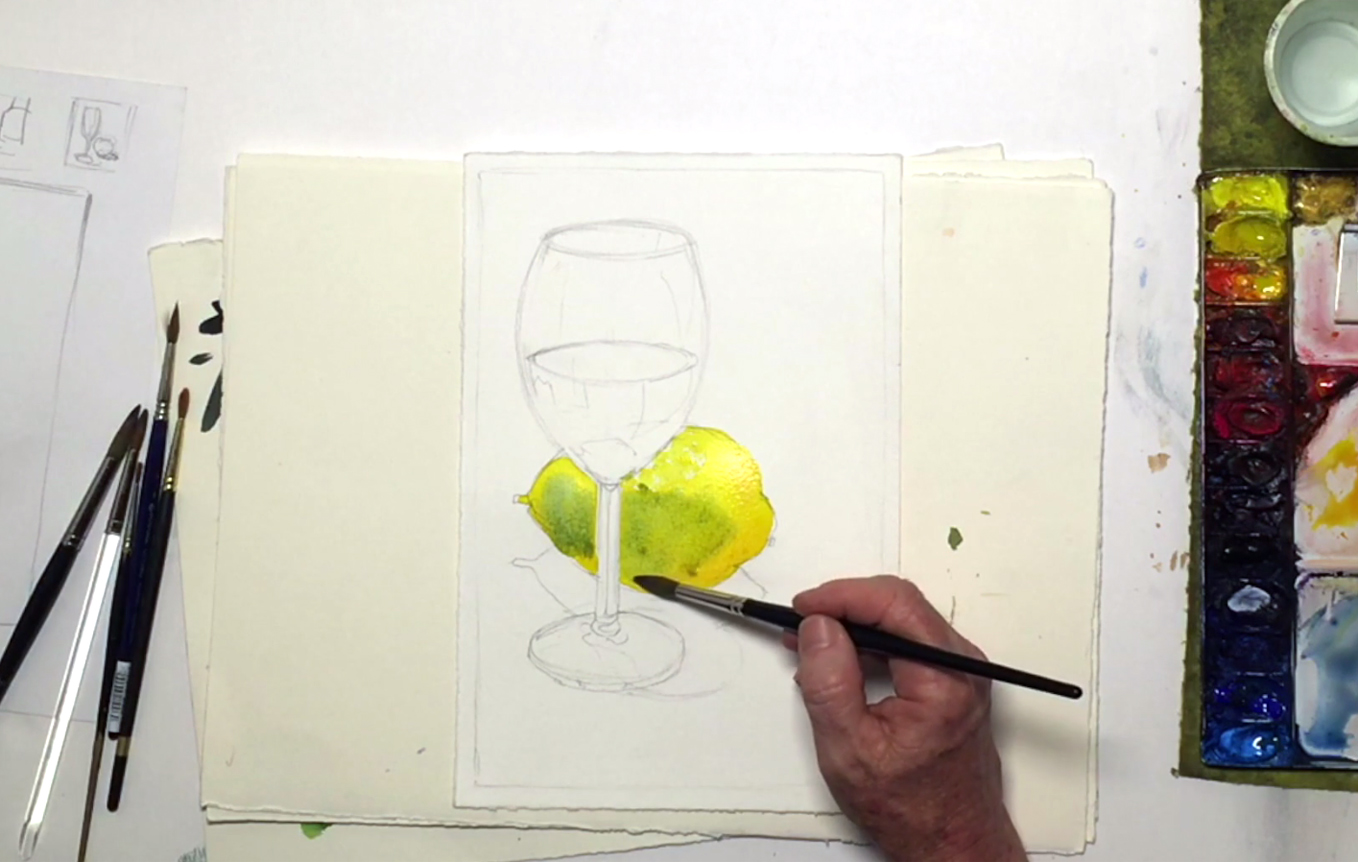 Before the paint can dry, mix in a touch of Cadmium Yellow Orange and Red Deep for the mid-tones of the lemon (this includes the reflected light along the very bottom of the lemon) and for the darkest shadows, mix in Cobalt, Cerulean, Peacock, and a touch of Ultramarine Blue before painting near the bottom of the lemon. Make sure the edges of these shadows are soft as the lemon is round. You can also add in a few more dimples using the skipping technique mentioned before.
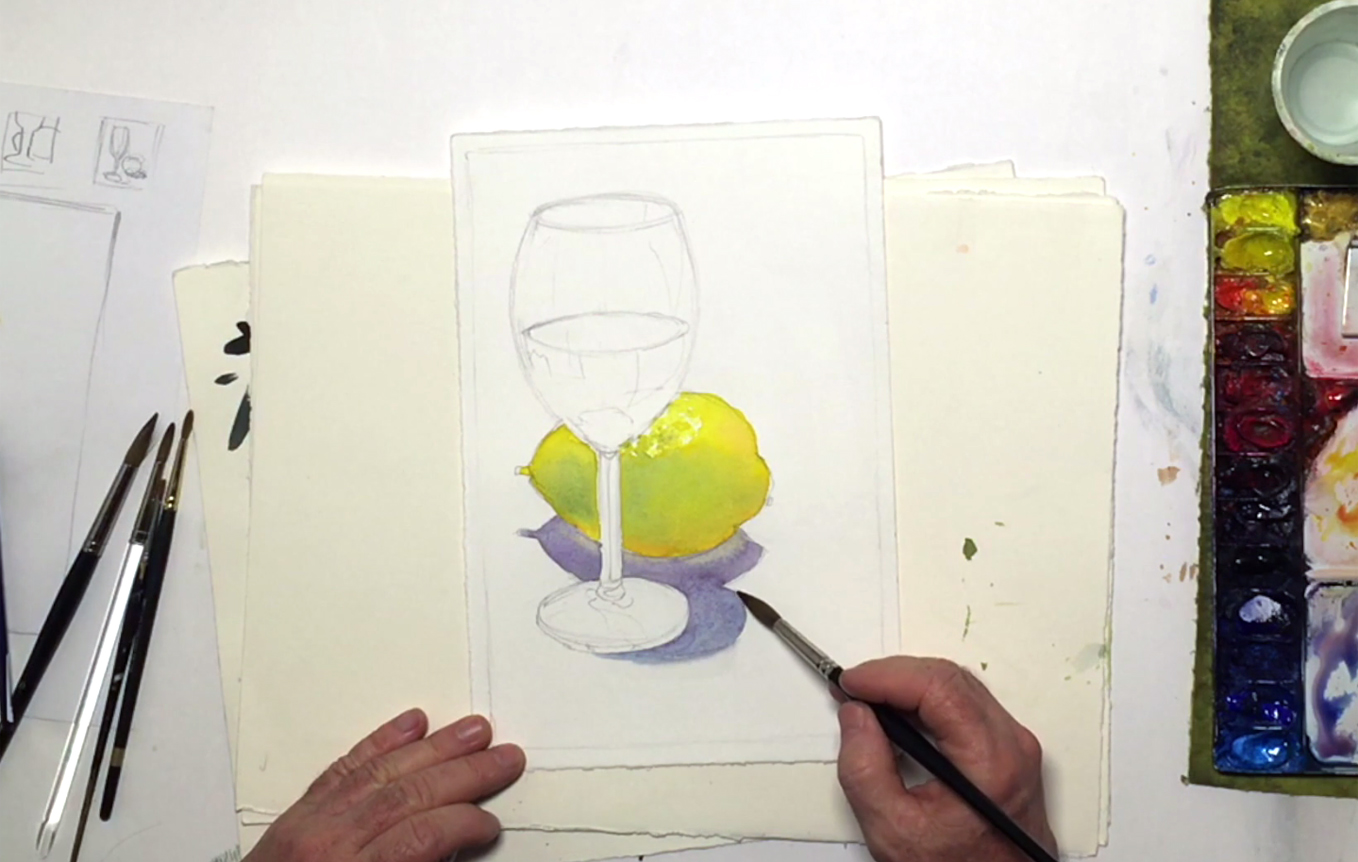
Step 5: Cast Shadow With Contrast
 For the lemon's cast shadow (i.e. the shadow underneath the lemon), add Alizarin Crimson and a touch of Mineral Violet and Opera to the blue mixture, then paint in the shadow. You can do a slight overlap over the bottom of the lemon to help break up the uniformity of color in the shadows, and add contrast to your painting as purple is the complementary color to yellow. A small portion of this yellow is also reflected by the table, so to paint that, lift out a little purple near the bottom of the lemon using a clean brush, then add some yellow to the same area.
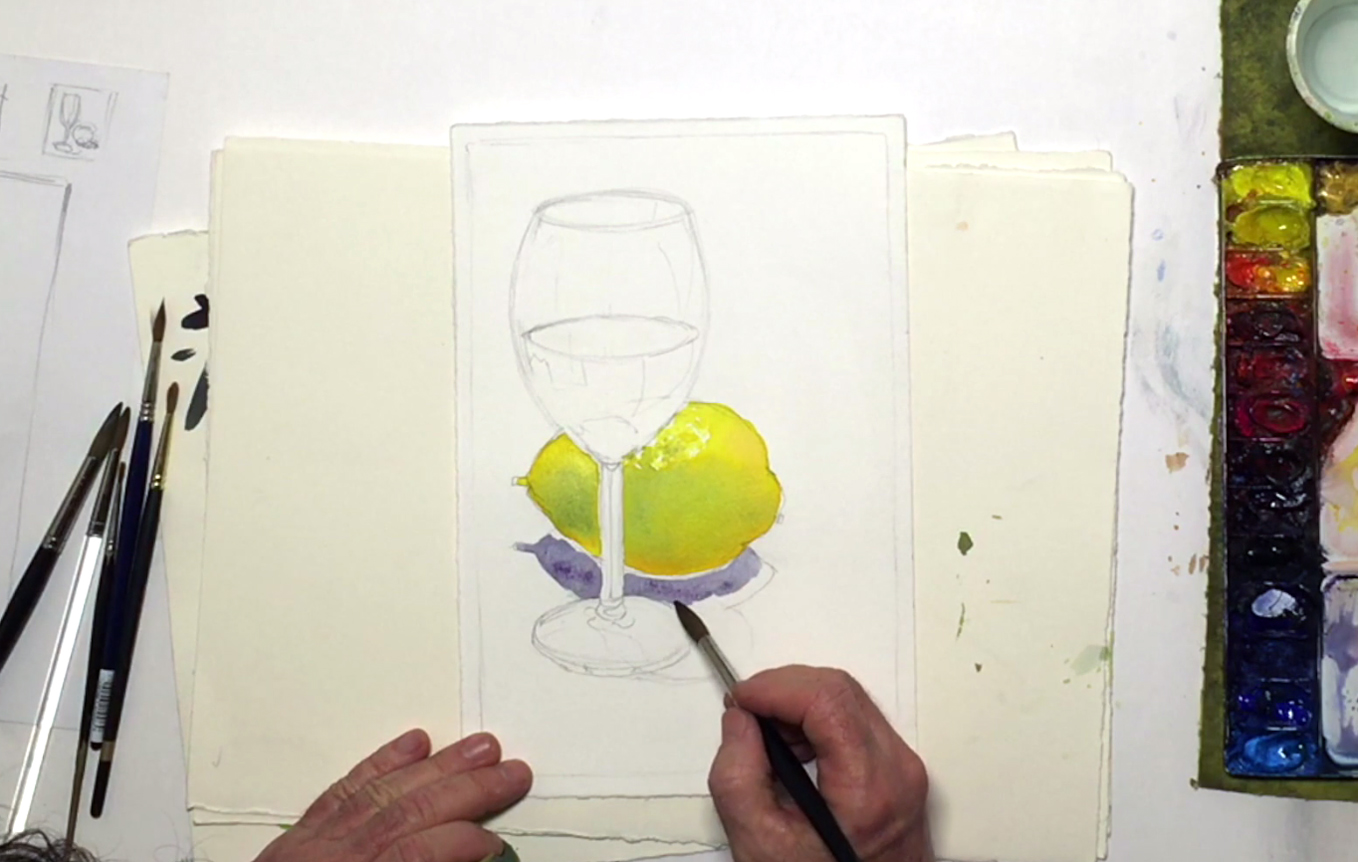
Step 6: Cast Shadow Of Wineglass
 With the bluish purple mixture, keep painting the cast shadows, including the one created by the wine glass. You can add more Cerulean and a touch of Opera for a subtle change, as the wine in the glass will alter the shadow slightly due to its color and translucency. Slightly soften the edge of this cast shadow with clean water so it's a little different from the lemon's cast shadow, then use the size 4 brush to paint the details in the ends of the lemon with Sap Green mixed with a little Vandyke Brown.
Step 7: Painting The Glass Stem
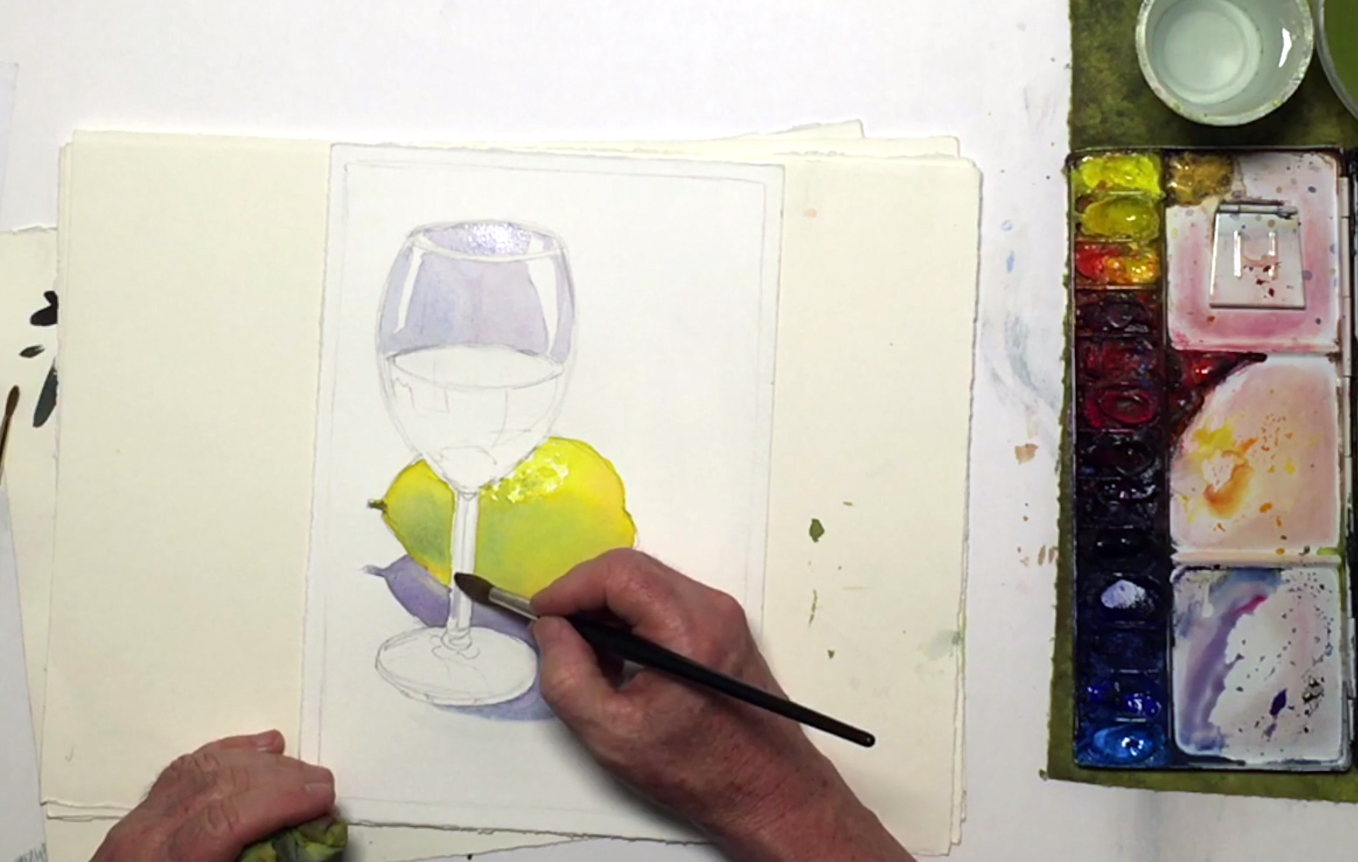 For the wine glass, use the same color as used for the cast shadows, but dilute it with clean water so it's not too dark. With the size 10 brush, paint in the shapes in the top part of the glass, leaving highlighted areas and the rim a crisp white. Add a little Quinacridone Magenta where the wine color is reflected in the glass, then mix in more blues and Mineral Violet before painting the left side of the glass' stem. Where the stem overlaps with the lemon, add in Cadmium Red Deep, Yellow Orange, and Yellow Ochre. Make sure to keep looking to and studying your still-life set to keep your shapes accurate, and leave the middle part where the wine is in the glass as you'll be painting it later.
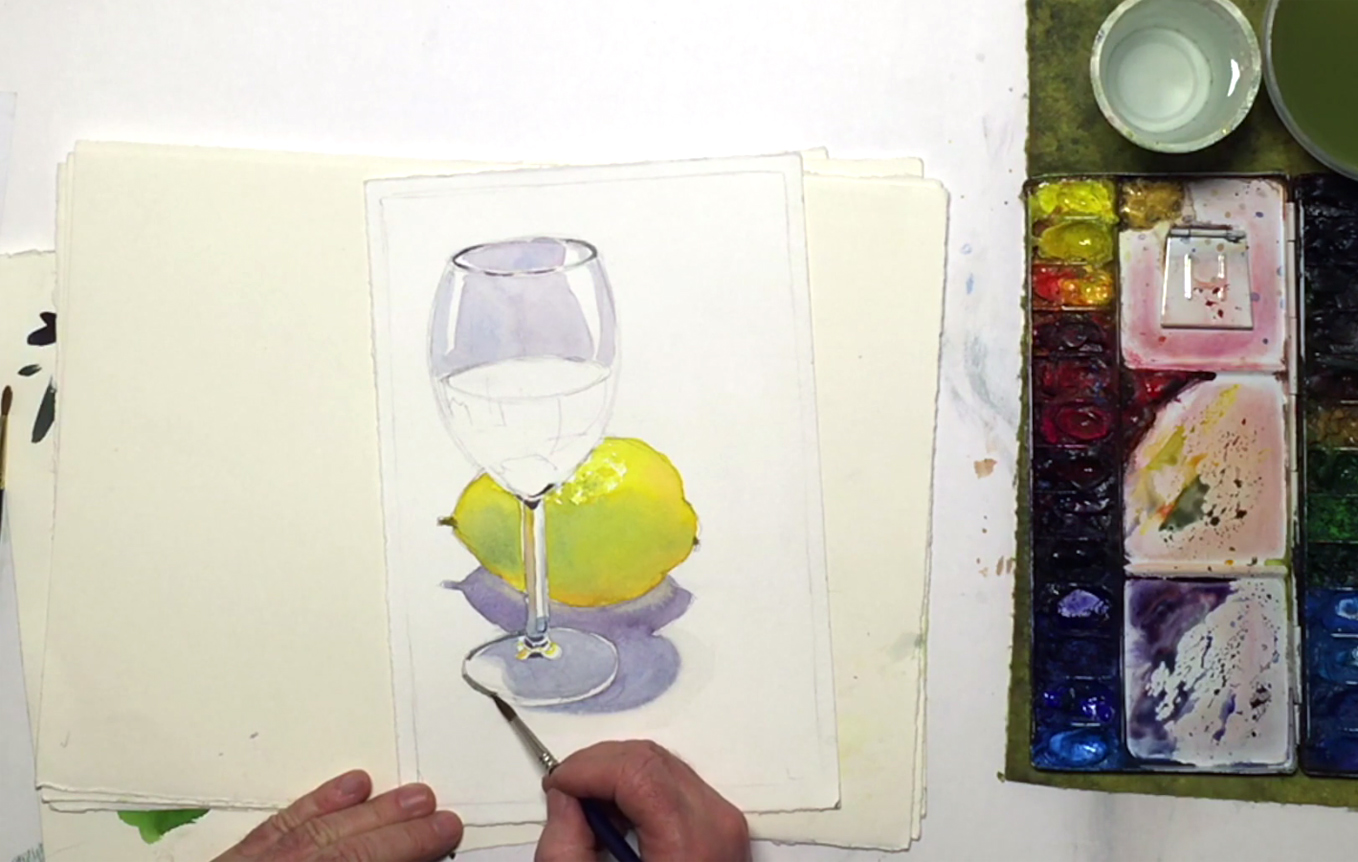
Step 8: Painting A Glass Base With A Shiny Effect
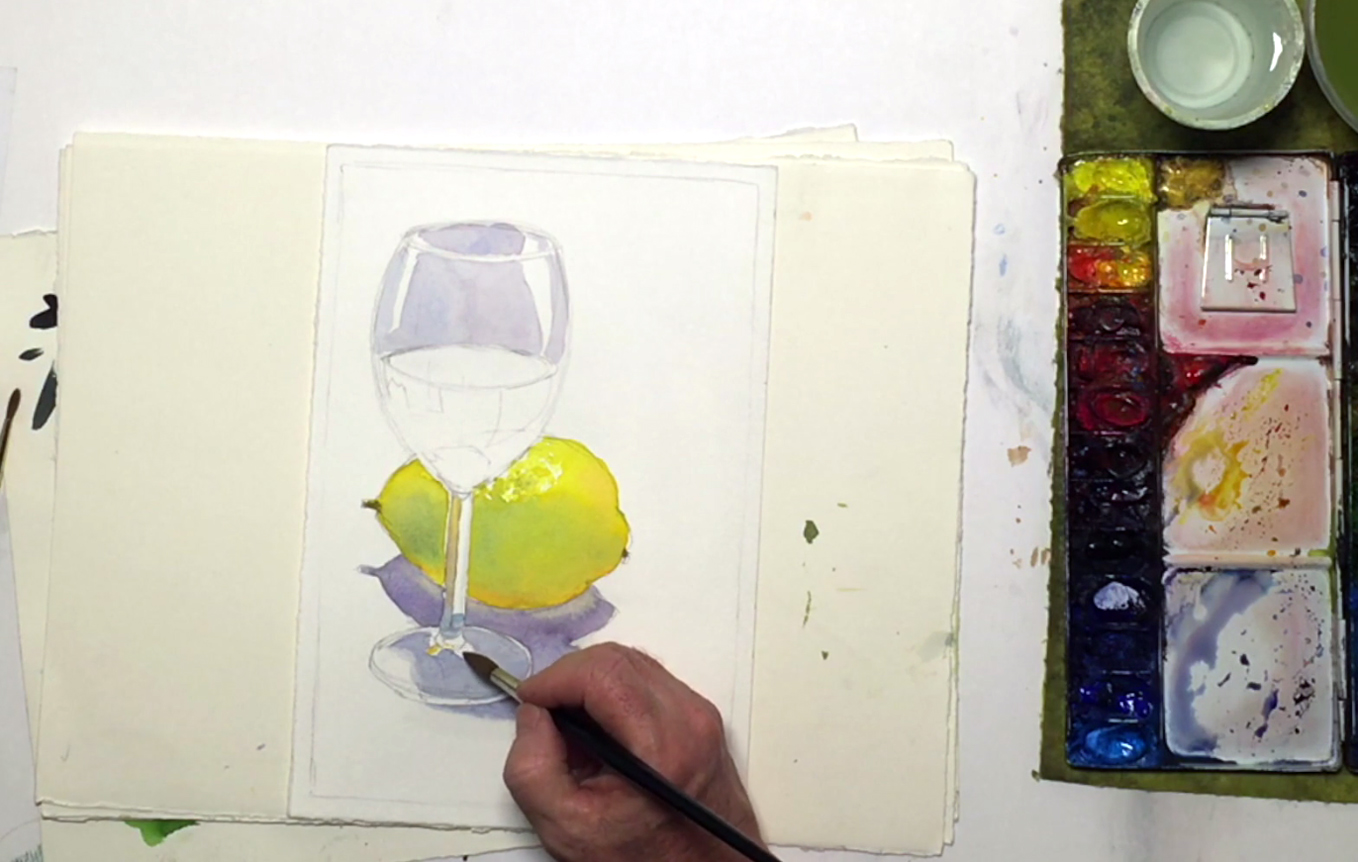 For the base, use the same color as the top part of the glass, although you can add a little Payne's Grey to darken it slightly. Leave a sliver of white light on the edge of the glass to create the "shiny" effect, and any highlights as needed. Soften any shadows as necessary, then paint in the lemon's color in reflected places within the glass' base. Next, add a thin line of shadow blue on the right side of the glass' stem to bring it to the foreground more.
Step 9: Bringing Out The Curved Effect
 Switch to the size 4 brush, and after cleaning it, mix Mineral Violet, Ultramarine Blue, Alizarin Crimson, Payne's Grey, and a touch of Burnt Sienna to get a very dark purple. Use this color to paint thin lines along the rim of the glass, breaking the line where light is reflected. Add Sap Green for lines that refract the lemon's color, then soften these lines a little with clean water. Repeat this process at the top of the stem and the edge of the base, mixing in the Sap Green or lemon color when needed. This adds the illusion of shiny glass due to the high contrast in tones, while also breaking up any uniformity in your brushstrokes and colors.
Step 10: Painting A Liquid (Wine)
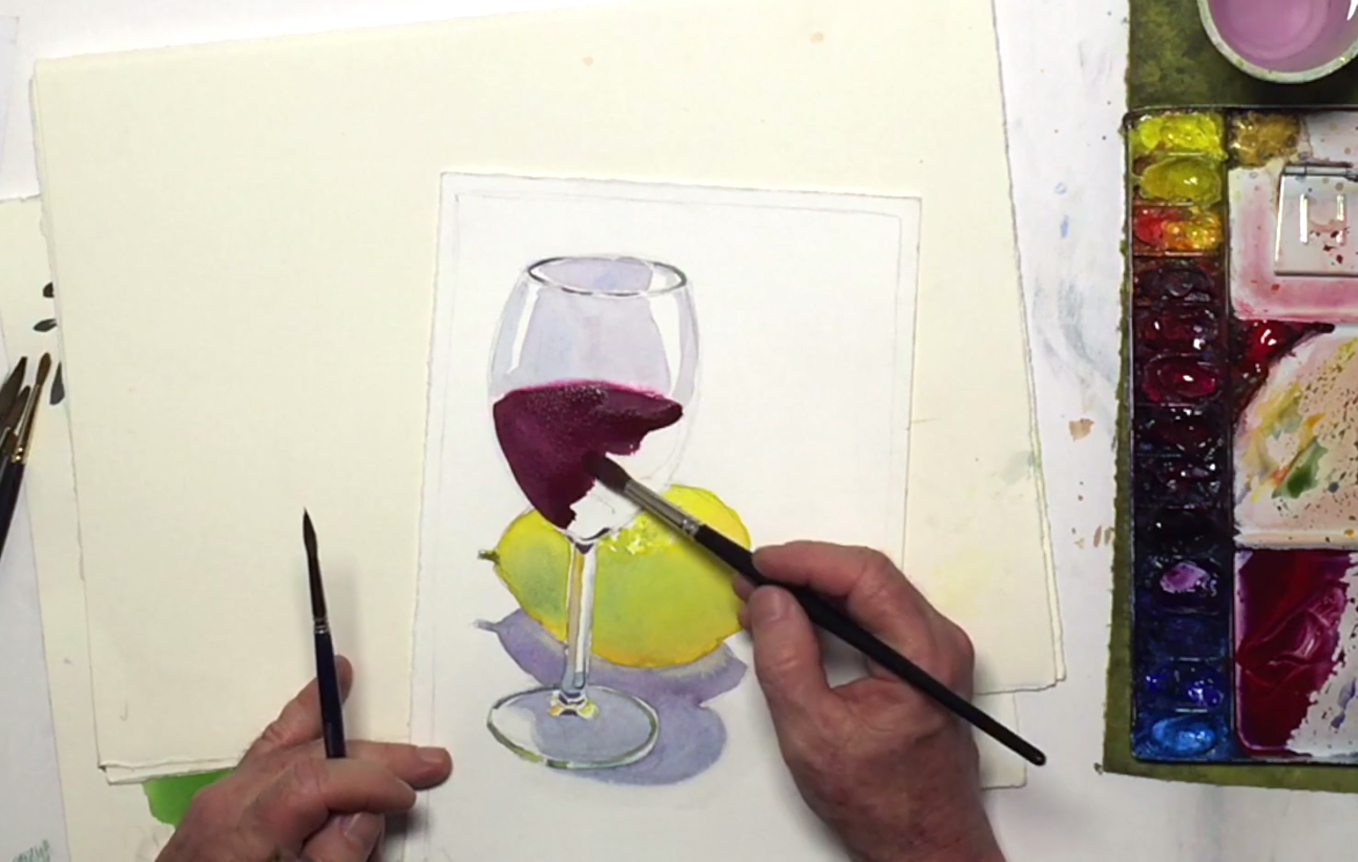 To paint the wine, use the size 10 brush to mix Alizarin Crimson, Mineral Violet, Ultramarine Blue, and Cadmium Red Deep for a dark wine red. This will be the base color (a.k.a. "local color") of the wine. Paint in the wine, adding a soft glow of Opera pink along the edge of the wine's surface to suggest fluidity and translucency. Next, add more Ultramarine and Mineral Violet to the mixture, and paint a second layer on the bottom half of the wine so that the wine's surface appears lighter than the bottom. If the paint is too thick, use a clean brush and a little water to lift out some paint, being careful not to scrub the paper too hard. Drop in some Payne's Grey for darker areas along the bottom, and make sure to retain some of the translucency that watercolor paint has. Add any finishing touches to the wine and glass, for example the cast shadow of the stem that falls across the base, then erase any extraneous pencil lines in the dry areas of your painting.
Step 11: Wet-In-Wet Background Wash
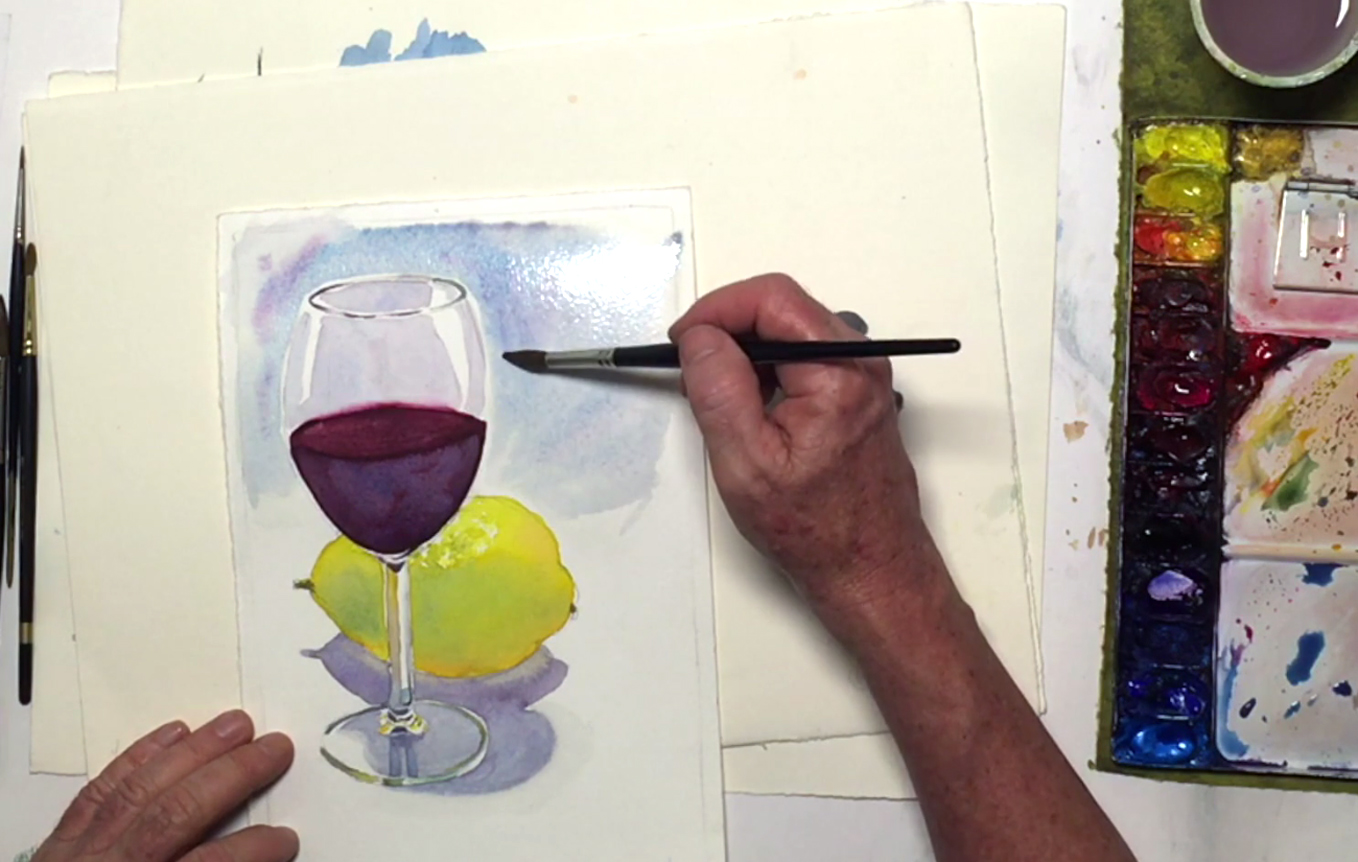 Clean your palette and size 10 brush, then paint a clear wash over the background area behind the objects. Be careful when wetting the area near to the wine glass; be sure to leave a sliver of a gap around the glass to emulate the reflective properties that glass has around its edges. While the paper is wet, use the wet-in-wet technique and drop in a mixture of Cobalt, Cerulean, and Peacock Blue, keeping your brushstrokes as organic (i.e. not uniform) as possible while making sure not to get too close to the wine glass' edge. You can add a touch of Alizarin Crimson into the background for color harmony and tie the whole painting together. Leave the painting to dry before moving on to the last step.
Step 12: Painting Shadows In The Wine And Finishing Touches
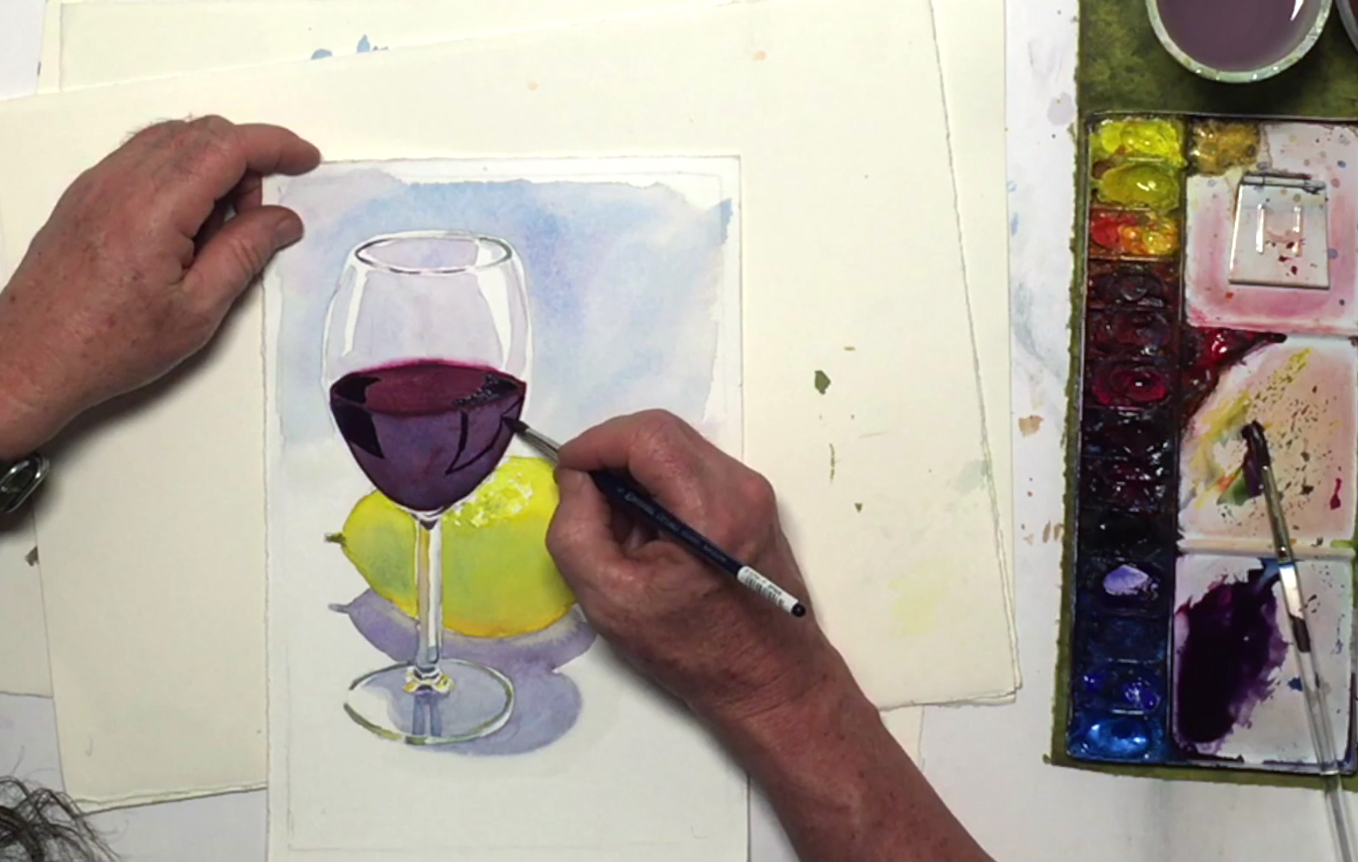 Check the dryness of the paper with the back of your hand, and when it's dry, draw in the shapes of any darker reflections within the wine area. Mix a dark burgundy using Alizarin Crimson, Quinacridone Magenta, and Payne's Grey, then paint in these dark reflections with the size 4 brush. When you're satisfied, leave your painting to dry, and feel free to celebrate by making a toast to yourself.


