Here’s an easy landscape painting to try! This is perfect for beginners as it gives an introduction to some simple and common watercolor techniques to achieve those beautiful surreal skies.
Materials Used In This Watercolor Study:
- Canson Montval Watercolor Paper (140lb, size 5.5" x 8.5")
- Pentel Graphgear 1000 automatic drafting pencil, 0.5mm lead size with HB or 2B lead
- Artist's tape or masking tape (optional)
Paints (Winsor & Newton's Professional Watercolors)
- Winsor Lemon
- Cadmium Yellow
- Winsor Orange (Red Shade)
- Cadmium Scarlet
- Winsor Violet
- Mauve
- Winsor Blue (Green Shade)
- Ultramarine (Green Shade)
- Winsor Violet
Acrylic Paint
- Mars Black
Brushes
- Round Brushes (nos. 0, 2, and 8)
- Rigger Brush (no. 1)
Step 1: Create Your Sketch
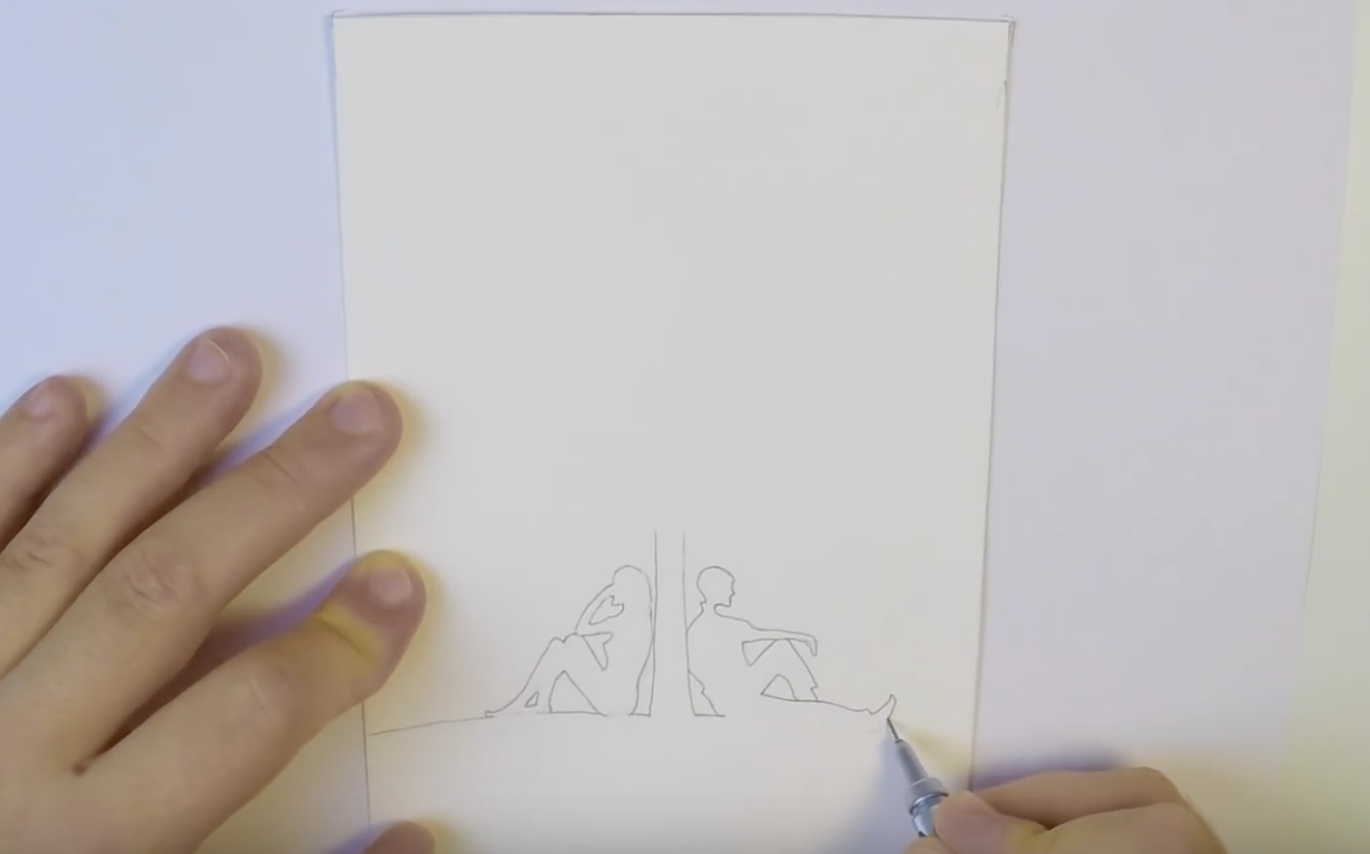
It’s best to begin by setting up your workspace. You have the option to keep your watercolor paper in place by securing it with a border of artist’s tape. The rest of your materials should also be easily accessible around your painting area. This watercolor painting features a dreamlike scenery showing 3 main subjects: the woman, the man, and the tree in the middle. Start your landscape painting with a sketch of the ground and the silhouettes of a woman and man sitting against a tree trunk. Keep the tree at the center of the drawing, and make sure to keep the left and right sides balanced without making them too symmetrical. Add some willowy branches to the tree to make this landscape painting surreal. Here's a close-up of the finished sketch: 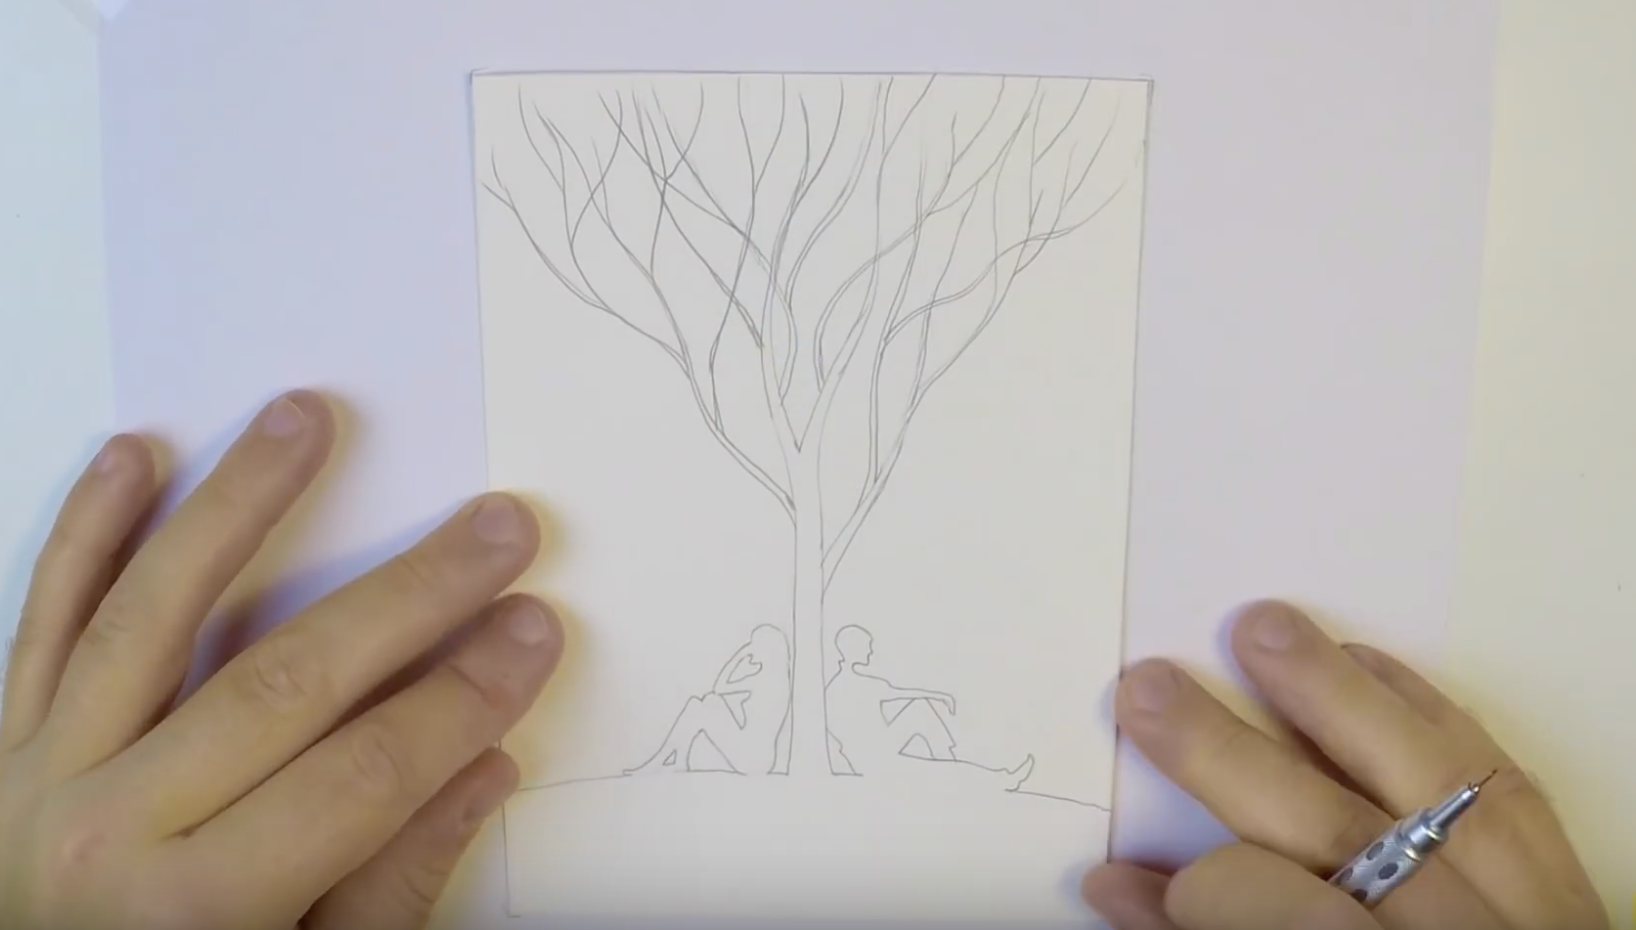
Step 2: Adding the Background Colors to Your Landscape Painting
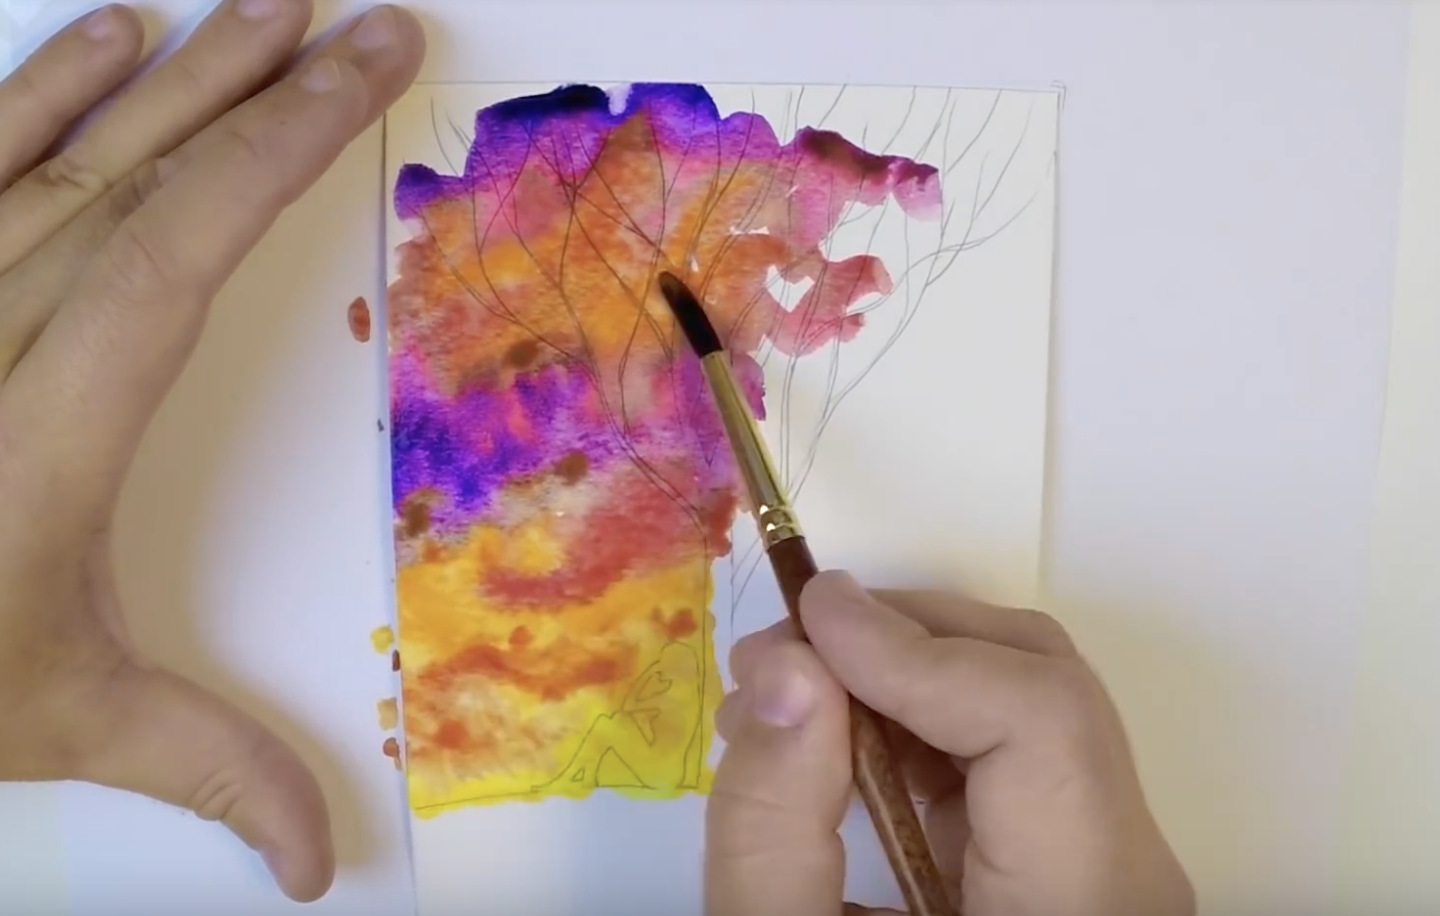 The background of the drawing is what adds drama to this simple watercolor painting. To achieve the balance of both vibrancy and softness in the painting, you may use the wet-in-dry technique. This means you will use wet paint on dry paper, allowing you to create a more vivid background. Since your paint will not be overly soaked in water, the color will come out more saturated. Start by using a no. 8 round brush to blend in some Winsor and Cadmium Yellow to the woman's side of the painting. Mix in a bit of Winsor Orange and Cadmium Scarlet as well to make this side of the landscape more washed in sunset colors. Switching to Winsor Violet or Mauve will also liven up your scenery even more. You can also use a splattering technique to add droplets of clean water to your painting, just enough to give it a dappled and more textured effect.
Step 3: Balancing Act with Contrasting Colors
 The man's side of the painting features more Winsor Yellow and Winsor Blue to create varying mixes of the two colors. Make sure there are parts where both colors stay distinct as well to create more contrast! In case your paint strokes create edges that are too hard, you can use the lifting technique to soften it a bit. Another variation of this technique, the wet lifting technique, will help you mop up any excess water. This can also help you fix any mistakes you may have made before the paint completely dries. When you're finished with the background, let it completely dry before moving on to the next step.
Step 4: Painting the Details of Your Landscape Painting
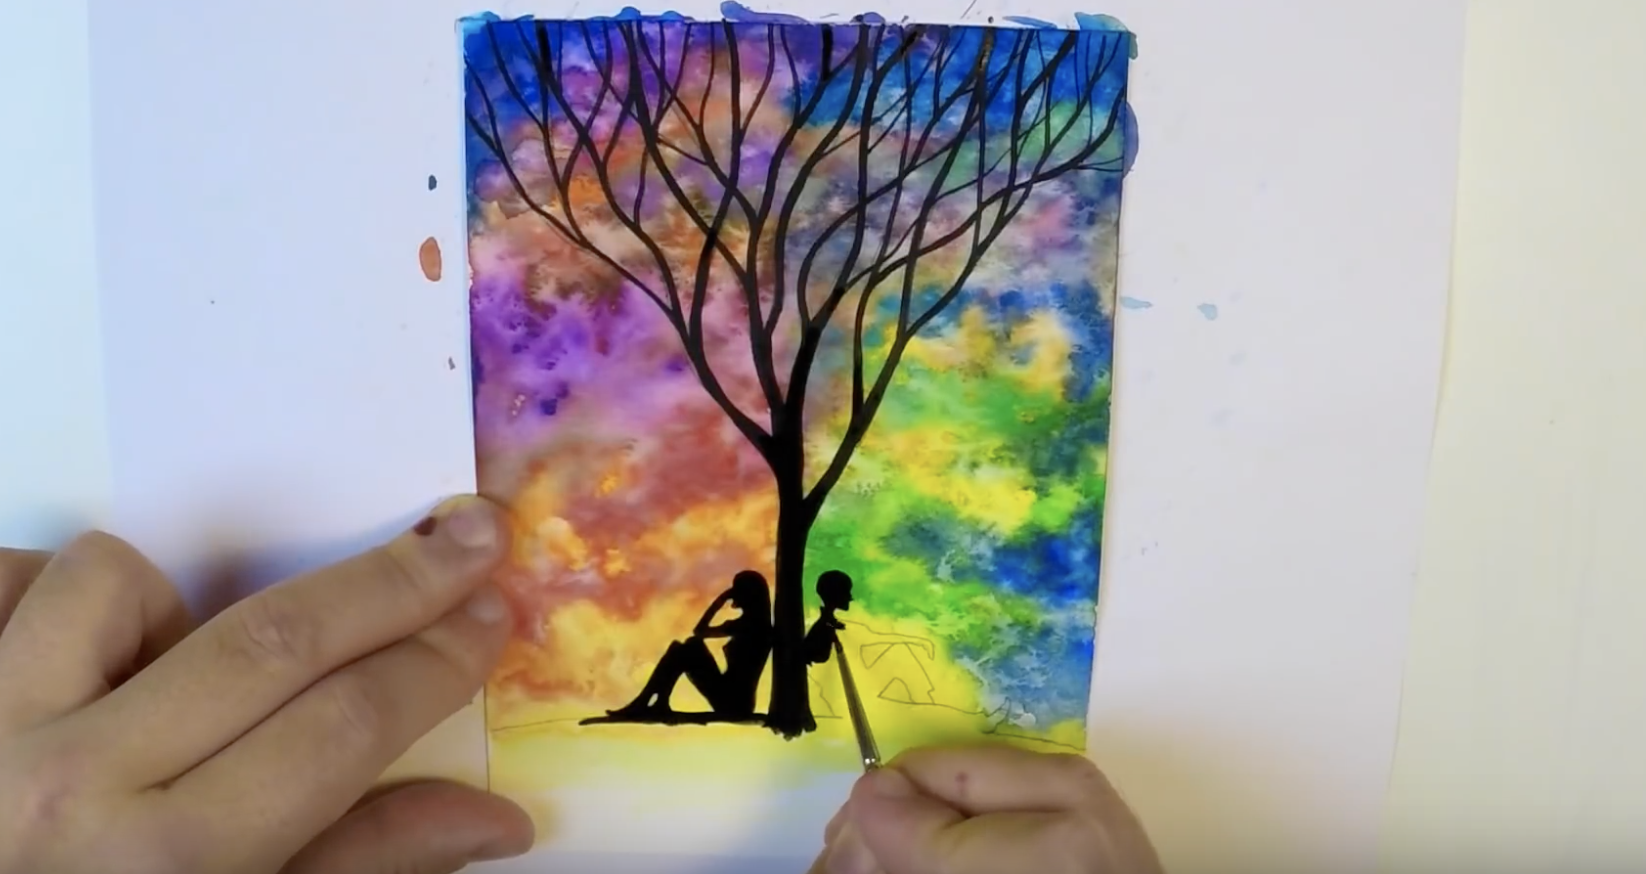 Using a rigger brush dipped in black acrylic paint, you can paint your main subjects. Start with the tree in middle of the landscape. Be sure to follow the lines you have sketched. When you paint the tree, define the wispy and elegant branches of the tree. These details will add to the dreamlike feel of this simple watercolor painting. Continue on to the silhouettes of the woman and man, then paint the ground as well. Switch to different sized round brushes as needed (e.g. use a larger brush to cover a larger area). Finally, add a couple of v-shaped birds in the background to complete your landscape watercolor painting.
Step 5: Give Yourself a Pat in the Back
 Once you've put in those last few details, you're done! You have the option to sign your painting to seal and mark it as your own. Lastly, you can carefully peel off the border of artist's tape (if you have one). Using a few simple watercolor techniques, you were able to create this vivid dreamlike landscape. So great job, and here's to producing more watercolor paintings in the future! You can watch the video version of this watercolor tutorial below:


