Materials Used In This Watercolor Study:
- Reference picture of Sargent’s Under the Rialto Bridge
- A block of Hahnemühle’s Cornwall cold press watercolor paper (210lb, size 9.4″ x 12.6″)
- Pentel Graphgear 1000 automatic drafting pencil, 0.7mm lead size with 2B lead
- Painting palette for watercolor paints
- A container of water
- Paper towels or a rag
- A tabletop easel or a box to prop your painting on
- A spray bottle with clean water
- Kneaded eraser
- Auxiliary plate or palette for gouache paint
Paints (Holbein Artists’ Watercolors)
- Raw Sienna
- Cadmium Yellow Lemon
- Burnt Sienna
- Jaune Brilliant No. 1
- Indigo
- Neutral Tint
- Pyrrole Red
- Gamboge Nova
- Cerulean Blue
- Permanent Alizarin Crimson
- Turquoise Blue
- Quinacridone Gold
Daniel Smith’s Extra Fine Watercolors
Holbein Artists’ Gouache
- Permanent White
Brushes
- Escoda Perla Joseph Zbukvic Series: Round brush (no. 20)
- Escoda Perla Joseph Zbukvic Series: Round brush (no. 12)
- Escoda Perla Joseph Zbukvic Series: Round brush (no. 8)
- Winsor & Newton’s Series 7 Kolinsky Sable: Round brush (no. 2)
- Winsor & Newton Sceptre Gold II Series 303: Short handle lettering/rigger brush (no. 1)
Step 1: Sketch and Analysis
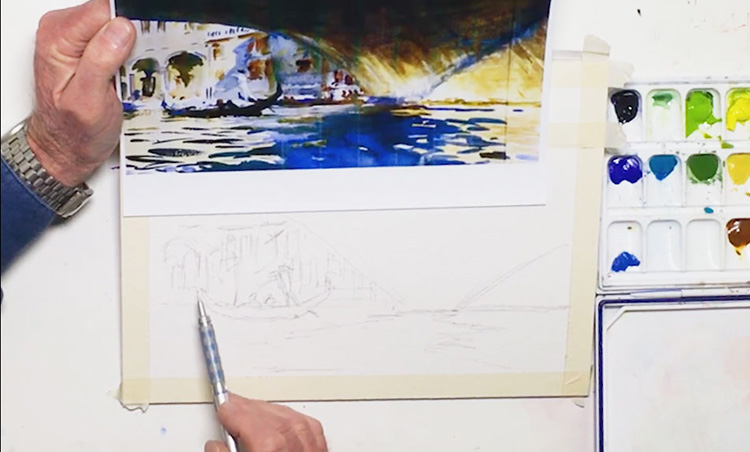 Under the Rialto Bridge was painted by John Singer Sargent, an American artist with a prolific portfolio of watercolor works. You can learn a lot about using value to create drama by studying his works. As always, begin by preparing your work space. Lay down a border of artist's or masking tape on your watercolor paper and make sure that your painting area is the same size as the reference image. For efficiency, your paint palette and water container should be on the same side as your painting hand. Don't forget to pre-soften your paints by spraying them with water. Before you start sketching, observe the reference's composition and break it down into smaller elements. Sargent's watercolor bridge study has four important ones: the bridge, the water, the buildings on the left, and the gondolas. Notice how the horizon line, which is your eye level, is quite low? And how the bridge and water frame the buildings and gondolas? Nothing is perfectly centered, and this asymmetry is what makes this scene visually interesting. When you sketch, put down enough lines to indicate the general layout of the scene. The smaller details can be "drawn" with your brush later. Here's what Bill's sketch looks like:
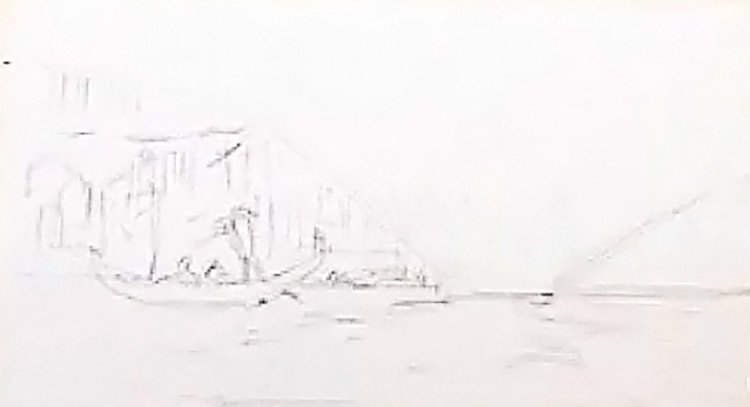
Step 2: Blending Colors on the Paper
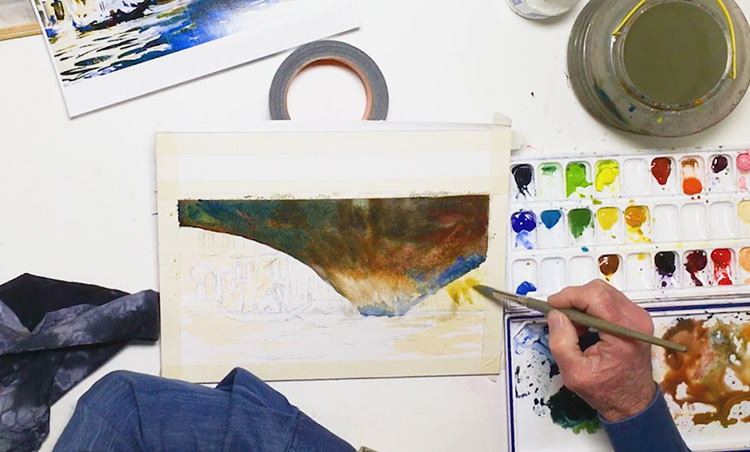
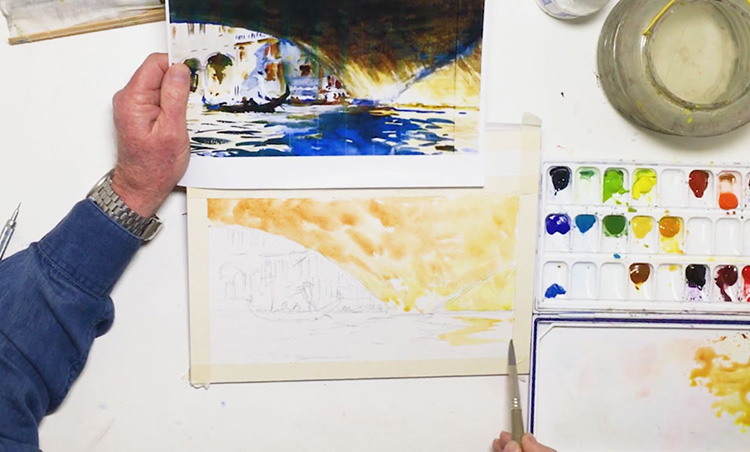 Let's begin with the first important element of this painting: the bridge. With a no. 12 round brush, dilute Raw Sienna and cover the bridge in a light wash. Start from the top-left corner and allow the paint to gradually get lighter. Use short, choppy strokes that follow the curve of the bridge to capture the textured feel in the reference image. Also be careful to paint around the base, where the water touches the bridge. Because it has one of the lightest values in this watercolor bridge study, it's best to let the white of the paper shine through. Next, add a layer of Cadmium Lemon Yellow to the bridge, painting wet-in-wet (i.e. adding wet paint to a wet surface) to achieve soft-edged strokes. Mix the colors directly on the paper to create interesting textures, and do the same with a third layer of Burnt Sienna. While the paint is still wet, lay in a few horizontal strokes to create an impression of stonework. Finally, dilute the yellow mixture and paint in loose strokes for the bridge's reflection in the water.
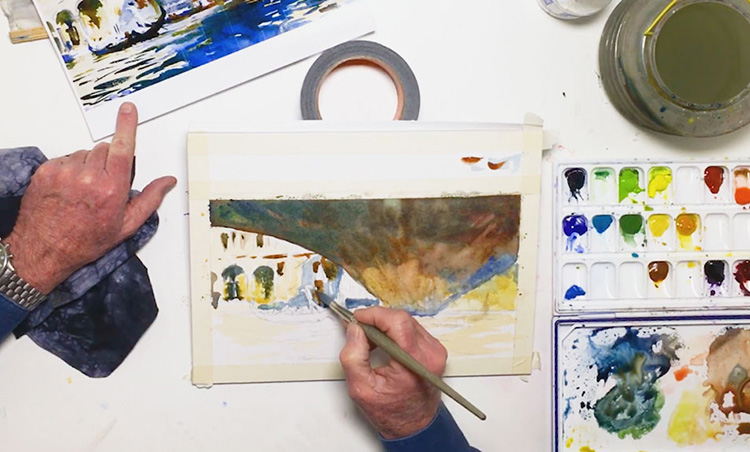
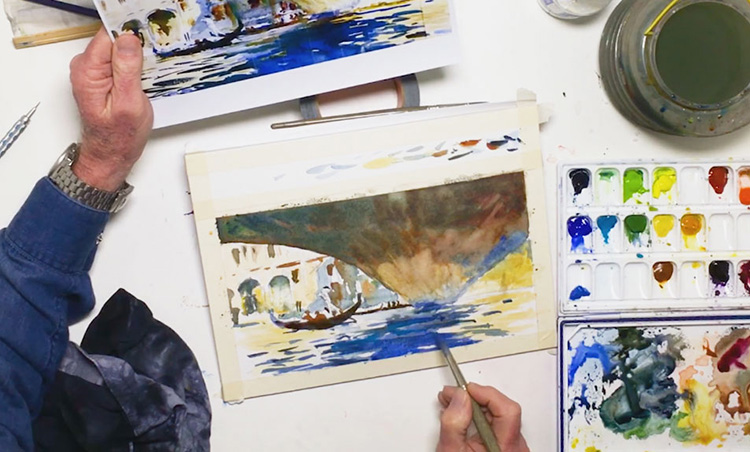
Step 3: Creating Shadows with Layers of Color
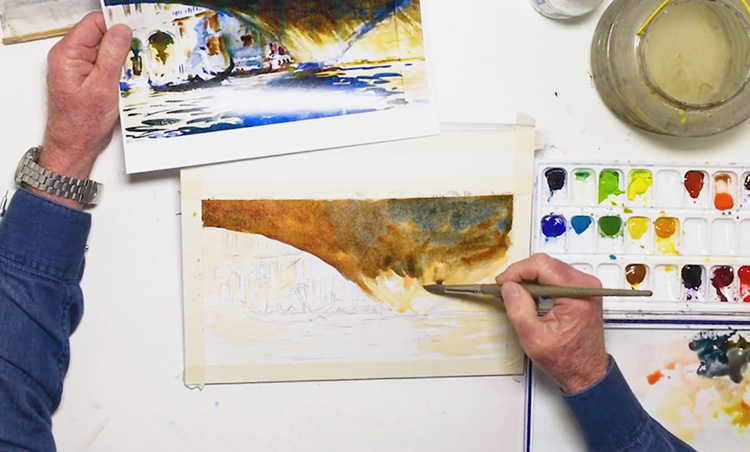 Add a light wash of the Raw Sienna and Cadmium Lemon Yellow mixture to the buildings on the left, again carefully painting around sections with the lightest values. Next, use a diluted Jaune Brilliant No. 1 for the yellow reflections on the water. Start deepening the shadows under the bridge with another layer of Burnt Sienna. Next, work in a Cobalt Blue, Burnt Sienna, and Indigo mixture, then Chromium Green Oxide with Neutral Tint. As with the initial washes, start from the top-left corner and work your way down in a graded wash. Again, while working wet-in-wet, blend the colors together directly on the paper to create interesting effects. Add additional strokes of Chromium Green Oxide, Indigo, Neutral Tint, and Cobalt Blue to the wet layers. Blending colors into your shadows will make them visually interesting compared to a pure, flat black. Be careful with how much paint you add, however. Too much may result in muddy colors and overworked paper.
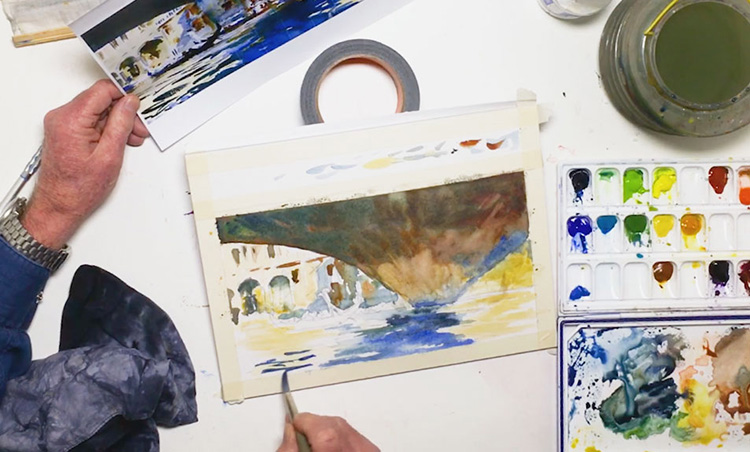
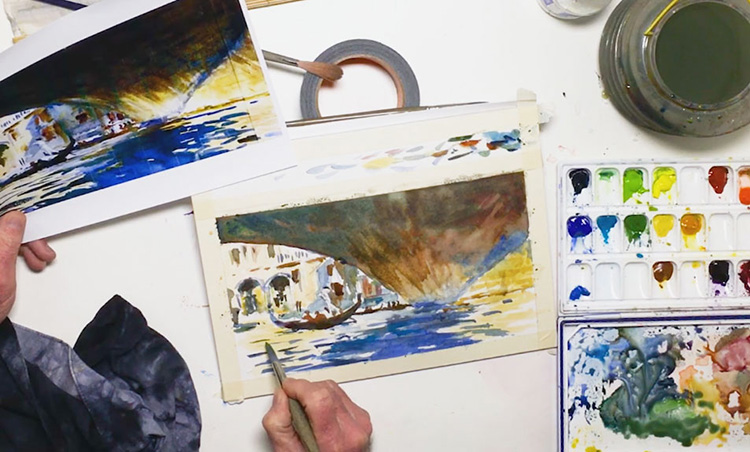
Step 4: Subtle Details in the Bridge
 Now that the shadows have been established, let's work on the subtle details in this watercolor bridge study. Pick up Cobalt Blue and lightly paint the diagonal line that slashes across the bridge from the upper-right side. Make sure the previous layers have dried a bit so that the line has both soft edges while maintaining some of its shape. Next, take Indigo and add some horizontal streaks into the bridge, to help define the subtle stonework. Use a mixture of Raw Sienna and Gamboge Nova to add another layer to the bright corner of the bridge, under the blue diagonal line. Add streaks of subtle yellow to where the shadows are lightest. Finally, take a touch of Pyrrole Red and add it to the bridge's shadows via the wet-in-wet technique to give it a subtle red tint.
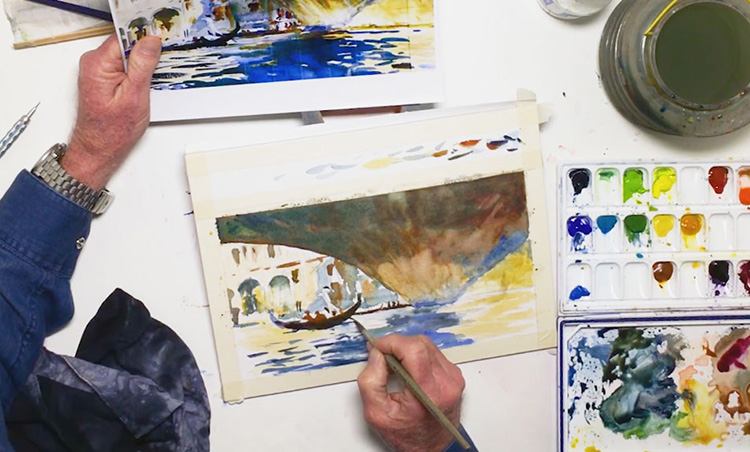
Step 5: Livening up the Point of Interest
 The buildings are an important point of interest in this composition because they have a lot of small details that add life to this simple scene. It is therefore important that the big shapes are established well. Once the yellow layers have dried, use a diluted Burnt Sienna with a touch of Cobalt Blue to block in the windows and doors in the buildings. Next, use the wet-in-wet technique to deepen the yellow tint with light washes of Gamboge Nova and Raw Sienna. Dilute your blue-gray mixture (Chromium Green Oxide, Indigo, and Neutral Tint) and block in the buildings' shadows with the wet-on-dry technique (i.e. wet paint on dry paper). Pay careful attention when you're painting around the figure of the gondolier, and allow the white of the paper to shape him, like Sargent did in his painting. Add a touch of Cerulean Blue to the wet shadow layer to strengthen the blue tint. Next, take your dark brown mixture and add in the shadows under the building arches. Make sure the yellow layers have dried first and paint with your brush tip to achieve hard-edged shadows. Finally, use Burnt Sienna to define the windows and details. Make sure that the blue shadows have dried a little before painting over them, otherwise the details will just blend into the shadows.
Step 6: Painting Water
 Part of what makes this watercolor bridge study so interesting is the playful combination of light and shadow in the water. Sargent effectively enhances the drama with warm yellows and cool blues, so this is what we'll do too! Mix Gamboge Nova and Raw Sienna, and add dashes of warmth to the yellow reflections of the water. Add this light brown tint to the bridge and buildings as well to tie together your main elements. Now pick up diluted Cobalt Blue and lay down a foundation for the shadows in the middle of the water. Paint in horizontal strokes, and block in the water from top to bottom in a graded wash. Add more Cobalt Blue to deepen the tint in the water, working wet-in-wet to produce soft-edged strokes with different values. Then, dab in Neutral Tint and Indigo to the sections of water with the darkest values. When your layers are dry, use Cobalt Blue and Indigo to add short streaks that overlap with the yellow reflections. You can use the dry brush technique here so that you produce strokes with hard, textured edges.
Step 7: Silhouetted Gondolas
 We have one last element to add to this watercolor bridge study, and that's the gondolas. Though they're small and not too detailed, there's no denying that they're an important focal point to this scene. First pick up Cobalt Blue and use the tip of your brush to block in the left side of the gondola in front. Next, mix together Indigo and Burnt Sienna, and use it to block in the rest of the boat, which is under the bridge and is therefore "in shadow". Add subtle streaks of Permanent Alizarin Crimson to strengthen the red tint of the boat. To finish this gondola off, pick up Burnt Sienna and block in its passengers. Switch to a no. 8 round brush and use Burnt Sienna to block in the gondola in the back. The smaller brush will make it easier for you to add the trickier parts of the gondola which peek out between the gondolier's legs. While the first layer is wet, drop in an Indigo and Burnt Sienna mixture to add interesting texture to the second gondola.
Step 8: Achieving a Deeper Blue
 The deep blue values in the water help bring drama to this watercolor bridge study. To achieve that level of darkness, add more layers to your water to deepen it. Once your previous layers have dried completely, use a no. 12 round brush to lay down horizontal strokes of Cobalt Blue, working wet-on-dry and going from top to bottom in a graded wash. While that layer is wet, add touches of Turquoise Blue to give the water more vibrancy. If any areas are starting to look overworked, carefully lift excess paint with a dry towel or clean brush.
Step 9: Detailing Your Watercolor Bridge Study
 We're almost done! All that's left is to add finishing touches and improve your values. First, mix Indigo and Burnt Sienna for the shadows under the archways. Next, use Permanent Alizarin Crimson with Cerulean Blue, then Carbazole Violet with Cobalt Blue, for the light purple touches on the buildings. Draw in details like the subtle outline around the archways using the tip of your brush. Add a touch of diluted Cobalt Blue and Cerulean Blue on the building shadows, and Burnt Sienna with Permanent Alizarin Crimson to strengthen the red tint in the brown details. Next, use the reddish brown mixture to paint the people on the second gondola, and add a few streaks under the bridge and to the water. With a diluted combination of Indigo, Burnt Sienna, Quinacridone Gold, and Chromium Green Oxide, add some subtle shadows to the water. Mix together Quinacridone Gold with Burnt Sienna to improve the values in the yellow sections under the bridge, buildings, and reflections in the water. Next, switch to a no. 2 round brush and use Cobalt Blue mixed with Burnt Sienna for the gondolier's hat and oar.
Step 10: Signing Off with Gouache
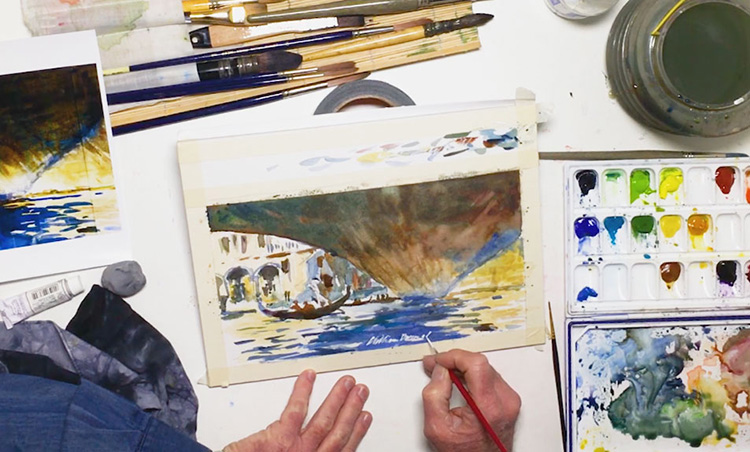 Squeeze out some Permanent White gouache and add a touch of Pyrrole Red, diluting the mixture with water until it reaches the consistency of melted ice cream. With a rigger brush, pick up the pink paint and sign your name on your finished watercolor bridge study. Don't forget to credit the original artist! Once the paint has dried, use a kneaded eraser to gently pick up stray pencil lines and brighten your painting. And finally, remove the artist's tape to give your painting a clean border. Congratulations! You've finished a study of Sargent's Under the Rialto Bridge!


