Materials Used In This Watercolor Study:
- Reference picture of Degas’ L'Absinthe
- A block of Hahnemühle’s Cornwall cold press watercolor paper (210lb, size 9.4″ x 12.6″)
- Pentel Graphgear 1000 automatic drafting pencil, 0.9mm lead size with 2B lead
- ½” Artist’s or masking tape
- Painting palette for watercolor paints
- Auxiliary plate or palette for gouache paint
- A container of water
- Paper towels or a rag
- A tabletop easel or a box to prop your painting on
- A spray bottle with clean water
- Staedtler Mars Plastic eraser
Paints (Holbein Artists’ Watercolors)
- Naples Yellow
- Gamboge Nova
- Brilliant Orange
- Brilliant Pink
- Olive Green
- Cerulean Blue
- Cobalt Blue Hue
- Quinacridone Gold
- Yellow Ochre
- Raw Sienna
- Burnt Sienna
- Neutral Tint
- Ivory Black
- Jaune Brilliant No. 1
- Umber
- Ultramarine
- Pyrrole Red
Daniel Smith’s Extra Fine Watercolors
Holbein Artists’ Gouache
- Permanent White
Brushes
- Escoda Perla Joseph Zbukvic Series: Round brush (no. 8)
- Escoda Perla Joseph Zbukvic Series: Round brush (no. 12)
- Princeton Snap! SH Gold Taklon Round brush (no. 4 or 6)
- Winsor & Newton Sceptre Gold II Series 303: Short handle lettering/rigger brush (no. 1)
Step 1: Sketching a Degas Painting
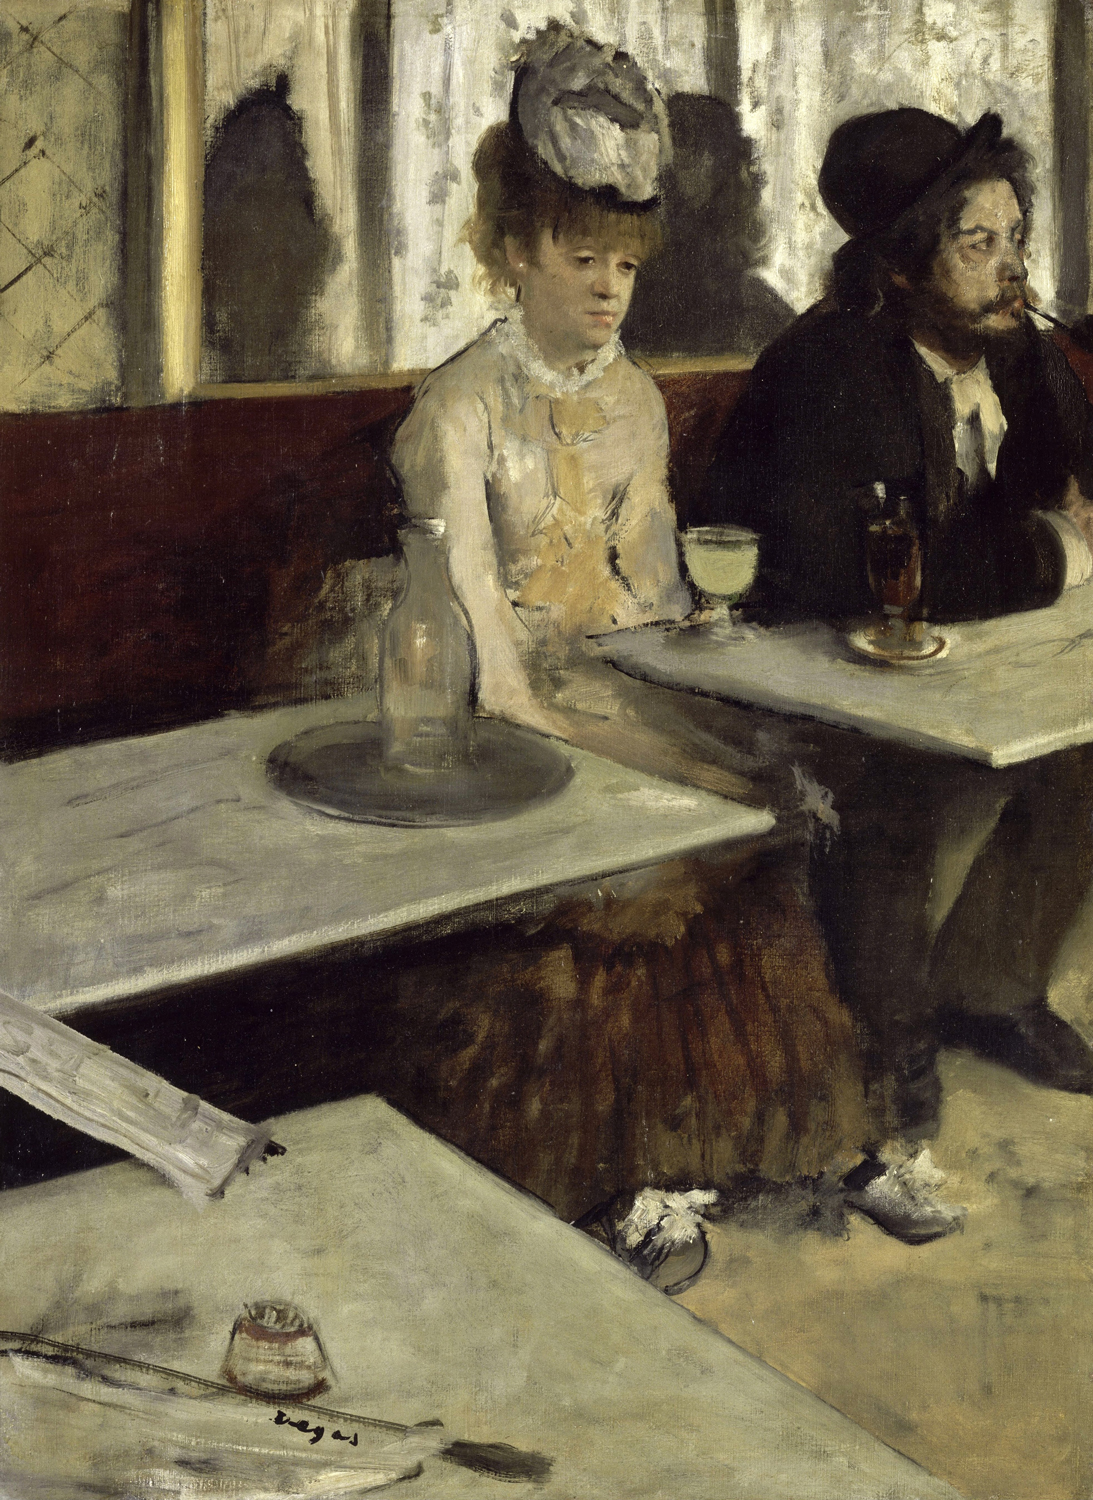
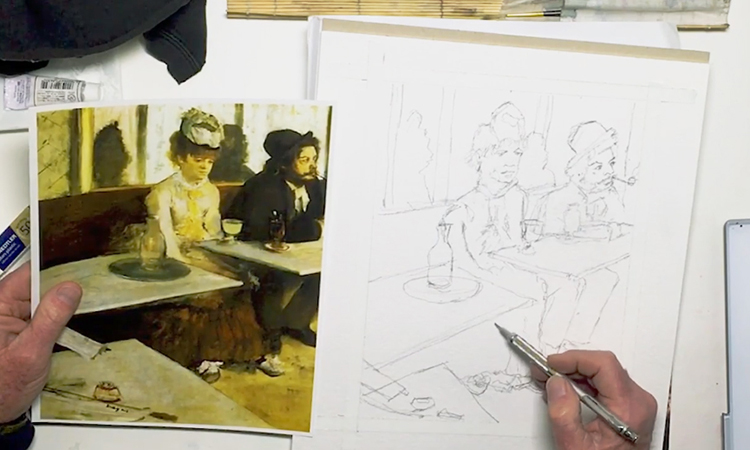 Today we'll be studying a painting by Edgar Degas, a French painter known for his contributions to Impressionism. The painting, L'Absinthe, depicts a woman and a man sitting in a cafe. As with the previous sessions, Bill begins by preparing his painting area. Since he intends the study to be the same size as the reference image, he uses the image to sketch crop marks onto the watercolor paper. The crop marks are then used as a guide for where to put down the artist's tape. The tape ensures that your painting will have a clean border after you have finished your study. Since the tape can be quite sticky (especially if you use masking tape as an alternative), apply pressure lightly when smoothing it down. Start with drawing the larger forms and pay attention to where they are placed. Try using an overhand grip on your pencil for this, which will give you a wider range of motion and control over your lines. When you move into smaller details, you may switch to an underhand grip, which will give you more control over small, precise lines. Avoid using your eraser often because the friction may damage the paper and affect the way the paint sits on the paper's surface. To quickly check if a geometric figure is working with the perspective in your image, use dots to mark the corners of the figure. Imagining straight lines connecting these dots then allows you to "see" if the image is correct. If everything seems to work, draw in the lines and continue your sketch. Remember, your sketch doesn't have to be perfect and will simply act as a guide for when you paint. You'll rely on your watercolors to bring out the cafe's moody atmosphere. Here's what Bill's sketch looks like:
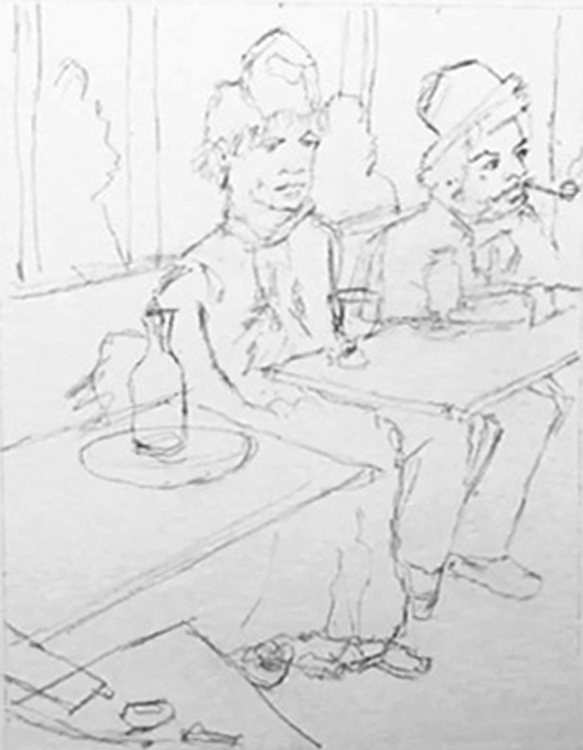
Step 2: Begin with the Yellows
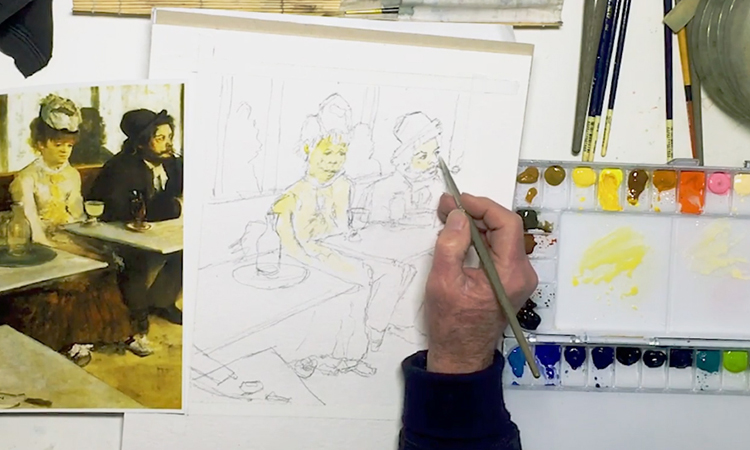 As in the previous sessions, begin with the colors that have the lightest values, which are the yellows for this Degas painting. Make sure that your workstation is well-lit so that it is easier to pick out the right colors in the reference image and your paint palette. It may also help to work on a surface that is slanted by about 45 degrees; the angle will help you pull down paint when applying washes. Use a spray bottle with clean water to reactivate dry paint, and with a no. 8 round brush, use Jaune Brilliant No. 1 for the lady's blouse. Mix together Naples Yellow and Jaune Brilliant No. 1 for both the lady's and the man's skin, which have a stronger yellow tint. For the subtle shadows around the lady's face and neck, create a cool-warm tint (i.e. a traditionally warm color with a cool hue) by mixing together a touch of Cerulean Blue with Naples Yellow. Work this greenish yellow tint into the lady's face with the wet-in-wet technique, working wet paint into an already wet layer of your painting, to achieve a subtle effect. Keep in mind that painting over your sketch lines will effectively "seal" them into your painting. Gently erase any lines you don't want beforehand. When getting water to dilute your paint, dip the tip of your brush, rather than the whole brush head, into your water source to avoid over-saturating your brush and polluting your water too quickly. If you feel like you've added too much color to your painting, go over the area with clean water and lightly dab a dry cloth over it to lift the extra paint off the page (as Bill does with the lady's face).
Step 3: Blocking in the Big Shapes
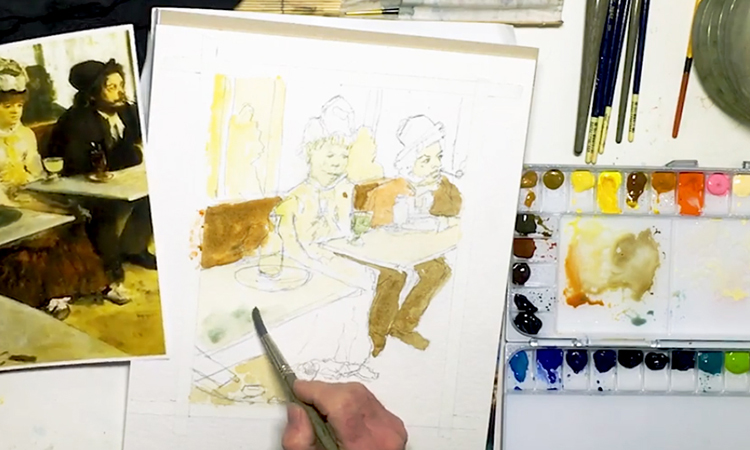
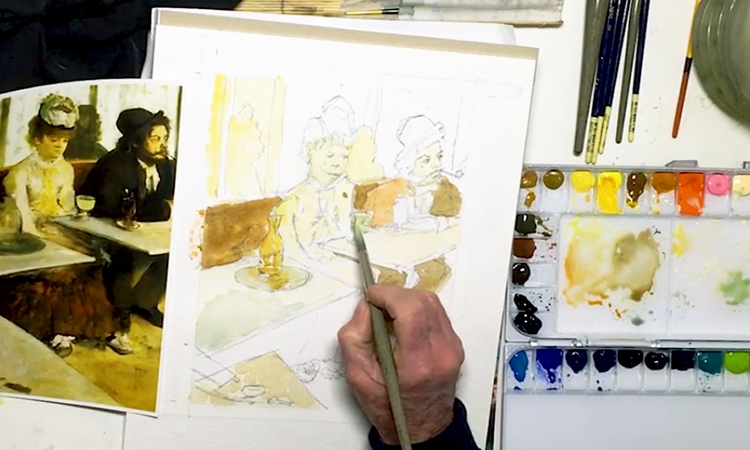
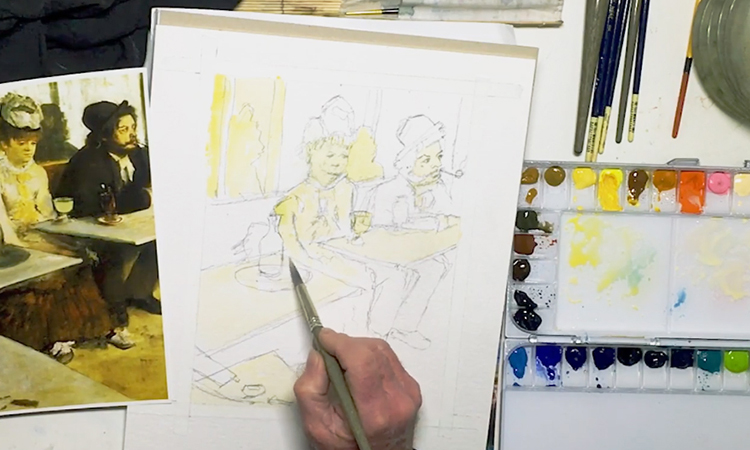 Next we use a series of light washes to block in the bigger shapes of the painting. Clean out your brush with water and switch to a larger no. 12 round brush. Load it up with a watered-down Jaune Brilliant No. 1 and paint in the tables with loose strokes. Keep the washes light, particularly for the two tables in the back. Block in the strong yellow areas in the wall with Naples Yellow. Use a light wash of the Cerulean Blue and Jaune Brilliant No. 1 mix for the subtle shadows and textures. You need not paint over the white areas of your Degas painting; it's fine to let the white of the paper show through. Use some of the Naples Yellow and Jaune Brilliant No. 1 mixture to add highlights to the bottle and glasses. Trace a light wash of the green mixture around the contour of the absinthe glass.
Step 4: Working in Shades of Brown
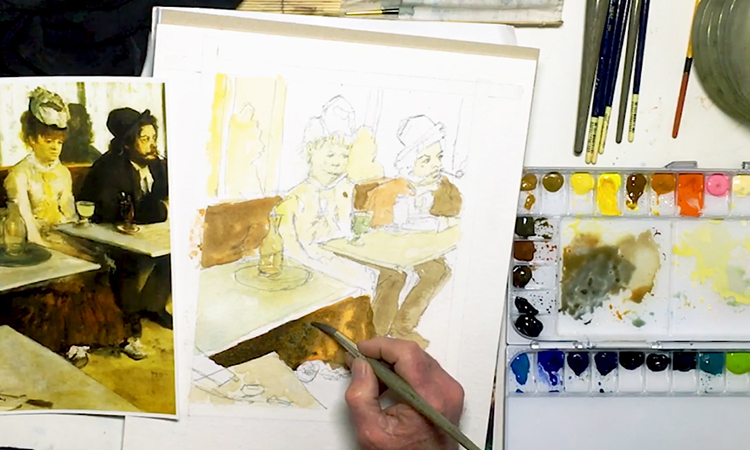
 Now to set down the foundation of the brown bench. First, put down a light wash of Yellow Ochre mixed with Naples Yellow. Next, add some Burnt Sienna to strengthen the brown tint of the mixture and add a second layer of paint, working wet-in-wet. Finally, pick up some Umber (with a hint of the yellow mix added to it) to add a third layer. Be careful when working wet-in-wet, as we did in this section. Adding too many layers in this manner may cause your colors to run together and become muddy. If there is a danger of this, allow each layer to dry completely before adding the next one. While that section dries, work on other areas of you Degas painting. Use the same Umber mixture to paint in the man's left shoulder, pants, and shoes. Lay down a light wash of the Umber mixture over the table in the foreground. Mix in a hint of Cerulean Blue into the Umber mixture and lay down another light wash to capture the subtle shadows on the tables in the back and the tray underneath the glass bottle. Take your time if you need to. Speed is not necessary to complete this study properly. Remember that watercolor painting is about building up color, so you should consider what your painting will look like later, rather than what it looks like now. Also, remember to be efficient about your brush strokes, as too many may lead to an overworked painting.
Step 5: Painting Glass
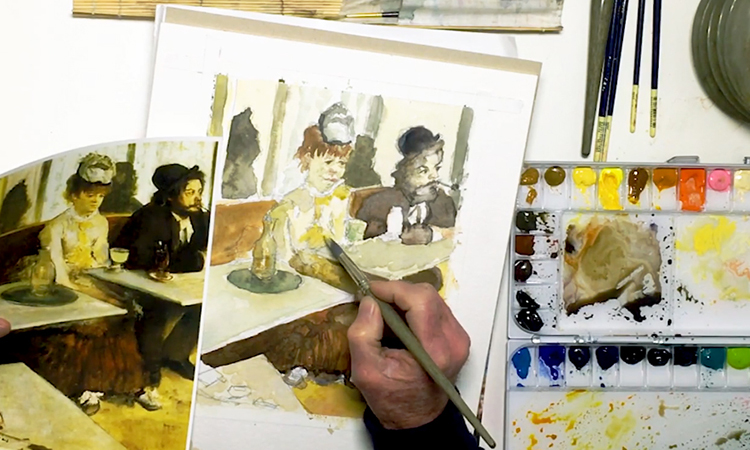
 Painting glass can be tricky because these objects tend to take on the colors of whatever is around them. To paint the bottle on the tray, take some of the Burnt Sienna mixture and paint along the contour of the bottle that faces the brown seats. Next, add in some streaks of Umber on the opposite side, and then some Jaune Brilliant No. 1 in between. Keep your brush strokes loose! It's okay if the colors blend together. Take some Chromium Oxide Green and Jaune Brilliant No. 1 to create a pale green mixture. Add some loose streaks of this mixture on the absinthe glass and the tray. Use a light wash of the pale green mixture over the tables to add another layer of paint. Add more Jaune Brilliant No. 1 to the mixture for sections of the Degas painting that are more on the yellow side, like the table on the right.
Step 6: Working on the Darker Shadows
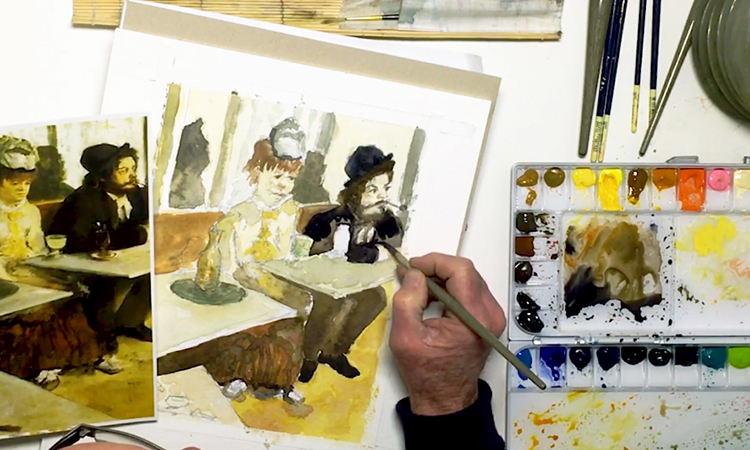
 Now let's block in the darker parts of the painting! Mix Burnt Sienna with some Umber and fill in the area underneath the leftmost table. Start from the left side of the Degas painting and include the lady's skirt. Add more Umber to darken the paint and add a second layer, painting wet-in-wet. Keep your strokes loose once you reach the lady's skirt. You are painting the foundation of the skirt's folds so you need not fill in the whole thing. Add some Cobalt Blue and a hint of Ultramarine to darken the browns. You can also add a bit of Neutral Tint, which is a transparent black that is great for darkening colors without making them muddy. Use this mixture to add a third layer of paint to the area. Again, keep your brush strokes loose when you reach the lady's skirts. Repeat this for a fourth layer (and darken the paint again with Ultramarine) if you think your paper can handle it. Use Burnt Sienna with a hint of Pyrrole Red to add some streaks of red to the folds, then leave that section to dry. Add Neutral Tint to the browns in order to darken the mixture to an almost black. Use this dark mixture to block in the man's pants. Next, use a mixture of Raw Sienna with a small amount of Umber to paint loose streaks on the man's pants to add some texture. Allow this section to dry before adding a new layer of paint. If the mixture has a reddish hue that is too strong, you can add a hint of Chromium Oxide Green to neutralize it. This happens because red and green are complementary colors (meaning they are directly opposite each other on the color wheel).
Step 7: Adding Yellow Texture to the Floor
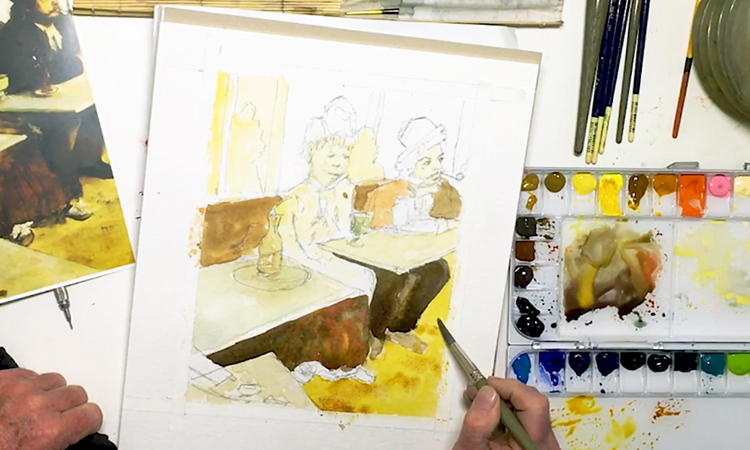 Now it's time to block in the bright yellow floor of your Degas painting! Mix together some Quinacridone Gold and Gamboge Nova (if necessary, tone it down with a bit of the brown mixture from earlier). Use this to block in the floor, leaving it nice and wet. Using wet-in-wet, work in a touch of Burnt Sienna in loose streaks across the floor, to give it those subtle shadows and textures from the reference picture. Be mindful of where you paint, particularly when you are going over the section near the man's pants. If the brown paint bleeds into your yellows (which can happen if the other section is still wet), dab the affected area with a dry towel to pick up the unwanted paint. Paint around the lady's shoes; you will deal with those in the next step.
Step 8: Working on Smaller Areas
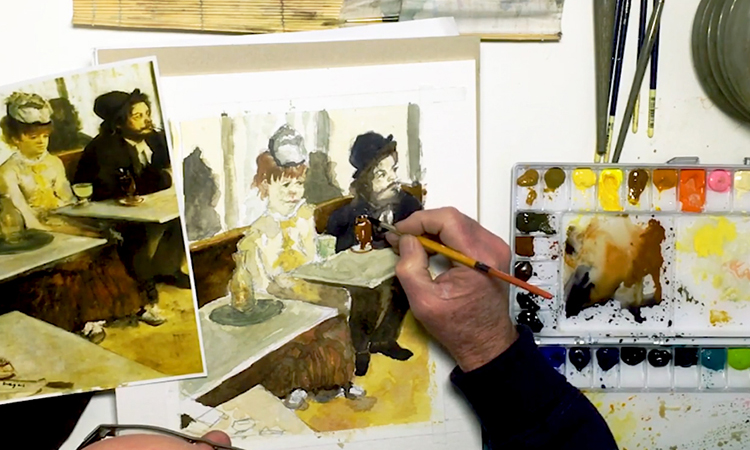
 Let's work on the lady again while the larger sections dry. Take some Burnt Umber and add a few strokes to the bottom of her skirt. In addition, take this opportunity to "draw" in the details of her shoes with your brush. Use your dark brown mixture (Neutral Tint, Umber, and Burnt Sienna) to add another layer to the bottom of the lady's skirt, darkening it even more. For the man's shoes, put down a layer that is a shade darker than his pants. After the initial wash on the skirt has dried, add more strokes to give more definition to its folds. Don't forget to fill in the small triangular hole on the left side of your Degas painting! Use a mixture of Chromium Oxide Green and Neutral Tint to paint the tray using the wet-in-wet technique. Next, lightly trace the shape of the bottle to create a transparent effect. Add bit of Yellow Ochre to the bottle for texture. Add a new layer of brown paint to the bench. Mix some Neutral Tint to the brown and use this darker mixture to fill in the man's coat. Paint around the shape of the man's glass as you do this, and use the tip of your brush to get in the details of his collar and the shape of his sleeve.
Step 9: Working on the Upper-Half of the Lady
 Switch back to the smaller no. 8 round brush and fill in the lady's hair with some Burnt Sienna. Use the tip of your brush to get any fine details in there. While the layer is still wet, work in a mixture of Neutral Tint and Burnt Sienna for a softer blend. Go back to your pale green mixture and add a bit of Neutral Tint to darken it. Use this to paint in the subtle shadows of the lady's hat. Work loosely and remember that it's fine to allow the white of the paper to show through. Add more Chromium Oxide Green to the mixture if you feel that the green tint isn't strong enough. It may be tempting to try to control your paint, especially when they start blending into each other, but remember that this is what watercolor does. Let the colors blend together and work with what the paint gives you. You can always lift the paint off you Degas painting with a dry towel if the effect doesn't suit your needs.
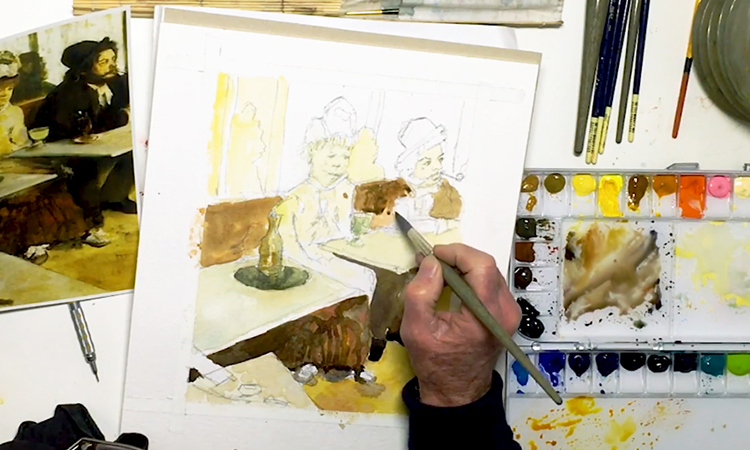
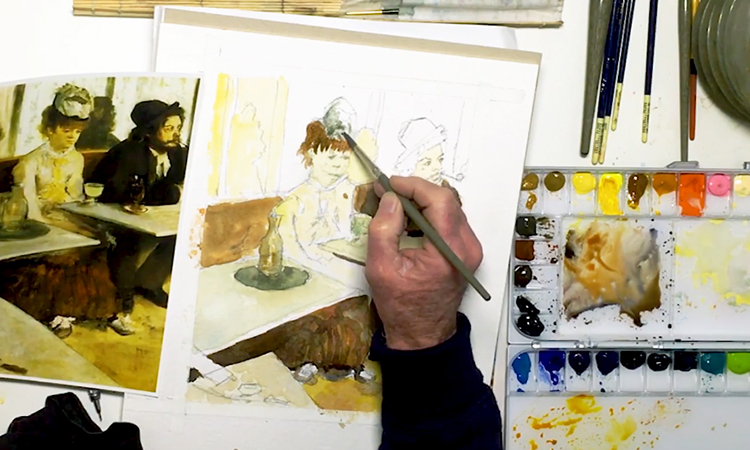
Step 10: Detailing the Man's Face
 As the larger sections dry, let's work on the details of the man face! Add some Neutral Tint to your brown mixture and use that to fill in the shape of the hat. While the layer is still wet, go back into it with a touch of Neutral Tint to capture the darker sections. Next, pick up some Umber and begin filling in his hair. Switch to an even smaller brush, the Princeton Snap! round brush (no. 4 or 6), and use the Umber mixture to draw the details of the man's face. Add a touch of Burnt Sienna to the mixture and use that to fill in his beard and mustache. Go back to your darker mixture to add in his pipe. Pick up a watered-down Cadmium Red and add a dab of paint for his mouth. You can soften hard edges in your Degas painting by lightly scrubbing along the edge with the tip of your brush and some clean water. To pick up excess wet paint in small areas, dry your brush, and then use it to soak up the paint.
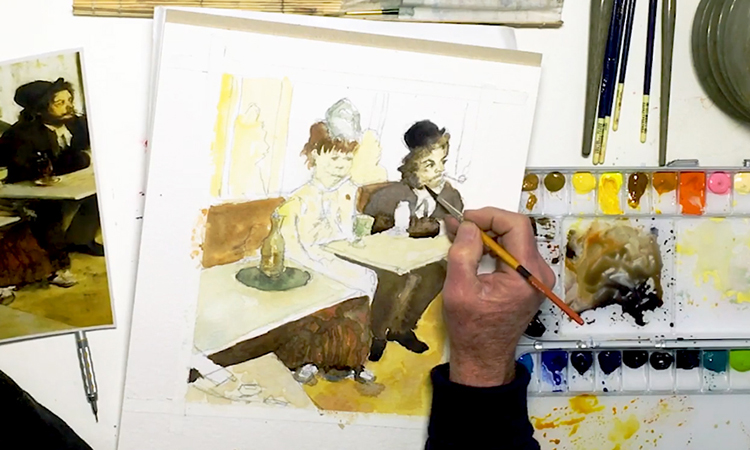
Step 11: Subtle Shadows and Details in the Lady's Face
 Now let's move back to the lady's face. Pick up some Neutral Tint and work in some of the details on the lady's hat. Use your dark brown mixture to paint in her eyes. If it's too dark, add a bit of Burnt Sienna to lighten it. Recreate the subtle shadows on her face with a light wash of your brown mixture. Pick up a touch of Brilliant Pink and use it for her lips. Go back to Neutral Tint and draw in some of the details on the lady's hat. You can remove small mistakes, like accidental drops of paint, by wetting the problematic area on your Degas painting and lifting the paint off with a dry towel or rag. This works best on paint that is non-staining. Paints that stain are more likely to leave traces behind on the paper.
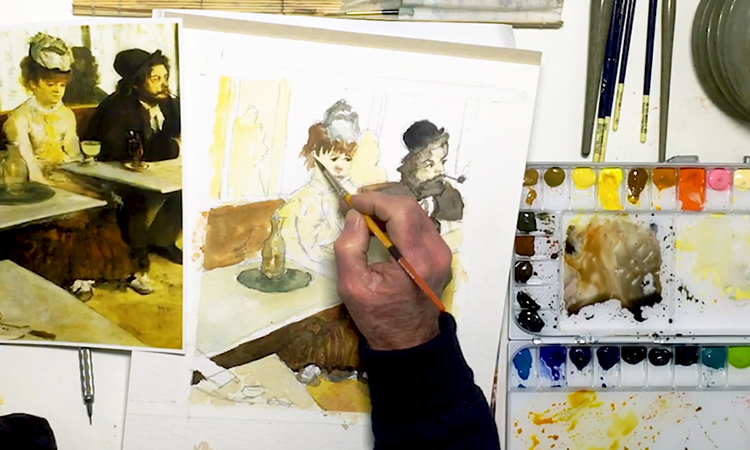
Step 12: Adding Shadows in Green
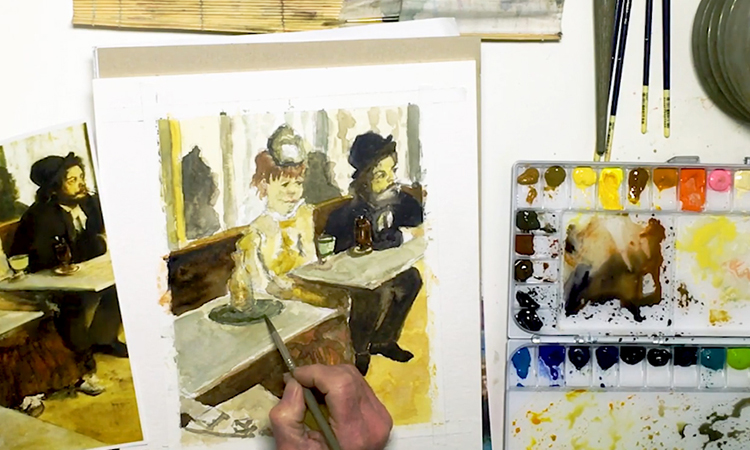
 Cover the wall in a light wash of Chromium Oxide Green. Use loose strokes for the shadows of the man, the lady, and the strong vertical lines above the bench. Add Olive Green and a touch of Ultramarine and Burnt Sienna to create a warm green tint. Use this to add a second layer to the shadows of the man and the lady. Switch back to the no. 12 brush and mix together Quinacridone Gold, Gamboge Nova and Jaune Brilliant No. 1 to create a pale yellow mixture. Use this for a light wash over section of the wall behind the man. Use loose strokes on the section behind the lady, which is lighter in value. Pick up some of your dark green mixture and add a layer of paint to the leftmost area of your Degas painting. Add some of the same paint to darken the vertical line shadows and do a loose wash on the rightmost table. Use a touch of Brilliant Orange on the bottom of the man's hand to separate it from the table. Add a thin line of your dark green paint under the tray for its shadow. Add a layer of Chromium Oxide Green to the subtle shadows on the lady's face. Mix it with a bit of your brown mixture for the shadows on the lady's lap, applying them wet-in-wet. Apply some Raw Sienna and then some Umber into those shadows to capture that yellow tint. Add touches of Naples Yellow on the lady's blouse and the bottle.
Step 13: Correcting Mistakes
 If you ever find yourself making a mistake in your Degas painting, don't panic! With a little patience, it may be possible to correct it. When Bill realizes that he accidentally buried the man's chin in his beard, he carefully lifts out some of the darker paint with water and a dry cloth. You might have to repeat this process depending on how light you need the area to be. If that's the case, do it little by little, allowing the paper to dry in between your attempts. Once Bill managed to clear out enough paint, he switched back to the smaller no. 8 brush and painted over the spot with Jaune Brilliant No. 1. Mistake rectified! You can use Jaune Brilliant No. 1 to retouch the man's face where it's needed. Add a new layer of Neutral Tint on the man's hat, coat, and pants to darken them. Mix together Burnt Sienna, Umber and Neutral Tint for a nice, dark brown that you can use to darken the man's hair. Use a light wash of this mixture for the subtle shadows on his shirt. Add touches of Umber to his clothes if you feel they need more brown.
Step 14: Building up Colors
 Soften the edges of the man and lady's shadows by scrubbing along the edges with the tip of your brush and some clean water. Add a light stroke of Yellow Ochre across the top of the bench, then darken the bench with a layer of Burnt Sienna and then Neutral Tint, working wet-in-wet to allow some of the brown to show through. Take some of your dark green mixture from earlier and lay down a light wash on the leftmost table, leaving some space in the bottom for the table's edge. Now to paint the last object in your Degas painting: the man's drinking glass. Switch to the smaller Snap! brush and pick up some Burnt Sienna. Begin painting the man's glass in loose strokes and allow the strokes to define the shape of the glass (rim, body, stem). Use some of the paint to define the rim of the saucer underneath the glass. Since the glass is in front of the man, it will reflect the color of his clothes. To do this, pick up some Ivory Black and add small hints of it on the glass and the saucer. Mix Umber with some greens and add a few strokes to the absinthe glass. If the glass is getting a little lost in the lady's blouse, define the left edge of the glass with your dark brown mixture. Use the dark brown to add a light wash to the shadows underneath the table.
Step 15: Last Minute Details
 Time to work on the final details of your Degas painting! Try not to get stuck in this stage for too long. Remember: too many strokes may cause your painting to lose its spontaneity. Soften the edge of the left table by adding a loose brushstroke of your yellow mixture across it. Add in a little Umber to the yellow and use this brown mixture to lightly draw in the details of the objects on the table in the foreground. Mix some Umber with Neutral Tint and water it down a little. Use this to add some details to the lady's shoes and to add some loose strokes to the walls for texture. Use Naples Yellow to add touches of yellow tint to the background, vertical posts, and blouse. If the man and the lady's skin tones need more yellow, add a light wash of Naples Yellow. Make sure that the areas you're working on are dry first before you add a new layer of paint or you might risk losing the subtle shadows you layered in earlier! Finally, use a mixture of Neutral Tint and Olive Green to give the bottle more definition. Use this same mixture to darken the tray's shadow and to draw in the crisscross patterns on the wall.
Step 16: White Touch-Ups and a Signature
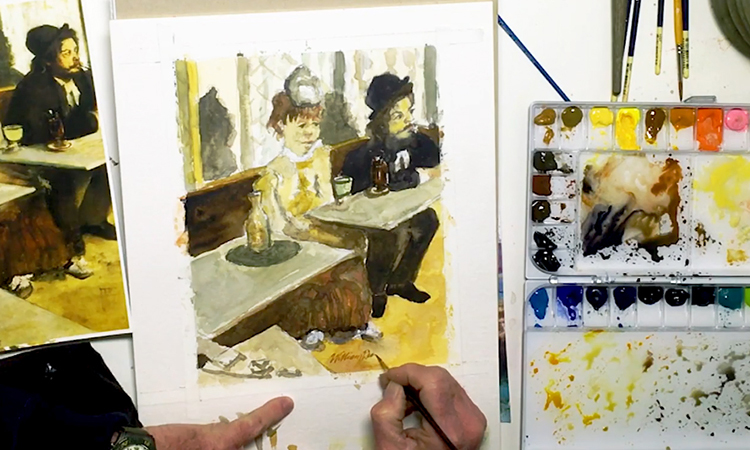 Use some Permanent White gouache to brighten up or highlight important areas of your painting. Adding too much white may distract from the subtle shadows in the scene, so do your best to keep it minimal. To finish off your painting, grab a no. 1 lettering or rigger brush, and sign your painting with Burnt Sienna. Don't forget the "à la Degas" at the end to credit the original artist. Congratulations! You have just finished studying a Degas painting. You can now peel off that artists' tape and proudly display it on your wall.


