"Anchor" yourself into this easy tutorial that shows you how to paint a watercolor sailboat! With artist William "Bill" Dunn captaining this lesson, you'll learn how easy it is to paint this idyllic yet quaint scene of Fort Bragg. Want to watch the video version? The full tutorial is available to members of our Beeblys WatercolorPainting.com.
Materials Used In This Watercolor Class:
- Reference picture of a harbor in Fort Bragg, California (click here for Bill's picture)
- A block of Arches cold press watercolor paper (140lb, size 12″ x 18″)
- Pentel Graphgear 1000 automatic drafting pencil, 0.7mm lead size with 2B lead
- ½" Artist's or masking tape
- Painting palette for watercolor paints
- Auxiliary plate or palette for gouache paint
- A container of water
- Paper towels or a rag
- A tabletop easel or a box to prop your painting on
- A spray bottle with clean water
- Kneaded eraser
- 10" Hyde curved spring aluminum paint shield (or any paint shield)
Paints (Holbein Artists' Watercolors)
- Cadmium Lemon Yellow
- Brilliant Orange
- Pyrrole Red
- Cobalt Violet Light
- Mineral Violet
- Leaf Green
- Olive Green
- Cobalt Green
- Viridian
- Cerulean Blue
- Cobalt Blue Hue
- Prussian Blue
- Indigo
- Yellow Ochre
- Burnt Sienna
- Burnt Umber
- Neutral Tint
- Ivory Black
Daniel Smith's Extra Fine Watercolors
Holbein Artists' Gouache
- Permanent White
Brushes
- Escoda Perla Joseph Zbukvic Series: Round brush (no. 8)
- Escoda Perla Joseph Zbukvic Series: Round brush (no. 12)
- Escoda Perla Joseph Zbukvic Series: Round brush (no. 20)
- Neef Rigger Supreme Taklon Series: Long handle rigger brush (no. 8)
- Neef Rigger Supreme Taklon Series: Long handle rigger brush (no. 12)
- Winsor & Newton's Cotman Brush Series 111: Round brush (no. 1)
- Loew-Cornell: Chinese bamboo brush (size 2)
Step 1: Anchors Aweigh!
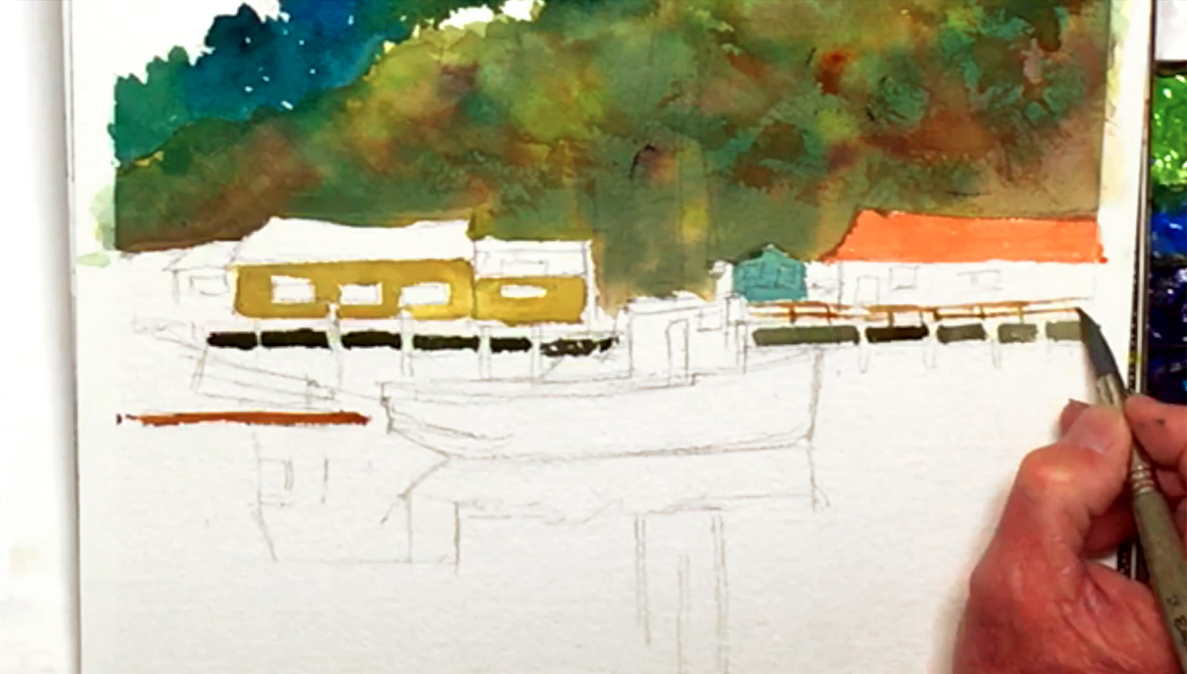
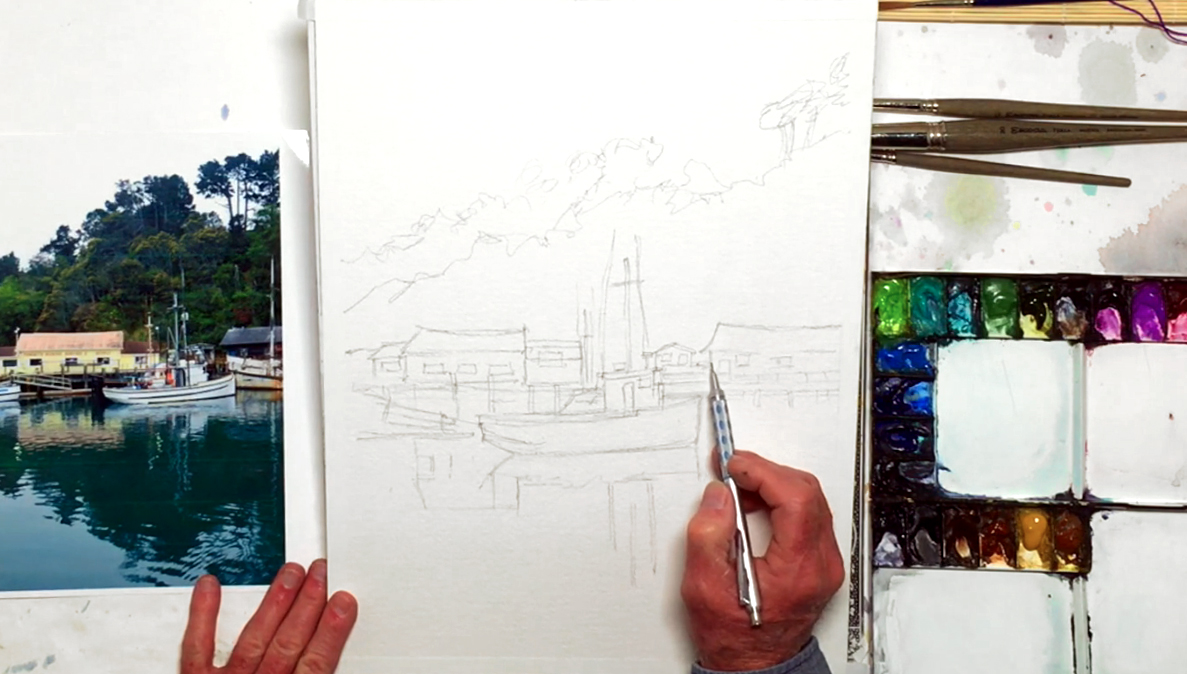 There's just something special about painting a sailboat moored in a quiet harbor, which is what this tutorial will cover. Bill shows his reference picture of Fort Bragg, then introduces his usual setup. This includes taping the edges of his watercolor block with artist's tape, then going over his tools and their layout. First is to break down the composition of the photo. This should be simple, as the composition of Bill's reference picture is almost exactly how he wants it. You can also tweak details like removing some of the unimportant boats and buildings to make sure the focus remains on the sailboat. When you have a general idea of your final composition, start a light sketch in pencil on the watercolor block. Remember to shift the horizon line so it's not in the middle for a more interesting design! In Bill's case, he goes with having more sky than water. In addition, be careful with the proportions of the sailboat, and measure it relative to the other objects in the picture. Position the buildings in the same way, and don't worry about perspective too much as you're looking straight at the scene. Simplify the details as you go, and focus on capturing an impression rather than replicating everything. For example, you can slightly curve the lines of the roofs to give them an older look. Don't forget to add the pier in the mid-ground and the outline of the forest in the background! And even if your sketch isn't perfect, remember that you can always change things while you paint. Below is a close-up of Bill's sketch:
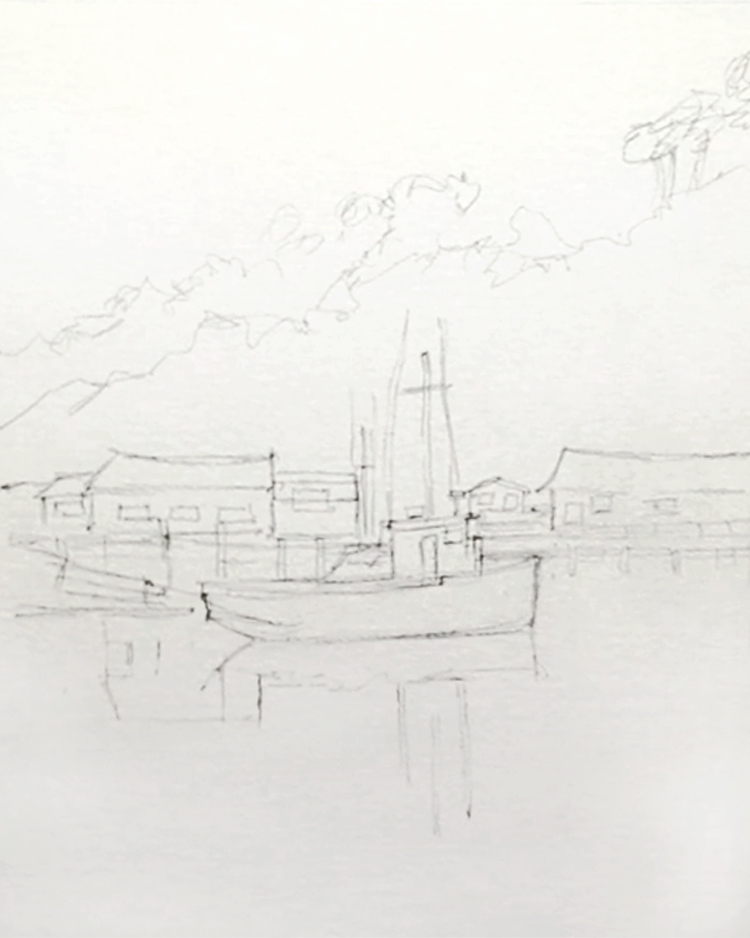
Step 2: A "Wet-In-Wet" Forest
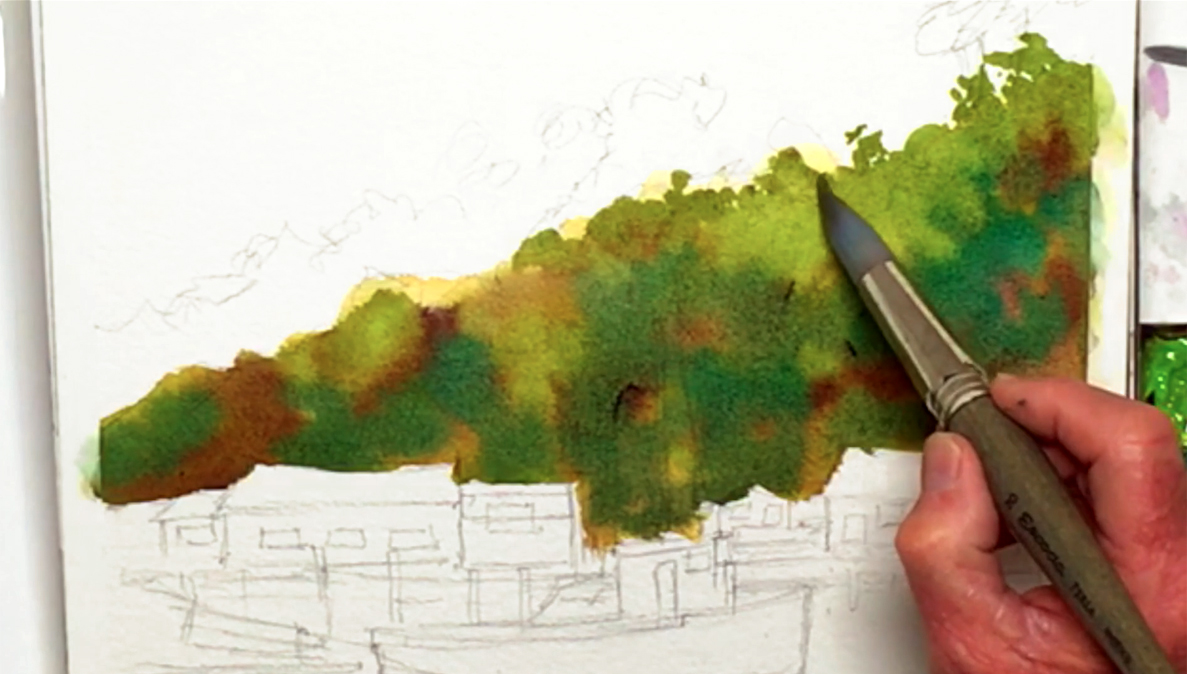 To help speed up the painting process, spray your paints with water to soften them up. Prop your painting at an angle as well so it's easier to see where you're painting. And all the while, keep planning ahead on what color scheme and balance you want to use to bring out the best in your watercolor sailboat painting. With a no. 20 round brush, wet the forest area with water before adding in paints via this "wet-in-wet" technique. This means painting on a wet surface to get a softer, blended effect. Start by painting a base layer of Cadmium Lemon Yellow and Yellow Ochre, leaving some white spots for highlights. After this underlying tone dries a little, drop in Olive Green for mid-tones, then Mineral Violet for the shadows and darker trees. Always allow some of the previous colors to show through, and paint randomly to capture the feeling of foliage in the background. Be careful to avoid the buildings below! Use a little Viridian next, then Leaf Green to push in some highlights for the treetops. Finally, dot in the silhouette of some leaves along the top line of the forest to get the feeling of trees.
Step 3: How To Paint Tree Shapes
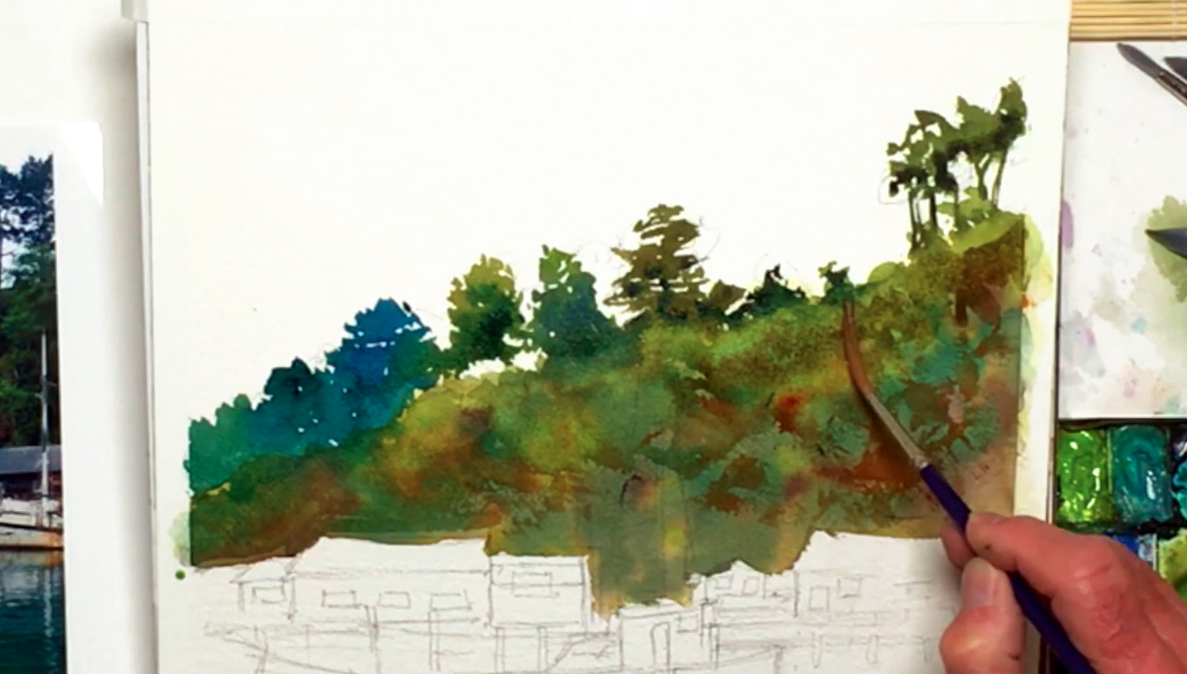 Change to a no. 8 rigger brush, then mix Mineral Violet with Olive Green and Prussian Blue to paint the silhouette of some trees sticking out from the top of the tree line. Add more Olive Green for the shadows and tree trunks, making sure they connect to the forest area below. Change to a slightly different green by mixing Olive Green and Mineral Violet, and paint the next few trees along the top. You can even paint a different type of tree for variation! For even more variety, use Prussian Blue for a few bluish green trees, then Chromium Green Oxide for something different in the left area. Drop in Cobalt Blue Hue while it's still wet for the same soft blends as before, then add some final trees using Olive Green and Prussian Blue. You can also blend the top part down into the main foliage area, lifting out paint with a paper towel if it gets too wet or dark. Use Burnt Sienna to glaze parts of the forest for an earthier tone, and make bashing motions with your brush for more texture. Then, tone some of it down with a mixture of Burnt Umber and Prussian Blue, using your intuition to guide you on where to place the different colors.
Step 4: "Wet-On-Dry" Buildings
 Before painting the buildings, make sure the foliage area is relatively dry so the colors won't bleed into one another. When you're ready, use a no. 12 round brush and a mixture of Burnt Sienna and Brilliant Orange to paint the rightmost roof via the "wet-on-dry" technique (i.e. painting on a dry surface). Mix Yellow Ochre and Cadmium Lemon Yellow for the walls of the building to the left, leaving white edges around the windows. If it's too bright, tone the yellow down with the mid brown mix. Use Cerulean Blue for the distant building that's to the left of the orange one, avoiding the boats in front. Then, mix Burnt Sienna and Umber, Indigo, and Prussian Blue for a dark green/gray, and paint the area under the pier. Leave the pilings and posts white for now, and don't forget to paint both the left and right sides. For the gangplank to the left of the watercolor sailboat, add Burnt Sienna to your orange mixture, and fill it in. Use the same color for the pier's railings as well.
Step 5: Water, Water, Everywhere
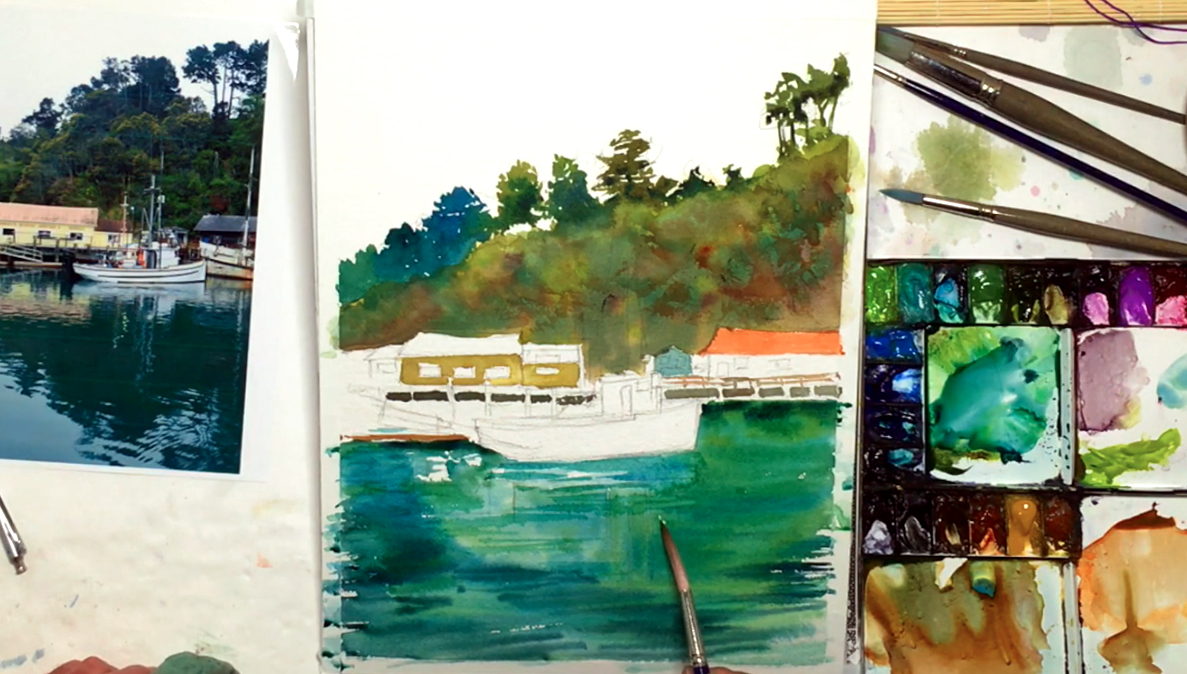 Go back to the no. 12 rigger brush, and use the wet-in-wet technique again to paint the water. Once you've wetted the water section, mix Cobalt Blue, Prussian Blue, Viridian, and Olive Green, and paint starting from the horizon line. Aim for a graded wash here, where the darkest area is at the horizon line, and the lightest is towards the foreground. Brush horizontally, leaving slivers of white for a shimmering effect. Since the sailboat is white, make its reflection quite light as well, wavering your lines for a watery illusion. Vary the colors by adjusting your green/blue mix, adding more Viridian in some areas, more Olive Green in others, etc. Try not to paint too many waves though, as the water in a harbor should be calm. Mix a saturated Olive Green and Viridian to make the area under the pier and gangplank even darker, working quickly to preserve the "wet-in-wet" effect. Add more Prussian Blue or Indigo to get some darker streaks and shadows, then switch to Cerulean Blue to paint the shadow under the watercolor sailboat.
Step 6: Adding Contrast, Details, And Texture
 Switch over to a no. 8 rigger brush, then mix Pyrrole Red with Cobalt Violet Light to paint the roof of the dark yellow building. Be careful not to touch the wet water area during this step! Next, use Olive Green and Burnt Umber to add details to the pier and gangplank, and to darken the right side for more contrast. Darken the water under the pier even more with a saturated Olive Green and Cobalt Blue mix, again leaving the pilings and posts white. For the pier itself, use Yellow Ochre mixed with Burnt Sienna for a wooden color. Change to Brilliant Orange for the leftmost building, and Cerulean for the rightmost building. You can even add a dry texture by brushing quickly over the rough paper. Drop in Viridian and Olive Green into the rightmost building as well to adjust its value, and add a Cerulean glaze over the red roof. Lastly, add more depth by using Indigo to paint the shadow under the eaves.
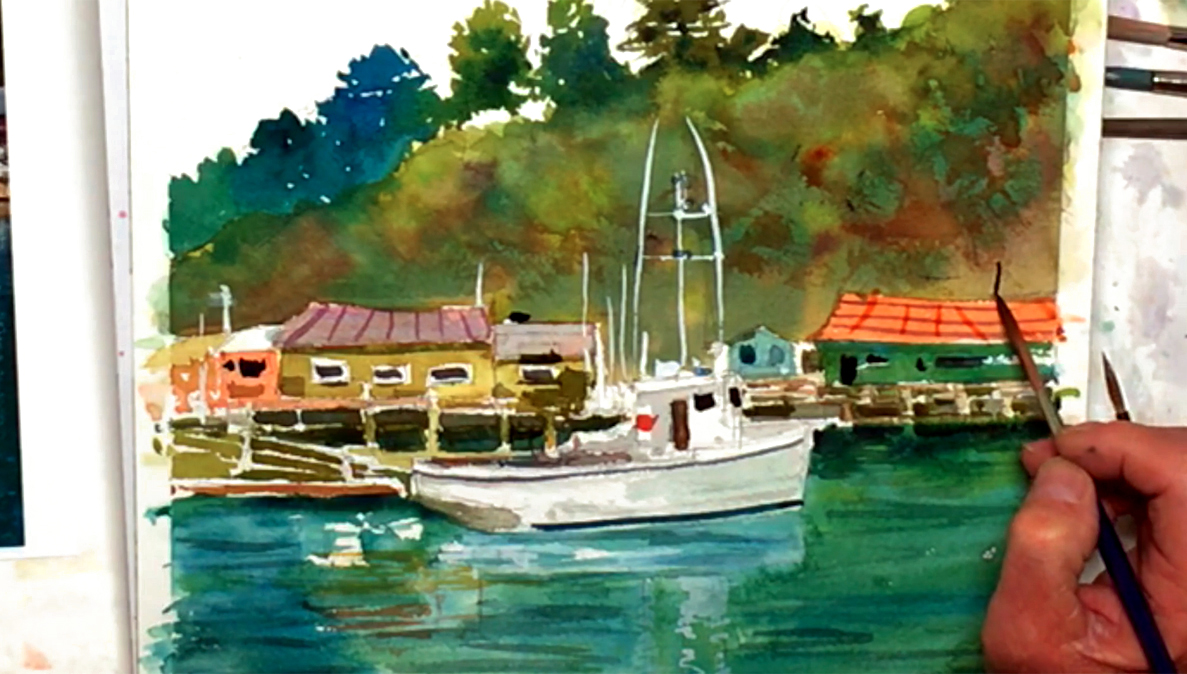
Step 7: Details On A Watercolor Sailboat
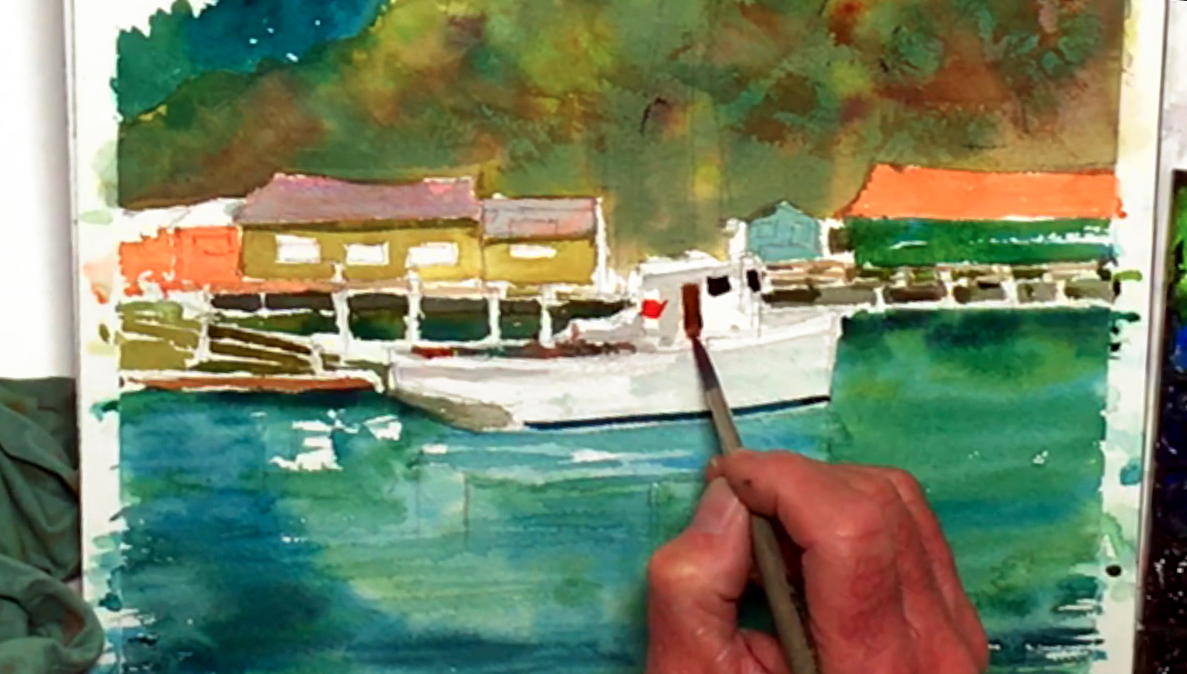 Dilute some Neutral Tint with a no. 8 round brush, then paint the sailboat's shadows and details. Drop in a little of the green mixture near the bottom to show how it reflects the water's color, then mix Burnt Sienna and Indigo for a dark brown to paint the cabin door. Drop in Pyrrole Red to the door for more color contrast, and add a lifesaver to the side. Go back to the dark Neutral Tint mix to paint the windows, then add Prussian Blue before painting a decorative stripe along the bottom of this watercolor sailboat.
Step 8: White Paint And More Details
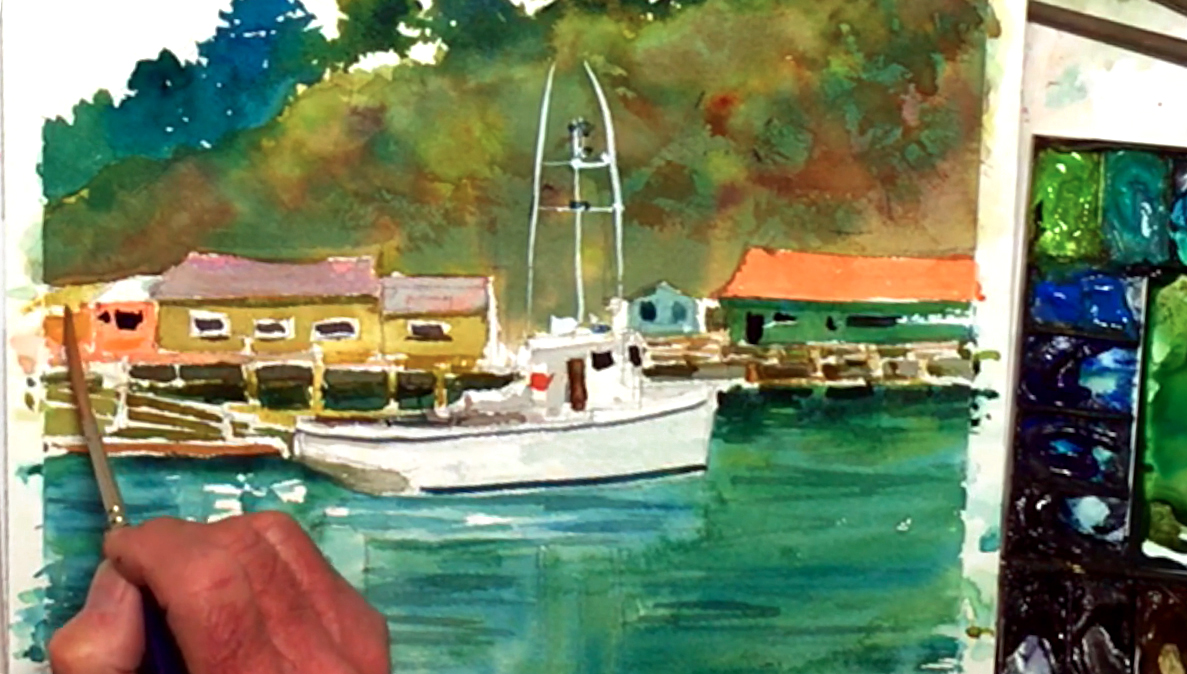 To paint the masts, squeeze out some Permanent White gouache paint onto your auxiliary palette, then use a small bamboo brush to get the thin lines you need. Paint any rigging and roof details as well for the watercolor sailboat, and feel free to add more masts than usual to get the impression of several boats anchored behind the main one. Switch to a no. 8 rigger brush, and use Neutral Tint to paint the buildings' windows. Next, add Olive Green to the Neutral Tint to darken the area under the pier again, and to add smaller, darker waves in the water. Mix Indigo and Prussian Blue with your green mixture for some different dark waves, but try not to go overboard with this. Mix Viridian with Indigo next, and paint another stripe along the top edge of the sailboat, its interior, and a shadow for the cabin door. Add some vague equipment details on the masts as well. Use diluted Indigo for the background building windows and for any shadows in the buildings, then switch to Yellow Ochre to paint the leftmost roof and some of the pilings along the pier. Drop in Burnt Sienna for variation in some places.
Step 9: Finishing Touches And Painting A Watery Reflection
 At this point, you can go back to add any necessary details to enhance the overall watercolor sailboat painting. For example, you can add more masts in the background, or use Carbazole Violet to add tile lines to some of the roofs. You can also add the feeling of more activity among the buildings using your green mixture, and some posts on the roofs using Ivory Black. Dilute some of the white gouache to lighten the sailboat's reflection even more, making wavier strokes for the same watery feeling. Paint the left main building's reflection as well, using Brilliant Orange for the roof and Yellow Ochre for the walls.
Step 10: Lettering And Making It "Pop"
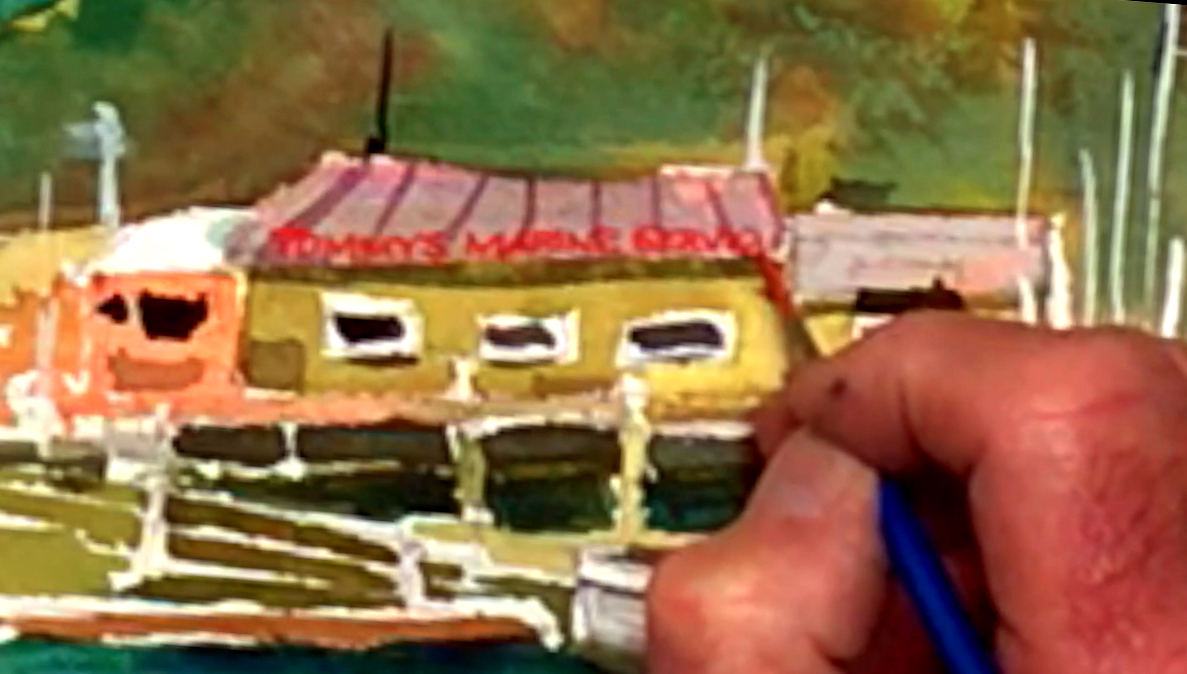 With the no. 12 round brush, darken the water a little using a mixture of Prussian Blue and Olive Green, especially the area around the sailboat's reflection. Then, use a no. 1 round brush to mix an opaque red by adding white gouache to your red paint, and letter a sign saying "Tommy's Marine Service" along the main building. The extra white will help make the red paint sit on top of the other layers of paint, making the sign stand out more. Next, paint some tiny details along the watercolor sailboat using the same small brush and saturated Carbazole Violet for an intense contrast.
Step 11: A Final Sky And Signature
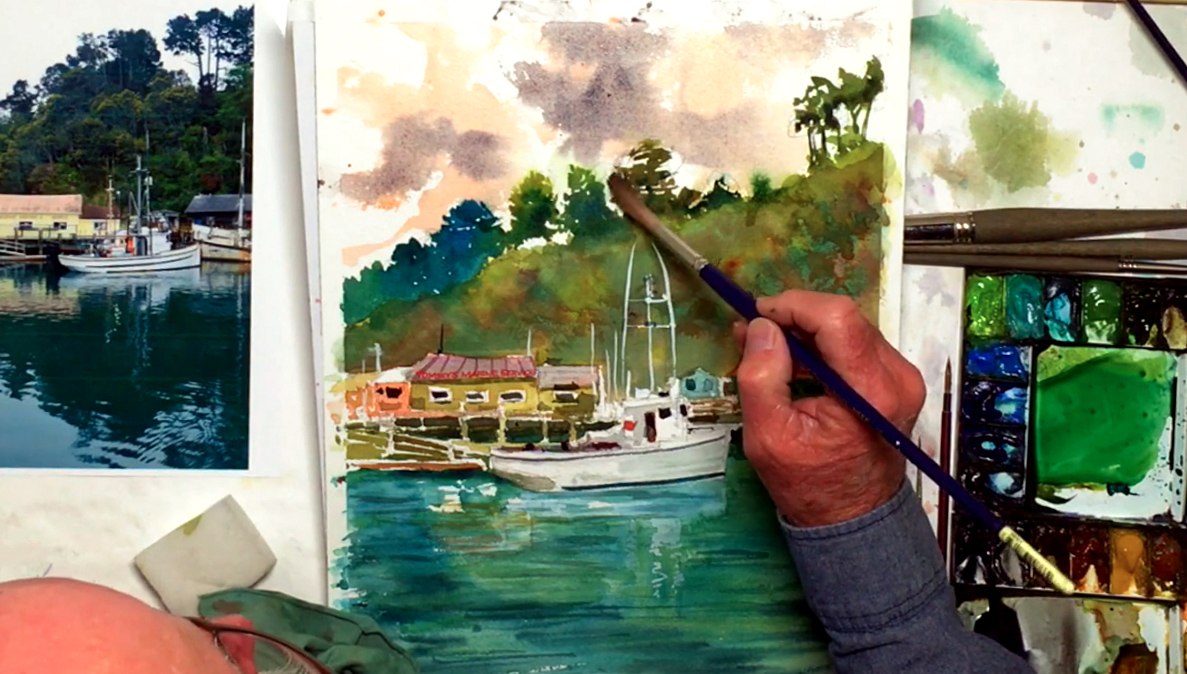 Just one last section to paint, and that's the sky! Use the no. 12 rigger brush to wet the sky first, and with the wet-in-wet technique, brush in diluted Brilliant Orange as randomly as possible, leaving white areas for clouds. Before the paint dries, add a little Neutral Tint for some cloud shadows. Remember that watercolor always dries lighter, so don't worry if it looks too dark at first. Tweak or fix anything that needs it, and keep stepping back to check the overall look of your painting. When you're done, sign your watercolor sailboat painting using the bamboo brush and a mixture of white and Cobalt Green. Leave everything to dry, and last but not least, gently peel off the tape. And voila! Hope you enjoyed this easy watercolor tutorial.


