This second painting study is of Winslow Homer's The Sponge Diver. Award-winning artist William "Bill" Dunn traces the steps of this master watercolorist, and breaks down each component to make it easy to follow. Want to watch the video version? The full tutorial is available to members of our Beeblys WatercolorPainting.com.
Materials Used In This Watercolor Class:
- Reference picture of Winslow Homer's The Sponge Diver
- A block of Hahnemühle's Britannia cold press watercolor paper (140lb, size 9.4″ x 12.6″)
- Pentel Graphgear 1000 automatic drafting pencil, 0.9mm lead size with 2B lead
- 1" Artist's or masking tape
- Painting palette for watercolor paints
- A container of water
- Paper towels or a rag
- A tabletop easel or a box to prop your painting on
- A spray bottle with clean water
Paints (Holbein Artists' Watercolors)
- Lemon Yellow
- Cadmium Yellow Deep
- Brilliant Orange
- Cadmium Red Purple
- Cobalt Violet Light (a.k.a. "Lavender")
- Viridian
- Cobalt Green
- Cerulean Blue
- Cobalt Blue Hue
- Yellow Ochre
- Burnt Sienna
- Burnt Umber
- Indigo
- Neutral Tint
Winsor & Newton's Professional Watercolors
- Oxide of Chromium
- Permanent Mauve (or Sennelier's Cobalt Violet Deep Hue watercolor paint)
- French Ultramarine
Brushes
- Escoda Perla Joseph Zbukvic Series: Round brush (no. 8)
- Winsor & Newton's Series 7 Kolinsky Sable: Round brush (no. 1)
- Winsor & Newton's Series 7 Kolinsky Sable: Round brush (no. 2)
- Winsor & Newton Artists' Watercolor Sable Brush: Round brush (no. 0)
- Winsor & Newton Sceptre Gold II Series 303: Short handle lettering/rigger brush (no. 1)
Step 1: A Painting Study And A Sketch
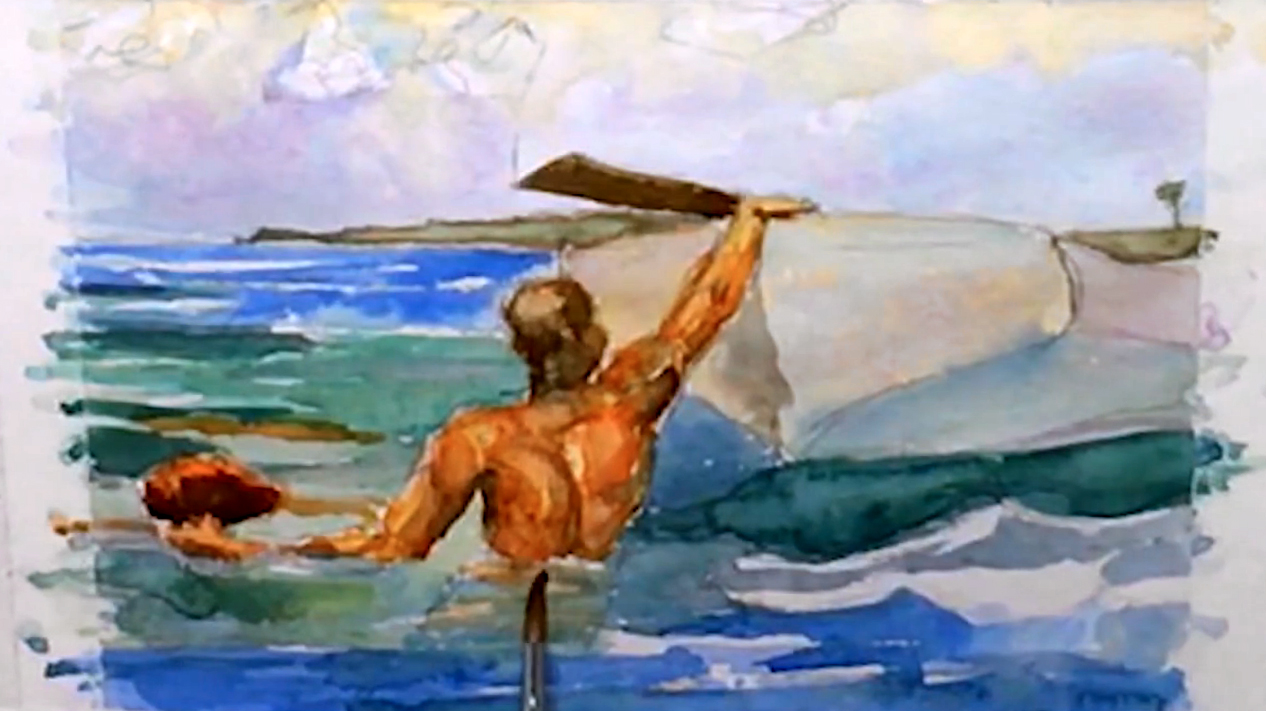
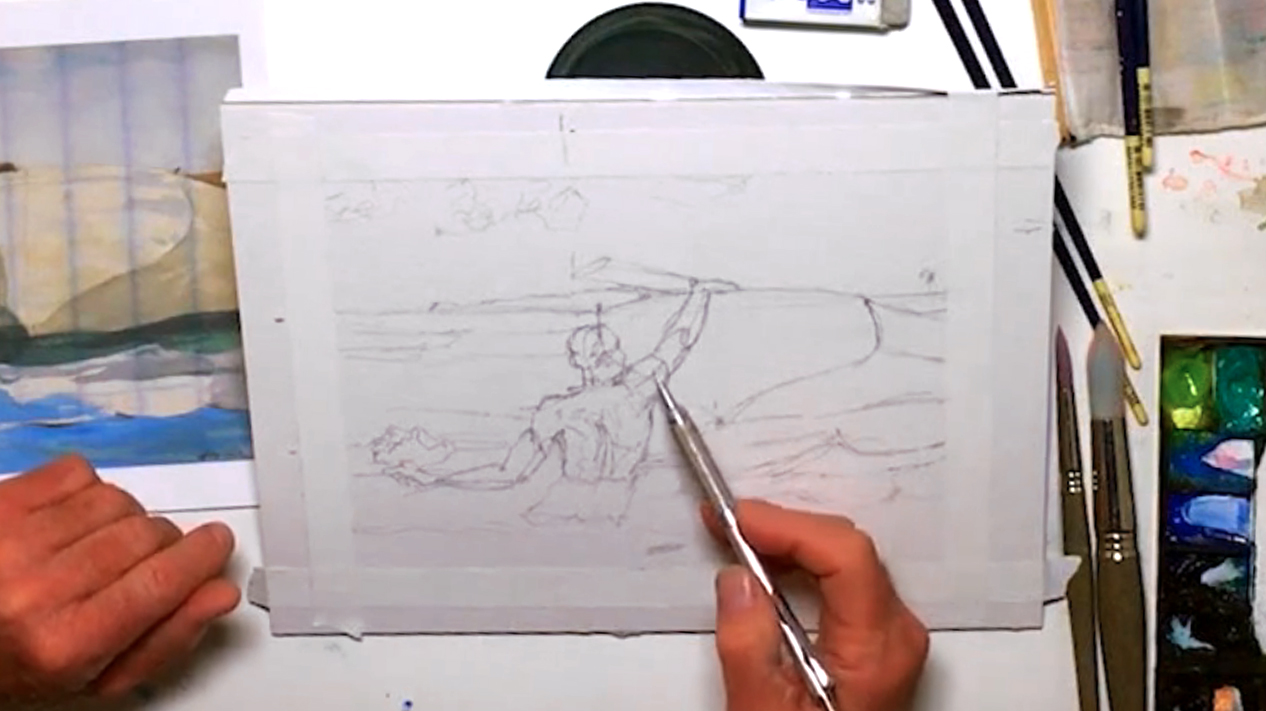 Like the Monet painting study, Bill copies this painting to learn more about color relationships, human anatomy, and value. In lieu of this, he chooses Homer's The Sponge Diver for its vibrant colors and unusual subject. As usual, Bill softens his paints by spraying them with water to make them easier to pick up when painting. He then tapes off the same size of the printed image on his watercolor paper via artist's tape, as he plans to reproduce the image at a 1:1 ratio. The white border also creates a clean edge for any future framing purposes. After printing and analyzing the reference photo, you can start sketching, beginning from the largest objects to the smallest. Bill shows how to divide the image into 3 "bands" of information, and pencils in the horizon line first. Then, he marks off where the diver's head is, working slowly to get the proportions right. The boat is also drawn in reference to the head's position. Try your best to get the subtle curves right! Focus on the diver's anatomy next, and lightly outline the body's position before defining the musculature. To do this, pencil in the larger shadows that emphasize muscle tone. Keep your guidelines simple and clear! Take care in the area where the body is submerged, as water refracts light and will distort the lines a little. Lastly, add the sea sponge, land mass, and oar, and some clouds if you need. Below is a close-up of Bill's sketch:
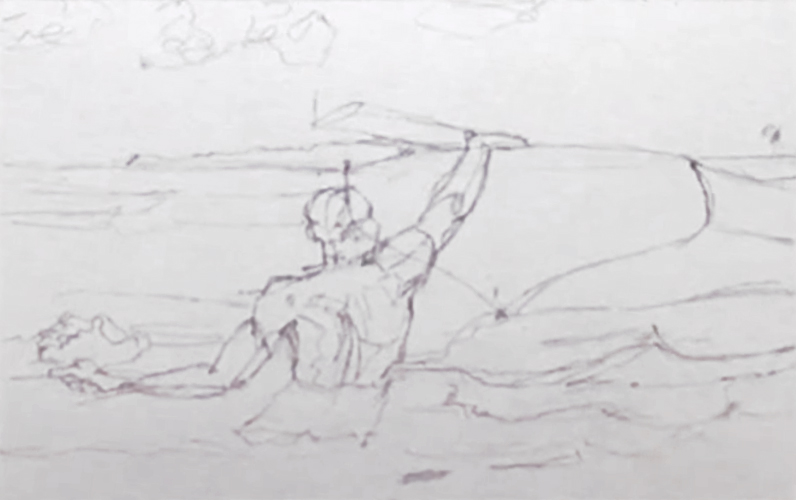
Step 2: How To Paint A Tanned Skin Tone
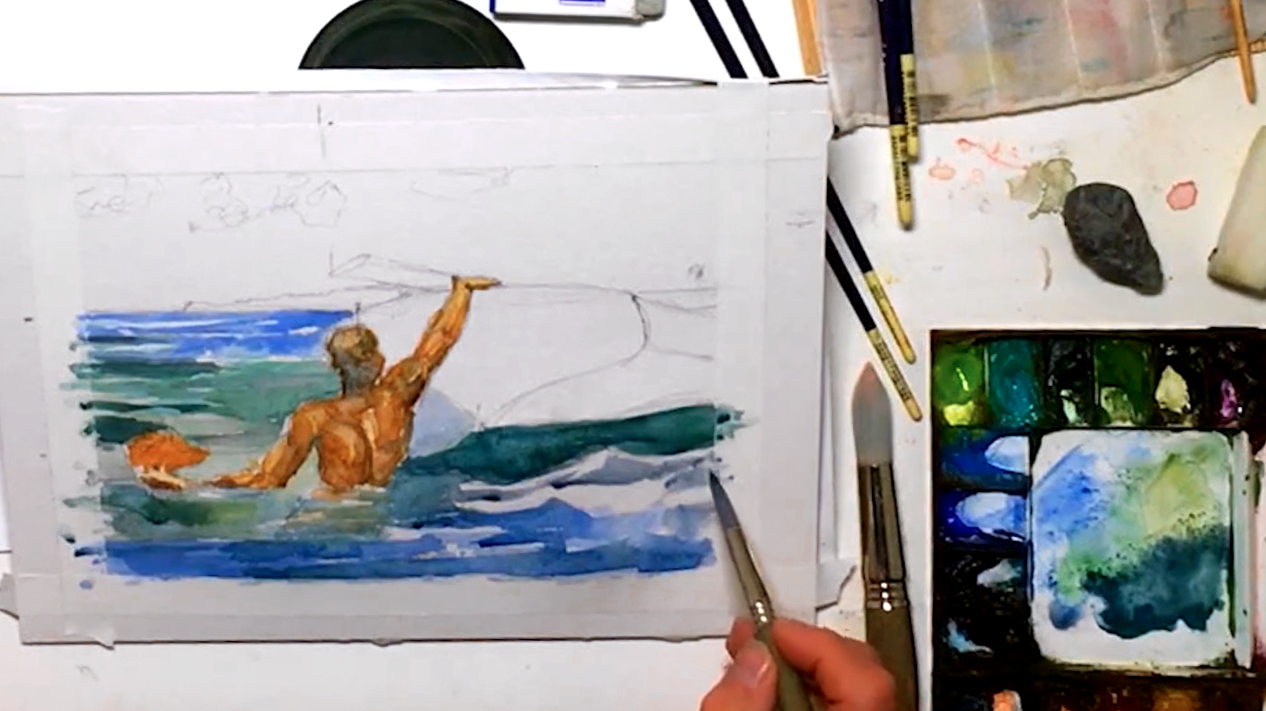
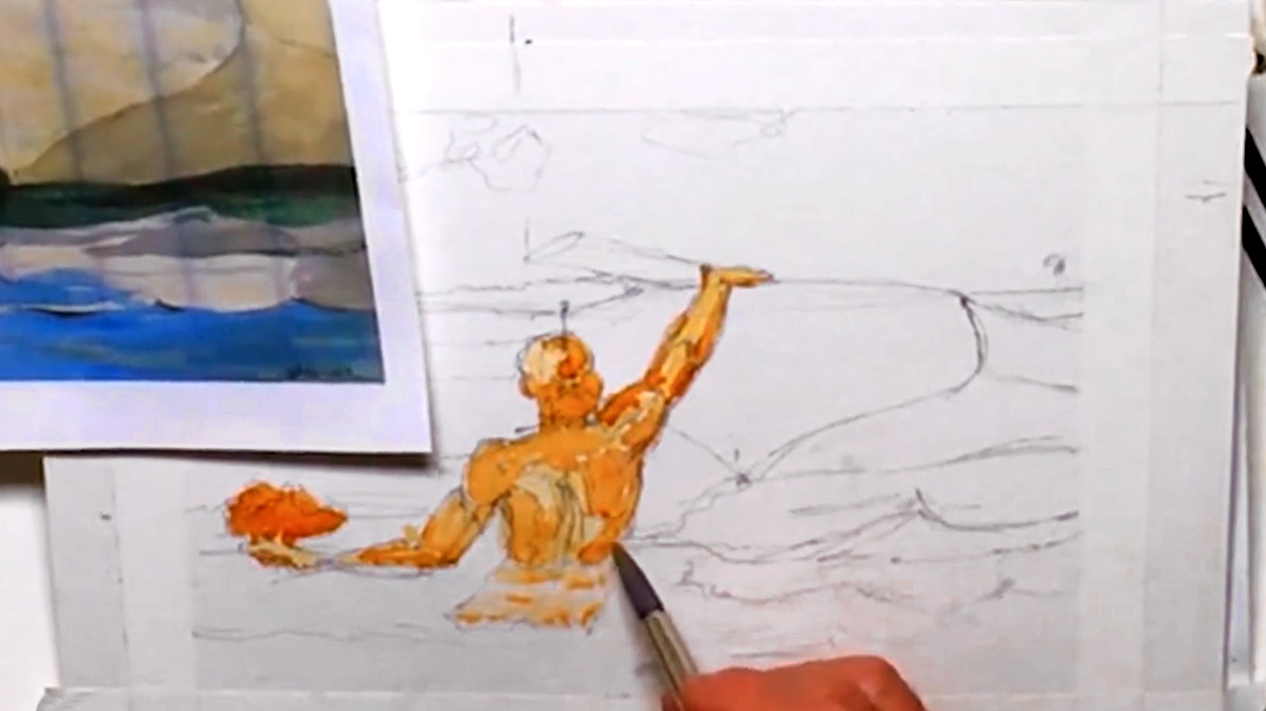 It's time to paint! Bill begins with the diver, so he mixes a base skin tone by diluting Yellow Ochre on his palette. He uses his no. 8 round brush, as it will help get both big brushstrokes and fine details. This light tan color isn't a traditional skin color, but here it's used as an underlying tone. Bill applies this to the diver's body, avoiding only the white highlights and the part under water. Next, he mixes in Burnt Sienna and Umber for a darker tint in the mid-tones and shadows. With just these 2 tones, a lot of the anatomy is defined, so be bold but careful when doing this. Feel free to paint the sea sponge as well, as it's also orange in tone. Streak some in the underwater area as well to get the impression of a submerged lower body in clear water. Throughout the whole painting study, remember to adjust your values as necessary.
Step 3: Layering Shadows And Anatomy
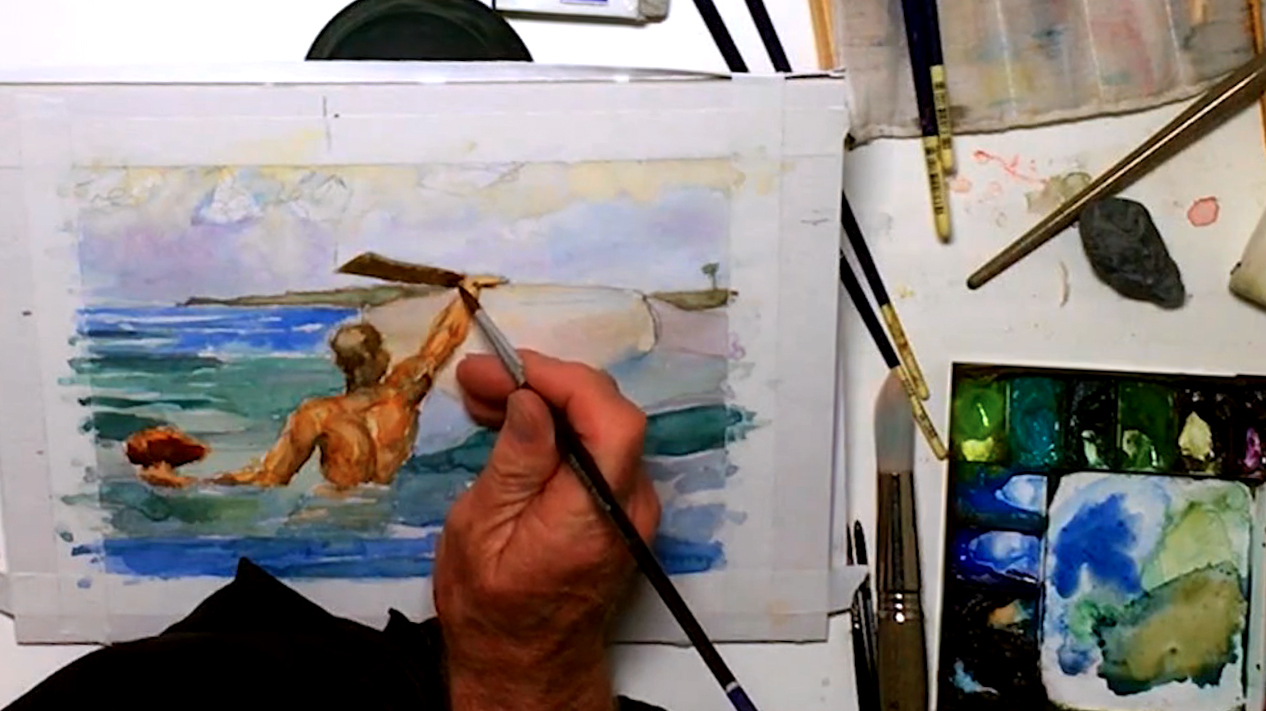
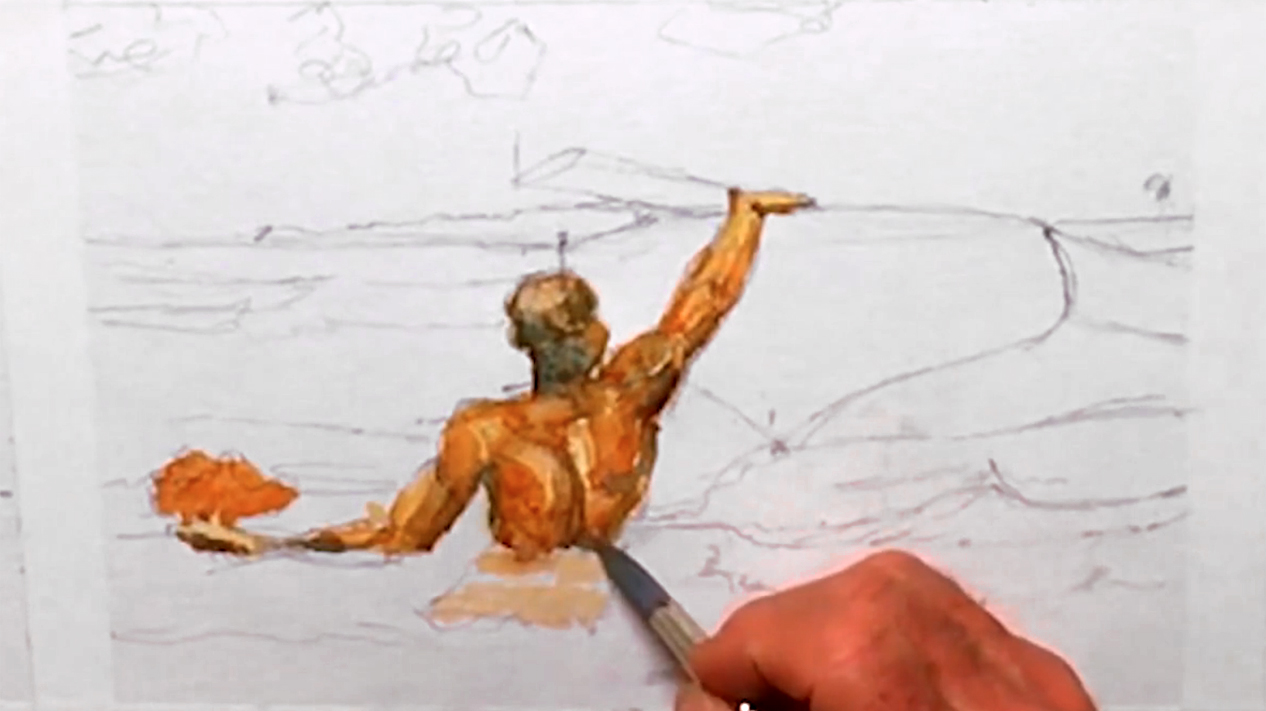 Add more Burnt Umber to your skin tone, and paint the darkest shadows on the diver. If excess paint starts to pool, use the tip of a clean brush to lift out the puddle. Paint the face and head last, and try to capture the different values (i.e. light vs dark) of the skull. For the skinhead look, add Cerulean Blue and Neutral Tint to your skin mixture for a warm gray, then paint the back of the head. Lift out highlights with the same method as before if necessary, then darken shadows by adding more Neutral Tint and Cobalt Blue Hue. Since the blue complements the orangey Burnt Sienna, it will create a good contrast, and balance out the orange where necessary. Touch in a tiny bit of Viridian in the spine, then add more of the blue mixture and Neutral Tint to darken the head area. Darken the underarm areas as well for more depth. If your paper is too wet, let it dry a little before continuing, or else your colors will turn muddy and spread too much in this painting study. To warm the skin tone again for that "sun-kissed skin" look, dilute Cadmium Red Purple and add a layer to the mid-tones. Finally, paint the darkest areas on the head by mixing more Neutral Tint and Cobalt Blue Hue before leaving the diver to dry.
Step 4: Paint The Colors Of The Sea
 Paint the sea next in this painting study, starting with a light Cerulean Blue at the horizon line. In this section, paint quickly with the "wet-on-dry" method to prevent the paint from streaking too much. Feel free to allow some white to show through for a "surf and waves" effect, even if it's not in Homer's painting. As the sea isn't just one color, mix in Cobalt Green and other blues for the next band of paint. Use Cobalt Blue Hue for a stronger color towards the bottom, and streak it into a few areas for some color harmony. Switch blues and greens as you see fit, using your reference image to guide each section of sea. Don't forget to leave the boat's reflection white! Allow the mixture of blues and greens to bleed into one another for softer color transitions, and change up the color when it looks too monotonous. For shadows, touch in Neutral Tint to your blues, and paint the diver's submerged arm and the area to his left. For the area around the boat, use the gray-blue mix, and add some Viridian for the greener areas. Mix Cobalt Green and Neutral Tint for the boat's shadow on the water, and for the darkest area, add more Indigo and Neutral Tint. You can also dilute this color and add it to the shadows in the boat's reflection. To get the feeling of the diver's lower body being underwater, dilute some of the blue mixture and streak over that area. Then, add more Cobalt Blue Hue to the sea's foreground, giving it an extra punch of color for more depth.
Step 5: A White Boat In The Water
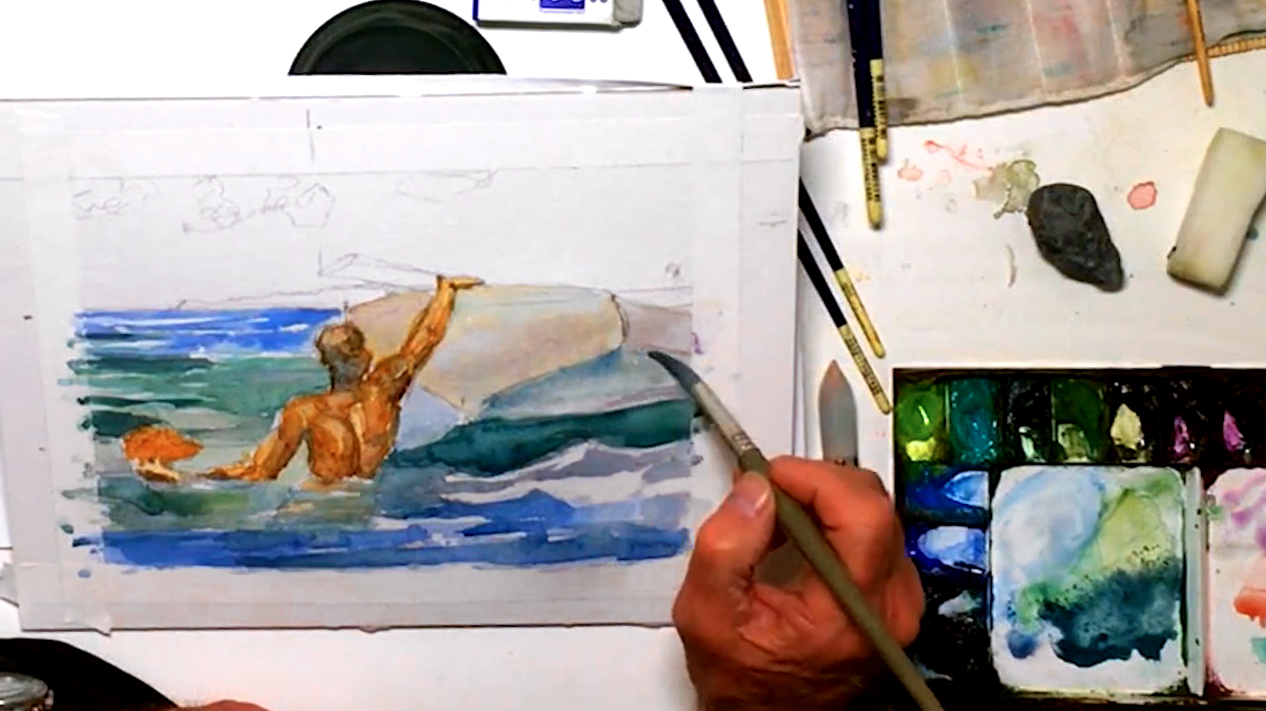 Let's continue to the boat itself. Even though it's white, it's still tinted with different hues due to the lighting and angles of each plane. So start by mixing Cadmium and Lemon Yellow, and water it down a lot before tinting the whole boat with this color. Next, dilute Cerulean Blue with a touch of Cobalt Violet Light, and add this tone to the face of the boat that's closest to the diver. For the boat's shadowed underside, dilute the turquoise (Viridian and Neutral Tint) mixture, as this shadow will take on some of the sea's tones. Touch in more Cobalt Violet Light for the boat's side, and make sure that overall, the underside should be the darkest plane.
Step 6: A "Wet-In-Wet" Sky And Sea Sponge
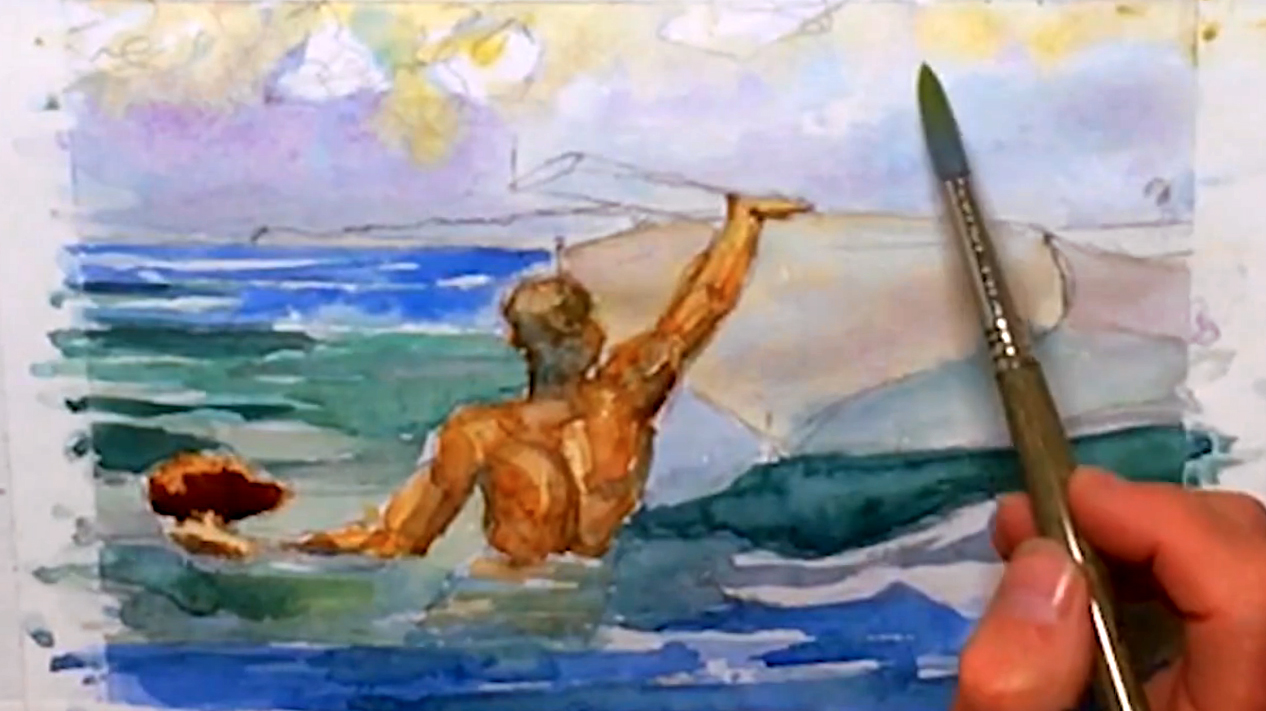 Next up in this painting study is working on the sponge and sky. Mix Burnt Sienna and Umber to paint the dark area on the sea sponge, taking care around the hand and highlights. While the shadow is wet, touch in Cobalt Blue Hue to the darkest areas. You can also change it up by switching to Permanent Mauve for a variation in hue. Doing this is called the "wet-in-wet" technique, which will produce softer edges and paint transitions. Focus on painting the sky next. Again, use the wet-in-wet technique here, so pre-wet the sky area with water before dropping in diluted Cerulean Blue. Avoid the clouds, but feel free to cover the land mass and oar, as you can paint over these areas later. To separate the sky and water a bit better, drop in Cobalt Violet Light as well, then a diluted Cadmium Yellow Deep for the area above the clouds. Lift any excess paint using a rag or paper towel, and for the best results, try not to overmix or overwork the sky.
Step 7: Warming Up The Mid-Tones
 Touch in Brilliant Orange to the sponge for a little more color in the highlights, then add some to the diver's mid-tones for a better contrast to the blues. Doing so will add more complementary areas in your painting study, and improve the overall look.
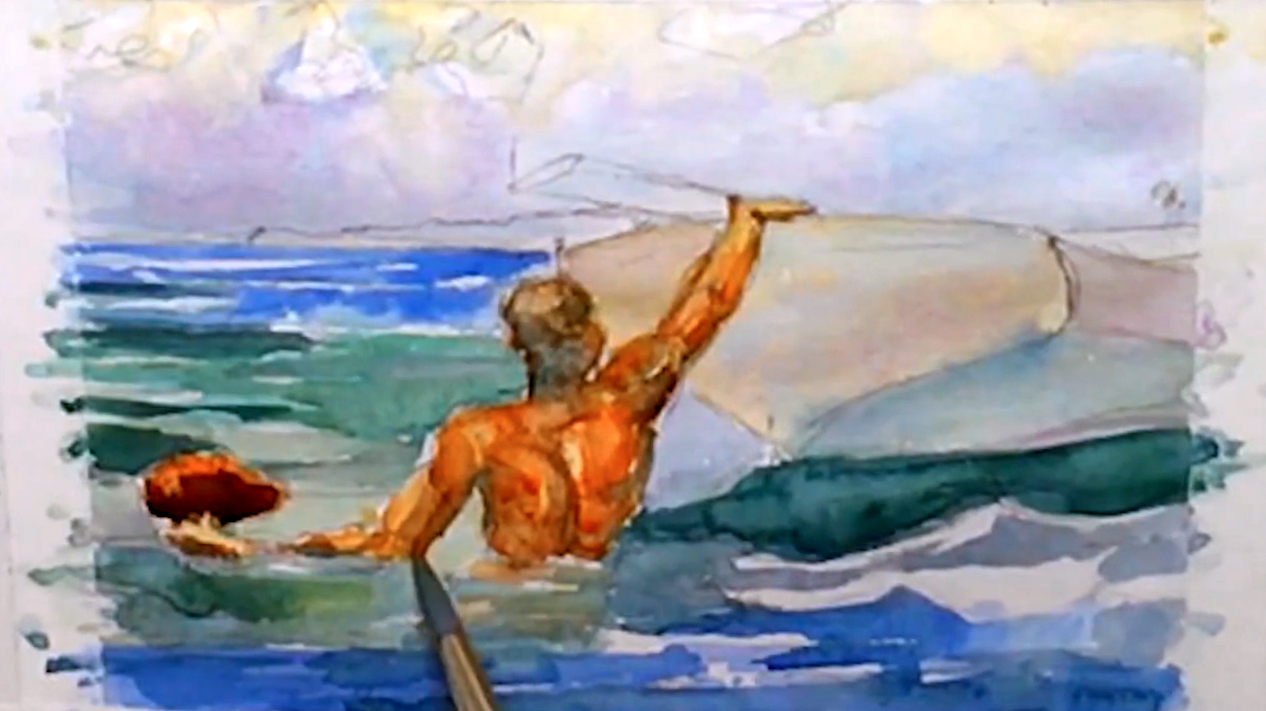
Step 8: A Dry Lifting Technique For Highlights
 Switch to the no. 0 round brush, and use it on the diver where you want to get some highlights back. Bill shows how to wet tiny areas such as the curve of the man's ear, then lift the paint out using a rag. While the paper won't be completely white, this is a good method for fixing parts where you may have accidentally painted over the highlights or made too dark. Before fixing the back of the neck using this lifting method, darken the shadows in the head and forehead area, mixing Burnt Sienna and French Ultramarine for contrast. Use the no. 1 round brush for this, and go around the highlights this time. Soften the edges so the shadows aren't too jarring, and paint the underarm and elbow too for extra emphasis.
Step 9: Painting A Distant Land And Details
 Switch to a no. 2 sable brush, then mix a diluted Burnt Sienna and Umber to paint the land mass in the distance. While it's wet, drop in the dark turquoise mix. Leave a thin white line between the water and island to keep the horizon line clear, and for the palm tree on the right, add Yellow Ochre to the dark green-blue mix on your palette. Be careful here, because you only get one shot at this! Drop in Oxide of Chromium as well to the island for a hint of plant life. For the oar, mix Burnt Umber and French Ultramarine for a dark brown. Touch in Neutral Tint for the darker underside.
Step 10: Finishing Shadows And A Signature
 It's time to add the finishing touches to your painting study. First, there's a cast shadow from the diver's forearm on the boat, so use a diluted gray and brown mixture to paint that in. Soften the left side of this shadow, then use the same color to darken the sea area between the man and boat. Next, add some of your brown mixture in the sea area to the left of the diver, and glaze over the same area with a diluted version so the brown doesn't look too out of place. Lastly, touch up any parts where the paints have bled too much, or add or fix any shadows to help improve the overall feeling of your painting. When you're done and the paint is dry, feel free to erase some of the pencil lines in the clouds. You can also use a small rigger brush to sign your painting! Remember to credit the original artist with an "a la Winslow Homer", as this painting is just a study. Hopefully, you've learned a lot from this deceptively simple exercise, and apply what you've learned to your future paintings!


