Capture the likeness of the human face in this beginner's guide to a watercolor portrait! Watercolorist William "Bill" Dunn shows how to get started on this popular subject, and breaks it down to the basics through painting a picture of his son. Want to watch the video version? The full tutorial is available to members of our Beeblys WatercolorPainting.com.
Materials Used In This Watercolor Class:
- Reference picture of Bill's son (or any portrait of your choosing)
- ¼ sheet of Arches cold press watercolor paper (140lb, size 11″ x 15″)
- Scrap paper
- Pentel Graphgear 1000 automatic drafting pencil, 0.7mm lead size with 2B lead
- 1" Artist's or masking tape
- Painting palette for watercolor paints
- A container of water
- Paper towels or a rag
- A piece of ¼" plywood larger than 12" x 16", treated on both sides with clear gesso and sanded down
- A tabletop easel or a box to prop your painting on
- A spray bottle with clean water
Paints (Holbein Artists' Watercolors)
- Cadmium Red Purple
- Permanent Alizarin Crimson
- Cobalt Violet Light (a.k.a. "Lavender")
- Olive Green
- Cobhttps://amzn.to/3kxmEDcalt Blue Hue
- Yellow Ochre
- Burnt Sienna
- Burnt Umber
- Indigo
- Neutral Tint
Winsor & Newton's Professional Watercolors
- Permanent Mauve (or Sennelier's Cobalt Violet Deep Hue watercolor paint)
- French Ultramarine
Brushes
- Neef Rigger Supreme Taklon Series: Long handle rigger brush (no. 8)
- Neef Rigger Supreme Taklon Series: Long handle rigger brush (no. 10)
- Escoda Perla Joseph Zbukvic Series: Round brush (no. 8)
- Escoda Perla Joseph Zbukvic Series: Round brush (no. 12)
- Escoda Perla Joseph Zbukvic Series: Round brush (no. 20)
- Winsor & Newton's Series 7 Kolinsky Sable: Round brush (no. 1)
Step 1: The "Art Director's Head"
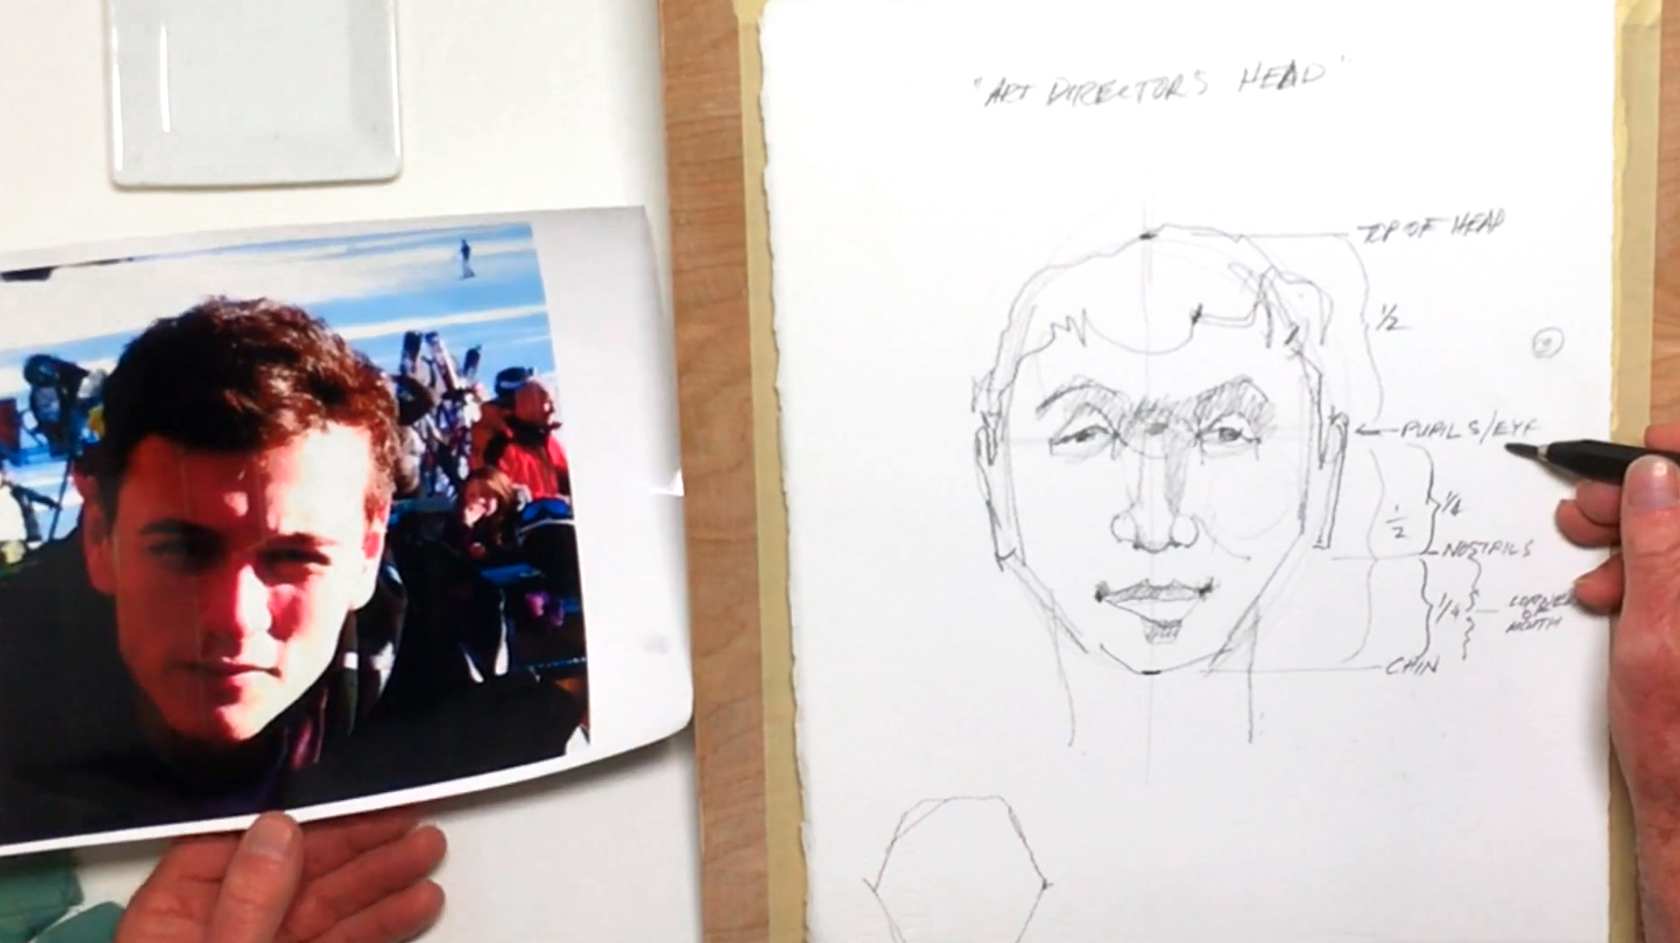 Welcome to Portraiture for Beginners! First things first: Bill introduces the "Art Director's Head", which boils down the average human head into general proportions. You can follow along for practice as well, since getting these measurements right will help you draw any face in the future. To start off, draw an oval shape with a vertical and horizontal line down the middle. Mark the top and bottom of the head, then add two dots along the horizontal line for the pupils. These dots should be about equidistant along the whole width of the face. In the bottom half of the head, mark off the halfway point in this section for the nostrils' position. Halfway again from the nostrils to the bottom of the chin is where the mouth should be. Going to the top half, draw the eyes around the pupils, and make the eyelids cover about half of the eyeballs. Add eyebrows along the top, then outline the nose's position. Ears on the sides of the head go from the pupil's level to about the bottom of the nose, and add hair to cover the top part of the head. This is your basic "Art Director's Head", which can be adjusted to match the specific features of your portrait drawing. Nonetheless, it gives you a good idea about facial proportions, and helps you think in terms of a series of planes and contours. After doing this, you can move on to sketching a real portrait. Below is a close-up of the "Art Director's Head":
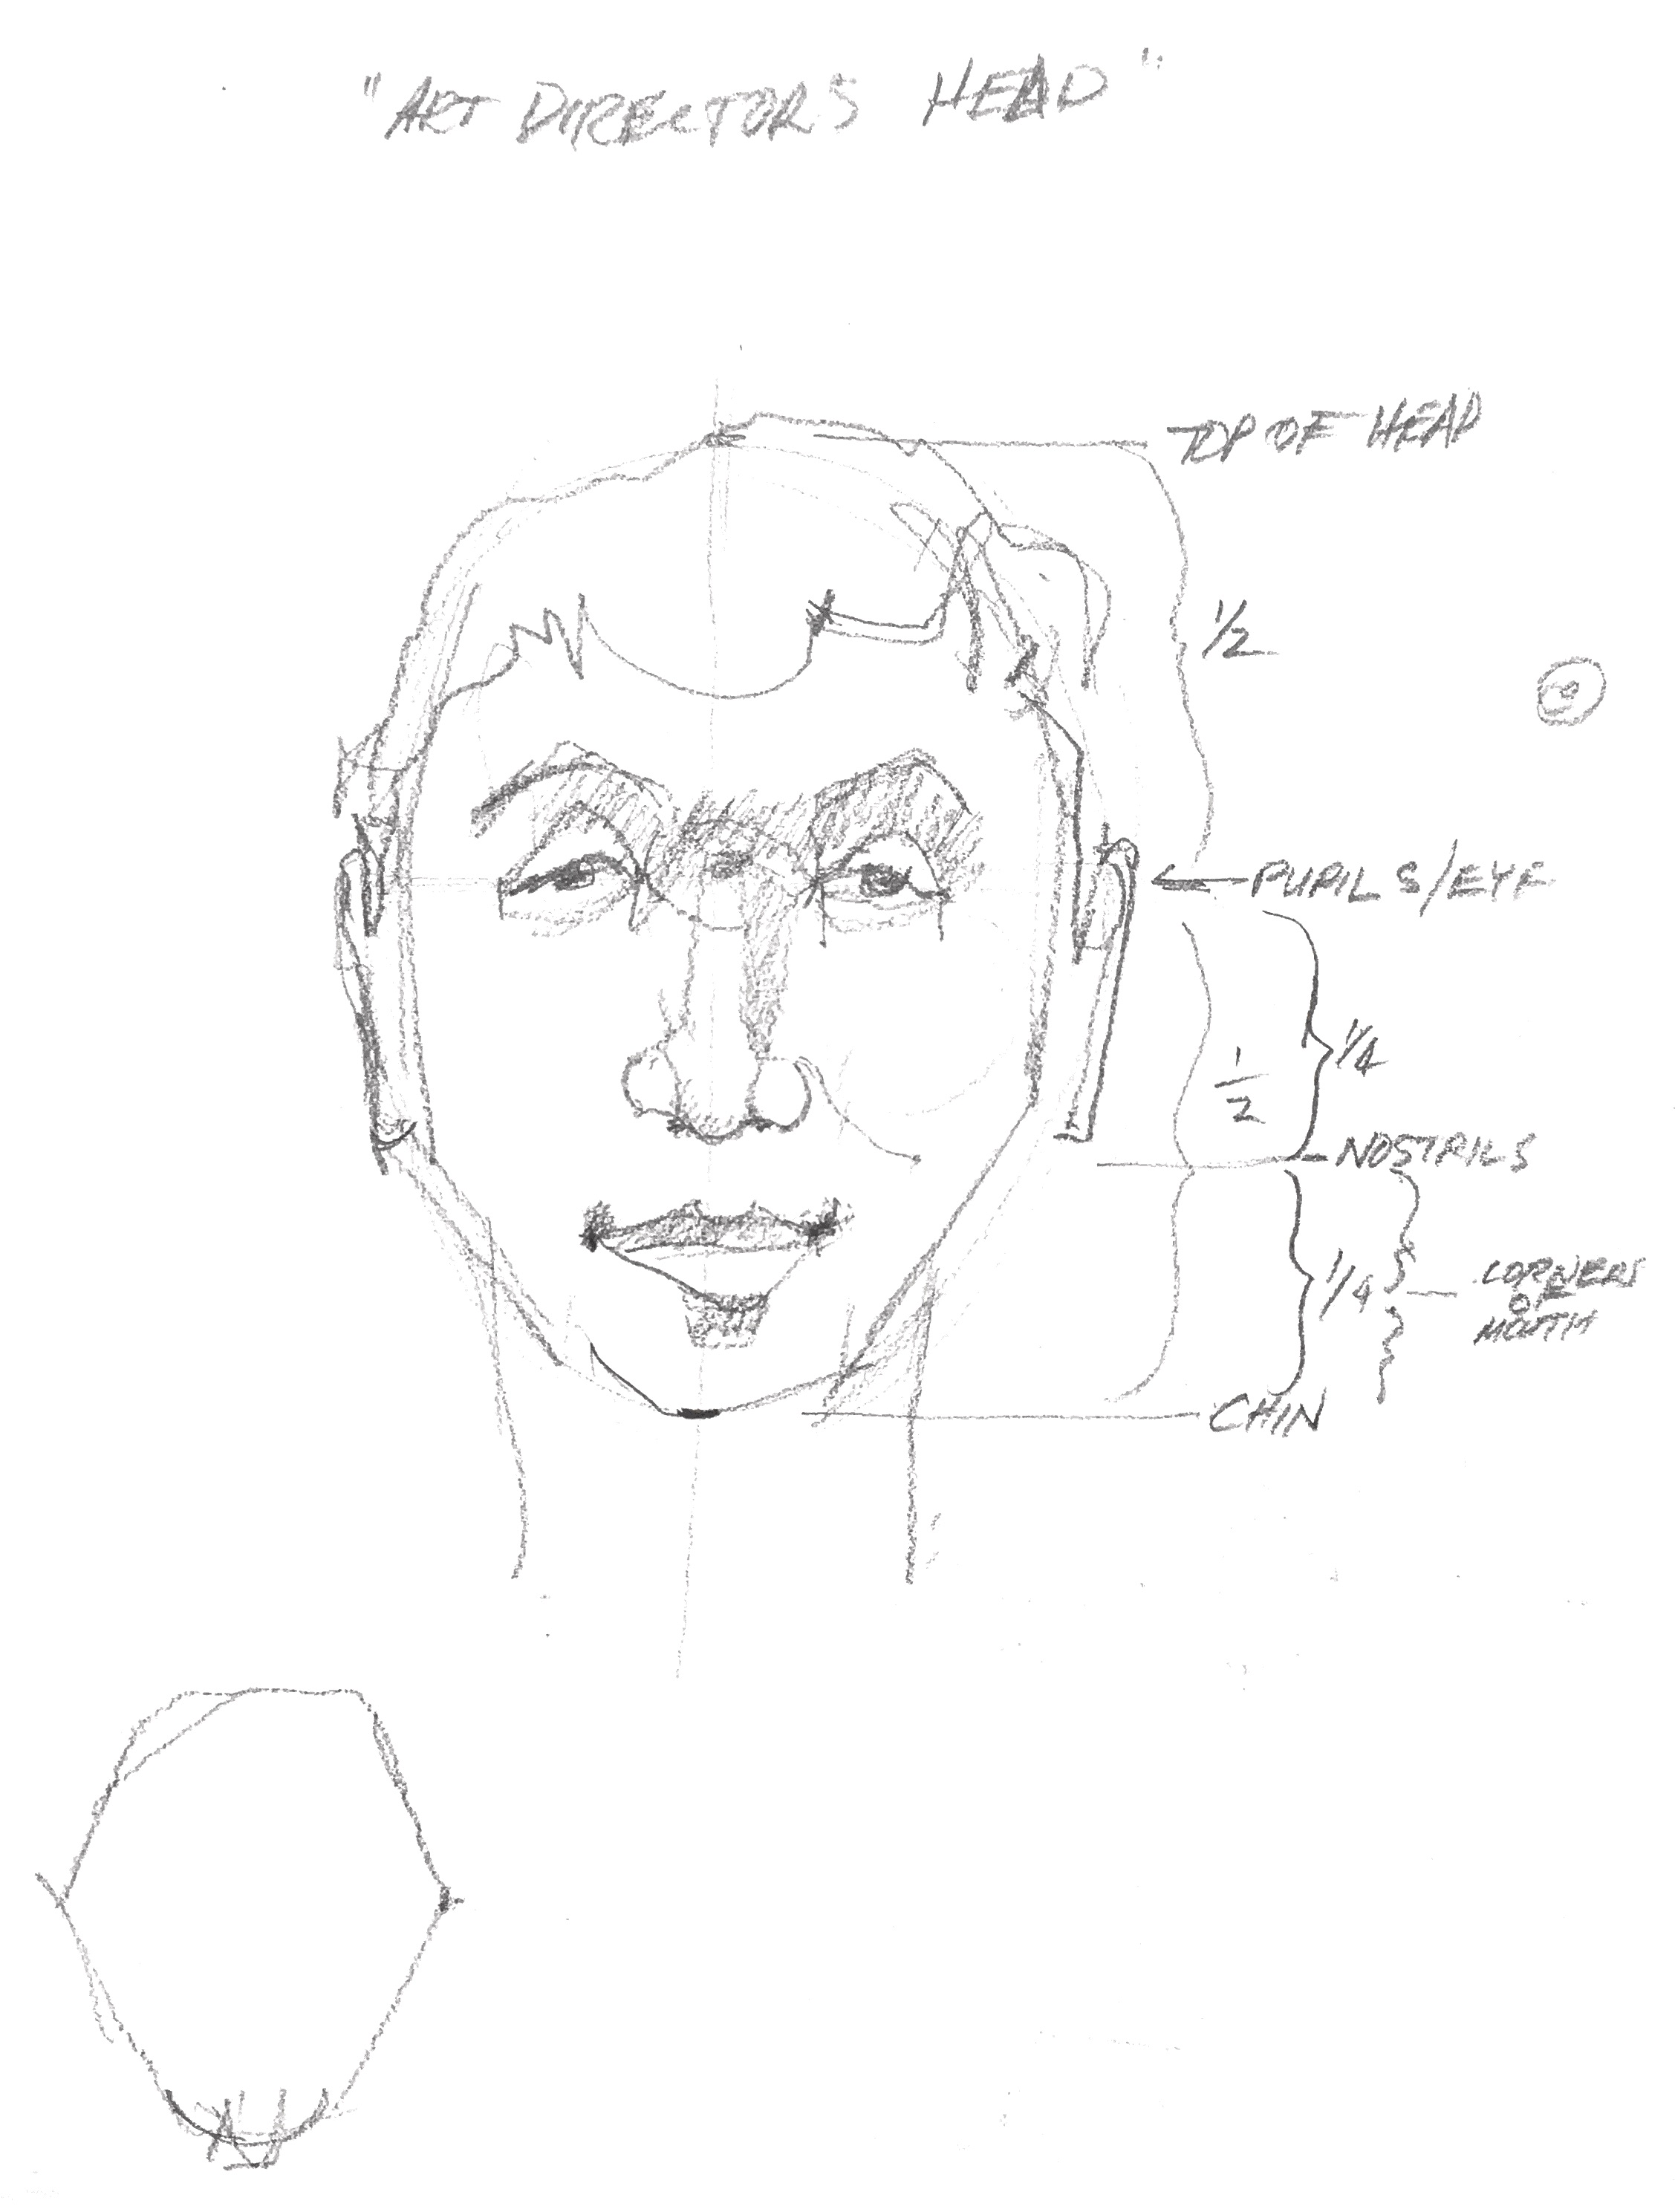
Step 2: Proportions Of A Portrait
 Prepare your watercolor paper by using masking tape to tape the edges to a piece of plywood, since this will help keep your paper as flat as possible. It also creates a clean border for framing purposes later. Taking what you learned in the previous step, lightly sketch your portrait onto your paper. Adjust the proportions and shapes of the facial features according to your reference photo, and for hair, draw clusters instead of individual strands. Furthermore, keep your sketch simple, but be as accurate as possible. For the background and clothes, you can always change them so the focus remains on the face. While drawing, don't forget to block in the main shadow shapes on the face as well! This will help you separate the different values on the face, especially if your reference photo has such a high contrast like Bill's photo of his son. Below is a close-up of Bill's sketch:
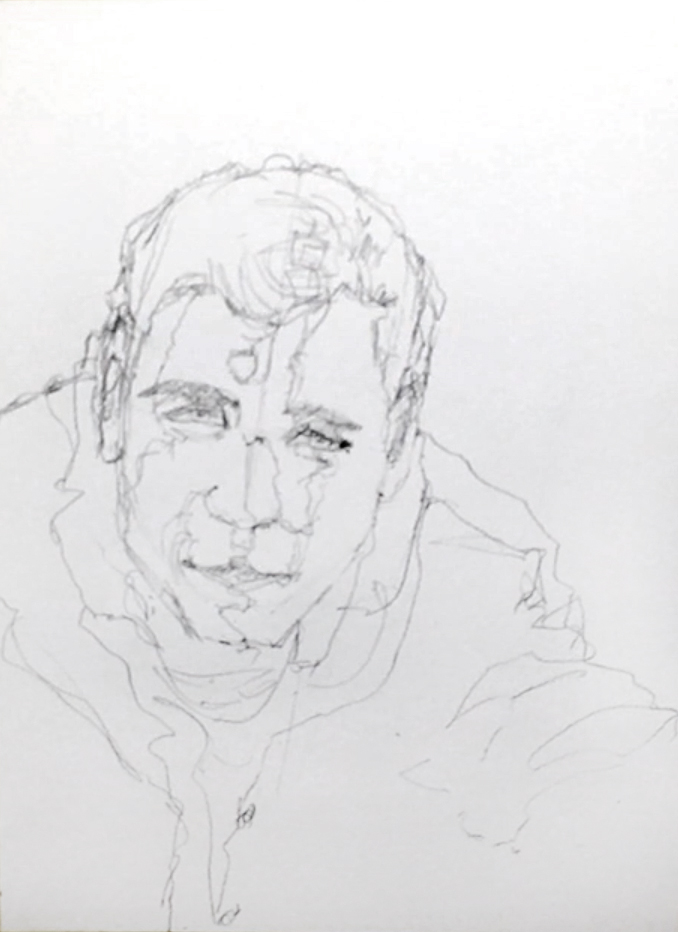
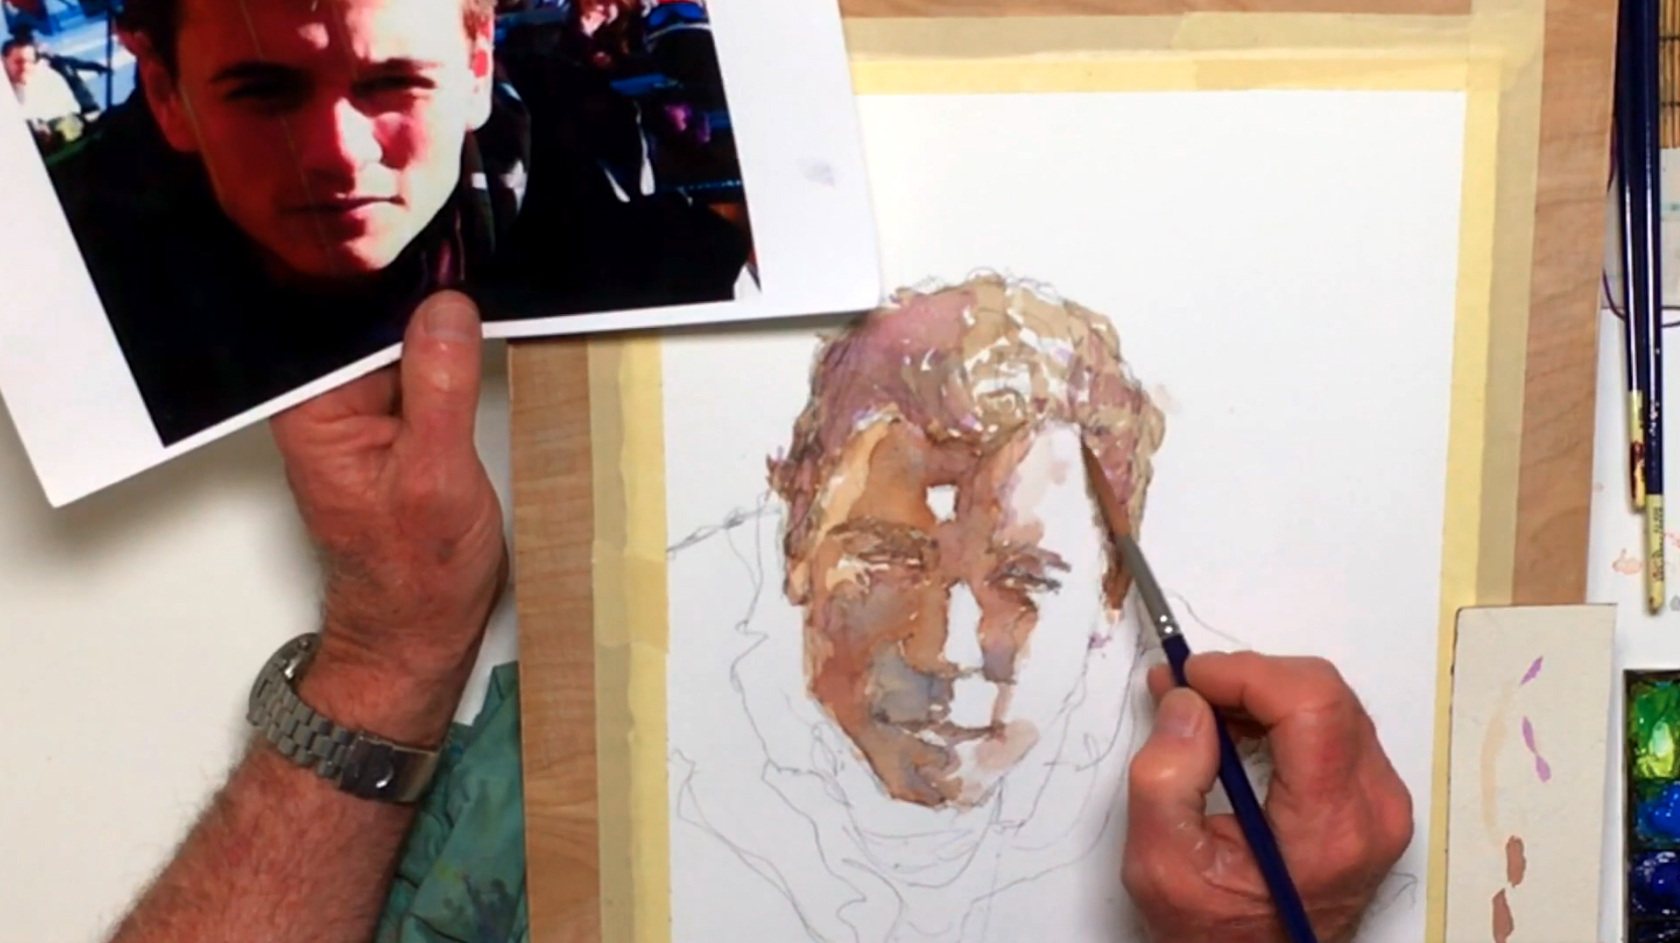
Step 3: Mixing Skin Tone For A Watercolor Portrait
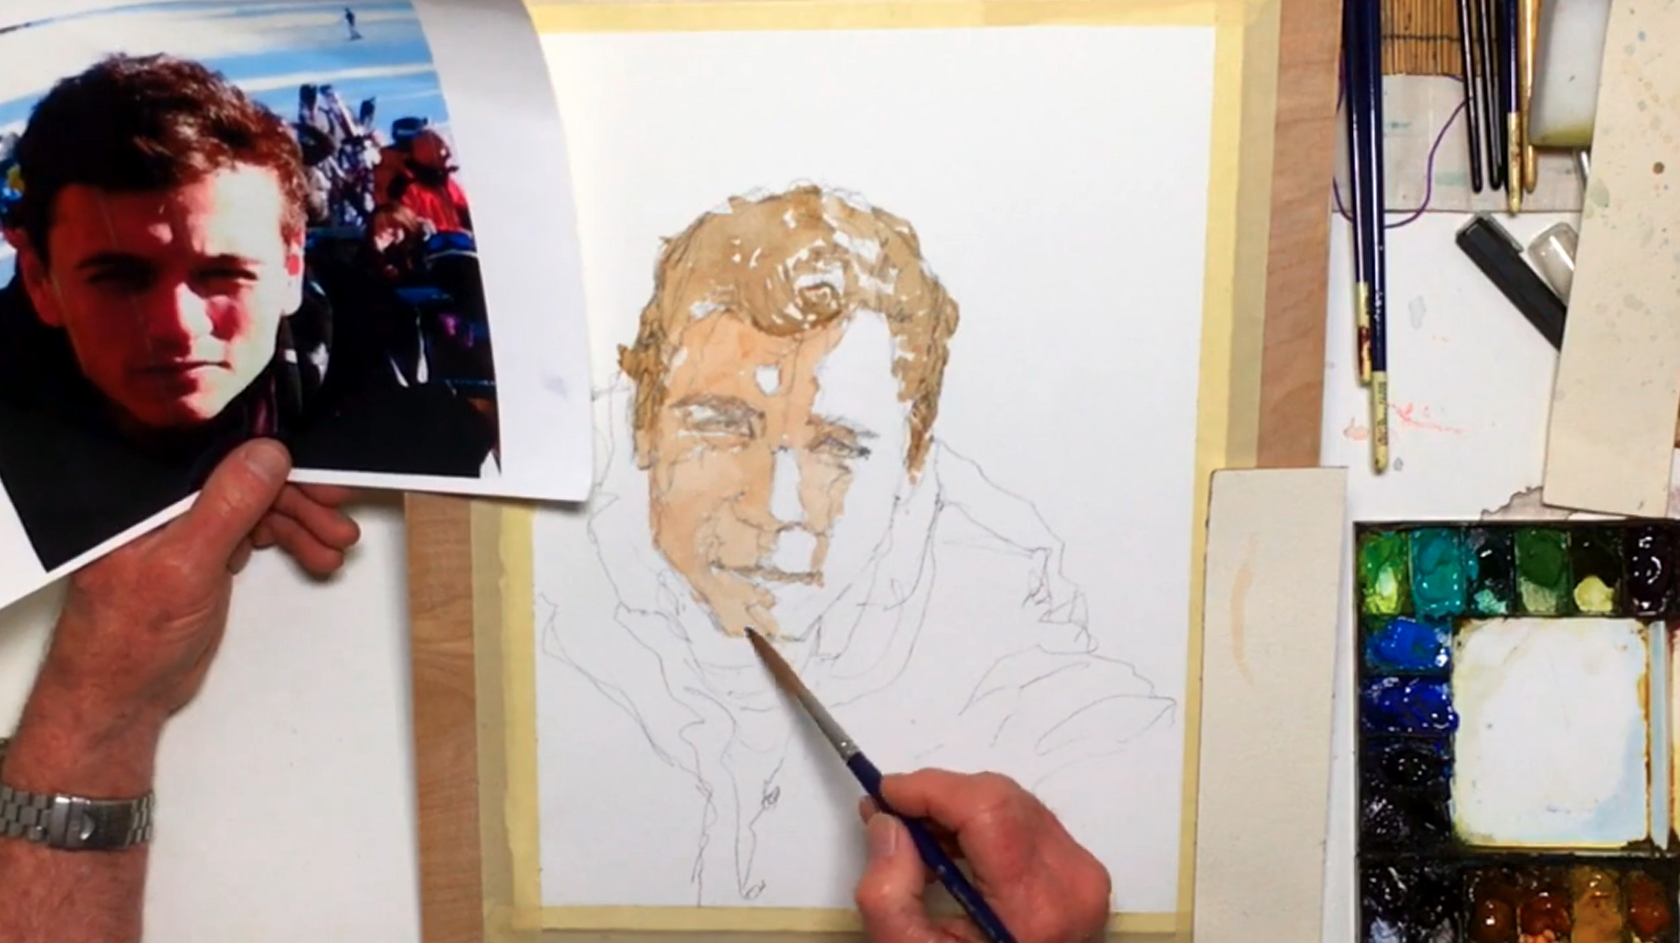 About 10 minutes before painting, make sure you soften your paints by spraying some clean water on them. This will make them easier to pick up. While you wait, you can plan out your concept and composition, especially in terms of color and whether you want hard or soft edges for your watercolor portrait. Begin with a no. 10 rigger brush, and mix a base skin tone using Yellow Ochre and a little Cadmium Red Purple. Add Burnt Sienna and Umber as well, and touch in some French Ultramarine. Keep checking the values (i.e. light vs dark) and colors in the reference picture, and adjust them as necessary. You can test your colors on some scrap paper before using them. With your base skin tone, paint the face using the "wet-on-dry" technique. Avoid any white highlights, but cover anything from mid-tones to shadows on the face. For the hair, mix Burnt Umber and Cobalt Blue Hue for a medium brown, and while painting, try to paint in the direction of the curls. Again, it's fine to leave white gaps for highlights.
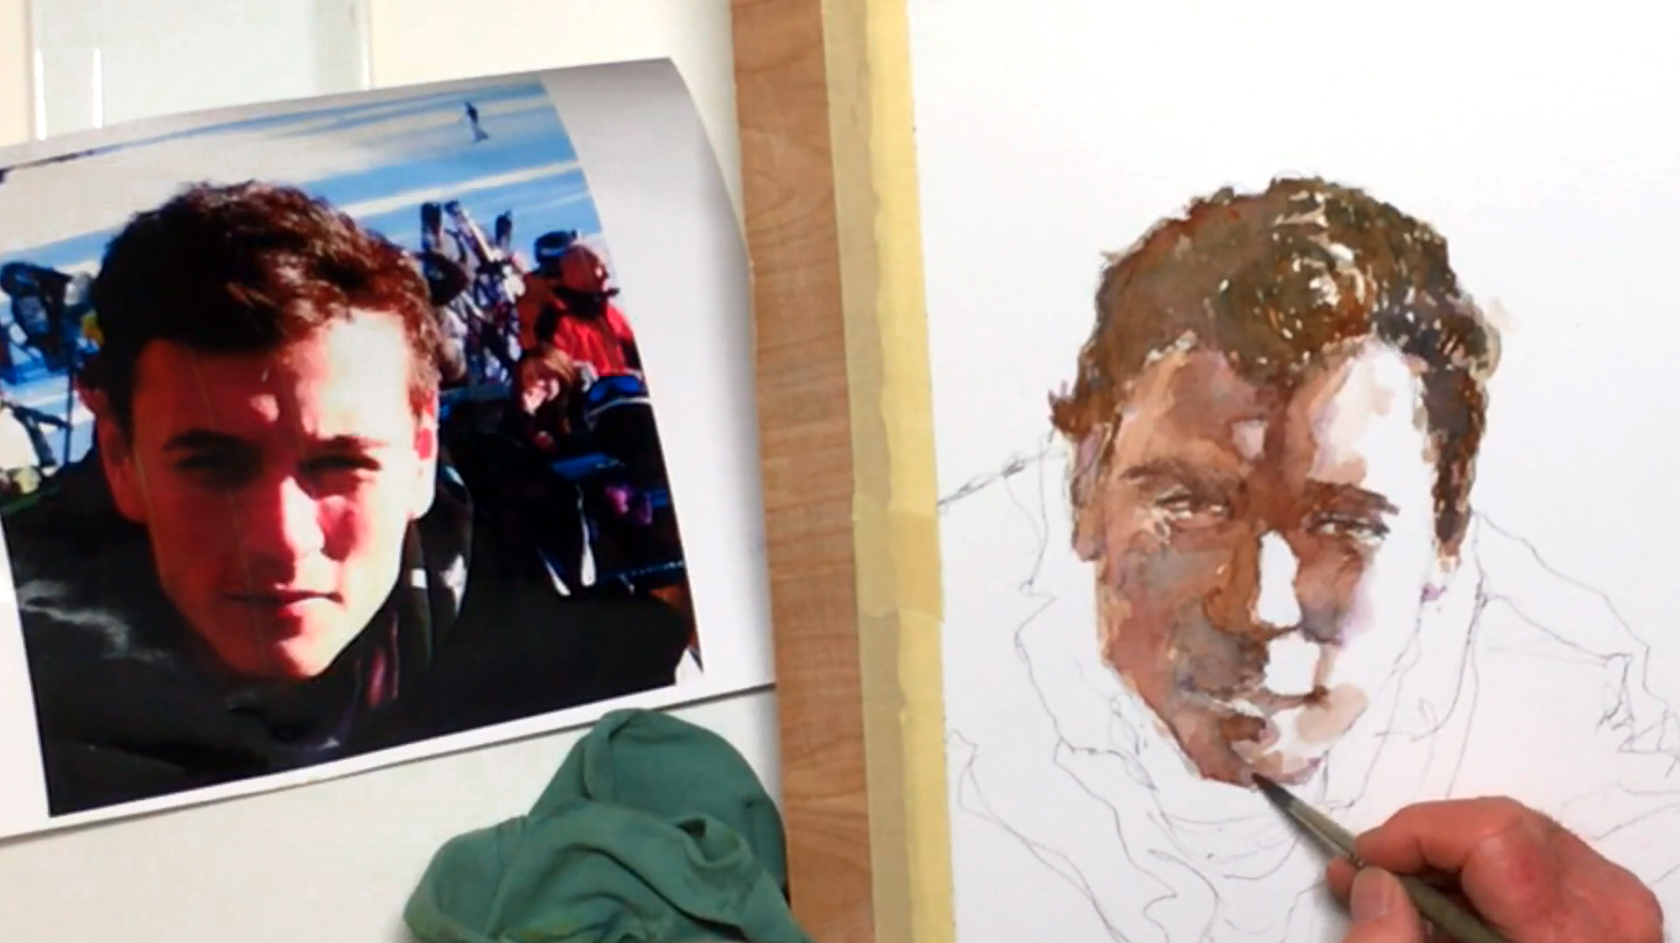
Step 4: Darker Skin Tones And Painting Hair
 For a darker skin tone, mix the previous colors, but add Cobalt Blue Hue and Permanent Alizarin Crimson. Layer this color into the mid to dark tones of the face. If you find the edges of your painted shapes are too hard, you can soften them by touching a wet clean brush next to the edge you want to soften. Most of all, remember to keep track of your wet and dry areas! For even darker tones, layer a diluted Cobalt Blue and Violet Light into the damp mid-tones. You can do the same to the hair area as well for the more subtle value changes.
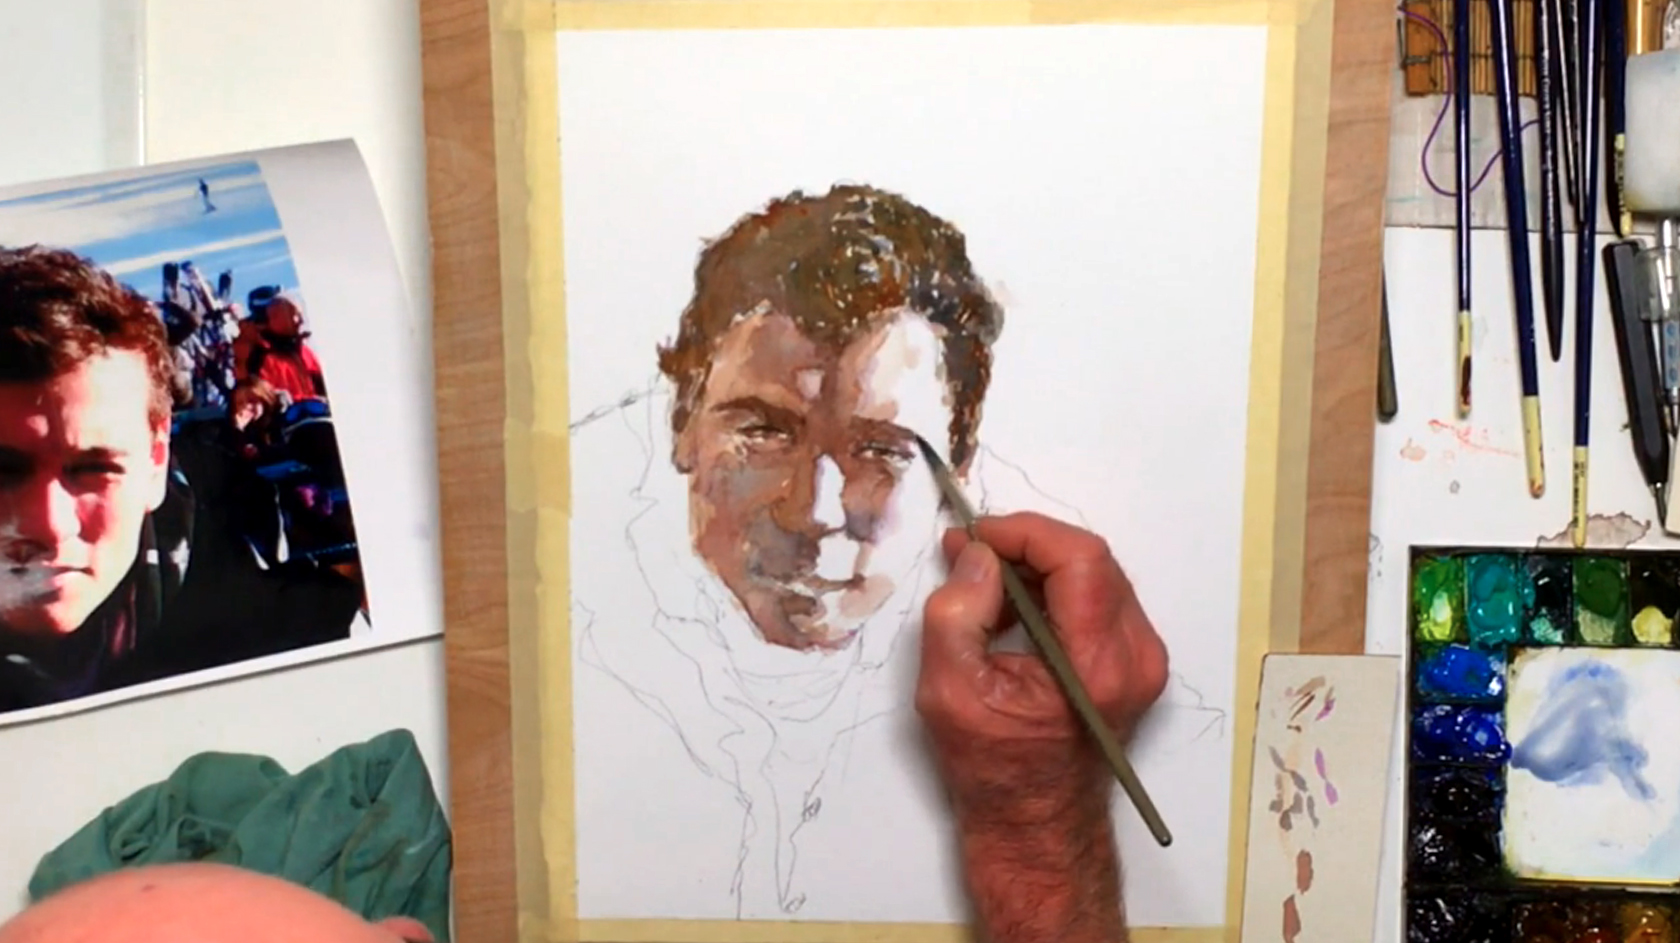
Step 5: Shadows And Facial Features
 To add even more contrast, mix Burnt Umber, French Ultramarine, Cobalt Blue, and Cadmium Red Purple for a dark brown, then apply to the hair's darker shadows. You can paint a few individual hairs here, and taper your brushstrokes for the best effect. For warmer tones, add a little Burnt Sienna to balance out the cool colors. Next, switch to the no. 8 round brush, then use it to mix Burnt Sienna and Permanent Mauve, with a touch of Ultramarine and Cobalt Blue. Use this darker brown to paint details in the eye area, the eyebrows, ears, lips, and nose. You can add more Cobalt Blue or Violet Light into the previous mixture to touch up the shadow areas, while toning down the highlights as necessary by giving it a diluted wash. In this step, try to make your values more descriptive, and add some contouring to hint at the facial muscles in this watercolor portrait.
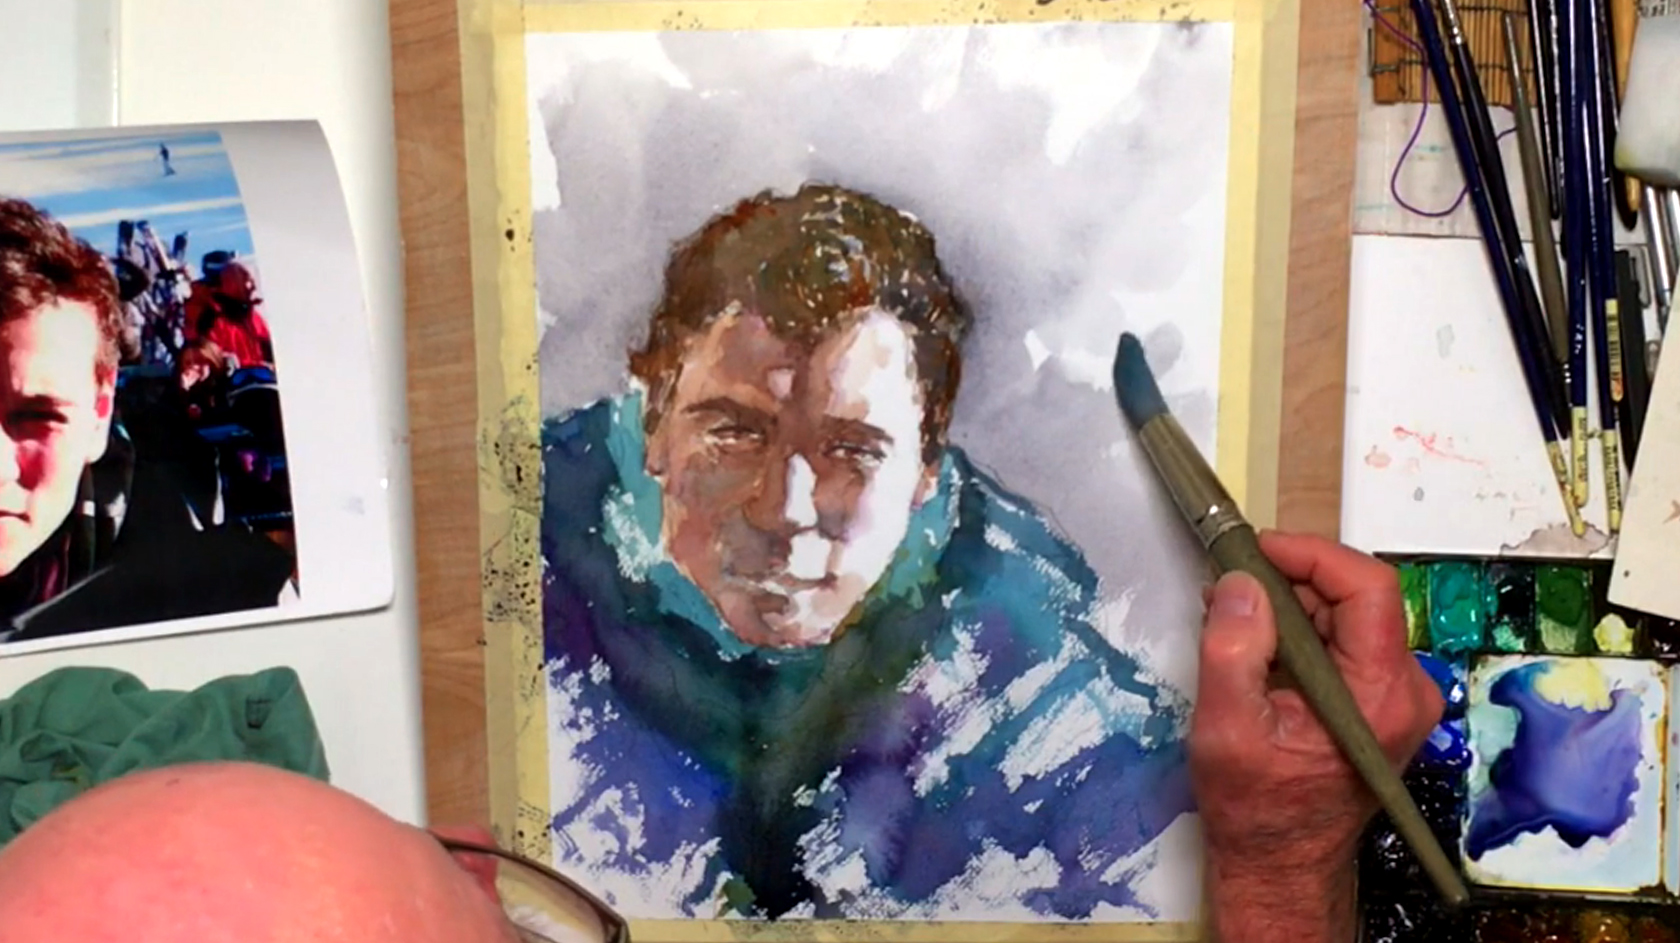
Step 6: Adjusting Facial Values
 For some color variation, add a light wash of Cobalt Violet Light to the bridge of the nose and to the edges of the ears. Adding Cobalt Blue near the highlights in the hair will create more interest in your watercolor portrait as well. Take this time to adjust the values throughout the whole face, and darken the pupils and eyes to draw the focus to the portrait's expression.
Step 7: Painting Clothing And Color Balance
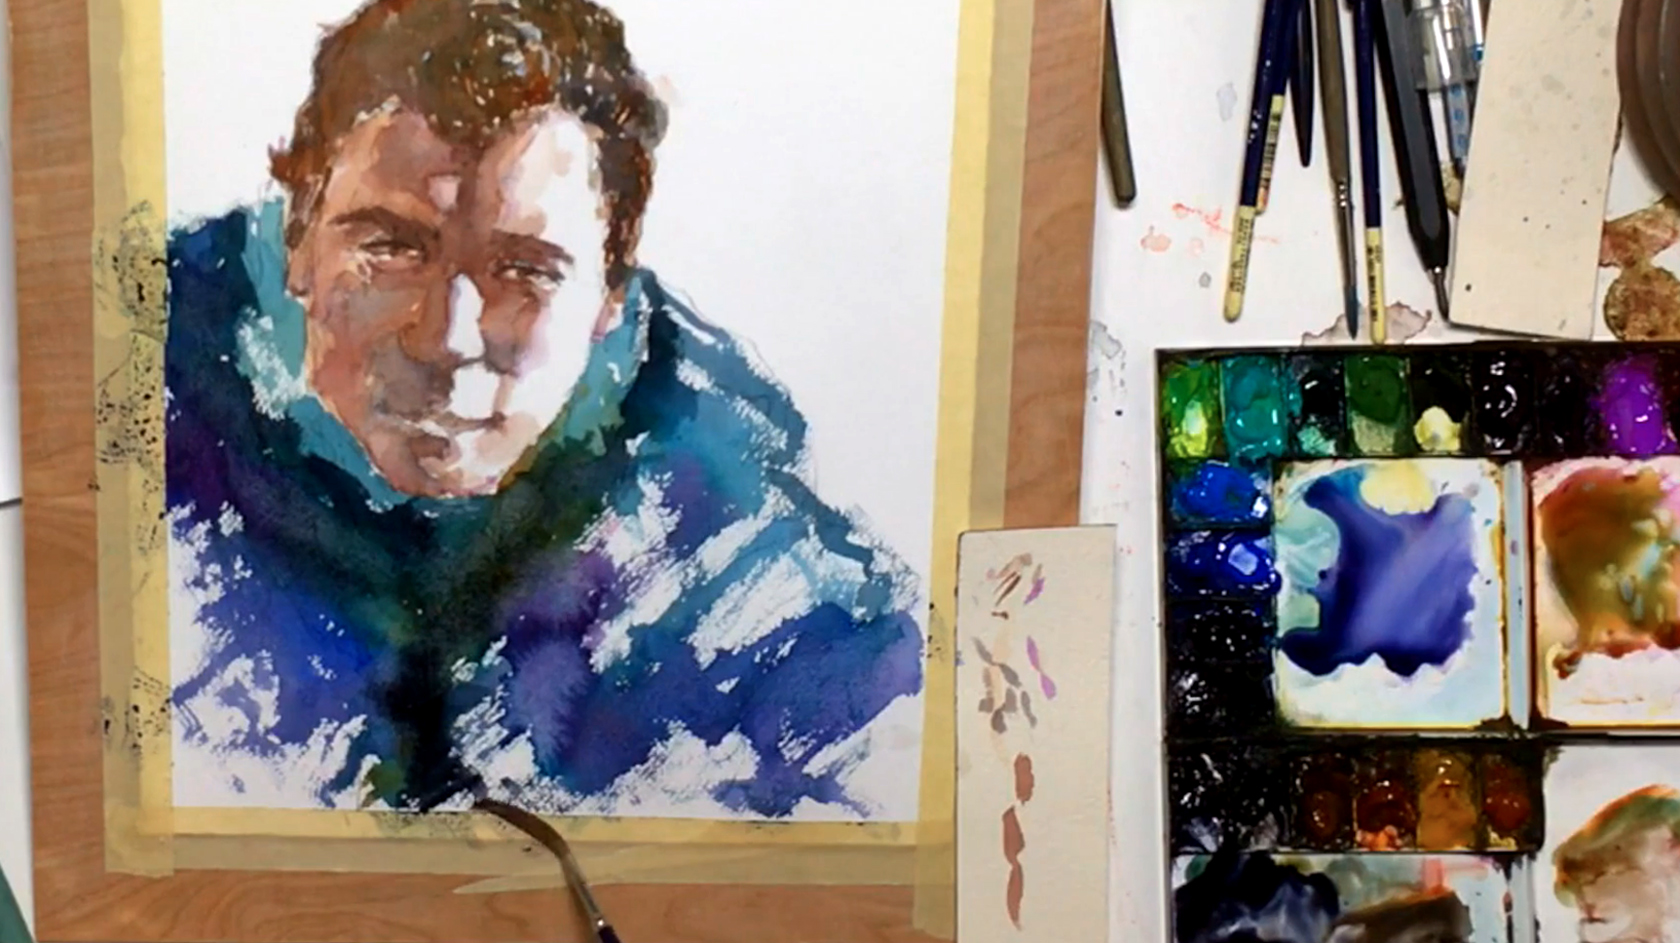 Now that the face is done, you can start planning for the background and clothing. Bill suggests placing warm colors next to cool colors and vice versa, since this is what will help create color harmony and balance for the whole watercolor portrait painting. So because the face has mostly warm colors, Bill changes the clothes to be cool-colored. With the no. 8 rigger brush, Bill starts with a mix of cool and warmer cool colors, but quickly changes to French Ultramarine for a stronger base layer. He paints messily here, as he wants to balance out the tidier brushstrokes used for the face. Like Bill, you also don't have to cover up all the white, and to get the same kind of rough texture, just keep painting until almost all the paint is gone from your paintbrush. This is the "dry-on-dry" technique, which is good for creating textural depth and interest. Drop in some Indigo for shadows, and add Permanent Mauve later for the darker folds and shadows in the clothing. Use Cobalt Blue to brighten your mixture, and add Neutral Tint for variation. Try your best to rely on your artistic instincts to help guide your color changes and placements!
Step 8: Adding A Basic Background
 As the painting nears completion, remember to keep stepping back to check the overall look of your watercolor portrait painting. In this instance, Bill thinks about what color to use for the background, and fixes the face by smoothing out some shadows with a wet brush. Bill goes with a basic light gray background in the end, using his largest round brush (no. 20) and diluting his Neutral Tint before painting the white space behind his son. He uses the "wet-on-dry" technique again, but paints quickly to prevent the paint from streaking or puddling. He suggests working some of the background color into the hair since this will tie the whole watercolor portrait together, and like the clothing, you don't have to cover all the white areas. As a result, the face will remain the main focus of your painting.
Step 9: Balancing Final Values And Finishing Touches
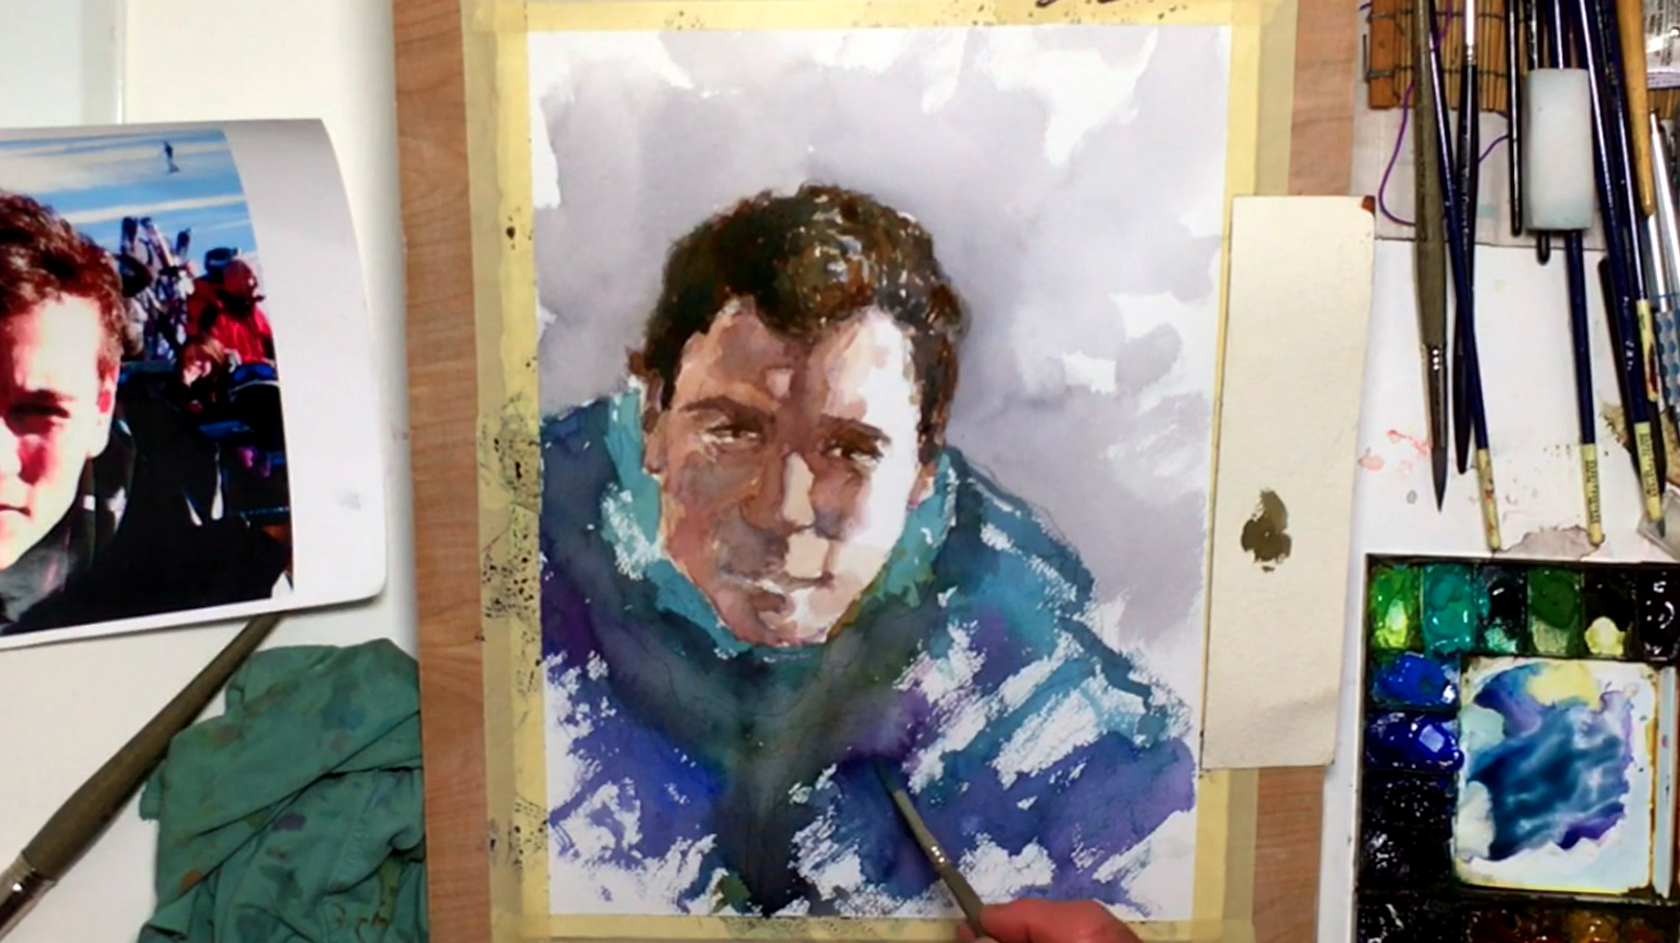 Change to the no. 12 round brush, and mix a more saturated Burnt Sienna with some Neutral Tint and French Ultramarine for a very dark brown. Add another layer to the hair to bring it towards the foreground, and drop in pure French Ultramarine in the shadowed side. Don't worry - the wet paints will mix on your paper, so the hair won't end up looking blue. Using the same method, darken the pupils and eye area for a more striking portrait. Add Yellow Ochre and Cadmium Red Purple to a little of the brown mixture, and dilute it before adding a light wash to the white highlights on the nose, lips, and part of the side of the face. This helps tone down the harshness of the white, and gives more of a transition between light and shadow in your watercolor portrait painting. Do any finishing touches as necessary, and cover any backwashes that may be seen. Finally, you can sign your painting using the small no. 1 round brush before leaving it to dry and taking off the masking tape. Feel free to frame it, or keep practicing for your next portrait painting!


