Learn to paint a pair of luscious lips as demonstrated by Kelly Eddington. Thanks Kelly for the helpful tutorial!
Materials Used:
- HB pencil
- Kneaded eraser
- A sheet of Arches cold press 140lb watercolor paper (7" x 5")
- Kraft paper tape (width 1")
- Painting palette for watercolor paints
- A container of water
- Paper towel
- Masking fluid
- Masonite board (at least 8" x 6") (optional)
- Estee Lauder All-Day Lipstick in Rich and Rosy (optional)
Paints
- Old Holland Classic Watercolors: Cadmium Red Light
- Alizarin Crimson
- Cadmium Yellow Medium
- Cadmium Yellow Extra Deep
- Parisian (Prussian) Blue Extra
- Dioxazine Mauve
- Burnt Sienna
- Holbein Artist Materials Watercolors: Opera
- Da Vinci Artists' Watercolors: Iridescent Napthol Red (optional)
Brushes
- Sax: Copper acrylic wooden handle flat brush (size 10)
- Royal: Soft grip golden taklon oval wash brush
- Loew Cornell American Painter (4000 Series): Short handle round brush (size 6)
- Loew Cornell American Painter (4000 Series): Short handle round brush (size 2)
Step 1: Prepping And Sketching
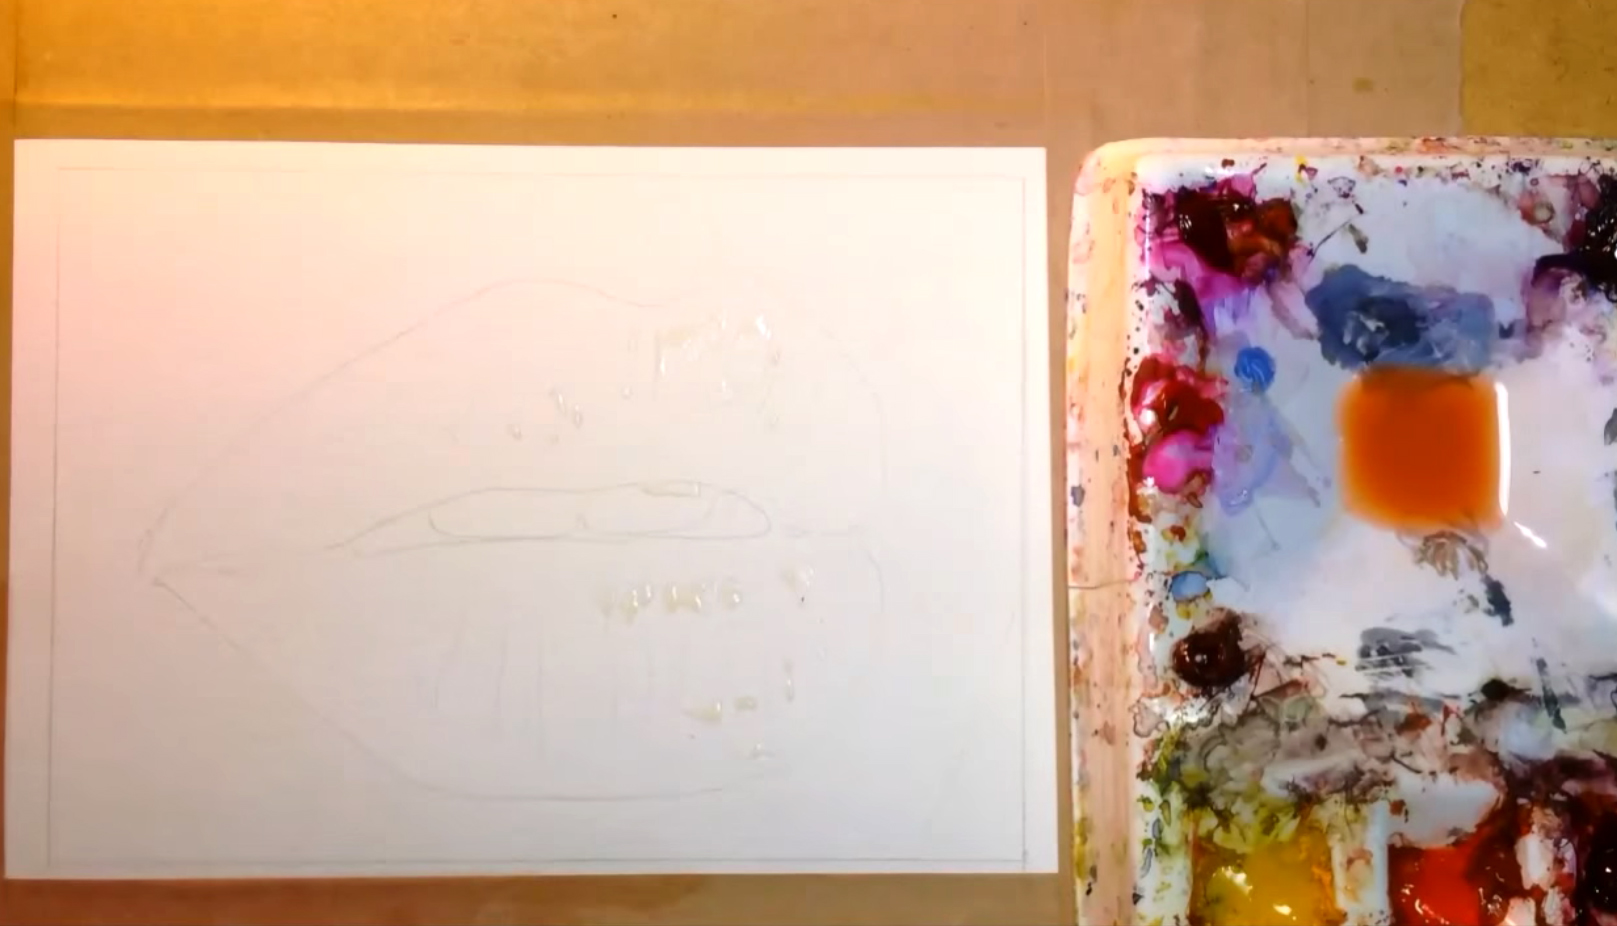 On the sheet of Arches 7" x 5" watercolor paper, lightly sketch a pair of lips and some teeth. It can be a picture of your own or someone else's, and if you want, you can put on the lipstick before taking a picture (or just use the color for reference later). When you're done, tape it to the Masonite board with the masking tape. If you don't have a wooden board, you can tape the paper to a hard surface which you don't mind getting paint on. Then, block in the white highlights on the lips with masking fluid. Let the fluid dry completely before proceeding.
Step 2: Painting The First Layer Of Skin Using The Wet-In-Wet Technique
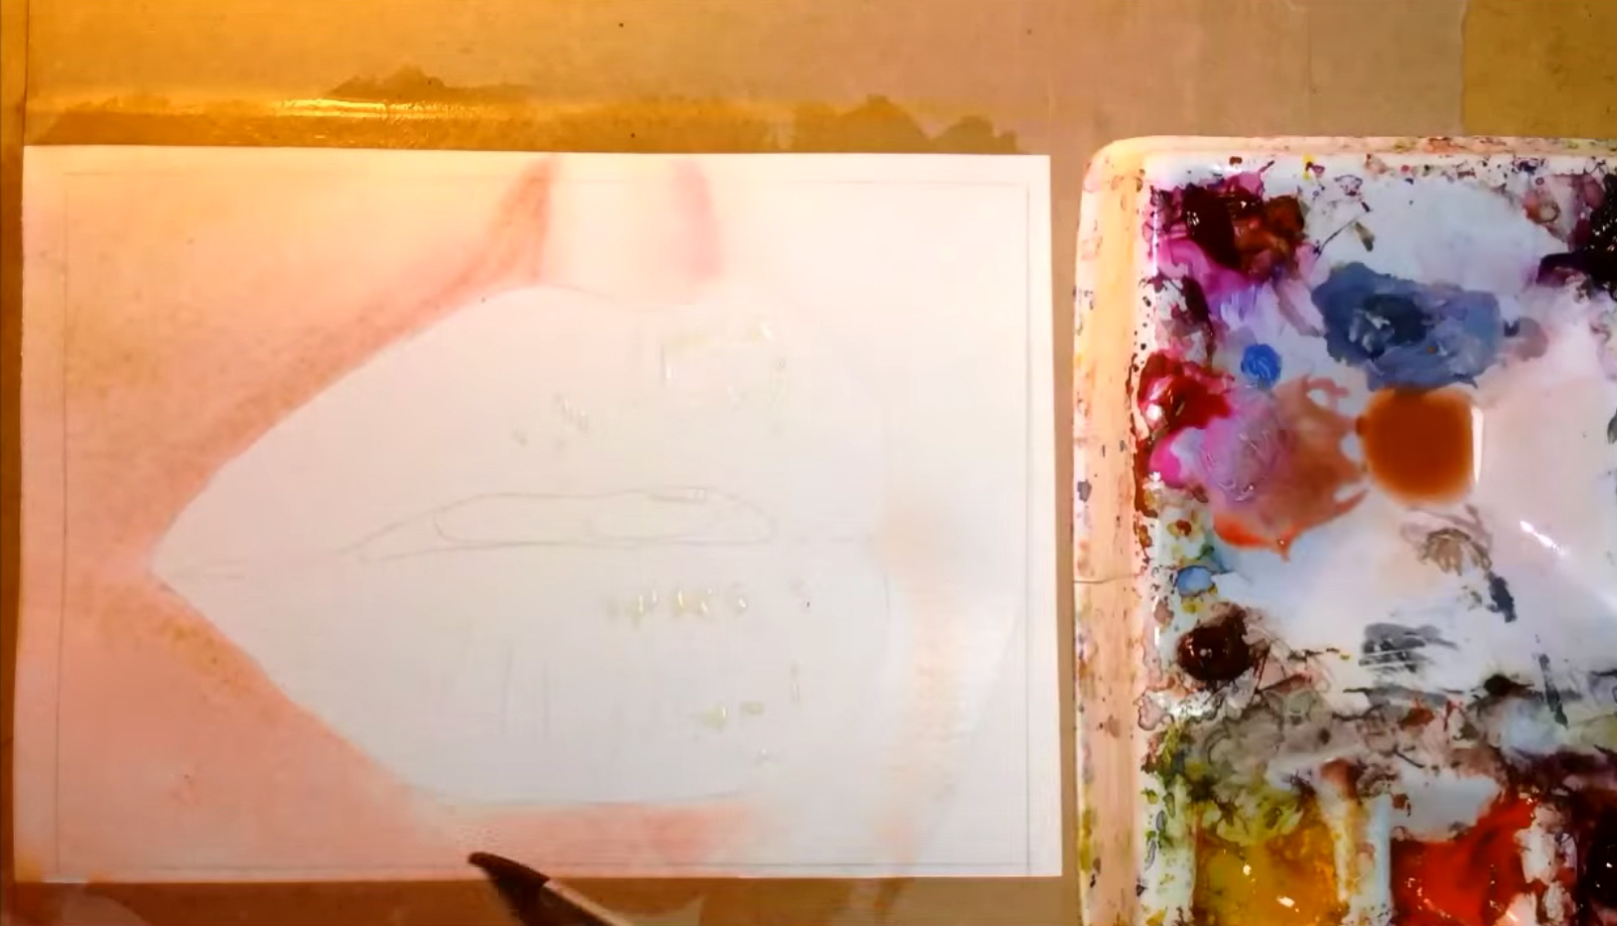 Prep your paints: get a light orange by mixing Cadmium Red Light and Yellow Medium, and have the yellow and some Dioxazine Mauve to mix in later. Wet the surrounding skin area with clean water and the flat brush (size 10), then using the wet-on-wet technique, paint in a wash using the orange mix so it appears as a light peach. Leave the right side of the mouth white for contrast, and the middle "valley" where the philtrum is (i.e. the area between the lips and the nose). Darken the shadows gradually by adding a touch of Dioxazine Mauve and Cadmium Yellow Medium, switching to the size 6 round brush when painting the ridges underneath where the nose should be.
Step 3: Painting The Teeth
 Mix a lot of water with the Parisian Blue, then paint the teeth with the wet-on-wet technique. Leave a little white for highlights, but since the lips are only slightly parted, most of the teeth should be in shadow. Drop a little Alizarin Crimson and Dioxazine Mauve in the darkest areas, as the cast shadow on the teeth (from the lips) will reflect a little of the lips's color.
Step 4: Full Red Lips
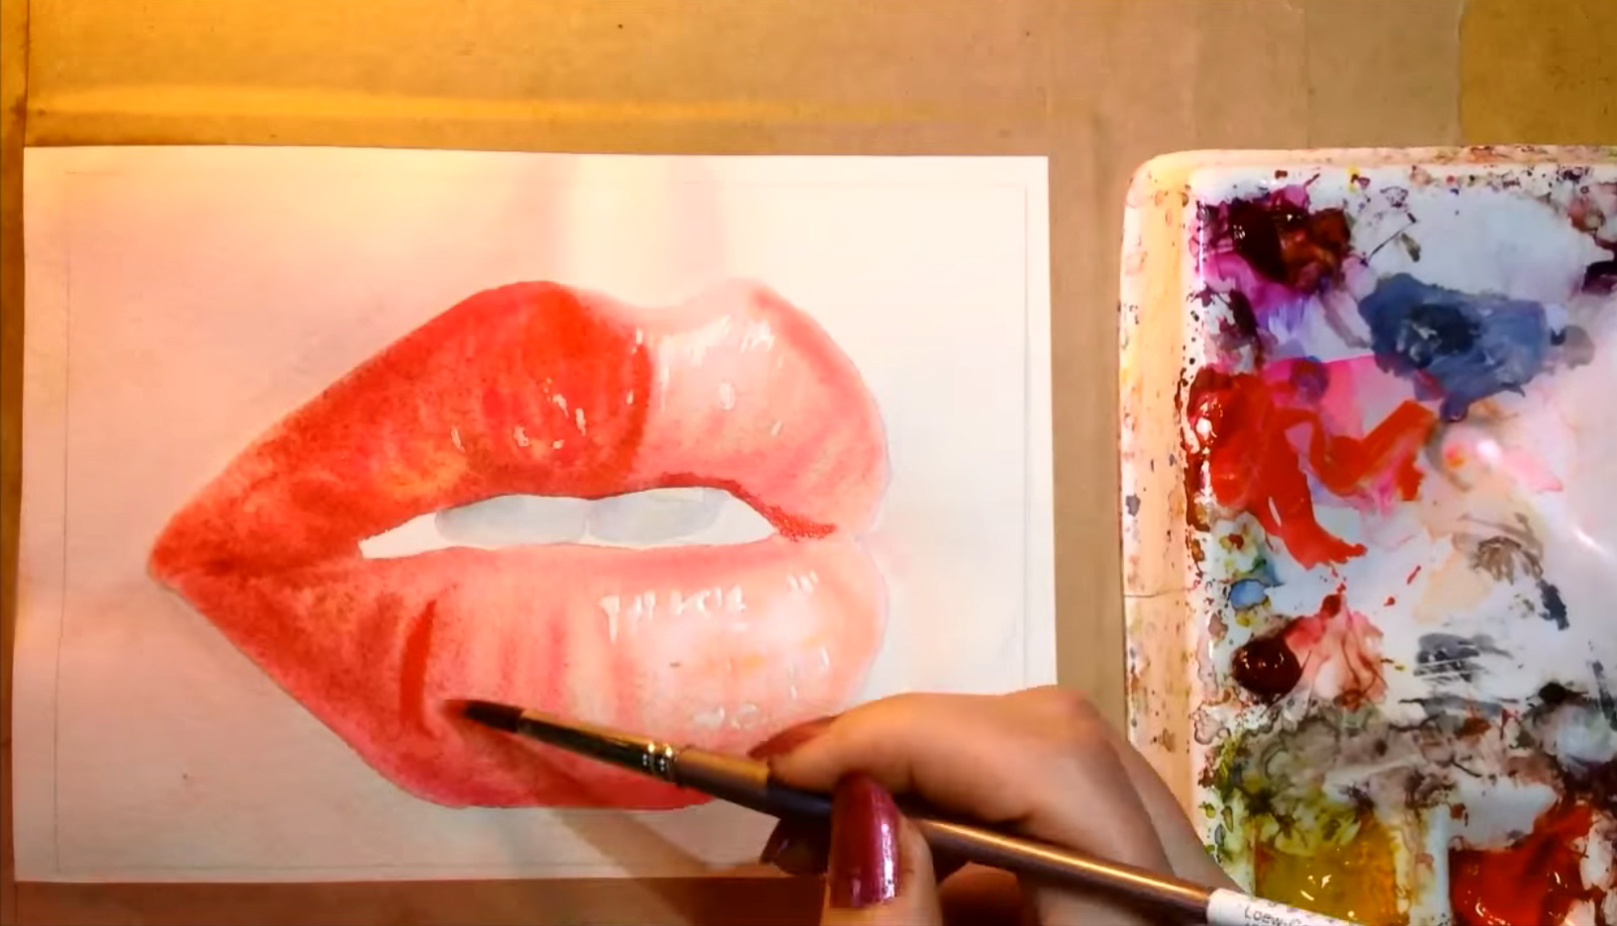 When the skin area is partially dry, wet the lips with clean water. Then, mix in Opera and more Cadmium Red Light to the previous orange mixture used for the skin, and use the color to paint the lips, starting from the darker left side and leaving the lightest areas for last. You can add Cadmium Yellow Extra Deep for a more orange tint. When you're done, do a second layer of paint on top to intensify the colors and shadows. Mix in less water with your paint so the color is more saturated.
Step 5: Adding The Shadows
 Establish the left side as the shadowed side by adding Alizarin Crimson and Cadmium Red Light. The lip area should still be wet, which will make your lines fuzzy, but continue to follow the lines and curves on the lips. Soften the edge around the lips with clean water and the size 2 round brush, then with the same brush, mix Dioxazine Mauve and Cadmium Yellow Extra deep for a dark brown to paint the inside and corners of the mouth, around the teeth, and the line where both lips are touching.
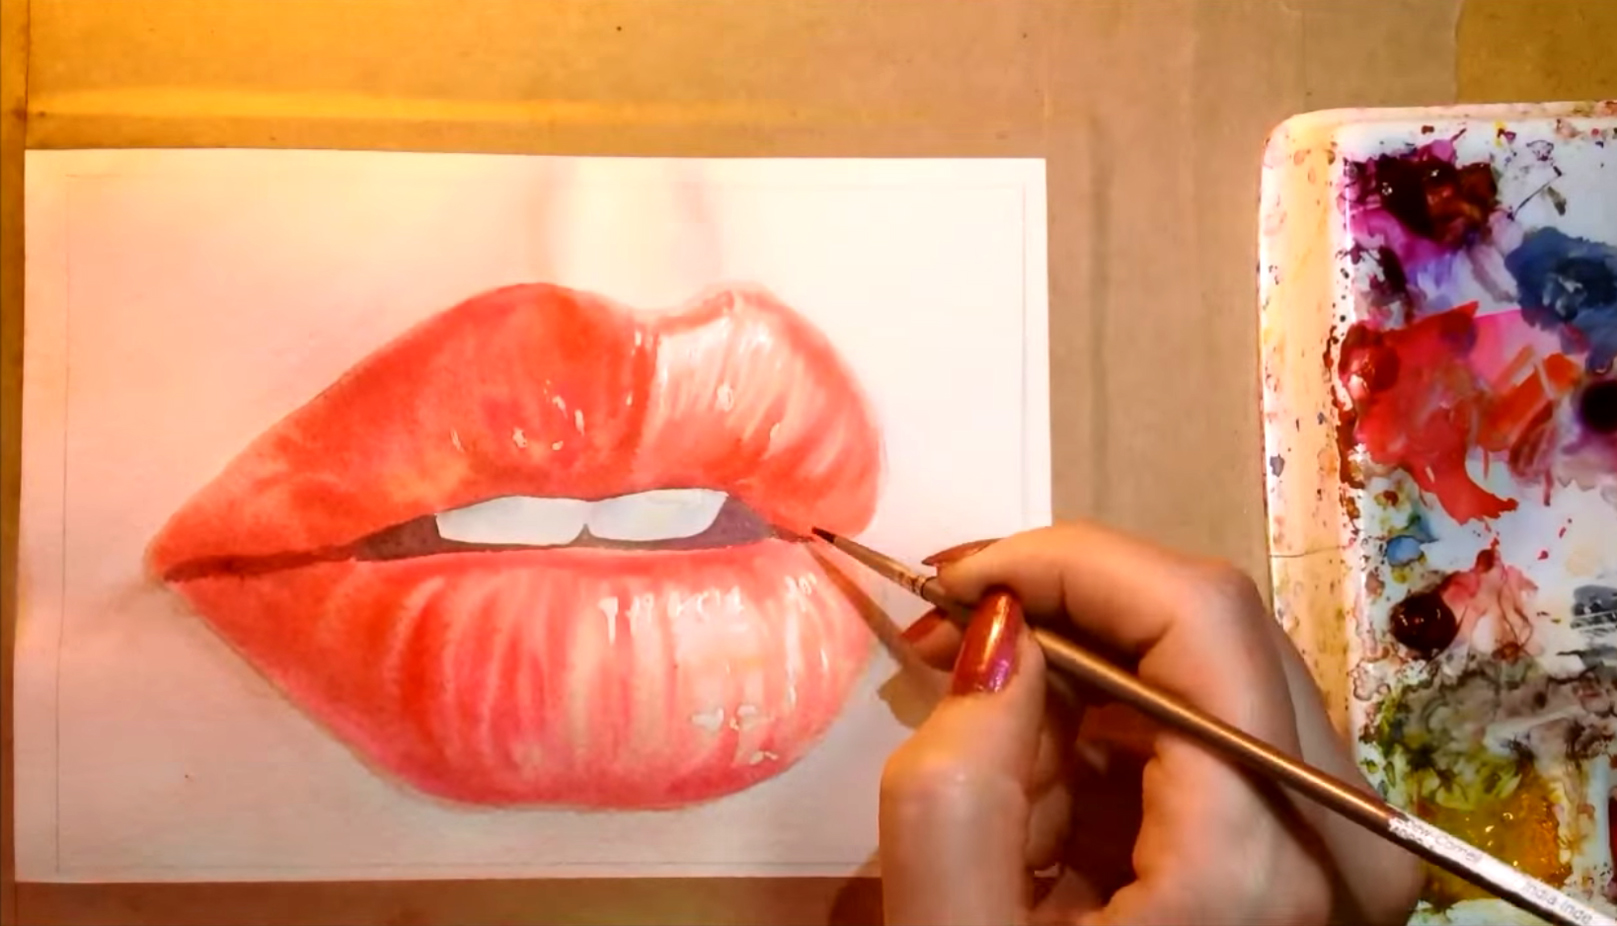
Step 6: Defining Wrinkle Lines
 As the paper dries, you can start defining wrinkle lines and shadows using the size 2 round brush. Alternate between Opera, Cadmium Red Light, Cadmium Yellow Extra Deep, and Alizarin Crimson to paint the wrinkles, especially on the lower lip. The lines should follow the curve of the lips to add volume (think of them as parentheses; the opening one on the left side and the closing one on the right). Avoid making all the wrinkles the same; paint some longer lines, some shorter lines, and use different colors while working from dark to light. The top lip should also be darker than the bottom lip, because light hits the bottom lip first as it sticks out more. Darken all the shadows until you're satisfied with the contrast and depth of the painting.
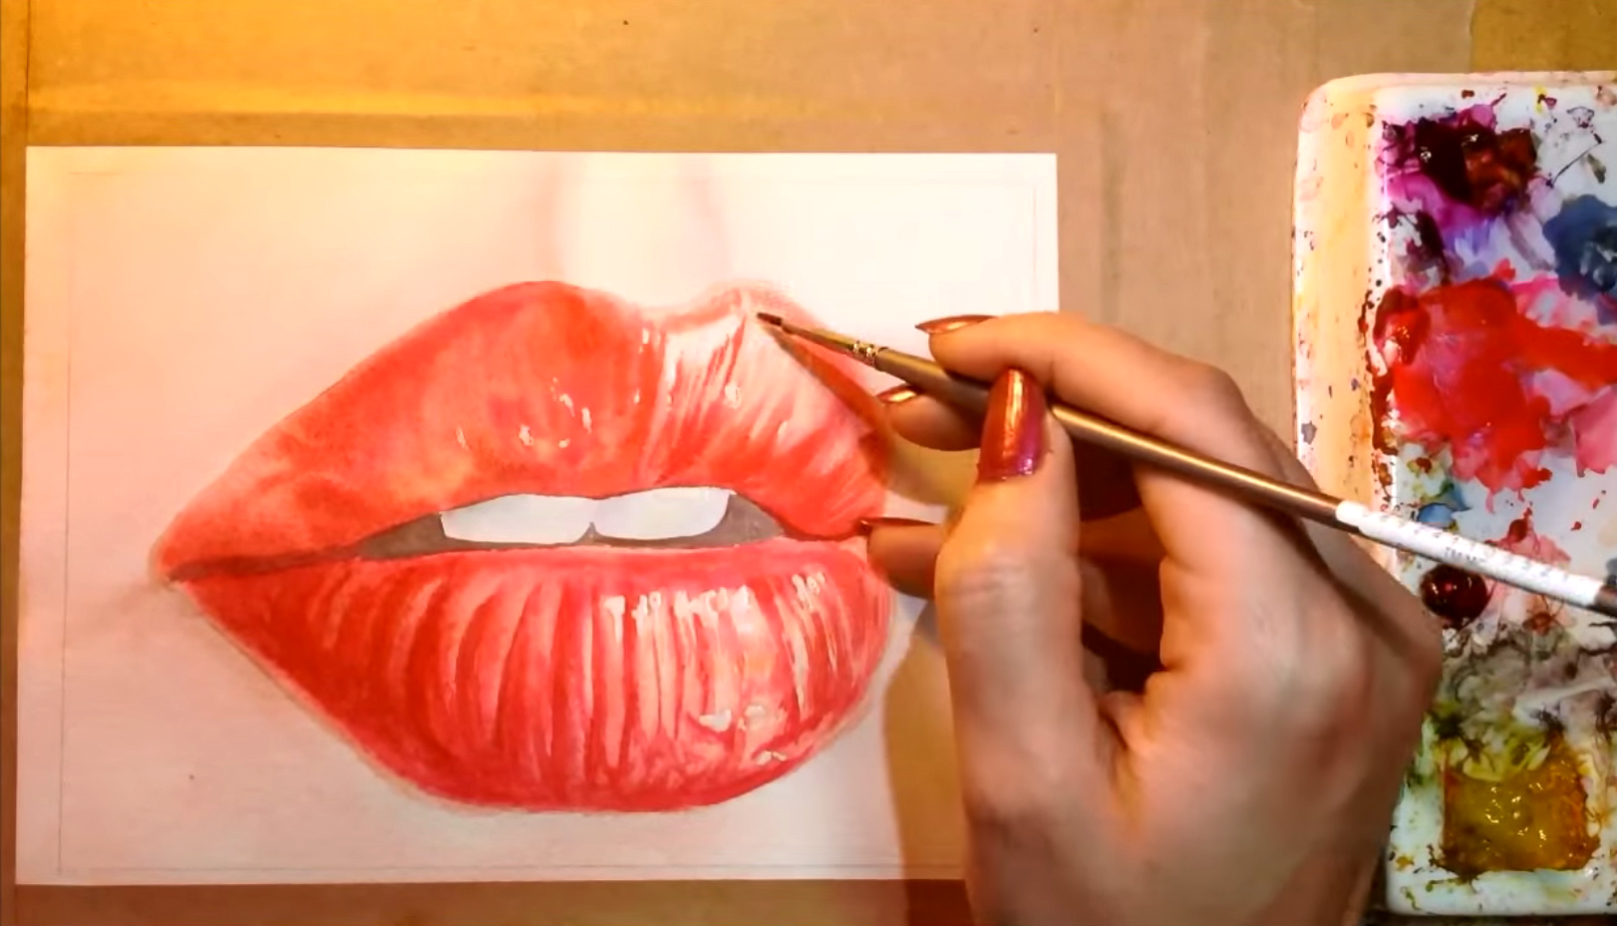
Step 7: Increasing The Contrast And Adding Finishing Touches
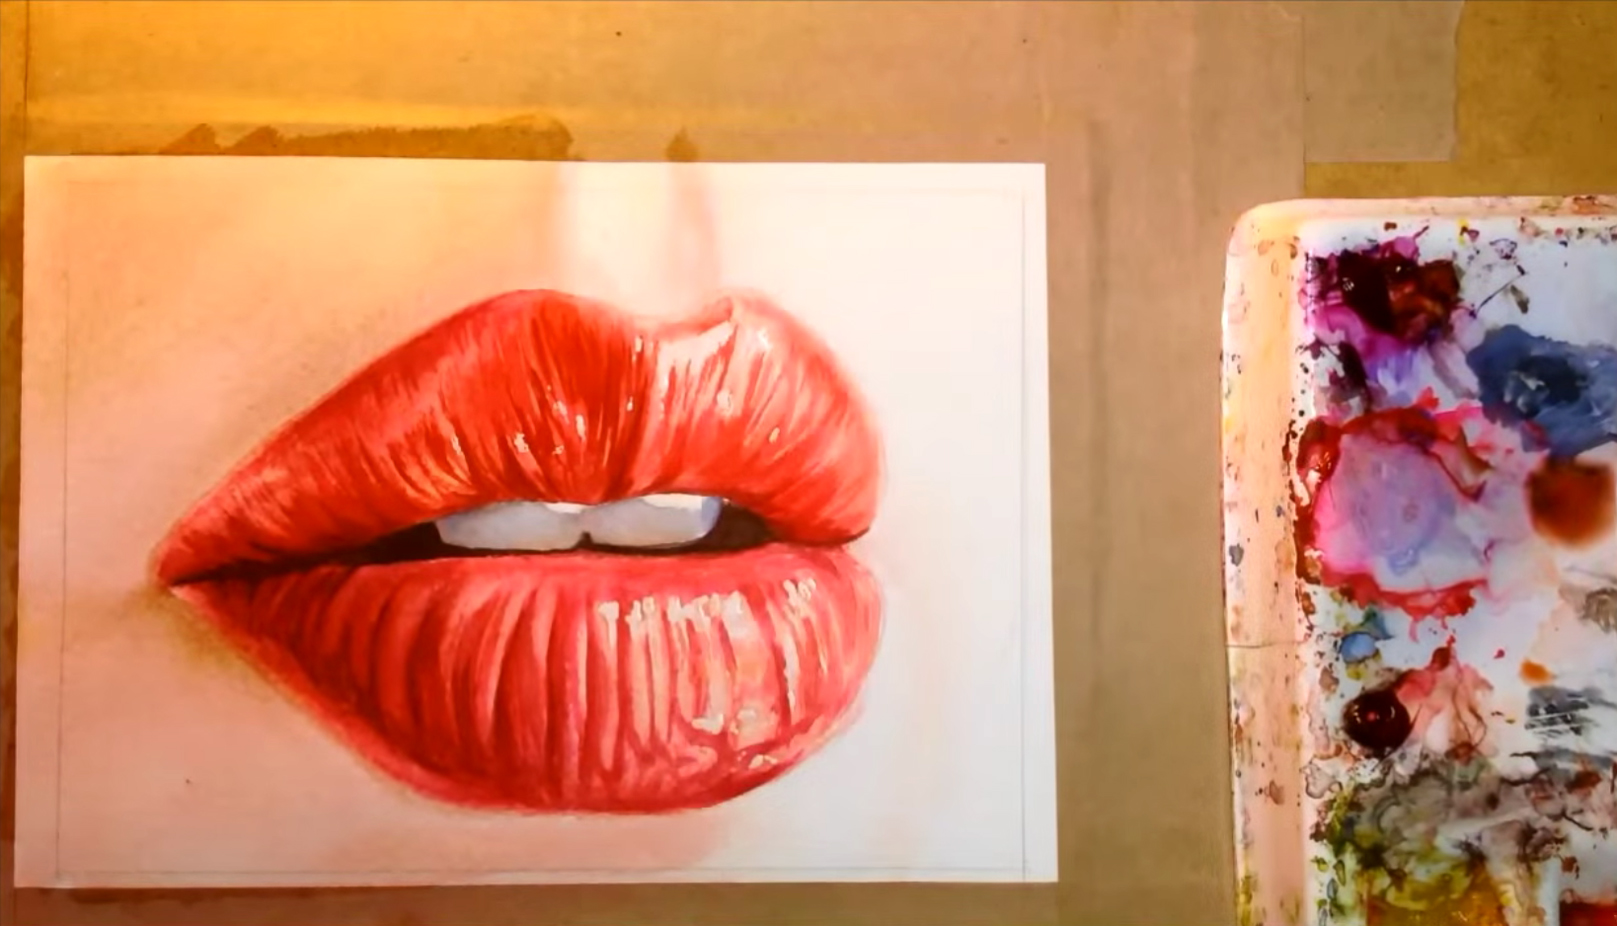 With the Royal oval wash brush, add more shadows underneath the lips and to the left side by mixing a little Burnt Sienna to the skin color, then erase the masking fluid before softening the edges around the white areas with a clean wet brush. For the final touch, paint a layer of Iridescent Napthol Red over the lips while avoiding the white highlights. This layer is not necessary, but it helps add a glossy finish to your painting. Step back to check the overall look of your painting, and when you're happy with the final result, gently remove the masking tape and let your painting dry. Here's the full video by Kelly Eddington:


