Follow along in this step-by-step tutorial with Steve Curl as he demonstrates how to watercolor paint a colorful sunset sky with silhouettes from his imagination. No reference image needed! Want to watch the video version? This tutorial is also available to members of our Beeblys WatercolorPainting.com.
Materials used:
- A sheet of Arches cold press watercolor paper (140lb, size 6" x 9")
- HB or 2B pencil
- Kneaded eraser
- Painting palette for watercolor paints
- A container of water
- A towel or rag to rest brushes on
- Tissue or paper towel
Paints (Holbein Artist's Watercolors)
- Cadmium Yellow Light
- Aureolin
- Cadmium Yellow Orange
- Cadmium Red Deep
- Permanent Alizarin Crimson
- Opera
- Ultramarine Deep
- Cobalt Blue
- Cerulean Blue
- Peacock Blue
- Payne’s Gray
- Neutral Tint
Brushes
- Silver Brush Black Velvet: Cat’s tongue brush (¾" width)
- Stratford & York Warwick Series: Round sable brush (size 12)
- Stratford & York Warwick Series: Round sable brush (size 8)
Step 1: Lightly Sketch Before Watercolor Painting
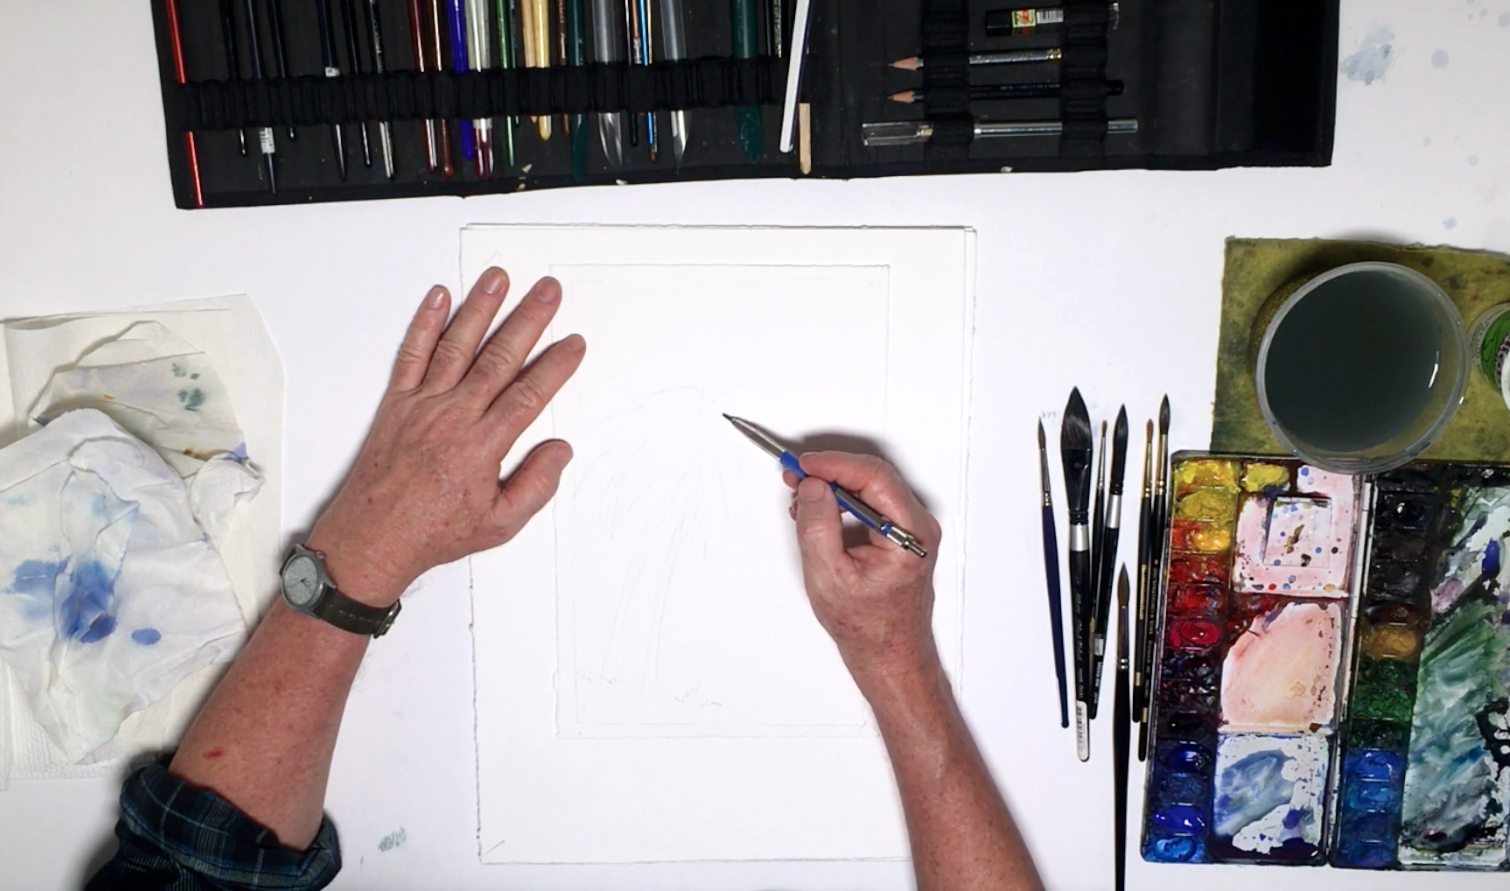 Before you get started, it's easier to have either a live view of a tropical sunset, or at least have a good quality reference picture to study and paint from. But you can always let your imagination go wild and paint whatever you'd like! Begin by lightly drawing a frame around the area you'll be painting in, then pencil in the outline of some palm trees, the horizon line, and the sun. The landscape will help define the sky, while the sun determines the "hot spot" (i.e. the light source) of your painting.
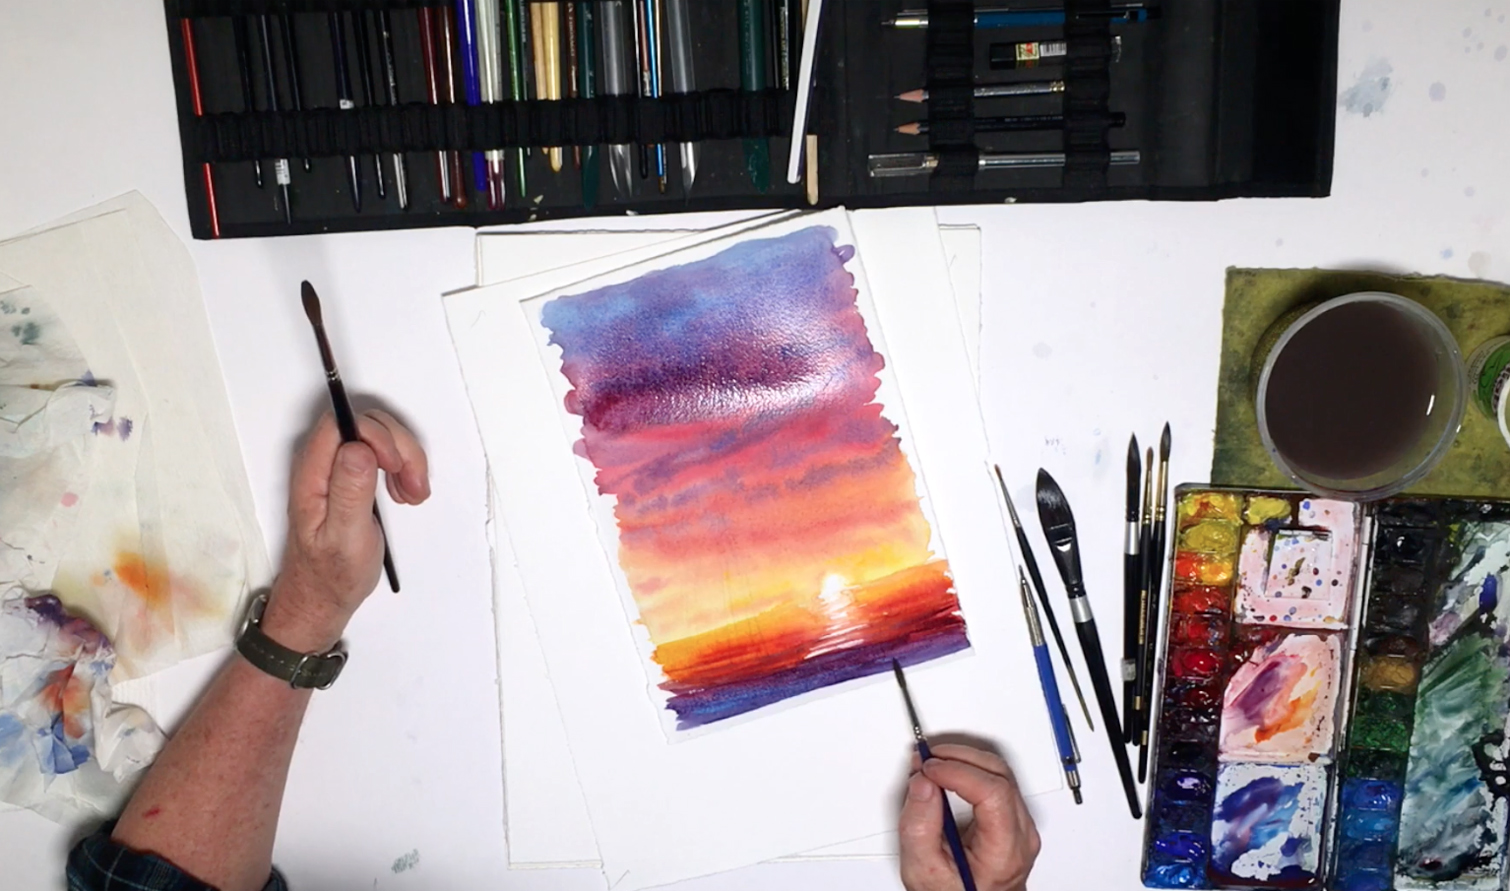
Step 2: Using The "Wet-In-Wet" Technique
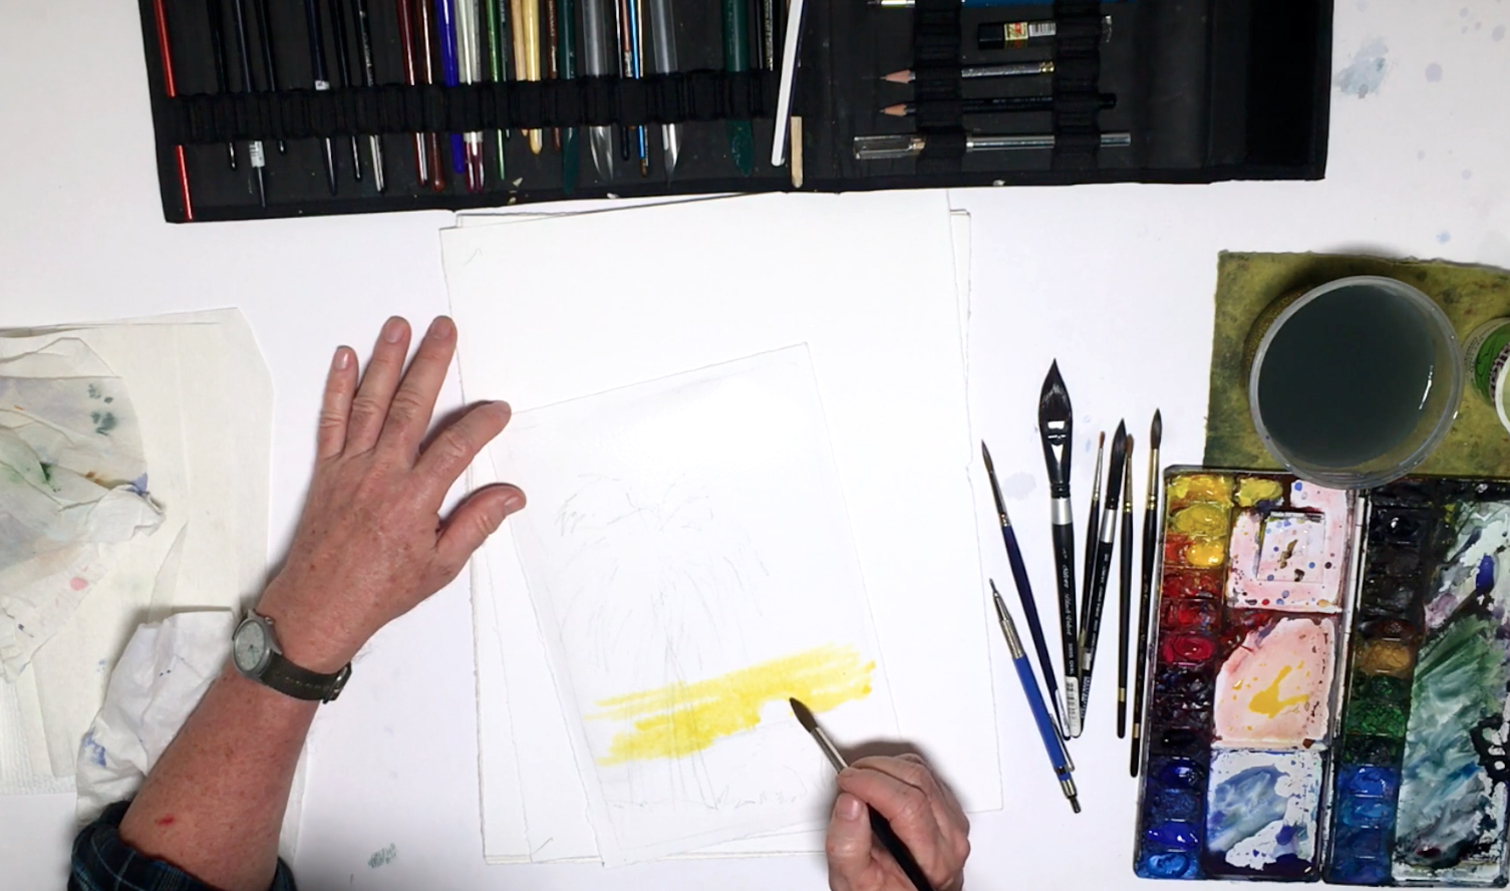 Wet the sky with clean water and the cat's tongue brush. You can brush over the palm trees, and wet the paper right up to the horizon line. While the paper is still wet, you can use the wet-in-wet technique by using the size 12 brush to pick up some Cadmium Yellow Light and Aureolin, then dropping the wet paint onto the wet paper. Start in the area above the horizon line, painting in horizontal strokes while making sure the brushstrokes aren't too regular. Leave the sun unpainted so the paper stays white and it's the brightest spot in the painting.
Step 3: Choosing Starting Colors For Your Sunset
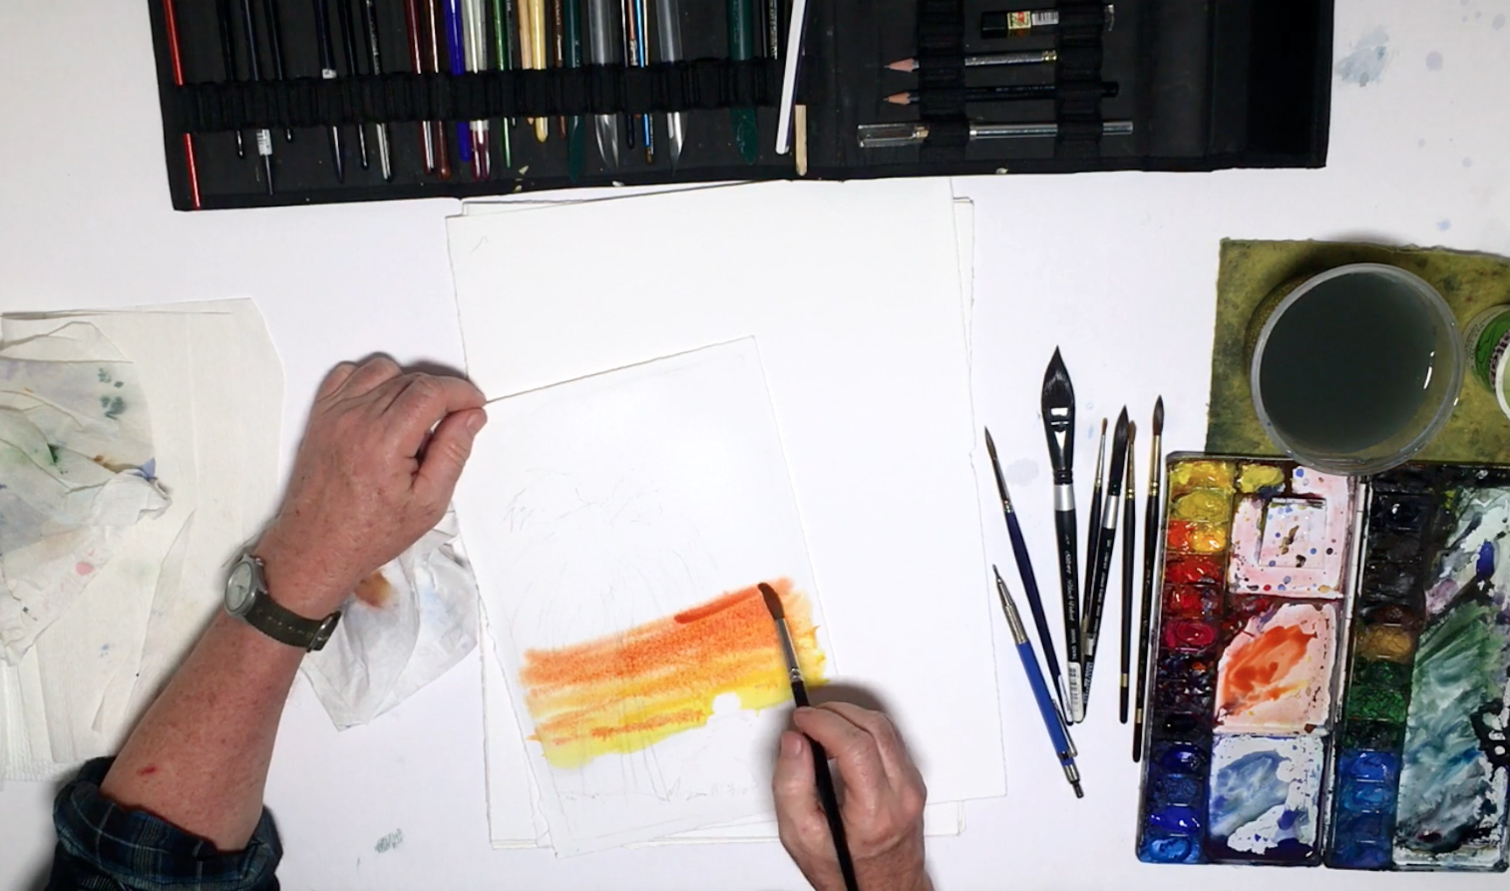 As you paint upwards, you will be painting the color spectrum from yellow to blue. In order to get a smooth color transition while maintaining the vibrancy of a sunset, make sure never to mix complementary colors (such as blue and orange) while using the wet-in-wet technique, as this will cause the paint to turn into a muddy gray. After painting about 2 inches' worth of yellow, mix in some Cadmium Yellow Orange. Next, blend in some Cadmium Red Deep as you paint upwards. You can break up any too-regular horizontal brushstrokes by adding some red strokes into the yellow area.
Step 4: Adding Colors To Your Sunset
 To get from red to blue, mix in some cooler reds (Alizarin Crimson and Opera) to the warm red (Cadmium Red Deep). As the cooler reds have a slight blue hue to them, it will be easier to transition to blue later on. Add these reds to the sunset, breaking up any regular lines the same way as before. If the paper starts drying, keep it wet with the cat's tongue brush and clean water. When you've painted a section of cool reds, mix in Ultramarine Deep blue with the Alizarin Crimson on your palette to get a strong purple, then blend it into the area above the red. As the purple contains blue, make sure to avoid the orange area when adding a few irregular lines.
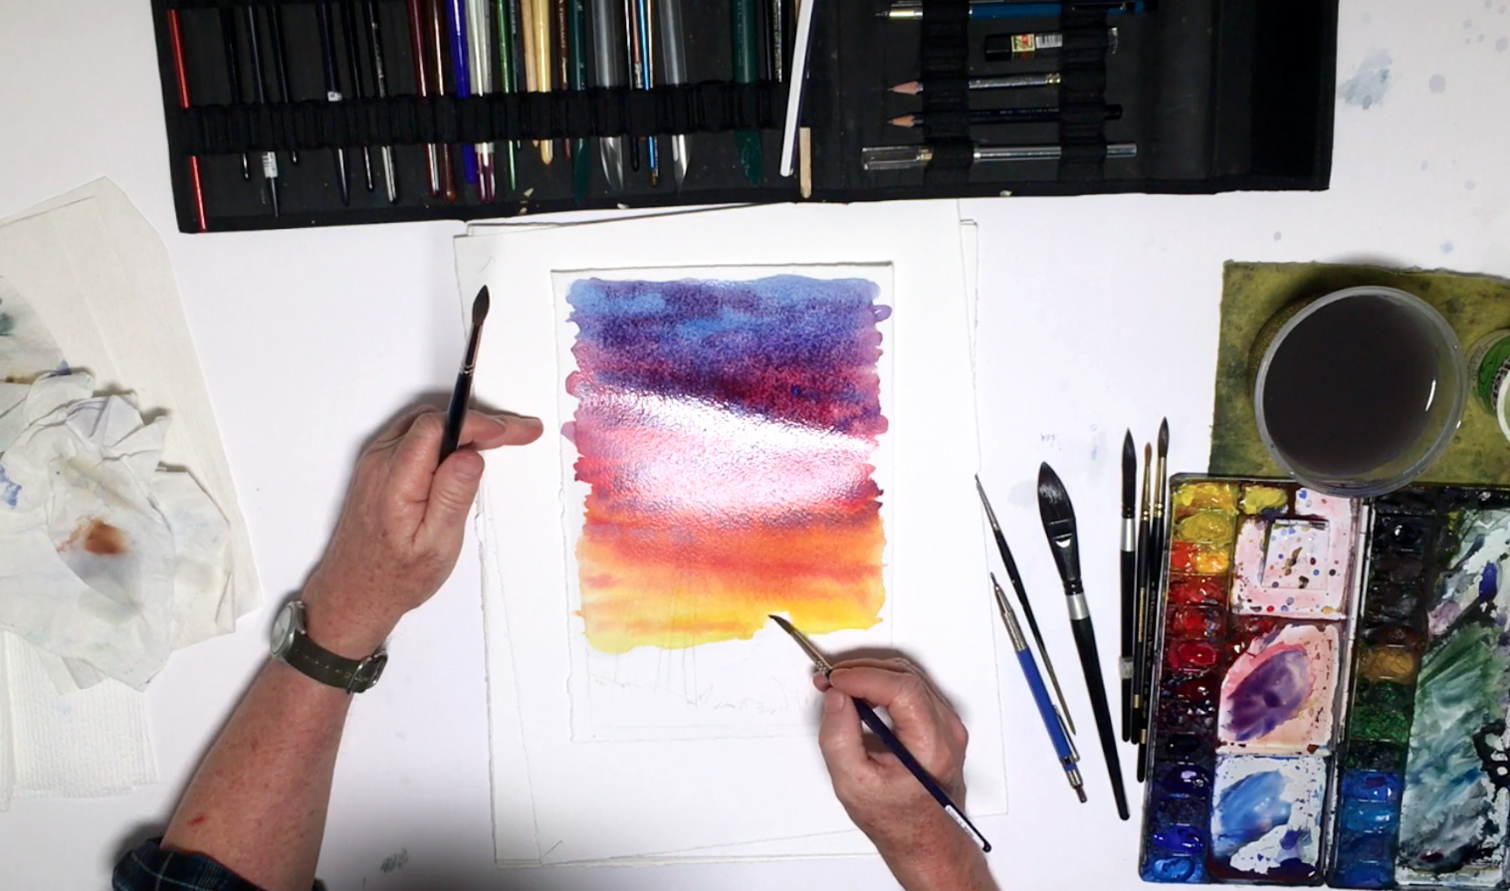
Step 5: Playing With Colors
 As you near the top of your painting, mix in more Ultramarine Deep and Cobalt Blue to get more of a deep blue hue. Melt it into the purple section, allowing some to drift into the red area while avoiding the orange area. You can also tilt the paper and use gravity to help blend the colors even more. For the topmost section, mix Cerulean, Peacock, and Cobalt Blue, and blend it into the sky. Add some of the blue into the purple and/or red area if desired, again breaking up any regular horizontal lines if necessary.
Step 6: Finishing Touches For The Sky
 Add any finishing touches to the sunset, and soften the edges around the sun with the size 8 brush and clean water. Make sure that the sun isn't perfectly circular, as this will make it look unnatural. Before painting the water, clean your palette so you won't accidentally mix any blues with your yellows or reds.
Step 7: How To Paint Water
 To paint the water, use the same colors as the sunset but in reverse, since the water acts as a mirror image of the sky. Again, start at the horizon line with the yellows and orange first, avoiding the area directly underneath the sun. Zigzag the paint in to create the rippling effect of a watery surface, and when the yellow and orange areas are done, add in the Cadmium Red Deep, then the Alizarin Crimson like before. As the water area is smaller than the sky, each color section will be smaller than it is for the sky.
Step 8: How To Paint Reflections On The Water
 With the size 8 brush, soften the edges where paint meets the white area for the sun's reflection. You can add a few lines of paint into this area to suggest ripples, using more watered-down paint as you move towards the horizon line to create a sense of depth. This is because objects in the distance will appear more faded than objects in the foreground, so as you paint towards the foreground, you can also add more details and more saturated lines to increase the contrast and add a greater sense of perspective to your painting.
Step 9: Mixing Colors For Water
 Mix Ultramarine Deep blue with Alizarin Crimson to get the same purple mixture again, and add it to the area underneath the reds. Keep varying your brushstrokes, and make them more defined as you get closer to the foreground. To finish off the water section, add Ultramarine Deep, Cerulean, Peacock, and Cobalt Blue to the very bottom of the painting. Add any finishing touches as necessary, then leave the painting to dry before moving on.
Step 10: Painting Palm Tree Silhouettes
 With the back of your hand, check that your painting is completely dry. When it is, sketch in any lost pencil lines for the palm trees, then mix the color needed for them. Because of the particular lighting created by any sunset, you will notice that objects in the foreground will appear quite dark, thus creating silhouettes of said objects. To reproduce this effect, mix Ultramarine Deep, Alizarin Crimson, Cadmium Red Deep, some Payne's Gray, and Neutral Tint to create a very saturated and dark purple color. Then, use this color to paint the palm trees, using your reference picture to help you get an idea of how palm trees grow. Remember to leave gaps in between the palm fronds, bunching them up in some areas while leaving some areas quite sparse to create a more natural feel to your painting. You can even add a few coconuts to the silhouette, although make sure that they look like they're growing from the trees. Again, try not to make the trees too symmetrical or regular.
Step 11: Finishing Touches
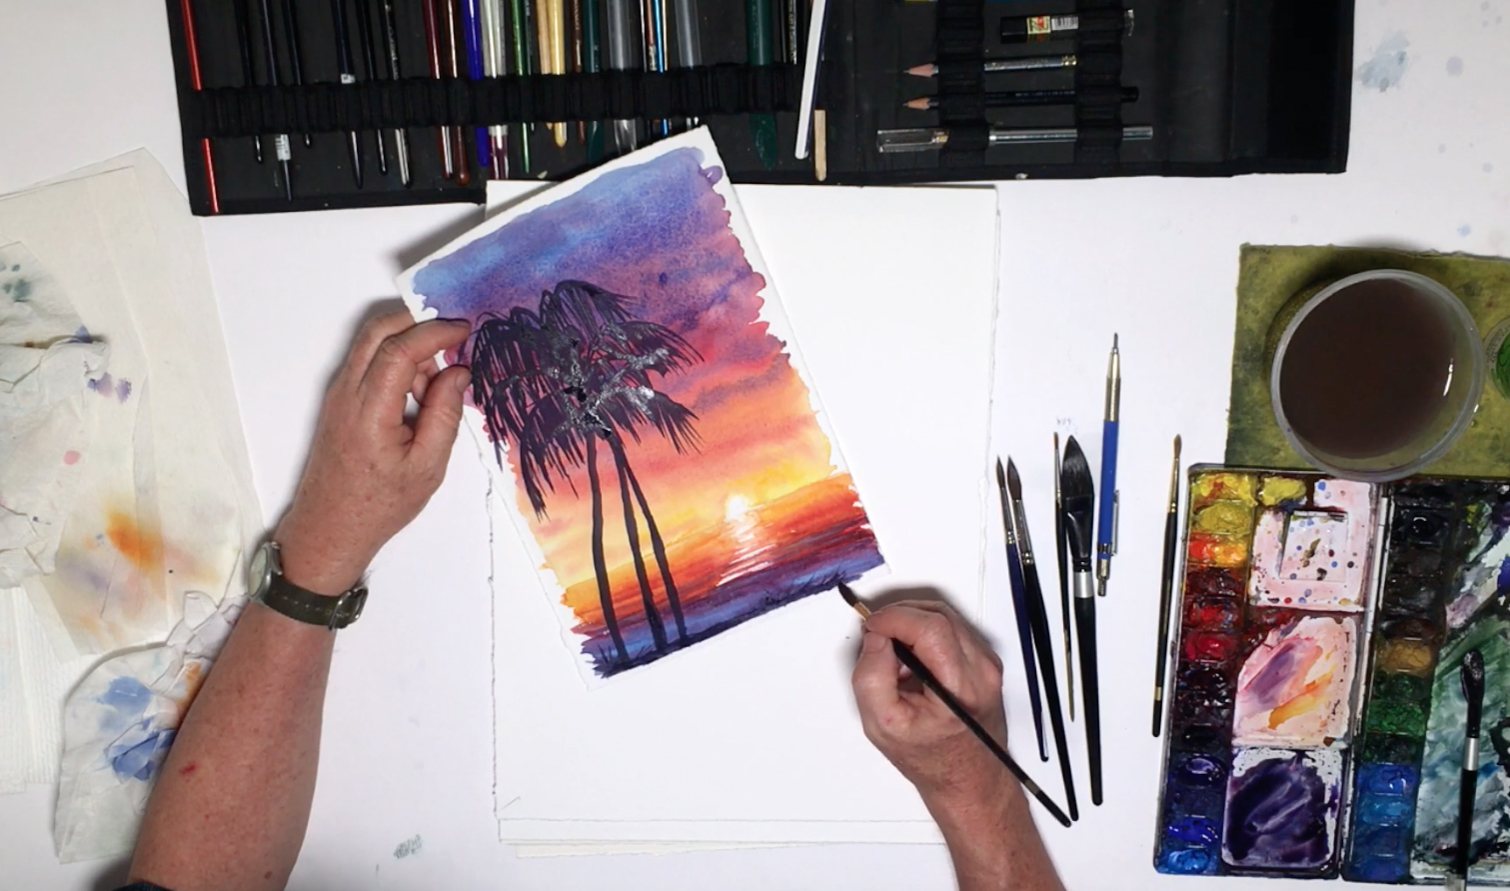 When you've finished painting the trees, use the same color to paint the ground and any extra foliage. Adjust the design according to what you want, and add any finishing touches to the overall look of your painting. When you're satisfied, leave your painting to dry, then erase any pencil lines with a kneaded eraser where necessary.


