Try this new painting idea: learn to paint the complexity of the universe by simply using salt and watercolors, as seen in this easy tutorial given by Leonardo Pereznieto.
Materials used for this painting idea:
- Arches Watercolor Paper (hot press, 140lb, 10" x 14", 100% cotton)
- Masking tape (width 1")
- Wooden board for support (at least 10" x 14")
- A palette for watercolor paint
- A container of water
- Tissue
- Coarse grain salt (can be Kosher or sea salt)
- A chopstick, or any similar stick of the same thickness as a paintbrush
Paints
- Schmincke Horadam Aquarell Watercolor: Translucent Orange
- Cadmium Red Light
- Deep Red
- Manganese Violet
- Delft Blue
- Prussian Blue
- Indigo
- Prussian Green
- Pthalo Green
- Permanent Green
- Dark Cobalt Green
- Brilliant Blue Violet
- Chrome Orange
- Cadmium Yellow Light
- Ivory Black
- Titanium Opaque White
Brushes
- Mop brush (½" round)
- Rosemary and Co.: Pure squirrel hair pointed round brush (size 0)
- Pure squirrel hair pointed round brush (size 2)
- Pure squirrel hair pointed round brush (size 4)
- Pure squirrel hair pointed round brush (size 8)
- Pure squirrel hair pointed round brush (size 12)
Step 1: Preparing Your Paints
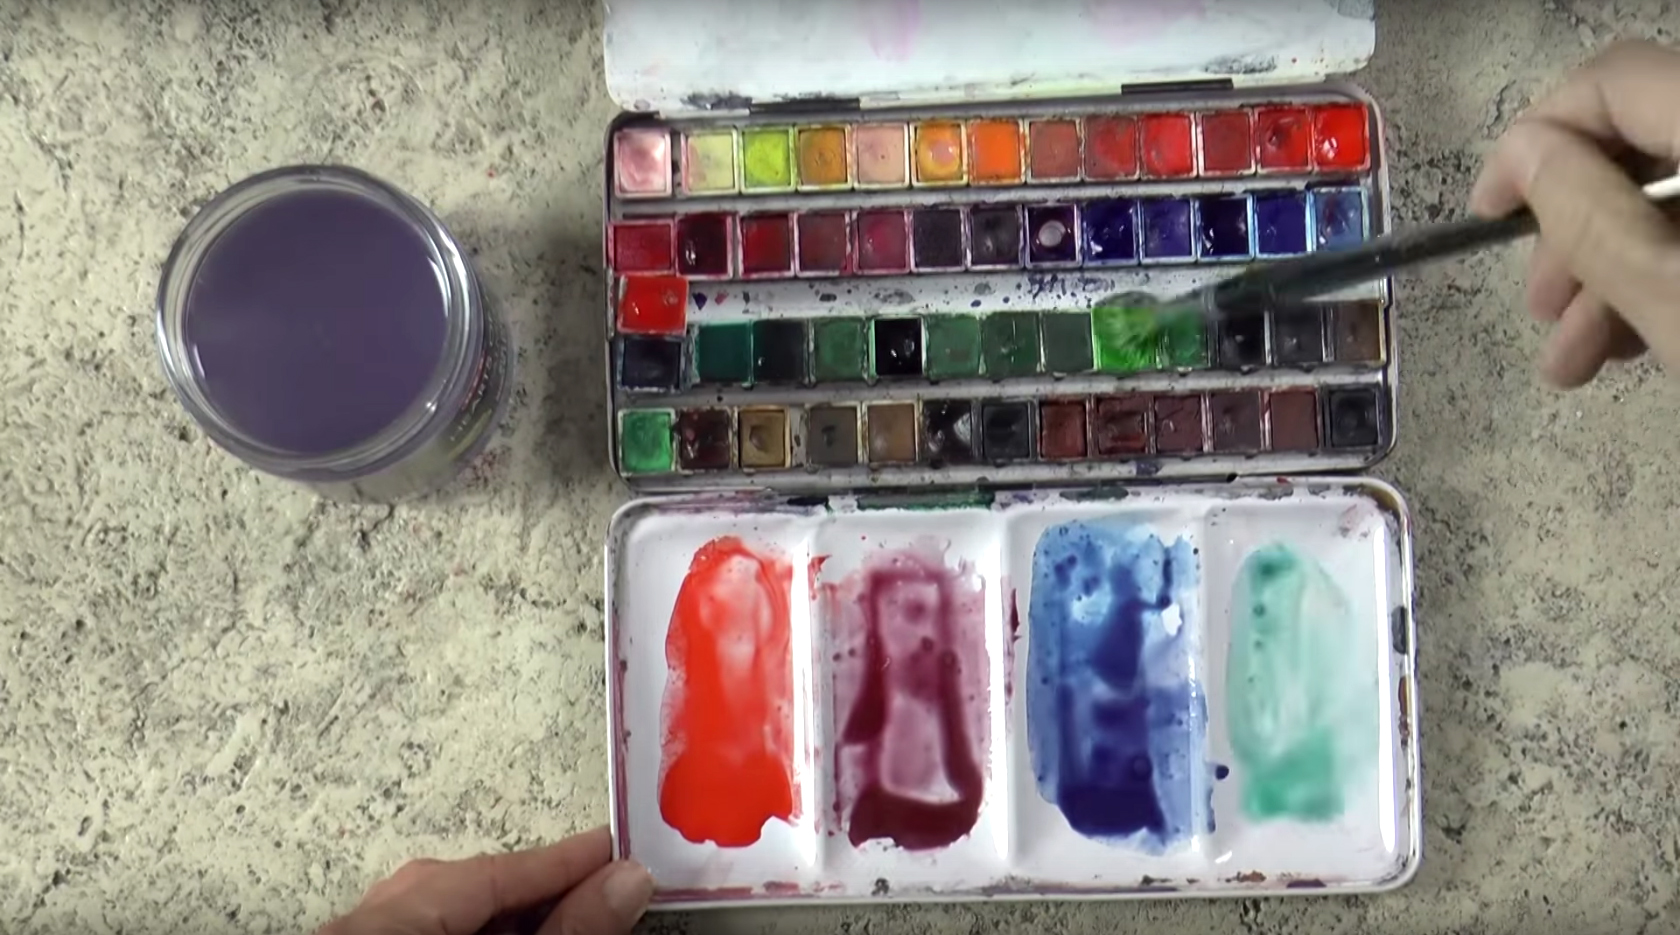 Tape the Arches Watercolor Paper to the wooden board, making around a ½" border around the paper. This gives your paper more support, and lessens the amount of warping on the paper when you paint. Then, prep your paint using the size 4 brush and water with these colors: mix Translucent Orange with Cadmium Red Light for a light red, Deep Red with Manganese Violet and a touch of Indigo for a dark, cherry red, Delft Blue with Indigo for dark blue, and Prussian, Pthalo, Permanent, and Dark Cobalt Green for a medium green.
Step 2: Making Colors Bloom with the Wet-In-Wet Technique
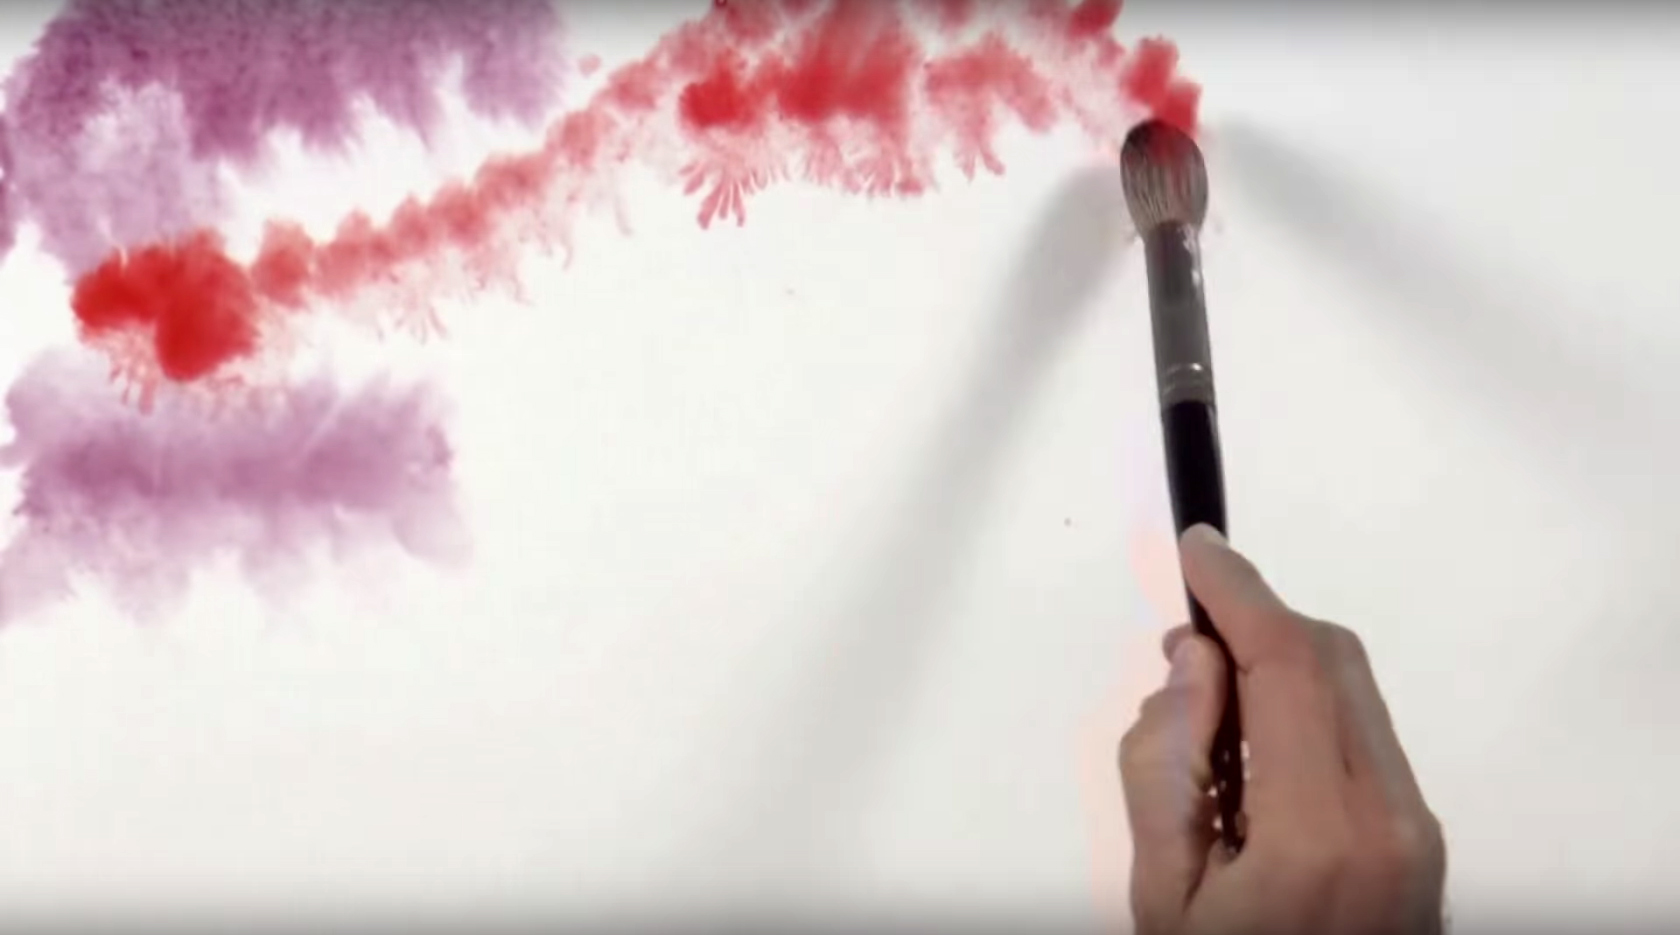 Prop the painting at a slight angle, then wet the entire paper with clean water using the mop brush (½" round). With the same brush, drop the dark red paint around the top left corner with dabbing motions, then switch to the light red and dab paint across the paper. Switch to the blue mixture when you reach the middle, taking care not to paint in the areas that already have paint. As the paper is tilted, let gravity and the grain of the paper move and blend the paint you drop onto your painting. Allow the paint to move freely; you can play around with these 3 colors to get the kind of nebula you like (but leave some space for other colors).
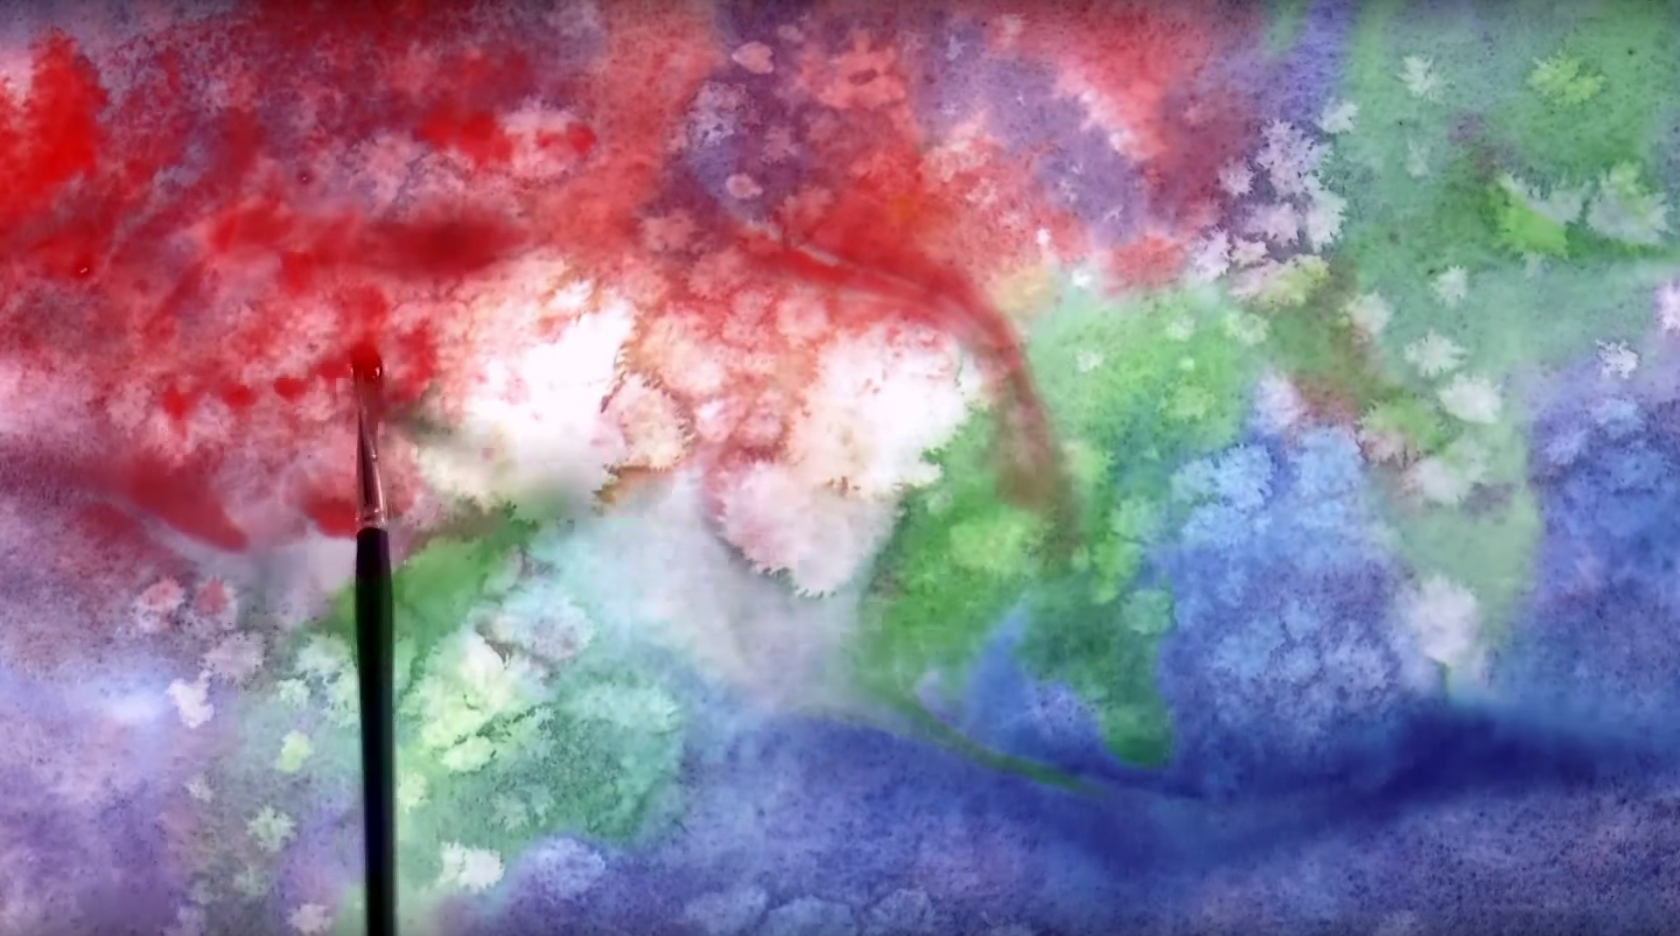
Step 3: Blending Colors
 With the smaller size 8 brush, dab the green mixture on, starting from the bottom left corner and working your way diagonally up to the top right corner. Try to imagine the colors of the universe while you paint so you have an idea of what you want the final painting to look like.
Step 4: Finishing the First Colorful Layer
 While the paper is still wet, add more paint using the size 4 brush to intensify certain areas and fill in any white spaces. You can blend in some Delft blue with the blue or green areas, and Manganese and Brilliant Blue Violet for the red or blue areas. You can also add some Chrome orange and Cadmium Yellow Light in any leftover white spaces. Try to avoid blending complementary (i.e. yellow and purple, red and green, blue and orange) or secondary (i.e. orange, green, purple) colors with each other as this will cause the colors to turn muddy.
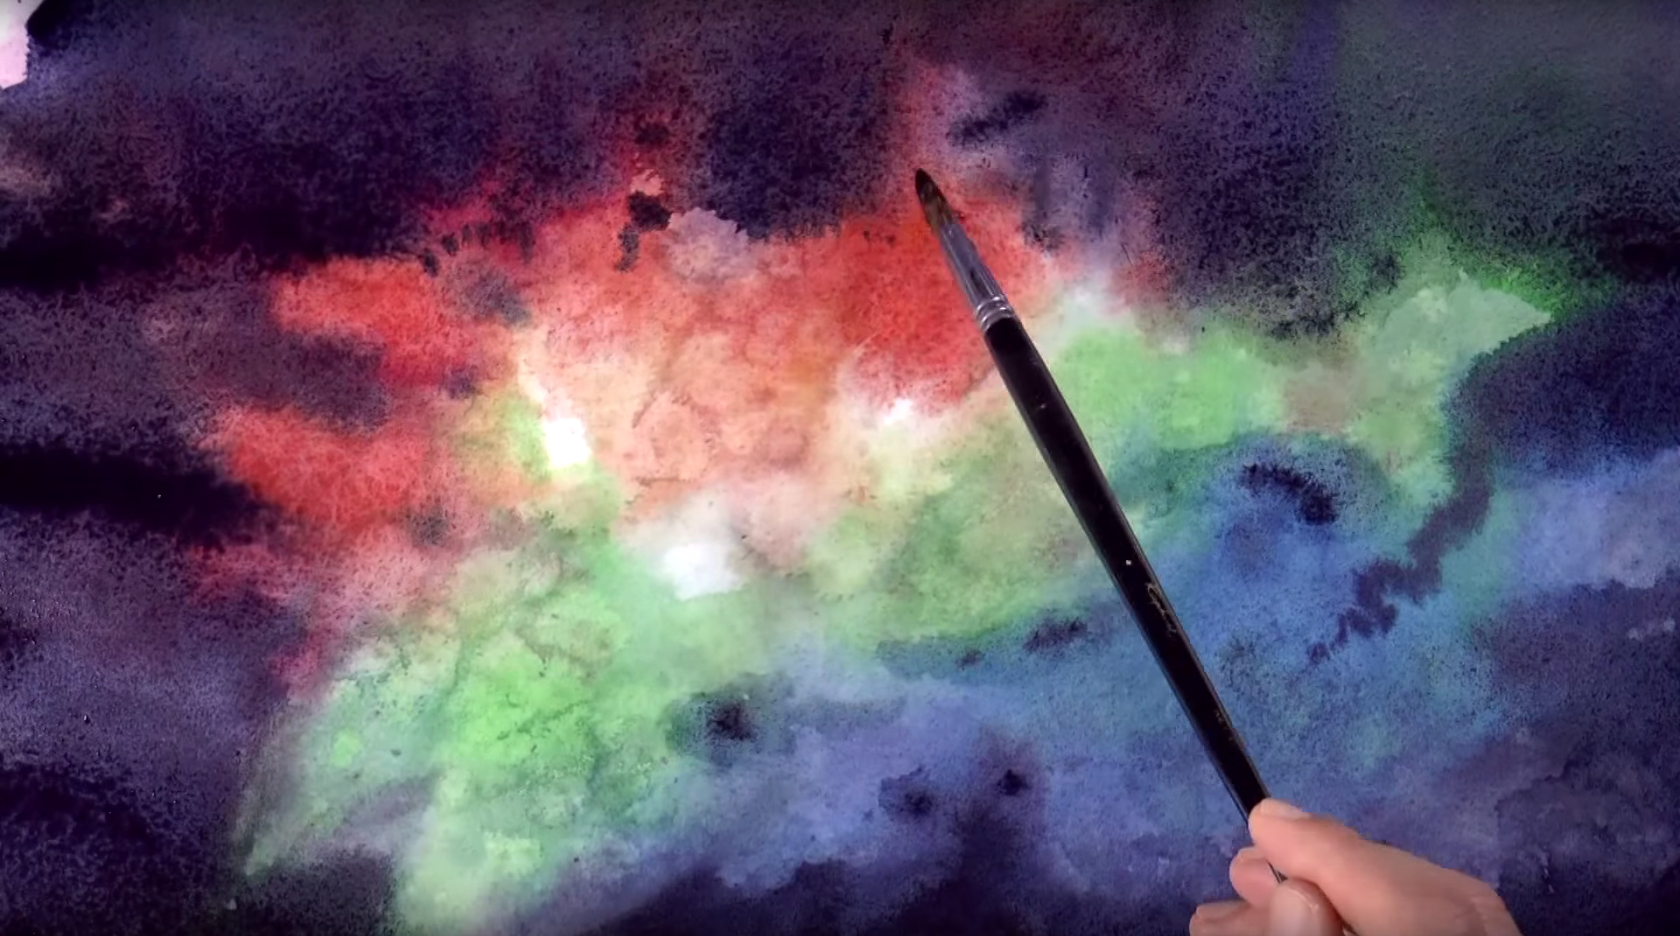
Step 5: Layering for More Color Depth
 As the paint begins to dry, place another layer of paint on top to intensify the colors even more. Watercolor will always dry into a lighter version than when it is wet, so don't worry if it looks too saturated. When the paper has dried enough to be damp instead of wet, you can dot more colors on top. Complementary and secondary colors can now be placed on top of each other without the fear of them blending into a muddy brown color. Always dab the paint on; never drag or start using different brushstrokes.
Step 6: Adding "Magic" Salt
 Reinforce the line of green paint with more Dark Cobalt Green and Permanent Green (the paint can be dabbed around the line and shouldn't be straight), then add another layer of different reds and violets to darken certain areas of the painting. This adds more contrast, and gives more depth to your painting. When you're satisfied with the overall look of your painting, sprinkle some of the coarse grain salt around the surface. This will produce a magical effect (here's a tutorial on adding salt as a watercolor technique). The salt will absorb the water and colors in the painting, so don't put too much. Let the whole painting dry, then gently scrape off any salt residue.
Step 7: Intensifying the Colors
 With this first layer dry, it will now be the base of your galaxy painting. Wet the whole painting again with clean water and the mop brush (½" round), and reinforce the colors with their purer counterparts (i.e. Cadmium Red Light for red areas, Delft Blue for blue areas, etc.) with the size 2 brush. This means adding less water into the paint, and no mixing of any paints on the palette (so take the color straight from its container and place it onto the paper). Let this layer dry, then repeat this step to deepen the colors even more.
Step 8: Darkening the Border
 While the paper is still damp, mix Prussian Blue and Ivory Black with the size 4 brush and dab the paint around the borders of the nebula, leaving an uneven shape in the middle where you can still see the colors of your first layer. The dampness of the paper should soften the edges of your paint as you apply it on top. You can use a balled-up tissue to help absorb the paint when the edges look too hard, or if you make a mistake. Always make dabbing motions when you make contact with the paper! You may need more than one layer of the Prussian Blue and Ivory Black mixture to make it dark enough.
Step 9: Flicking Stars Into Space
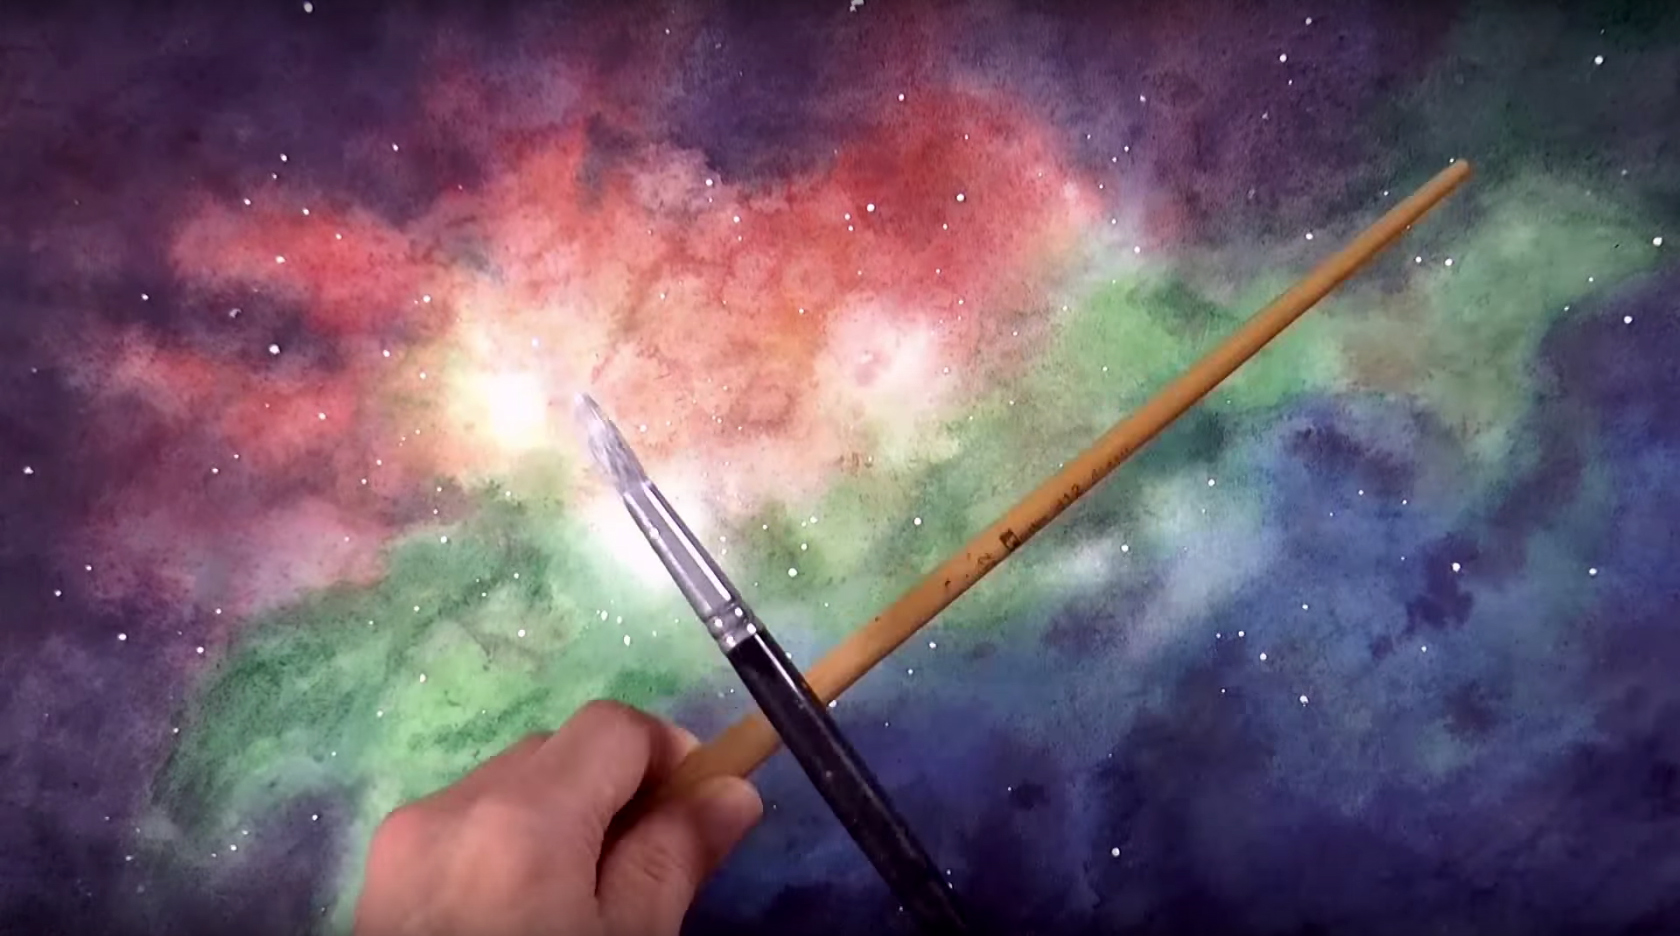 Use the size 2 brush for any finishing touches on your painting, and when you're satisfied with the results, let the whole painting dry. To add stars to your galaxy, move your painting so it lies flat on the table, then take Titanium Opaque White paint with the size 4 brush, making sure not to add too much water so the white paint remains opaque when you use it. Holding the brush parallel to your paper, lightly tap your paintbrush against the chopstick so that tiny white flecks of paint fall onto your painting. Keep picking up more paint and tapping your paintbrush until you feel there are enough stars. You can also add some "manually" by using the size 0 brush and dotting the white paint on. When you're done, let the paint dry, then carefully remove the masking tape. Here's a video of the entire painting from start-to-finish:


