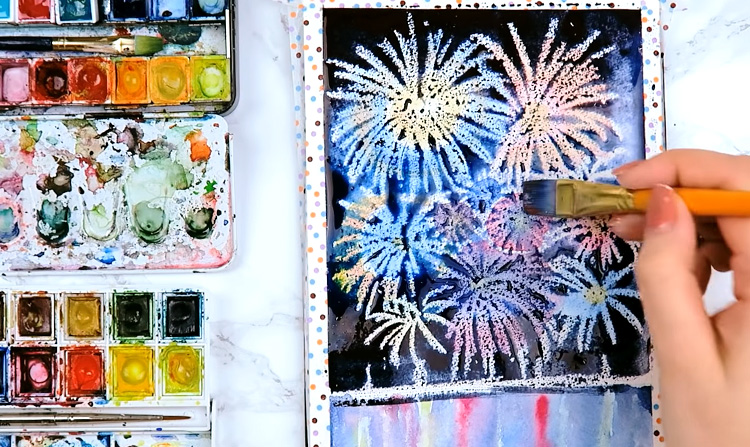
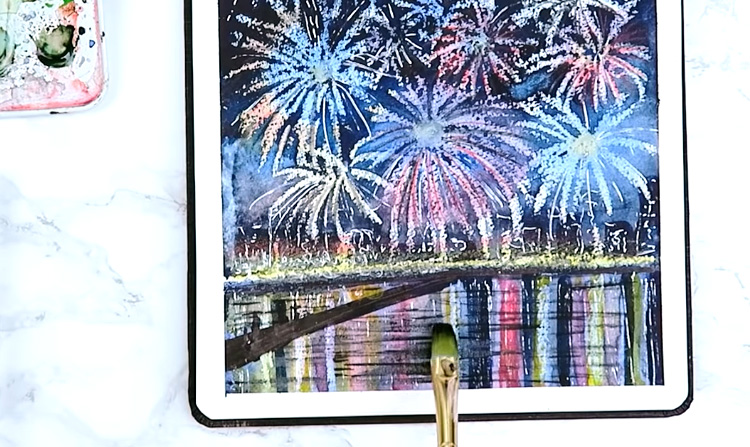
Mako's back and she's got an irresistible beginner technique to bring all your colorful watercolor ideas to life! In our current lineup of easy paintings, get ready to paint explosions of color with your brushes, paints, and... crayons?
Materials Used:
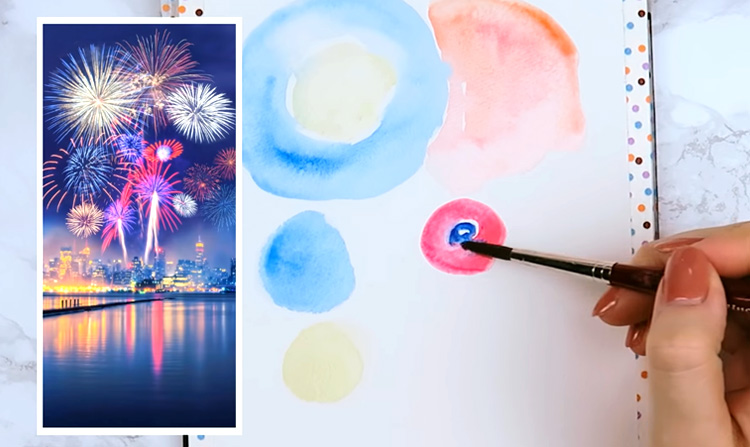
- Reference image of fireworks over a cityscape (or any fireworks image of your choice)
- Hahnemühle's Watercolor Book A5 (135lbs, size 5.8 x 8.3") or any similar watercolor paper
- Palette for mixing paint
- Container with clean water
- Paper towels
- Washi, artist's, or masking tape (1/2" width)
- Uni-Ball Signo gel pen (white)
- A white crayon or piece of candle wax
- Permanent marker (black)
- Colored pencil (yellow)
- Hairdryer
Winsor & Newton's Cotman Watercolors
- Lemon Yellow Hue
- Cadmium Yellow Hue
- Alizarin Crimson Hue
- Intense Blue (Phthalo Blue)
Schmincke's Horadam Watercolors
- Ultramarine Finest
- Ivory Black
Brushes
-
Da Vinci Student Series 3503: Round brush (no. 6)
-
Da Vinci Student Series 3503: Flat brush (no. 4)
-
Da Vinci 5880 Cosmotop: Flat brush (no. 12)
Step 1: A Base of Colorful Circles
As far as watercolor ideas go, fireworks seem like intimidating subjects to paint. How does one begin to paint bright explosions of color? Well, before you begin, prepare your workspace by putting down a border of artist's, masking, or washi tape around your watercolor paper. This will keep things nice and neat after you finish this lesson. Next, pull up your reference image and figure out your painting's composition. Since we're painting in a portrait orientation, crop out a section of the reference image to better fit a vertical space. Now that we have a guide for this watercolor painting, let's have fun with color! Load up a no. 6 round brush with diluted Lemon Yellow Hue, then paint a circle with the wet-on-dry technique (i.e. adding wet paint to a dry surface). Let your reference image be your guide on where to position it, but allow yourself to get messy if it feels right. Do the same with Cadmium Yellow Hue, Intense Blue, Alizarin Crimson Hue, and Ultramarine Finest. Create more colorful circles or add outlines to existing ones, and play with hard and soft edges between the colors to keep things interesting. Don't forget to leave space at the bottom for the cityscape and the water.
Step 2: Deep Blue Water
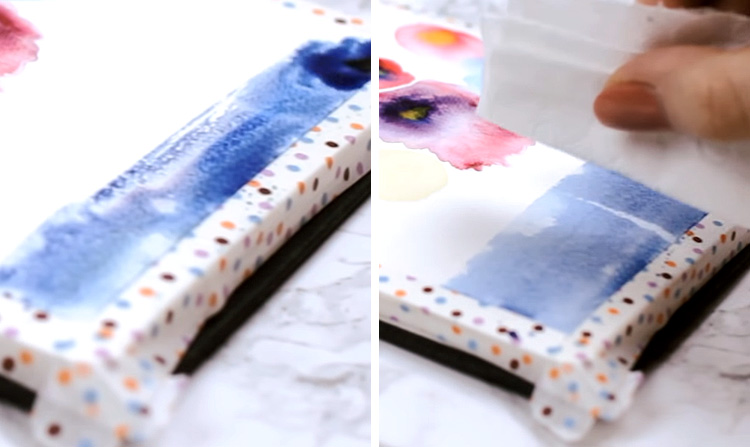
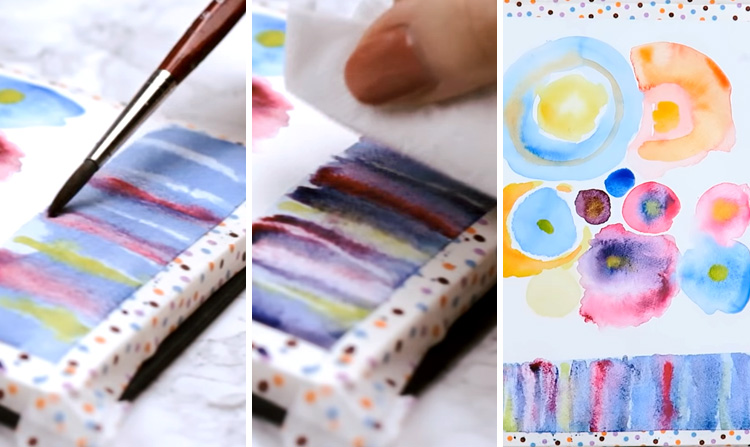
The next step in this lesson is to block in the water. Using the same round brush, pick up Ultramarine Finest and lay down a flat wash at the bottom of the frame, covering about an inch of the paper. Next, use the edge of a folded paper towel to lift up vertical lines of paint while the layer's still wet. Do this 4-6 times, varying the spaces in between each line of lifted paint.
Step 3: Colorful, Striped Reflections
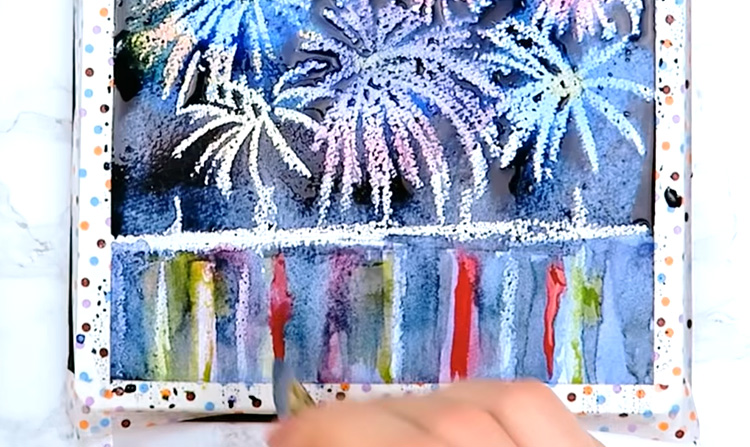
The water reflects the different colors of the fireworks, so in this step, use your round brush to add strips of color to the water. Use the wet-in-wet technique (i.e. adding wet paint to a wet surface), dropping Lemon Yellow Hue, Cadmium Yellow Hue, and Alizarin Crimson Hue to the wet water layer to achieve soft edges. If the layer gets too watery, use the edge of your folded paper towel to lift excess pigment, like in the previous step. Once you're satisfied, let the painting dry or use a hairdryer to speed up the process.
Step 4: Bringing Watercolor Ideas to Life with a White Crayon
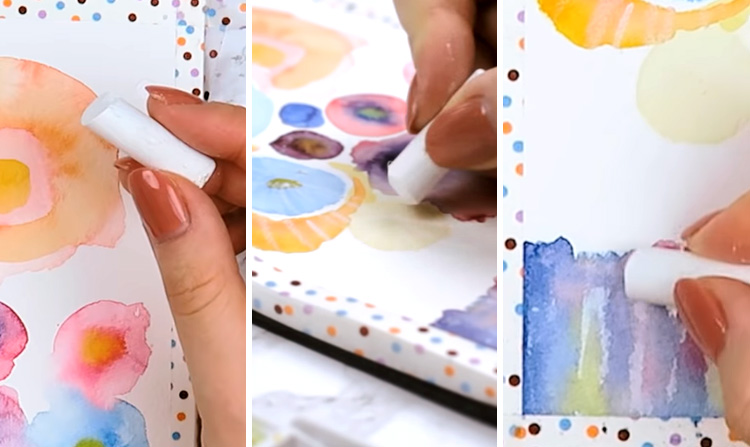
Don't worry if things are looking crazy right now. This is where your fireworks will start coming together! First, take a piece of white crayon (alternatively, some candle wax) and sketch lines that radiate out of the center of each colored circle. Use the edge of the crayon to draw your lines as thinly as possible, and be mindful of how many you put down. Add a few vertical lines to the water as well. Finish things off by drawing a thick horizontal line that divides the sky from the water, adding vertical lines along it to suggest a cityscape in the distance. It doesn't look like much at the moment, but the magic happens in the next step.
Step 5: Revealing the Resist Technique with a Dark Wash
Want to see your watercolor ideas come to life? Sit tight and do this: Load your no. 12 flat brush with a dark violet color mixed from Ultramarine Finest, Alizarin Crimson Hue, and Ivory Black. Starting from the top of the frame, lay down a flat wash with horizontal brushstrokes. As you fill in the sky, watch how the paint avoids the crayon, allowing those explosions of color to shine through! Congratulations, you've just applied the resist technique, which involves using art supplies that repel watercolor paint. The crayon made waxy lines that were practically invisible and thus preserved the colors underneath when painted over. In addition, using dark paint creates a strong contrast to the brighter colors, making the fireworks a true explosion of color. Cool, right?
Step 6: Strengthening the Tint of Colorful Reflections
While the sky layer dries, let's strengthen the colorful reflections in the water. Use the edge of the flat brush to add vertical lines into the water using the same colors from before. Apply dark violet to build up contrast around the edges of the water, and again, play with hard and soft edges, letting the paint blend together on the page.
Step 7: Adding More Darks
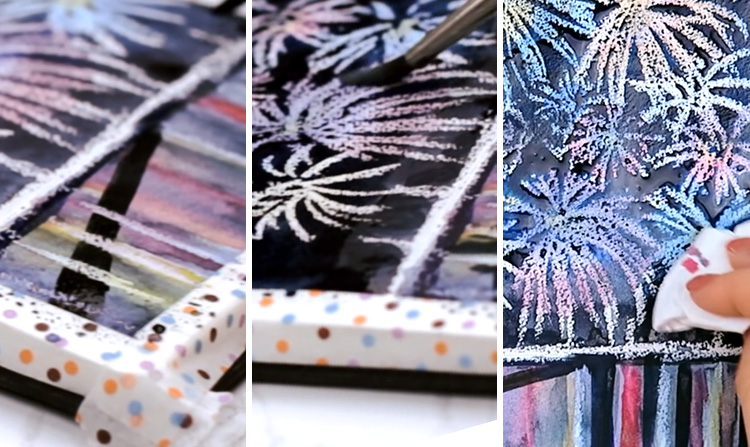
Switch to back to the no. 6 round brush and use Ivory Black to sketch a dark path that extends diagonally from the left side of the water. Next, apply the same black to the sky via the wet-in-wet technique, making sure to fill in every nook and cranny of the painting. Finish this step by using a crumpled ball of paper towel to lift wet paint from the bottom of the sky to lighten its value.
Step 8: Improving Contrast in the Final Details
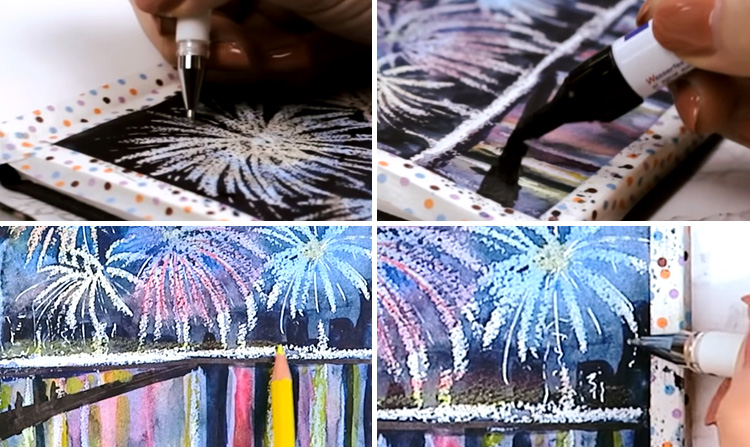
Once everything has dried completely, let's use a different set of art supplies to add sparkle to your watercolor ideas! Use a white gel pen, or a brush with white gouache or acrylic paint, to give more "pop" to the fireworks display. Sketch thin, broken up lines that extend out from the center of each firework, and break up the lines to give them a more textured effect. If that dark path in the water is not dark enough, use a black permanent marker to give it an extra layer of intensity. Give the distant cityscape a glow by using a yellow colored pencil to shade over the line that separates the sky from the water. Create a gradient that disappears into the sky to give it an atmospheric feel. Finally, pick up that white gel pen once more and add small windows and edges to some of the buildings. Remember to keep it loose and fun!
Step 9: More Reflections in the Water
Here's one last technique you can use to give extra depth to your painting. Use a no. 4 flat brush loaded with Ivory Black to add sweeping, horizontal lines into the water, using clean water to blend some of the lines into the rest of the painting. Wait for the painting to dry completely before removing the tape around the edges, giving your painting a clean edge.
That concludes this session! We hope you had fun learning new watercolor techniques in this one!
If you'd like to pick up watercolor ideas straight from Mako herself, here's her video:
