Let's join Mako as she tries out some extra special watercolor techniques! In this tutorial, we're using the negative painting technique to make not just one but two vibrant backgrounds. Now get ready to paint some eye-catching leaves!
Materials used:
- Hahnemühle's Watercolor Block (140lbs, size 9 x 12") or any similar watercolor paper
- Washi, artist's, or masking tape (1/2" width)
- Palette for mixing paint
- Container with clean water
- Dry rag or paper towel
- HB pencil
Schmincke's Horadam Watercolors
- Lemon Yellow
- Cerulean Blue Hue
- Ultramarine Blue
- Cadmium Yellow Medium
- Schmincke Payne's Gray or Lamp Black
- Burnt Umber
- Cadmium Red Light
Brushes
- Da Vinci Series 5530 CosmoTop Mix B: Round brush (no. 10)
- Da Vinci Series 5590 Squirrel Mix: Round brush (no. 2)
Step 1: A Light Wash Foundation
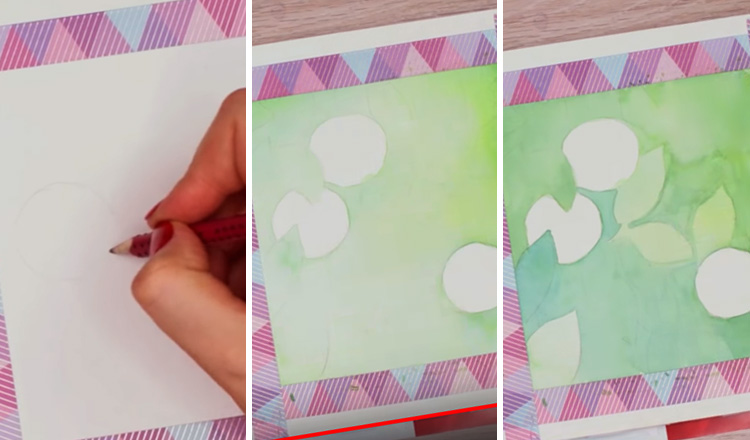
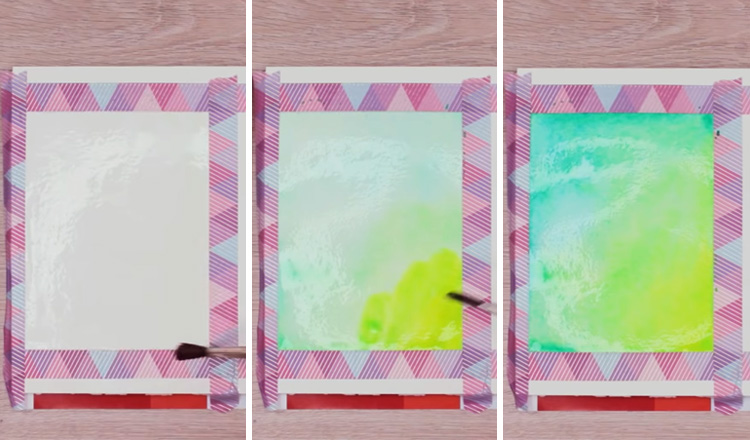 Negative painting is the act of painting around a subject and allowing the unpainted space to give it its form. To do it properly, you have to be extra mindful of the blank spaces on your paper. We'll be practicing how to think this way in this lesson by painting 2 easy watercolor ideas. Let's jump right in and try out these watercolor techniques, shall we? The first thing to do is to use artist's or masking tape to divide your watercolor paper into 2 sections. Next, prepare Lemon Yellow and Cerulean Blue Hue in two separate wells of your mixing palette, using water to dilute the tints to a transparent consistency. Prepare a green shade in a separate well by mixing Lemon Yellow with a hint of Cerulean Blue Hue. Take a no. 10 round brush and apply clean water over the first section. Use just enough water to make the paper shiny, and use a dry rag or paper towel to mop off any beads of water that collect along the edges. Now do a graded wash (i.e. a wash that transitions from one value and/or color to another) with the colors you just prepared. Start with Lemon Yellow at the bottom-right corner, work in the green tint when you reach the middle, then finish with Cerulean Blue Hue at the top. Since you're working wet-in-wet (i.e. adding wet paint to a wet surface), the colors blend into each other seamlessly, leaving no hard edges. Allow this first layer to dry completely before proceeding to the next step.
Step 2: Cutting Out Shapes With A Brush
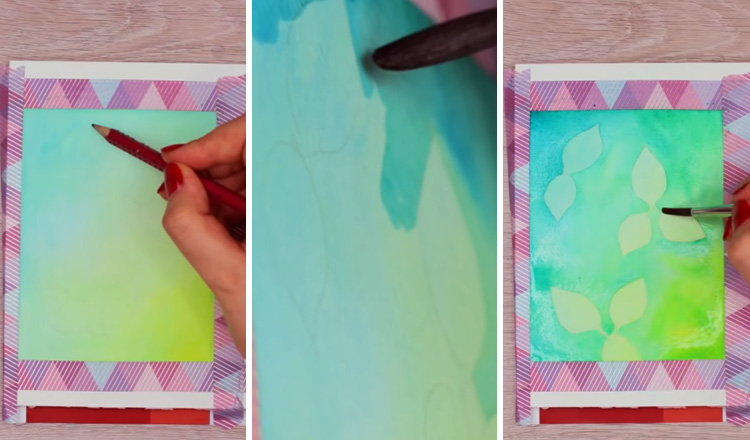 For this step, take out a pencil and lightly sketch out a few leaves. Try to avoid using an eraser because you might damage the colors already on the page. With the same round brush, apply a second layer of paint using the same colors as before. This time, paint around the leaves you just sketched. It's almost like you're cutting them out with your brush - neat, huh? You can add more paint to darken the value (i.e. how light or dark a color is), but try to keep this layer transparent like the first one. The values of your watercolor painting may seem too light right now, but don't worry - it will become more vibrant with each new layer. Like in the first step, wait for this layer to completely dry before moving on to the next.
Step 3: Rinse and Repeat!
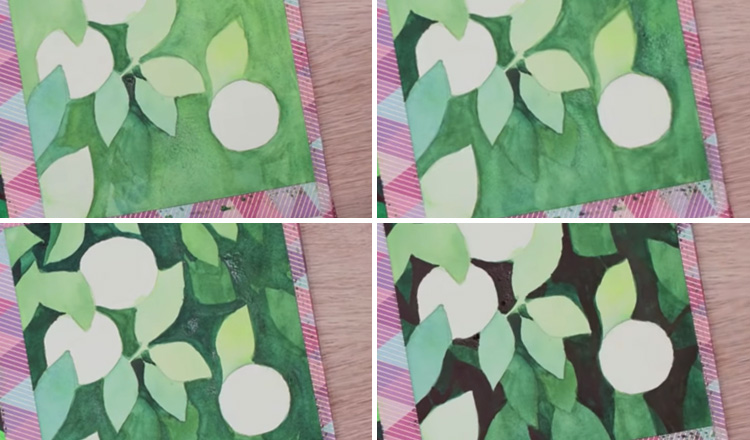
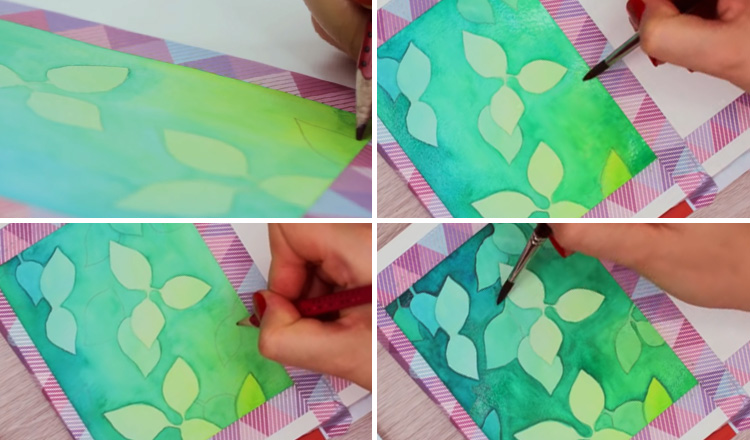 The next step in this painting is to repeat the watercolor techniques that we did in step 2! With a few small changes, of course. First, sketch in some new leaves, then use the same round brush to paint a third layer with Lemon Yellow, Cerulean Blue Hue, and the green mixture. To add interest, combine Ultramarine Blue and Cadmium Yellow Medium for a warm green tint and work it into the other colors via the wet-in-wet technique. Allow this layer to dry, then repeat the same steps: draw leaves with a pencil, then add a fourth layer, carefully painting around each new leaf. Use more saturated paint in order to darken the tint.
Step 4: Using Watercolor Techniques to Create Depth
 For this step, it's more of the same! Since there's not a lot of empty space left, you can actually skip the sketching part and "draw" the leaves out with your brush. This time, add a bit of Schmincke Payne's Gray or Lamp Black to the green mixture to darken it even more for the fifth layer of paint. Use even more Payne's Gray/Lamp Black for the sixth layer, and switch to the no. 2 round brush so that it's easier to cover the small spaces. Remember to wait for a layer to dry completely before adding a new one. You don't want your colors to bleed, or turn into a muddy mess!
Step 5: Painting in Some Leafy Details
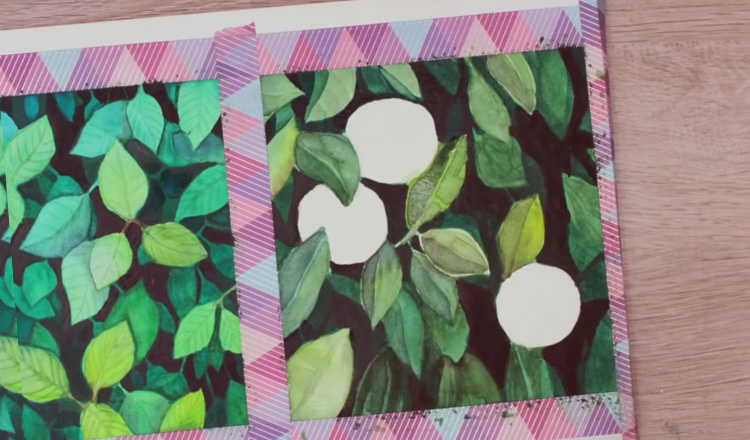
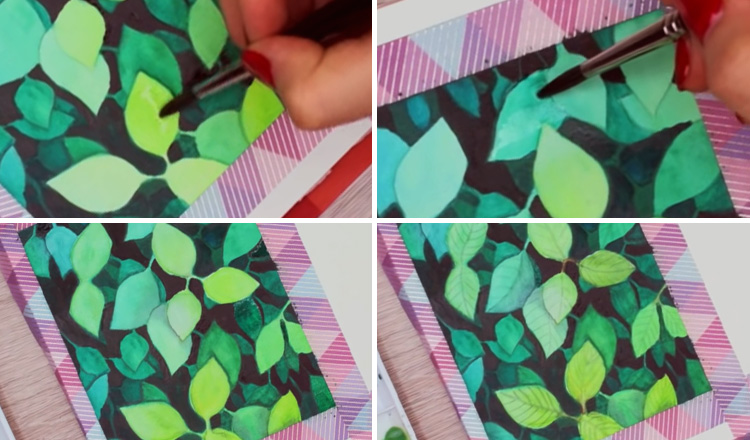 By this point, it should be easy to see the results of your painting techniques. The leaves from the first 2 layers stand out the most, while the leaves from the latest layers seem to fade into the background. This is because of value and contrast: lighter objects come forward, while darker objects are pushed into the background. We're not done yet though! Let's add some details to really make this painting pop. Use the no. 10 round brush to mix Lemon Yellow and Cerulean Blue. Dilute the green mixture with water and apply it to the lightest colored leaves, starting from the stem. Do a graded wash by adding some water as you spread the color to the tip of each leaf, giving them depth. Next, pick up diluted dark green tint and use it to add shadows on overlapping leaves. Paint around the contours of the topmost leaf, and fade out the color with water for a natural look. Once these layers of color have dried, switch back to the no. 2 round brush and use the dark green tint to add veins to the leaves. Pick up diluted Burnt Umber and apply it to some of the stems - and you're done!
Step 6: Throwing Oranges Into The Mix
 Did you have fun using watercolor techniques to create the first leafy masterpiece? The second painting will be similar, but with a fun, orange twist. This time, we begin with a sketch. Use a pencil to draw three oranges and some leaves into the second section of your watercolor paper. With a no. 10 round brush, apply a layer of clean water around the oranges. Next, use the wet-in-wet technique to lay down a layer of diluted green mixture made from Lemon Yellow and Cerulean Blue. Allow this layer of transparent green to dry completely before laying down a second layer of paint. For this layer, paint around some of the leaves that you sketched, and add more blue to deepen the green tint.
Step 7: Building Leafy Green Depths
 The watercolor techniques in this step should be familiar to you by now. It's time to build depth with layers! The third layer is pretty straightforward. Simply use more pigment and less water to make the green more vibrant. For the fourth layer, add more Ultramarine Blue to deepen the green's value. For the fifth and sixth layers, use Payne's Gray/Lamp Black to push the green into an even darker value. Remember to create new leaves by painting around them, and always allow each layer to dry completely before adding a new one!
Step 8: Painting Tips for Leafy Details
 Now that the leaves have been established, let's give them some texture! With the no. 10 round brush, pick up diluted Lemon Yellow and Cerulean Blue to darken the lighter-colored leaves. Add shadows to overlapping leaves with the dark green mixture, and use water to soften the shadow edges. Instead of adding lines to the leaves, you can use the dark green mixture to paint half of the leaf to add interest.
Step 9: Dropping Warmth into Oranges
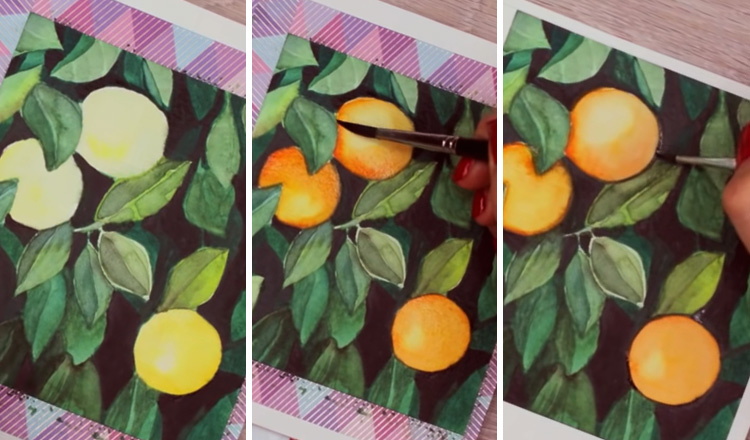 Last but not the least, it's time to work on those oranges! First, establish the base color by blocking them in with diluted Lemon Yellow. Once this base layer has dried, mix Lemon Yellow with Cadmium Red Light and apply it to the oranges, starting from the outer rim. Do a graded wash by adding water as you pull the paint inward, in order to give the oranges some depth. Allow that layer to dry before adding a stronger tint of orange with the tip of your brush. Apply this to the outer edges of all oranges wherever there are leaves touching or overlapping them, then blend the color into each orange by adding some water before leaving them all to dry. Finally, pick up the dark green tint from before, and paint a thin line around each orange to make them stand out from the rest of the painting. Once everything is dry, don't forget to peel off the tape around the borders to give your paintings a clean edge. That's it! We hope you enjoyed learning these more challenging watercolor techniques! If you'd like to watch Mako paint these vibrant leaves, here's her video:


