Do your watercolor paintings look like they need a creative boost? Well, we've got you covered! Here are 13 watercolor techniques and ideas you can use to bring your paintings to the next level. Thanks for showing us the way, McCall!
Materials used:
- Any cold press watercolor paper (140lb, size 9" x 12")
- Artist's or masking tape (½" width)
- Prang Oval 8-Pan Watercolor Set, or any watercolor paint you might have on hand
- Palette (as needed)
- Container with clean water
- Dry rag or paper towel
- Elmer's No-Wrinkle Rubber Cement or Grumbacher's Miskit liquid frisket
- Table salt
- Rubbing alcohol
- Push pin or needle
- A stamp, or any item you can use as a stamp (like leaves)
- Two straws
- A pen or pencil
Brushes
- Any flat brush (no. 14)
- Utrecht Manglon Synthetic Brush: Round brush (no. 4)
Intro: Set Up Your Paper to Practice Watercolor Techniques
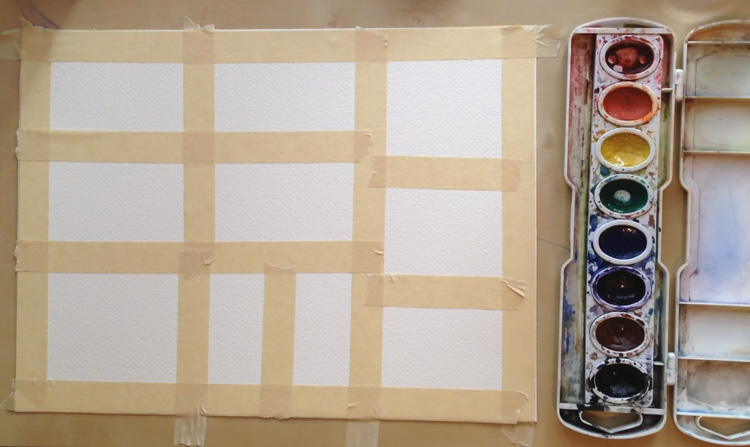 Before you begin practicing these watercolor techniques, first divide your watercolor paper into 10 sections. Start by adding strips of artist's or masking tape along the borders of the paper, then add smaller strips in between. These sections don't need to be uniform if you don't want them to be! Feel free to make them big, small, narrow, or wide to jazz up your practice session.
Tip #1: The Beautiful Consistency of a Flat Wash
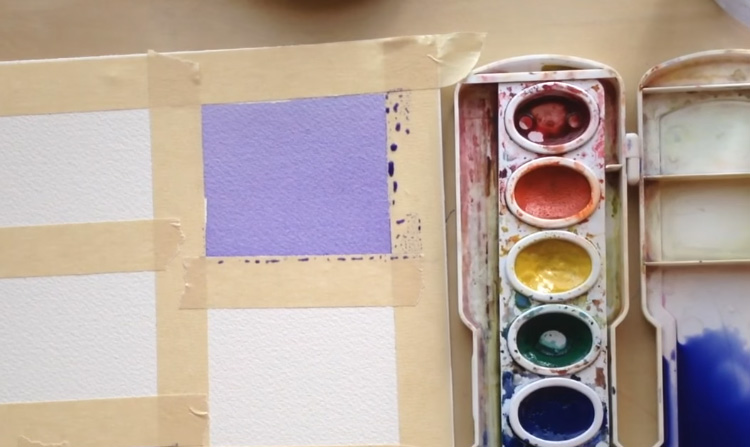 Now then, let's begin with the first of these watercolor techniques: the ever-reliable flat wash! Flat washes are a staple technique in watercolor painting. They look simple but can be tricky to do. To do a proper flat wash, first mix a large batch of Violet with water using your no. 14 flat brush. You can test the color on a piece of scrap paper or paper towel to check the value (i.e. how light or dark a color is) of the paint. Next, load up your flat brush with the pigment and apply it to one of the sections on your watercolor paper. Use horizontal brushstrokes and go from top to bottom. Since the area you're working on is small, you can actually tilt the paper while you apply the paint so that gravity helps to pull the paint down. Working on an angled surface also achieves this effect. You'll know you're doing it right if the paint you've laid down has an even consistency. If extra paint pools around the edges of the section, mop it up with your brush. Pro tip: it's best to work quickly to achieve a flat wash! That even tone is achieved by pulling the paint down while each brushstroke is still wet.
Tip #2: Creating Personality Via the Graded Wash
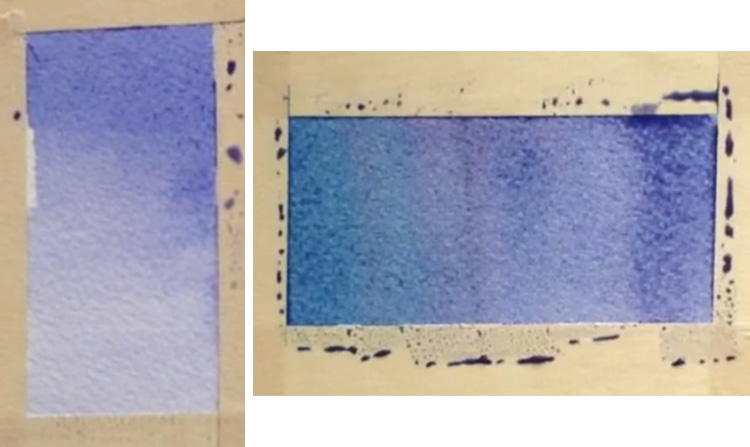 Now that you've tried the flat wash, it's time to get a little fancy. This next watercolor technique is about the graded wash, which is a wash that transitions smoothly from one value or color to another. First, let's do a graded wash that transitions in value. Load your flat brush with Violet and lay down horizontal brushstrokes on a new section of watercolor paper. This time, add a little water to each new stroke, which gradually dilutes the pigment. When you finish, you'll get a beautiful value change from dark to light. A graded wash that transitions in color uses the same technique; the only difference is that instead of water, you gradually add a new color. Before you start painting, prepare both colors in advance - for this example, let's use Violet and Blue. Lay down vertical brushstrokes of Blue in a new section, painting from left to right. As you fill up the rectangle, add a little Violet to each new stroke, and watch as the colors melt into each other seamlessly. Remember to lift any extra paint pooling around the edges of the watercolor paper to avoid getting a backwash effect! A backwash happens when one section of paint dries before another and wet paint seeps into the dry section.
Tip #3: Protecting Details with the Masking Technique
 Here's a fun technique where you'll get to use something new. The masking technique involves using a tool to preserve the white of the paper as you paint. For this practice session, we'll use rubber cement. Use the little wand attached to the inside of the cover to pick up rubber cement, and drizzle it onto a new section of watercolor paper. Give it some time to dry before applying a layer of Violet with your flat brush. Once the paint has dried completely, gently rub off the rubber cement with your finger. As you see, the paint was unable to enter the spots with rubber cement so the white of the paper is preserved! Masking is a great way to protect small details of your watercolor painting that would be difficult to paint around, especially highlights or the white reflection needed when painting eyes. You can also use liquid frisket (also known as masking fluid) instead! This tool was crafted especially for watercolor painting so dries much faster on the page compared to rubber cement. It's also easier to apply, and can be done with a paintbrush to create more delicate details.
Tip #4: The Dreamy Softness of the Wet-in-Wet Technique
 Here's another staple in this lesson about watercolor techniques: the wet-in-wet technique! First, rinse your flat brush and apply a layer of clean water to a new section of watercolor paper. Be sure to add just enough water to give the page a glossy shine. If excess water begins to pool around the edges, mop it up with a clean brush or a paper towel. Next, pick up diluted Blue and add a layer of wet paint directly onto the wet surface of the page. Load Violet and add a brushstroke of tint to the bottom of the section while it's still wet. You can also use the corner of the brush to dab dots of paint into the wet paper to create a more interesting effect. Notice how the paint immediately spreads throughout that wet surface? Once this section completely dries, those brushstrokes will have soft, "hazy" edges, almost like they've melted into each other.
Tip#5: Scratching the Surface with Sgraffito
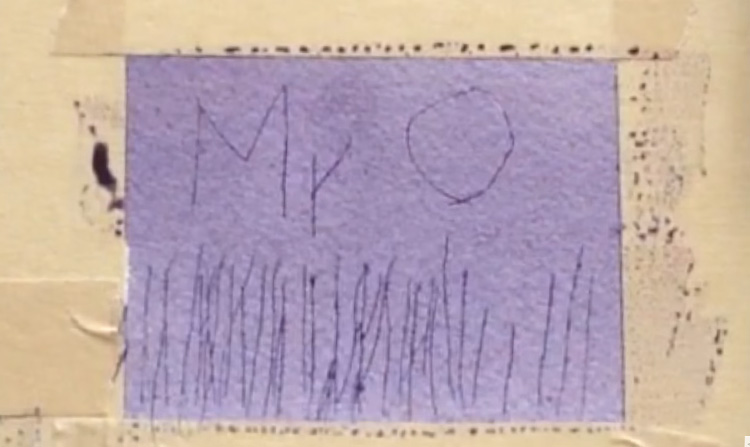 Would you believe us if we told you that an ordinary needle can help to add interest to your watercolor ideas? Because it can - through the Sgraffito technique! To do this, pick a new section of watercolor paper to work on, and with the tip of a needle or push pin, scratch the page with different lines. Make sure you're applying enough pressure to scratch the paper's surface, but not enough to puncture it. Next, switch to the flat brush, and mix Brown with Violet to deepen the purple tint. Load the brush and paint over the whole section, scratches and all. The paint will pool into the marks you made, darkening them and creating an interesting contrast with the rest of the page. Pro tip: watercolor techniques like this one benefit the most from darker colors, and make the scratch marks stand out more.
Tip #6: Bursts of Salty White
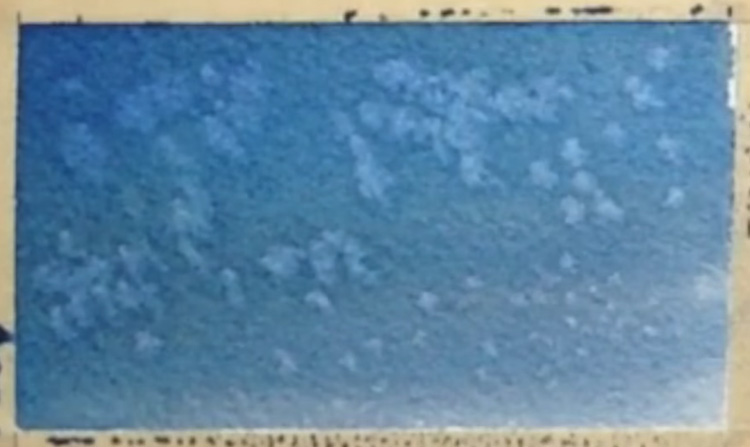 This is another watercolor technique that benefits from tints with dark values, so the first thing to do is to use your flat brush to darken Blue with Violet. Next, lay down a flat wash in a new section of your paper. While the paint is still wet, sprinkle a pinch of salt over the painted area, then let it dry. It will take some time, but eventually you'll see white speckles form around where the salt crystals have landed. This happens because the salt actually sucks up the paint around it, creating little starburst effects. If you want to learn how to watercolor a starry galaxy, you can try this technique out to create the stars. Give this section plenty of time to dry completely. Once it does, carefully rub off the salt crystals so as not to damage the paper. Now let's move on to the other watercolor techniques!
Tip #7: Pushing Away Paint with Rubbing Alcohol
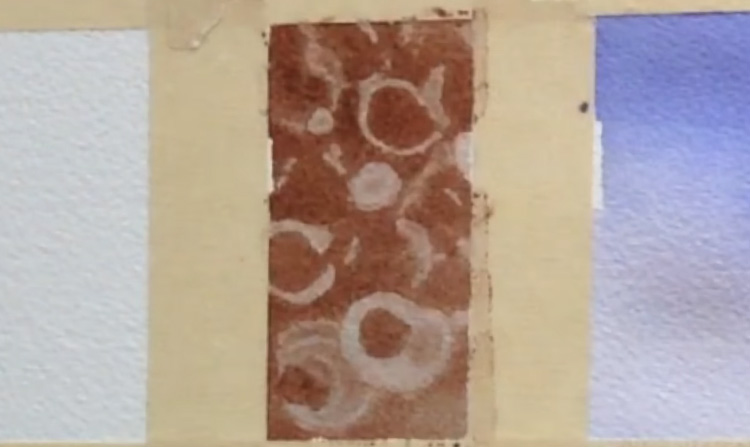 The rubbing alcohol technique has a similar effect to the salt technique, and it starts out the same way. First, use the flat brush to do a flat wash of Brown on a new section of watercolor paper. Next, while the paint is still wet, apply the rubbing alcohol! You can do this in several ways. One way is to use the other end of your paintbrush to add dots of alcohol into the wet paint. Another you can try is to use the end of a straw to create fun, circular patterns. Much like with the salt technique, the rubbing alcohol technique creates white patterns in wet paint, but it does this in a different way. While salt sucks up paint, alcohol pushes away paint from wherever it's applied. Interesting, right?
Tip #8: Lifting Paint to Create Negative Space
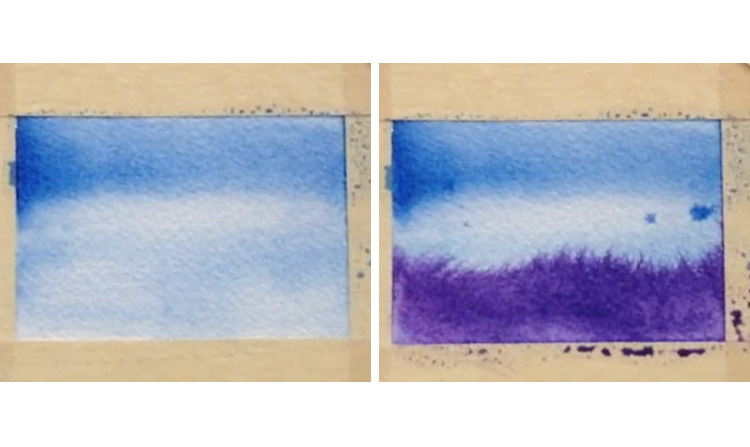
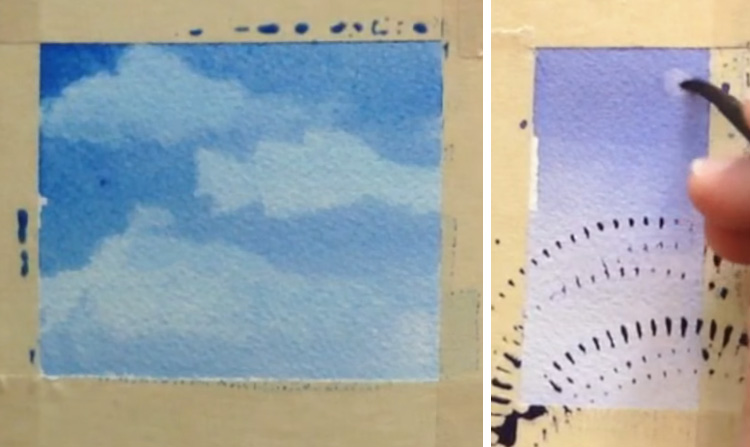 Watercolor techniques aren't always about adding paint. In this one, you'll be lifting paint to create areas of interest in your watercolor painting. In the first method, we'll be using the lifting technique to create clouds. Begin by using your flat brush to lay down a flat wash of Blue in a new section of watercolor paper. Then, while the paint is still wet, use the corner of a paper towel to create clouds by picking up the paint. Use a light dabbing motion to vary the values in the cloud and create depth. The second method lets you lift paint to create an area of interest in an already dry painting. First, take the no. 4 round brush and wet it with clean water. Load just enough water to make the bristles shiny; wipe off excess water on a dry rag or paper towel. Now, go back to any of the dry painted sections (in this case, we're using the one with a graded wash), and use a circular motion to apply water with the tip of your brush. The re-wetted paint gets sucked into the brush and whitens the concentrated area, almost like magic! Pro tip: If you need to preserve the white of your paper, it's always best to paint around what you want to preserve, or use the masking technique to protect it. Not all pigments are classified as staining colors (i.e. colors that stain the paper and can't be lifted completely), but being non-staining doesn't guarantee that they won't leave behind traces of color.
Tip #9: Texturing with Dry Brushstrokes
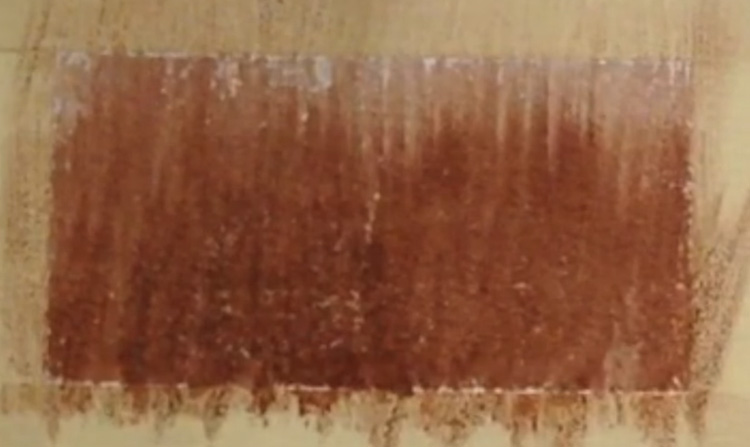 To use this technique effectively, make sure that your no. 14 flat brush is as dry as possible. Next, load the brush with Brown paint by dipping the brush directly into the watercolor pan. Pick a new section of watercolor paper, and apply vertical brushstrokes starting from the bottom of the section. Apply then release pressure for each stroke to create a texture that's dark at the bottom and light and feathery towards the top. This effect happens because very little water is mixed into the paint, creating strokes where the brush bristles are pronounced. The dry brush technique is great for creating textures like grass and fur, so it could be a great asset to any nature or animal paintings!
Tip #10: A Smattering of Paint
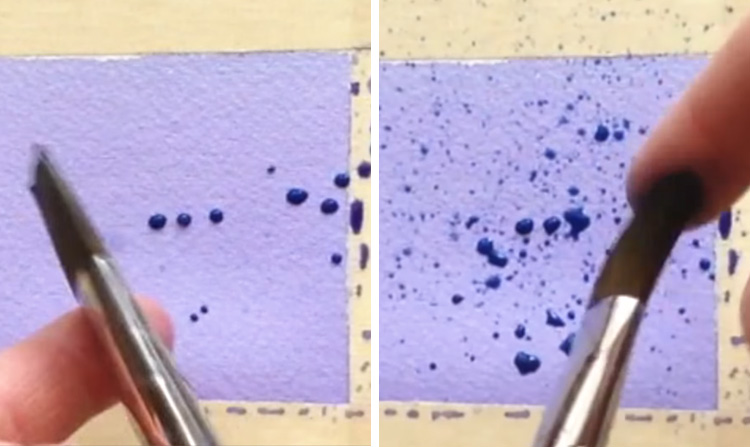 This is one of the messier watercolor techniques, so be prepared to clean up as you go! To do the spattering technique, load your flat brush with a lot of Blue paint, and hold it over one of the painted sections (in this lesson, we're using the square where we practiced the flat wash technique). Now tap the ferrule of the brush (i.e. the metal bit that joins the bristles to the handle) against your finger to force the paint off the brush tip. This method produces large drops of paint in a controlled way. To produce spatters with smaller drops and wider coverage, use your finger to flick through the bristles. You can also use a toothbrush to achieve this effect.
Tip #11: Leaving A Mark
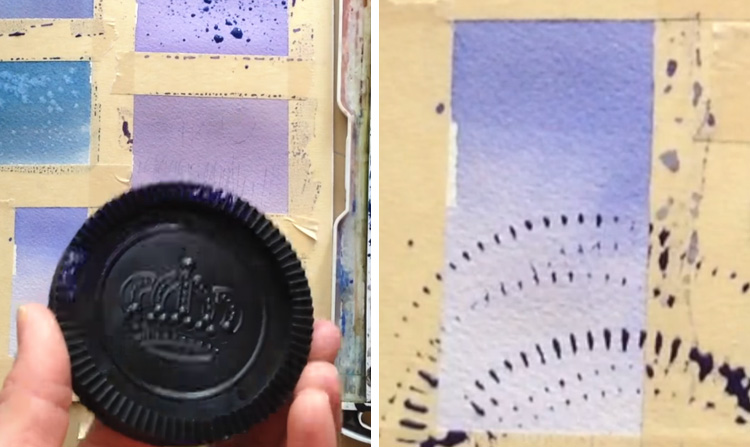 The stamping technique is probably the most simple and straightforward to do out of all the watercolor techniques in this lesson. First, as always, dilute a color that you want to use for your stamp - here we'll use Violet. Next, take your stamp and apply a layer of paint to it with the flat brush. Lastly, lay down the painted side on top of the watercolor paper (here we're using the graded wash section), and apply pressure. When you lift the stamp, it should leave behind an impression in watercolor paint! The fun thing about this technique is that you can use almost anything as a stamp. Anything with a textured surface, like a leaf or a poker chip, is bound to leave a good impression! Just be careful though, as watercolor paint has a slight chance to stain whatever you're using as a stamp.
Tip #12: Breathing Trees into Existence
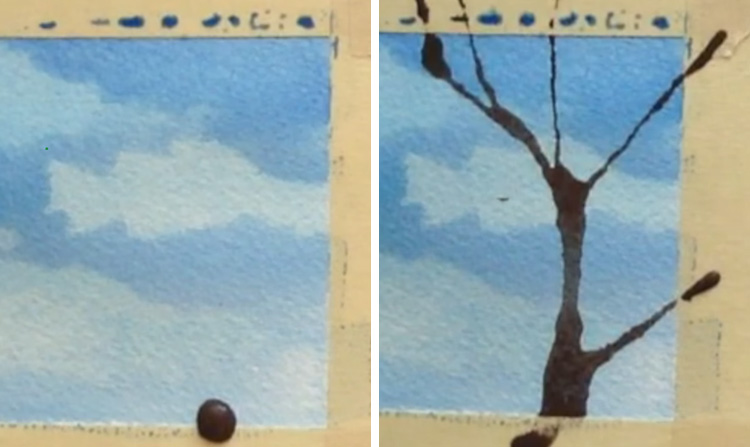 Did you know that you can paint a tree... with a straw? Start by mixing Blue with Brown to deepen the brown tint, then use the flat brush to add a thick drop of paint at the bottom border of a painted section of watercolor paper (here, we're using the one with clouds). Taking a fresh straw (not the same one you used for the alcohol technique!), point it at the paint drop, and blow the paint in the direction you want! If you find yourself running out of paint, you can always add fresh drops of paint directly onto any still-wet streaks, and continue your straw-blowing adventures from there.
Tip #13: Deepen Colors With A Glaze
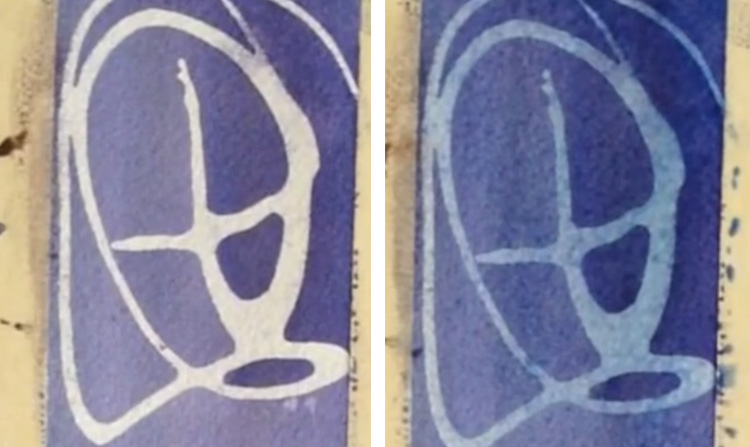 We're at the last tip already! How time flies when you're learning how to watercolor. The final tip of this lesson is using the glazing technique to add depth to your colors. Pick up diluted Blue with your flat brush, then lay down a flat wash over one of the painted sections; in this case the one where we practiced the masking technique. As it dries, that whole section will appear to be darker than before. That's it! A glaze can be applied several times, but just be sure to allow each layer to dry completely before adding a new one. Try not to add too many layers though - while watercolor paper is designed for watercolor paint, most of them will have a limit before they begin to buckle or pill. To finish off this practice session, carefully peel off the artist's tape from the page and label each section with the technique you used. And you're done! We hope you enjoyed trying out all these different watercolor techniques. If you're curious about how McCall uses these techniques, you can watch her video here:


