Did you know that there's a simple way to create a textured watercolor background by only using a spray bottle? Well be prepared to have your mind blown because we'll be doing just that in this tutorial. Thanks for guiding us through the steps to create easy paintings and cool backgrounds, Soon!
Materials used:
- Arches hot press watercolor paper (300lb, cut to size 9" x 12")
- Spray bottle with an adjustable nozzle, filled with clean water
- Three small plastic plates to hold your paint
- Artist's tape (recommended), masking tape, or double-sided tape
- A wooden board to tape your paper on (larger than your paper size)
- Any paintbrush
- A container with clean water
- Dry rag or paper towels
Winsor & Newton Professional Watercolors
- Permanent Rose
- Cerulean Blue
Mijello Mission Gold Watercolors
- Permanent Yellow Deep
- Cerulean Blue
Step 1: Preparing Your Workspace
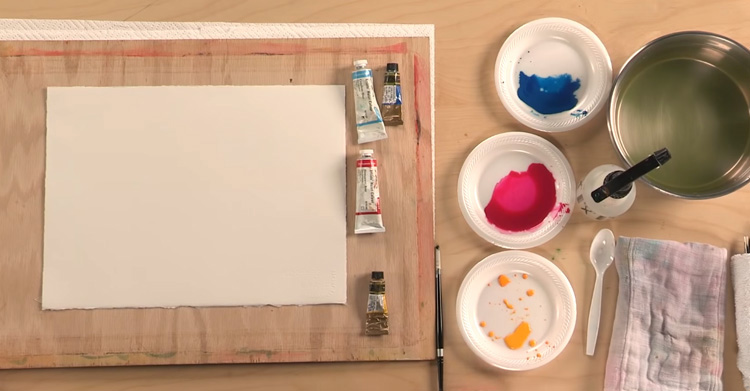 For this tutorial to be effective, it's important that you prepare your materials and workspace well. First, attach your watercolor paper to a thick, flat board. Make sure that the board isn't too heavy or attached to anything; you need to be able to move and tilt it around later. Use double-sided tape to secure the paper from the back. You can use artist's or masking tape as well; just loop the tape into itself before attaching it to the paper (actually preferable as this won't damage your paper when it's time to remove it). This step is important because you don't want your fingers to get in the way of the paint. Next, lay out a dry rag or paper towels on the table at approximately the width of the board. These will catch any paint that drips off the board later, keeping your workspace clean. Finally, prepare your paint! The paint will be poured onto the paper so you'll want to keep them in separate containers. Use something that won't take up too much space and is easy to move around, like plastic plates. Dilute your pigments with water, mixing the paint evenly with a paintbrush until it reaches the consistency of milk. Make sure you mix enough paint to cover the paper you're working on.
Step 2: Adding Water with a Spray Bottle
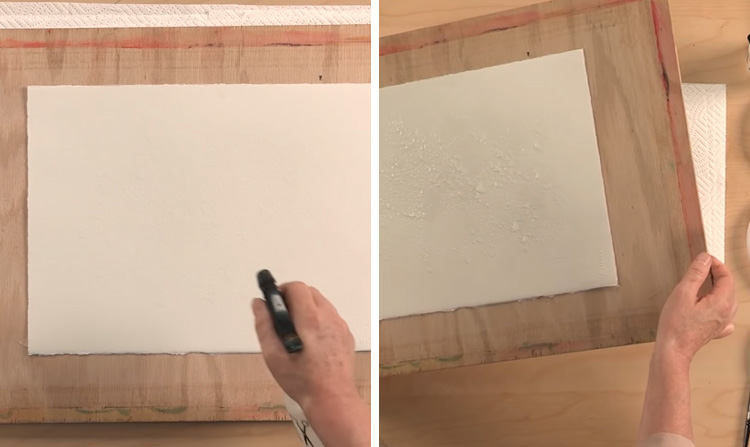 Before you use the spray bottle on the page, test it out. If it produces a fine mist, adjust the nozzle until the spray is more concentrated and controlled. Once you are satisfied, start using the spray bottle to add beads of water onto the watercolor paper. Try to concentrate most of the water beads in the center of the paper. Since you're using very thick paper, it should be sturdy enough to hold all that water without buckling. Amazing, right? You can manipulate the beads of water by tilting the board in different directions. Do this until you are satisfied with how the water sits on the page.
Step 3: Pouring Paint
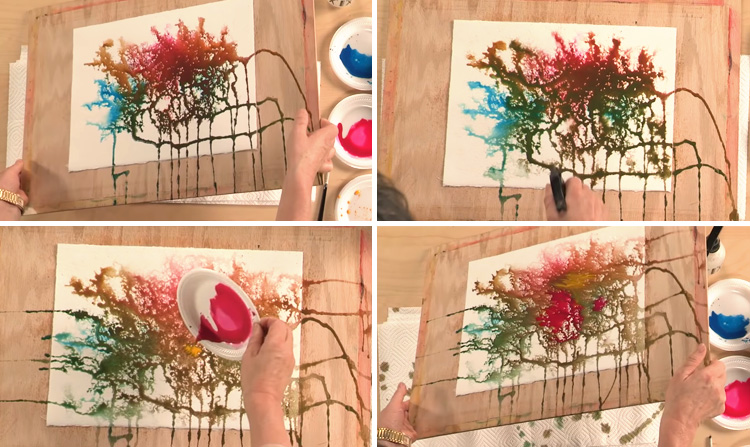
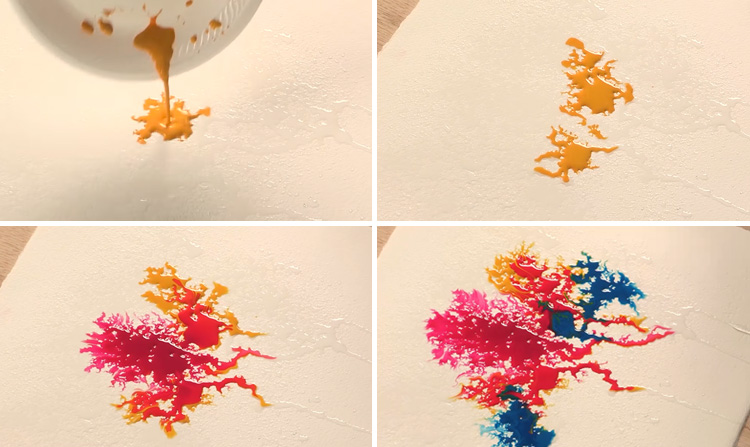 It's time to get colorful with this pour painting! Pick up the plate containing the mixture of Permanent Yellow Deep and pour the paint directly onto the watercolor paper. As with most watercolor paintings, you want to work from light to dark colors as the darker colors may overwhelm the lighter ones. For the best results, find a spot with a heavy concentration of water and pour the pigment there. The paint will quickly flow through wherever the water has settled, producing a unique and intricate pattern! Do the same with Permanent Rose and Cerulean Blues (Soon mixes two different brands of Cerulean Blue paint here, but you can experiment with just one for now). You can be extra creative and pour the pigments in different sections of the paper. The colors will naturally meet and mix together wherever there's water on the page.
Step 4: Gravity Lends A Helping Hand
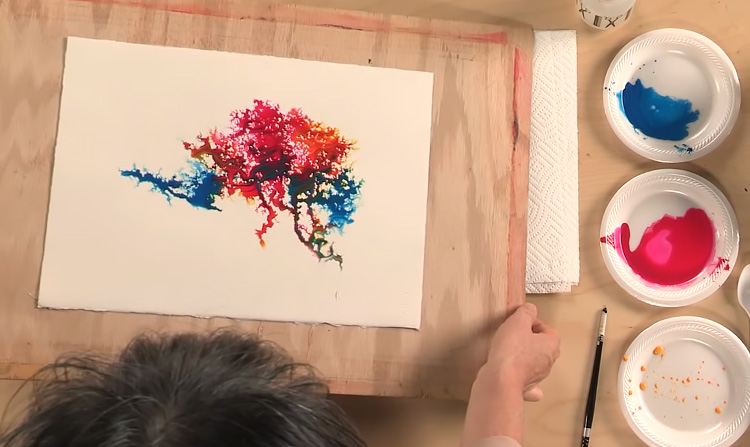 The pigments will eventually stop moving around and settle on the page after a while. Once that happens, you can pick up the board and start tilting it in different directions. This will encourage the paint to mix together and spread out even more. If the paint runs off the paper and towards the edge of the board, just position the board over the rag or paper towel you laid out earlier.
Step 5: More Spray Bottle Fun!
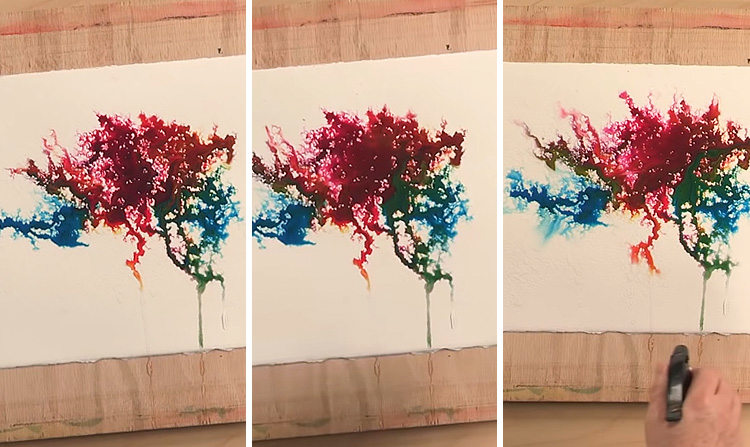 Is that it? Not quite! It's time for more spray bottle fun! If you want parts of your background to appear more solid, just take your spray bottle and spray into that section to cover it with water. The additional water will pull more paint into that section, covering it up. Here's another fun thing you can do to give the edges of your watercolor painting more texture: spray water that radiates away from the center of the page. If you aim for the edges of the painting, water from the spray bottle will force paint outward, giving those edges a soft, wispy effect.
Step 6: Rinse and Repeat
 The next thing to do is rinse and repeat! Cycle through steps 3 to 5 until you're satisfied with the outcome of your watercolor background. Tilt the board around so that gravity can help pull the paint in different, interesting directions. Use the spray bottle to make areas more solid or to soften hard edges. You can even pour in more paint to strengthen your colors! Just try not to overdo the mixing, or else you may end up with one muddy color. Once you finish, allow the painting to completely dry before removing it from the board. Ta-dah! You've done it! You've made a fun, textured background with the help of a trusty spray bottle. You can take your painting even further by adding a painted subject on top, like Soon does. Regardless, we hope you've enjoyed picking up this great technique to spruce up your future paintings. You can watch Soon demonstrating the technique in this video:


