Hope you're in the mood to pick up some new watercolor techniques because today we'll be adding new tips to your arsenal. Following these essential do's and don'ts of watercolor can bring your watercolor painting skills to the next level. Thanks for showing us the best way to paint art using watercolors, Ahmad!
Materials used:
- Canson XL series cold press watercolor paper pad (140lbs, 9" x 12" cut to size 4½" x 6") (any similar brand is also fine)
- Any printer paper
- Toilet paper
- Thin tissue paper
- Paper towel
- Artist's tape or masking tape
- Container of clean water
- Watercolor paints (any brand and color)
- A few watercolor paintbrushes (any large brush is fine)
- HB pencil
- Kneaded eraser
Tip 1: Avoid Printer Paper
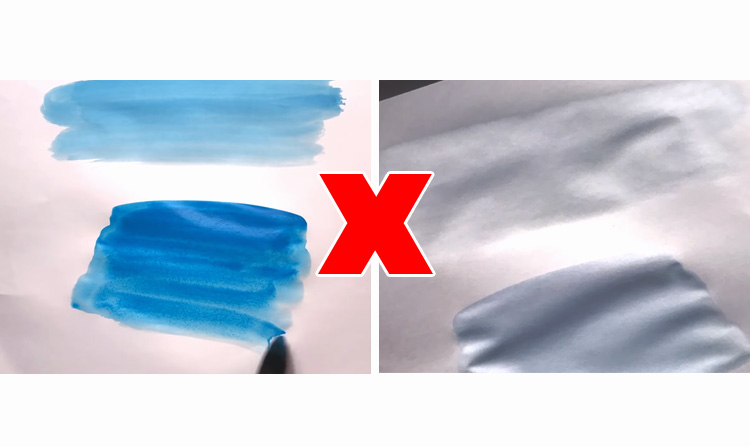 The first tip is pretty straightforward: don't use printer paper! Printer paper is very thin and flimsy, which means it doesn't hold water very well. Even just a single layer will cause it to buckle and create unsightly wrinkles all over the page. Yuck! Instead, you can use printer paper to sketch and plan your illustration. When it's time to paint, use the heavier watercolor paper brands which are produced especially for watercolor painting. Famous watercolor artists favor these papers because they're able to hold tons of water and paint with limited buckling, pilling, or wrinkling. Good watercolor paper is a big investment, but your art will definitely thank you later.
Tip 2: Watercolor Techniques for Lifting Paint
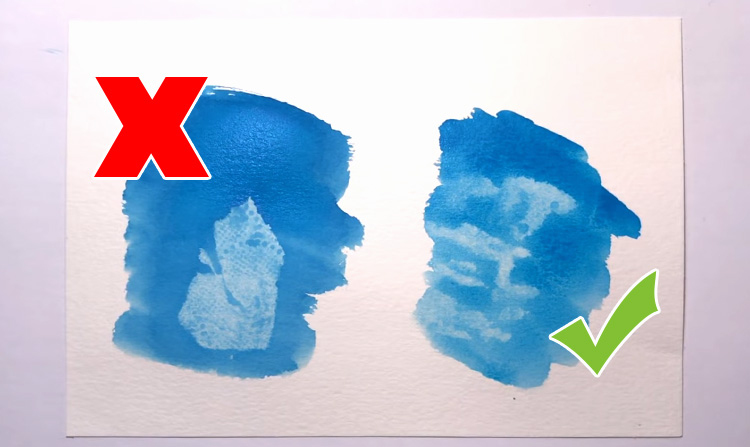 There are many different watercolor techniques for lifting paint from your paper. Here are two things to keep in mind before you try it yourself: First, don't use toilet paper or thin tissue paper! Thin tissue paper can easily break off and stick to your watercolor painting, potentially ruining it. Instead, use paper towels, which are made of sturdier material. Second, don't apply too much pressure! Too much pressure may damage the fibers of your paper, and creates harsh-looking marks. Instead, use a light dabbing motion to pick up paint. This creates a more subtle effect that you can even use to create interesting textures for an abstract painting!
Tip 3: How to Avoid Buckling
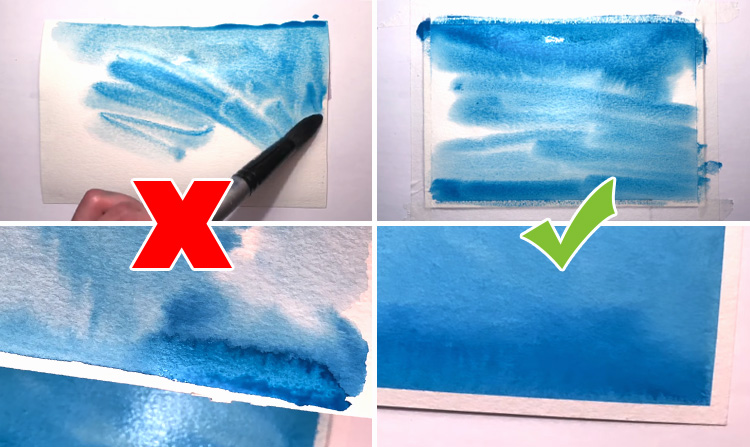 Next tip: don't wet the whole paper without first taping it down! Paper saturated with water tends to buckle, curling up around the edges. Because it is no longer laying flat, any paint added to the paper will pool around the edges, instead of spreading around the whole page. This makes trying watercolor techniques, like a flat wash, virtually impossible! To avoid this, use artist's tape (or masking tape) around the border of the watercolor paper. This type of tape isn't as sticky as regular tape, so you can peel it off without tearing the paper underneath. It also ensures that the paper remains relatively flat, even after you've added water to it. As a result, layers of paint are able to spread evenly. A nice bonus to this is that the tape gives your watercolor painting a clean edge after it is removed. Just make sure to gently peel the tape off after the paint has dried.
Tip 4: Adding Water
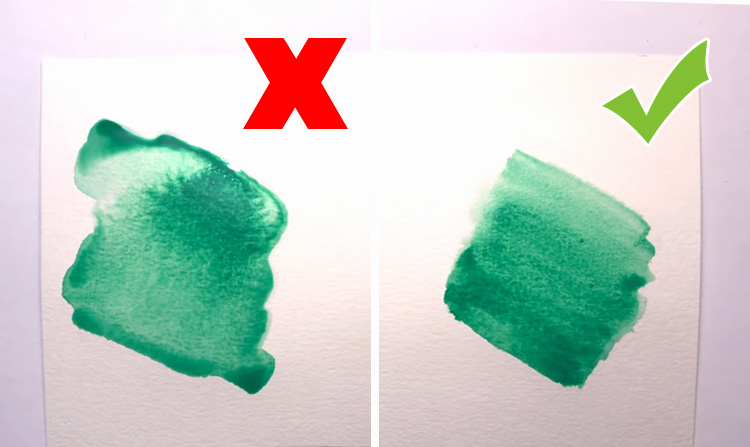 Water is a must when working with different watercolor techniques. When working with the wet-in-wet technique (i.e. adding wet paint to an already wet surface), the first step is to add a layer of water to your watercolor paper. A handy tip to remember here is: don't add too much water! You'll know you've added too much if the water starts pooling around the edges, as if it's ready to spill out. When you add paint to these over-saturated puddles, the pigment tends to pool in unsightly ways instead of spreading evenly. To avoid this, use just enough water to give the paper a subtle sheen of moisture. Next, when adding paint, work from bottom to top. See how much easier it is to control?
Tip 5: Sketching in Outlines
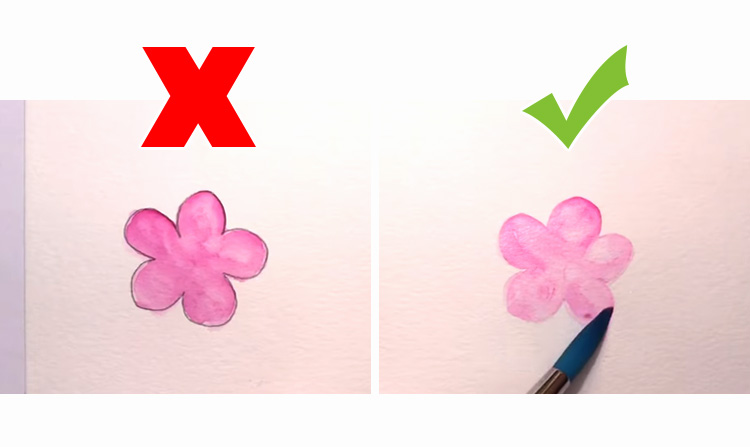 The final tip has less to do with watercolor techniques than it has to do with preparing your sketch. When sketching in the details of an illustration, don't make your lines too dark or harsh! Heavy lines will be very visible even under several layers of watercolor paint. In addition, you'll be forced to use more pressure when erasing, which can damage the fibers of the paper. Instead, sketch lightly and try to use the least amount of lines possible. You can make your lines even lighter with careful erasing (pro tip: if you have a kneaded eraser, you can roll it over your pencil lines while applying a little pressure). As you paint, these lines will practically disappear into your painting and allow the colors to shine through! Good job! You've just picked up 5 new tips on watercolor techniques. Now get out there and make some art! Want to see how Ahmad demonstrates these techniques? Feel free to watch his video here:
Paul Rubens Artist Grade Watercolor Paint, 48 Colors Solid Cakes with Portable Metal Box for Artists


