It's the Year of the Pig, folks! Got any fun pig pictures in mind? Here's a suggestion: let's celebrate Chinese New Year with a whimsical painting of a steampunk flying pig! Thanks for walking us through it, Anita!
Materials used:
- A sheet of Arches hot press watercolor paper (140lb, cut to 5" x 7" size)
- Painting palette for watercolor paints
- 2 containers of clean water
- A rag or paper towels
- Derwent or Prismacolor watercolor pencils
- Pentel 120 A3 mechanical pencil with 0.5 light blue lead
- Artist's or masking tape
- Wooden board that's larger than the paper
Van Gogh Watercolors
- Cerulean Blue (Phthalo)
- Turquoise Green
- Prussian Blue
- Quinacridone Rose
- Azo Yellow Deep
- Permanent Orange
Holbein Acryla Gouache
- Titanium White
Brushes
- Da Vinci 5073 Series: mottler brush (40mm), or any 1½" flat brush
- Kolibri 888 Series: round brush (no. 2/0)
- Kolibri 888 Series: round brush (no. 0)
- Kolibri 888 Series: round brush (no. 8)
- Van Gogh 191 round brush (no. 6)
- Leonhardy Super Star Rund 374: round brush (no. 4)
Step 1: Sketching a Steampunk Flying Pig
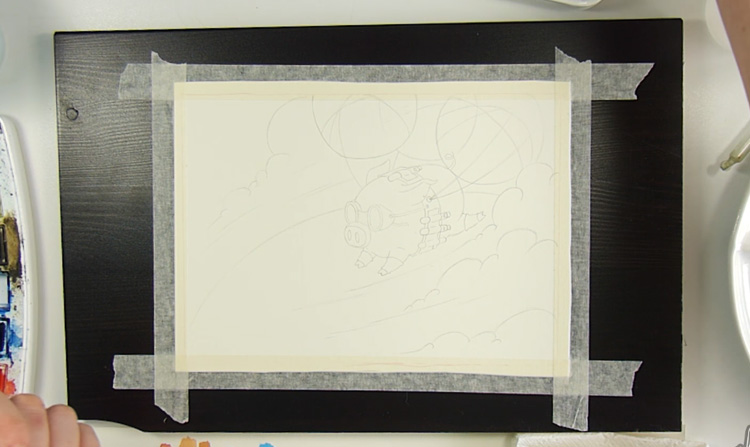 For this special pig picture, you will first need to sketch out the image on a sheet of watercolor paper. To make the composition more interesting, draw the pig a little off-center and add a curved diagonal line for the main "speed line". Have the clouds and the balloon strings follow this curved perspective as well to give the illusion of movement. When drawing your subject, keep your lines light and refrain from erasing too much to avoid damaging the paper. Draw the steampunk details since they are important to the theme and may be difficult to paint without guidance. Keep in mind that the sketch is merely a guide. Once the sketch is finished, secure it to a wooden board with artist's tape and get ready to start painting! Here's what Anita's sketch of a steampunk flying pig looks like:
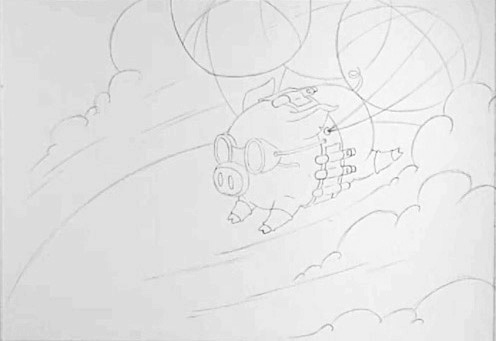
Step 2: Begin with the Sky
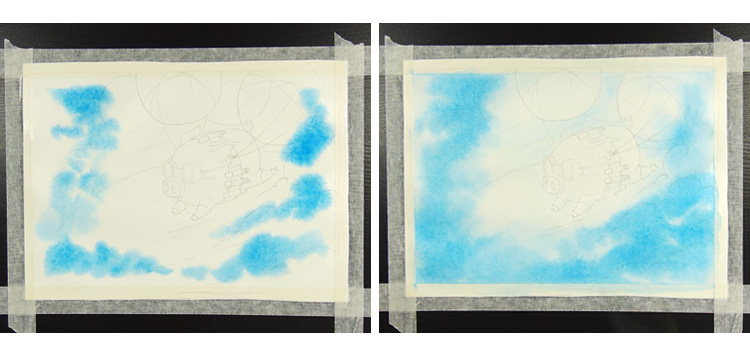 First off, take your mottler brush (or flat brush) and put down a layer of clean water over the whole painting area. Next, use a no. 8 round brush to drop patches of Cerulean Blue into the sky with the wet-in-wet technique. Adding wet paint to an already wet surface will give this first layer a soft-edged and "fluffy" appearance, which is a crucial characteristic for the sky! Paint around the pig and the curved horizon to preserve the white of the paper. This is important so that the colors you lay down in these areas later will look as bright as possible. To give the sky more depth, drop more blue tint around the outermost edges of the frame, and use a diluted blue for central area around the pig. It's okay if some of the blue overlaps onto the balloons, but try to keep this minimal. Mop up any excess blue paint with the corner of a dry towel or a brush, then allow this first sky layer to dry before proceeding to the next step.
Step 3: Layering in Depth
 It's time to add depth to the sky! Like in the previous step, use the mottler brush to put down a layer of clean water over your watercolor painting. Switch to a no. 8 round brush loaded with diluted Turquoise Green and fill in the horizon, working wet-in-wet. Dab the teal tint into the surrounding area as well, but keep the tint concentrated around the central area of the painting. Remember to paint around the steampunk flying pig to preserve the white of the paper! For extra depth, do a graded wash by adding water to lighten the paint gradually. Next, mix in Prussian Blue to darken the Turquoise Green, and dab this mixture around the border of the painting via wet-in-wet. If the painting is drying out, use the mottler brush to add a thin layer of water before you add more paint. Now let's do something fun! With the tip of a no. 6 round brush, use a long sweeping motion to "draw" lines across the wet puddles of blue paint. This will pull the paint in the direction of your strokes and create a "speed lines" effect that will give your steampunk flying pig the illusion of movement! For the patch of sky above the horizon, use strokes that follow the curve of the horizon. Use the opposite curve for the section below. Do this before the paint dries up so that the speed lines have a soft-edged look. When you're satisfied with your work, let this layer of paint dry before continuing to the next step.
Step 4: Painting Around Important Elements
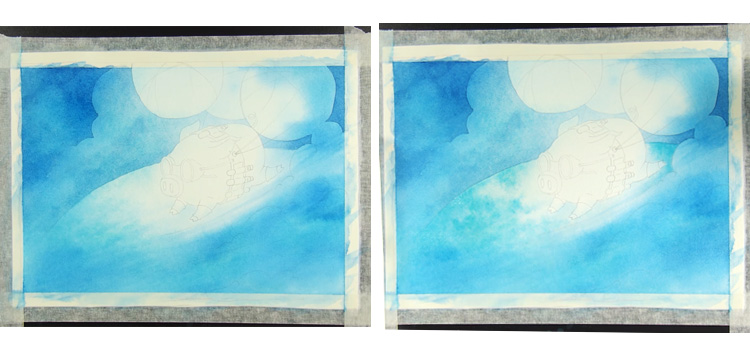 Using the same no. 6 round brush, load it with the Turquoise Green and Prussian Blue mixture. With the wet-on-dry technique (i.e. adding wet paint on a dry surface), lay down a flat wash over the top half of the sky. Dilute the edge with water to fade it into the bottom half of the sky. Remember to paint around the steampunk flying pig and the horizon so that they stand out more. After this layer has dried, lay down another layer of dark blue tint, painting around the clouds wet-on-dry for a hard edge. Next, darken the bottom half of your watercolor painting with the same blue tint. Add a layer of diluted Turquoise Green to the horizon area. While this layer is wet, dab in a stronger Turquoise Green tint via the wet-in-wet technique to give the horizon some interesting texture.
Step 5: Rendering A Steampunk Flying Pig
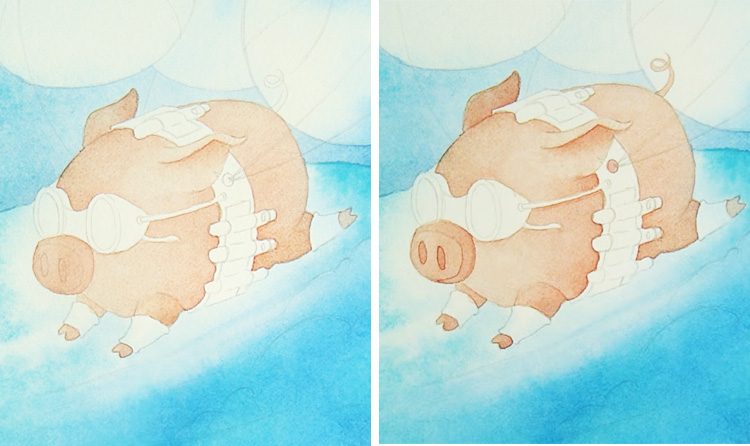 Now that we've finished the sky, it's time to paint that flying pig! Take the no. 4 round brush and load it with Azo Yellow Deep mixed with Quinacridone Rose. This mixture should be diluted enough for the right "pig" color. Block in the pig with a light flat wash, working wet-on-dry. Paint around the steampunk gear; you'll be filling those in later. Once the layer has dried, mix Azo Yellow Deep with Permanent Orange for the pig's shadows. Most of them should be located at the bottom-right areas. You can blend these shadows into the rest of the pig by softening the edges with water. As with previous layers, let these layers dry before continuing on to the next step.
Step 6: Filling in the Finer Details
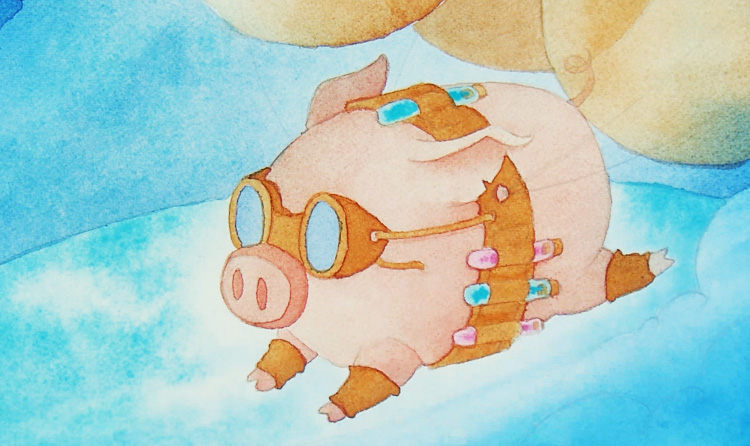 With your no. 4 round brush, use Azo Yellow Deep to fill in the pig's goggles, belt, leg bands, and test tube stoppers. Let the layer dry before adding a mixture of Azo Yellow Deep and Permanent Orange for the shadows on the gear. Next, use use diluted Permanent Orange for the balloon in the back. Wait for it to dry, then use diluted Azo Yellow Deep to fill in the two front balloons, allowing them to overlap with the third balloon. Now switch to a no. 0 round brush to work on the smaller details of the painting. Use Cerulean Blue for the goggle lenses, then Turquoise Green and Quinacridone Rose on the test tubes. Once the test tubes have dried, darken the center with the same color. This will give it a glass-like effect.
Step 7: Blue Shadows
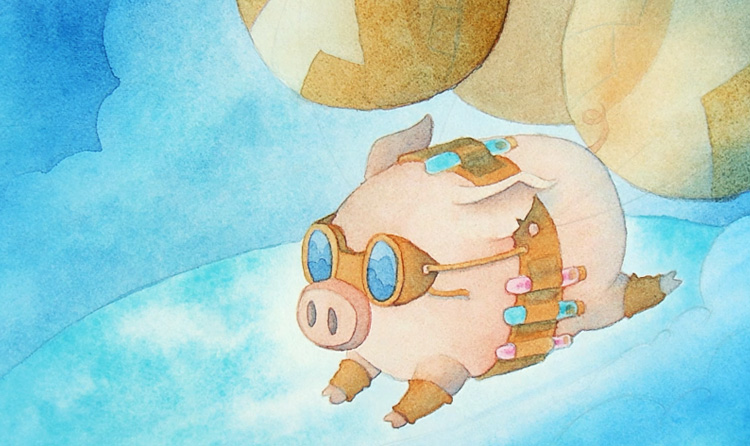 With the no. 4 round brush and the Prussian Blue/Turquoise Green mixture, add shadows to the balloons. Keep the shadows consistent with the pig's shadows by focusing them on the bottom-right areas. Finish the shadows off by adding water to soften hard edges, blending them into the rest of the balloon. Next, use the dark blue tint to darken the pig's shadows. To do this, first add a layer of clean water with the no. 4 round brush, then dab the paint in with the smaller no. 0 round brush, working wet-in-wet. This technique will give the shadows a more subtle feel. Now let's add a cute detail to this steampunk flying pig. Use Cerulean Blue and the tip of your no. 0 round brush to add cloud reflections into the goggles. An easy way to add texture to your watercolor painting is to mix things up with a different medium. In this case, use a mechanical pencil with light blue lead to define the pig's shadows even more. You can also use blue watercolor pencils to achieve the same effect. Make sure the painting is dry before you do this though! Once you're finished with the pig, sketch in cloth patches on the two balloons in front. Switch to the no. 6 round brush and fill in those patches with Azo Yellow Deep mixed with Permanent Orange.
Step 8: Mixed-Media Detail Work
 Almost done! In this step, use your colored pencils (or watercolor pencils) to darken the shadows and details on the pig. Do the same for the two balloons in front. You can ignore the third one because less detail will push it into the background, giving your picture depth. Stick to shades of brown and blue so that they harmonize with the rest of your painting. Don't be afraid to play with these new tools! Watercolor pencils can be fun to experiment with because you can blend the lines into paint just by adding water. Next, fill in the clouds with a no. 6 round brush loaded with Titanium White gouache paint. To achieve a fluffy, misty feel, work in a dark-to-light graded wash over 2-3 layers. The first layer should establish the larger shape of the clouds, so start off with more translucent paint, then build up the brightness of the white by using less water for each succeeding layer.
Step 9: Creating Motion with Lines
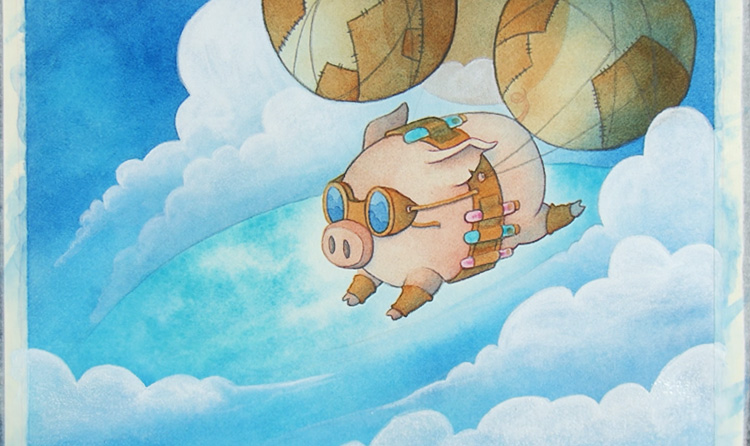
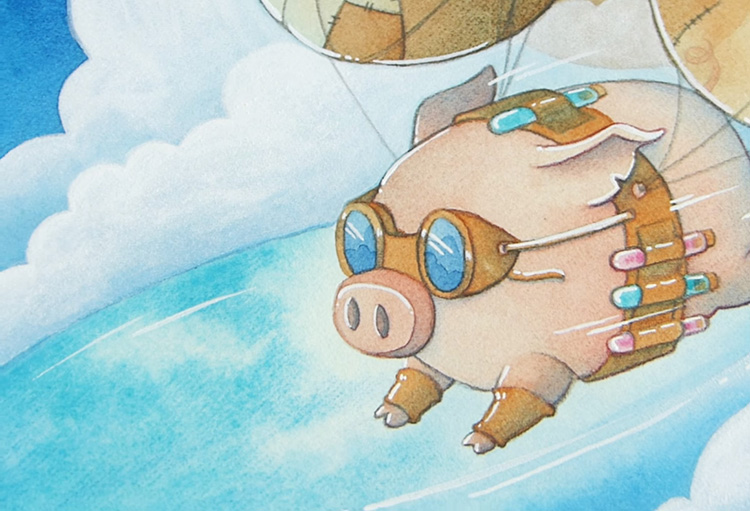 It's time for finishing touches! For this step, use a no. 2/0 round brush and white gouache paint to add highlights on your steampunk flying pig. These are best placed on the opposite side of the shadowed areas. Use the tip of your brush and a delicate touch to keep the lines thin and crisp. Finally, draw curved lines that follow the path of the clouds and the pig. Add some that overlap on top of the pig as well. These "speed lines" are often used in comics to convey the idea of motion, and they will do the same for your painting. Try not to add too many though or it might overwork your painting! Guess what? You've just painted a cute picture, experimented with different media, and celebrated a fun holiday, all in one whimsical watercolor painting. Hope you had fun! If you want to see how Anita does it, here's her video:


