If you've ever wanted to paint pretty watercolor flowers, you're in the right place! In this tutorial, we'll learn how to make these flowers bloom with some simple brushwork and the wet-in-wet technique. Thanks for showing us the way, Jay!
Materials used:
- Arches Aquarelle cold press watercolor paper (140lb, size 10" x 7")
- Painting palette for watercolor paints
- A container of water
- A rag or paper towels
ShinHan Premium Watercolors
- Permanent Rose
- Opera
- Permanent Magenta
- Vermilion Hue
- Bright Violet
- Lemon Yellow
- Sap Green
- Peacock Green
Brushes
- Round brush (no. 18)
- Round brush (no. 8)
Step 1: Begin with a Wet Surface
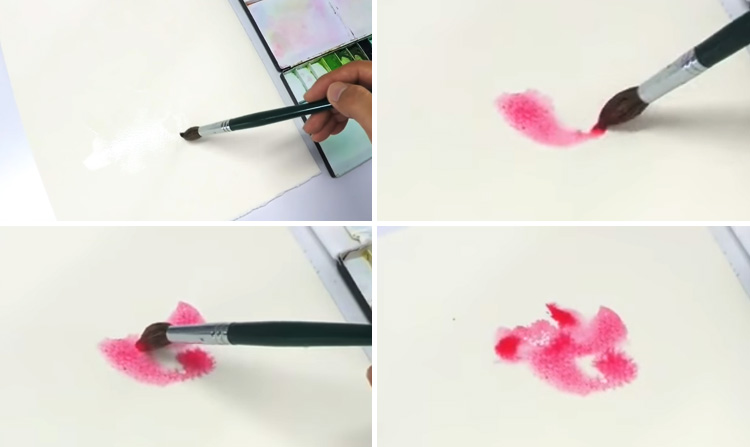
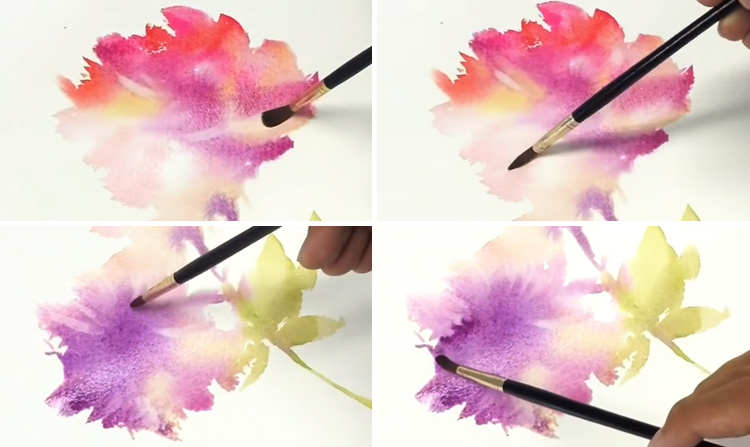
For this tutorial, you'll be "drawing" the form of the flower by using an approach similar to Sumi-e painting, an East Asian technique concerned with capturing the "essence" of a subject rather than its correct form. This means that you'll be working without a sketch. But don't worry! It's not as difficult as it sounds. First, take a no. 18 round brush and wet the surface of your watercolor paper with clean water. Also, go for cold press instead of hot press paper, so that the base of your painting has an interesting texture. While your paper is wet, load your brush with a Permanent Rose and Opera mixture and lay down three loose strokes at the upper right corner of the page. The first stroke should be a shallow U-shape that tapers off. Lay it down starting with the side of the brush and ending with the brush tip, going from left to right. The second stroke is the same shape just above the first, but going from right to left. The third stroke should be a short, wavy line that continues from the end of the second stroke, also going from right to left. Keep your strokes big, loose, and wet. It's okay if they run into each other since you are using the wet-in-wet technique, which means you are adding wet paint to an already wet surface. Don't worry about the paint mingling with each other - that's the beauty behind this technique!
Step 2: Shaping the First Watercolor Flower
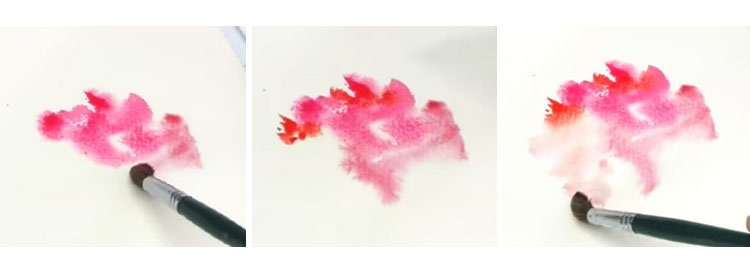
In a few strokes, you've created the upper right corner of the first flower. In this step, we'll be filling out the rest of it. First, load your brush with diluted Permanent Magenta and start on the right side of the flower. With the side of the brush, paint a short wavy line, first from top to bottom then from right to left, just beneath the reddish pink strokes. Next, pick up Vermilion Hue and add short strokes along the top. Use the tip of the brush and a bottom to top motion so that you can pull up some of the pink pigment. After that, add some short strokes to the left of the flower. To fill out the bottom-left side of the flower, rinse out the brush and do a graded wash of orange just underneath the short strokes. Start light and add a little more pigment towards the bottom. As with before, try not to be too precious with your strokes. Keep it loose and don't be afraid to let the paint flow freely on the page!
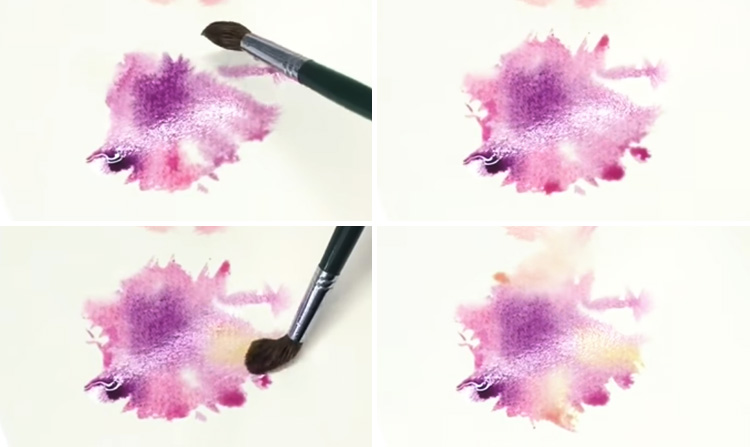
Step 3: Rounding off the Base
To round off the base layer for the first flower, take some Bright Violet and add a diagonal stroke that slants down from the center towards the right, working wet-in-wet. Pull some of the surrounding paint into the stroke and allow the colors to blend together. Add a dab of Lemon Yellow to the top of the violet, then finish it off by adding three more yellow streaks that begin along the violet diagonal and curve outward towards the edge of the flower.
Step 4: A Second Flower
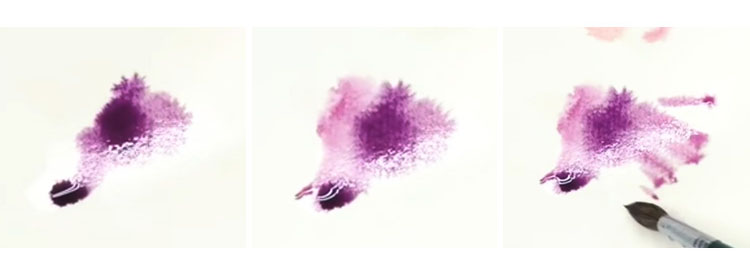
Mix together Lemon Yellow, Bright Violet, and Permanent Magenta, then begin painting the second of your watercolor flowers at the lower right corner of the paper. With the side of the brush, lay down a stroke that goes from right to left and allow it to taper to a point. Load your brush with diluted Permanent Magenta and Bright Violet and add another stroke above the first one. Lastly, paint 4-6 short streaks that radiate out from the bottom of the first two strokes. Again, keep it loose and wet, and try not to mess with the paint too much.
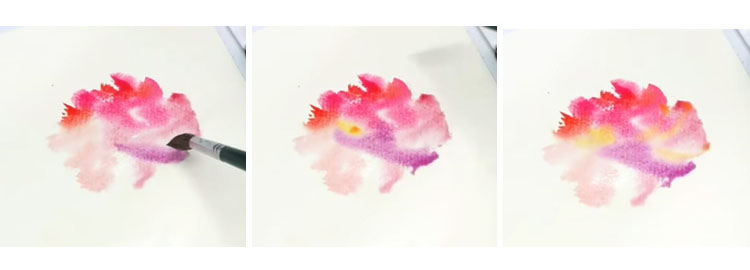
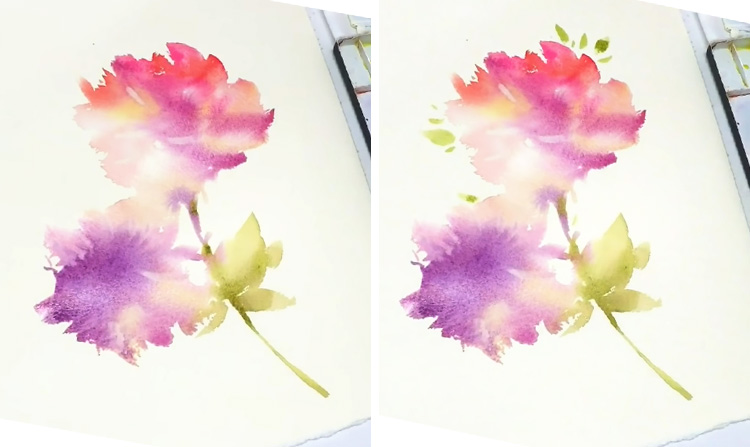
Step 5: Painting Petals
Take the reddish pink mixture and use the side of the brush to create streaks that radiate out from the violet center to establish the petals. Pull some of the violet paint while keeping the effect subtle. Next, add hints of Lemon Yellow to the bottom in a similar way, working the paint in via wet-in-wet. Put some distance in between strokes so that the petals have more definition. Add a third stroke of yellow along the top of the flower, starting at the center and radiating outward. If there are any excess beads of paint, use a clean brush to mop them up.
Step 6: Tracing a Stem
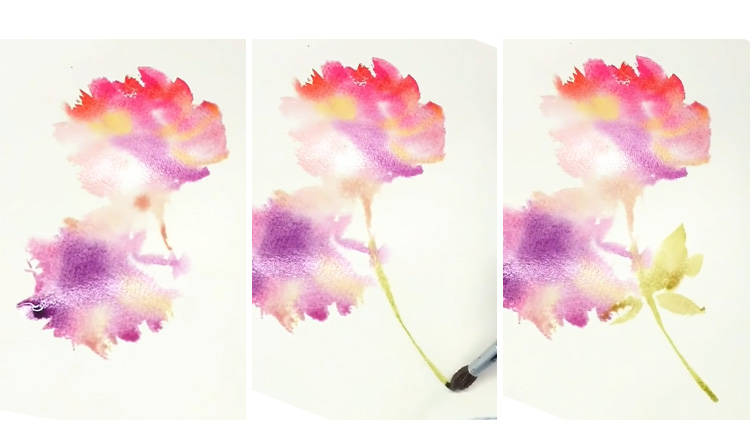
Use the yellow mixture from before to trace out one-third of the stem of the first flower. With the tip of your brush, paint a nice, thin line that begins at the base, and stops where the second watercolor flower is. Take a Sap Green and Lemon Yellow mixture and continue filling out the rest of the stem, which should curve down towards the bottom of the paper. To create leaves along the stem, start with the tip of the brush, press down to thicken the stroke, then release. Handling the brush this way creates a stroke that tapers at both ends. Play with this technique to make 3-4 leaves of various sizes.
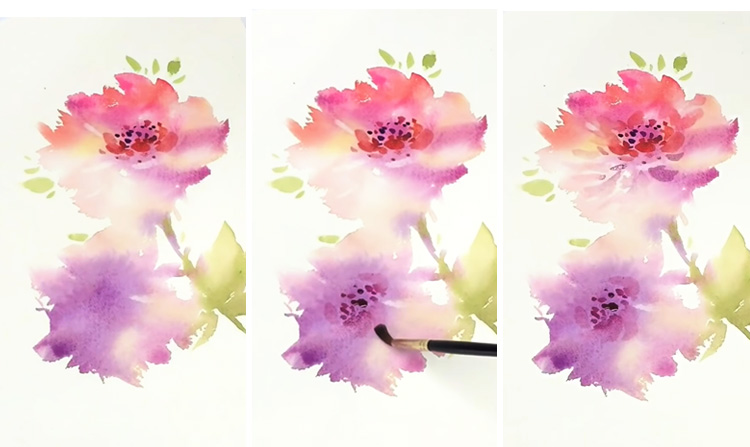
Step 7: Bringing out Details
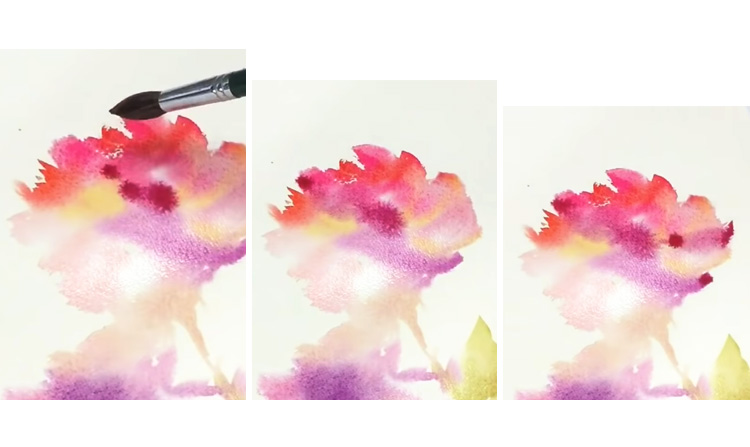
Now that the base layers for the watercolor flowers have been established, the next steps will focus on bringing out the details. Mix Permanent Magenta to the reddish pink mixture and drop three dots into the center of the first flower to darken it. Use the side of the brush to spread out the dots, but keep the paint concentrated in the middle. Next, add a petal to the bottom of the flower with same color and have it radiate out from the center. Drop in a few more dots of color onto the tips of the petals to add interest.
Step 8: A Darker Center
Darken the center for the second of the watercolor flowers with drops of Permanent and Bright Violet. Dab in dots of the violet mixture, then use the side of the brush to push out the paint to the left, keeping the dark violet tint concentrated in the middle and working wet-in-wet. Next, add shadows to the stem by dropping hints of violet directly under the first flower, and again under the leaves. Use Sap Green and Lemon Yellow to blend the purple shadows into the rest of the stem and leaves.
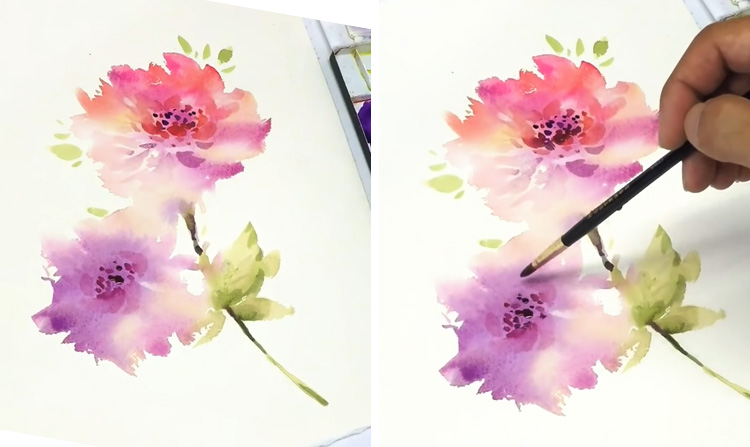
Step 9: Lifting Paint to Create Delicate Details
Now for something a little different! Switch to a no. 8 round brush and make sure that the bristles are dry. Dab the brush into the center of the first flower to pick up paint and create faded, curved strokes which will act as the stalks for the stamens (i.e. the pollen-producing parts of the flower). Concentrate the strokes around the middle of the flower and apply them in a horizontal manner. Do the same for the second flower, but focus on picking up paint around the outer edges of the petals. You may reinforce these faded strokes by strengthening the tint of the darker areas around them, working wet-in-wet. Try not to do this too much though or you may risk overworking your flower painting.
Step 10: Touches of Green
We're nearing the finish line! Let's add some touches of green to balance out all those reds and purples. Take the green mixture from earlier and dab hints of it into the parts of the stem that are directly below the first flower, above the leaves, and into the shadow caused by the leaves. Add smaller leaves around the flowers by playing with pressure to create strokes with tapered edges. When you finish, allow your watercolor flowers to dry completely before continuing to the next step.
Step 11: Finishing off the Stamens
Once the flowers are dry, we can now finish the stamens! Load your no. 8 brush with Permanent Violet and add dots to the center of the first flower, working with the wet-on-dry technique (i.e. adding wet paint to a dry surface). Next, take a diluted Vermilion Hue mixed with the reddish pink mixture and add a few more dots and short strokes that curve out from the center of the flower. Do the same for the second flower with Vermilion Hue mixed with violet tint. Begin by adding dots in the center and end with diluted short strokes that curve outward. With a diluted violet mixture, create shorter petals by painting short strokes that radiate out from the center of each flower. Allow these longer strokes to be more transparent to create interest.
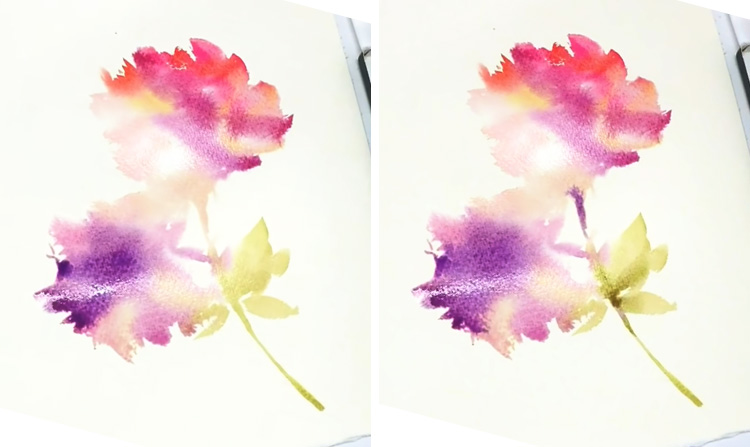
Step 12: Adding Finishing Touches to Your Watercolor Flowers
We're at the finishing touches stage! This part is all about strengthening the contrast in this easy flower painting. Try not to work in too much paint at this stage, otherwise the watercolor flowers may look muddy or overworked. First, mix Peacock Green with Bright Magenta and a hint of Sap Green, and deepen the shadows on the stem, working wet-on-dry. Add short strokes along the edges of the biggest leaf to give it some detail, then deepen the shadows even more with a hint of violet. Finally, drop hints of the violet mixture into the center of the flowers to add more contrast to the stamens. Once your painting is completely dry, you may frame and hang it up wherever you wish.
And there you have it! You have successfully painted yourself some watercolor flowers!
If you'd like to see how Jay applies these techniques, here's his video:


