It's that time of the year to create gifts that spread cheer! Here are some super cute Christmas cards you can make for the ones you love. Thanks for sharing your creative Christmas ideas, Idunn!
Materials used:
- 3 pieces of watercolor paper or card stock
- Black ink gel pen
- HB/2B Pencil
- Eraser
- Ruler
- Nail scissors
- Painting palette for watercolor paints
- A container of water
- Gold acrylic paint (or a gold gel pen)
- Glitter nail polish (silver and gold)
- 1 piece of light blue paper or card stock
- Sticky craft gems (rhinestones) or sequins
- Coin
- Sewing thread (red)
- Clear tape
- A small piece of clear plastic
Winsor & Newton's Cotman Watercolors
- Cerulean Blue Hue
- Cobalt Blue Hue
- Cadmium Red Deep Hue
- Chinese White
- Burnt Sienna
- Intense Green (Phthalo Green)
- Yellow Ochre
Brushes
- Round brush (no. 00)
- Round brush (no. 0)
- Round brush (no. 4)
Step 1: Preparing the First Christmas Card
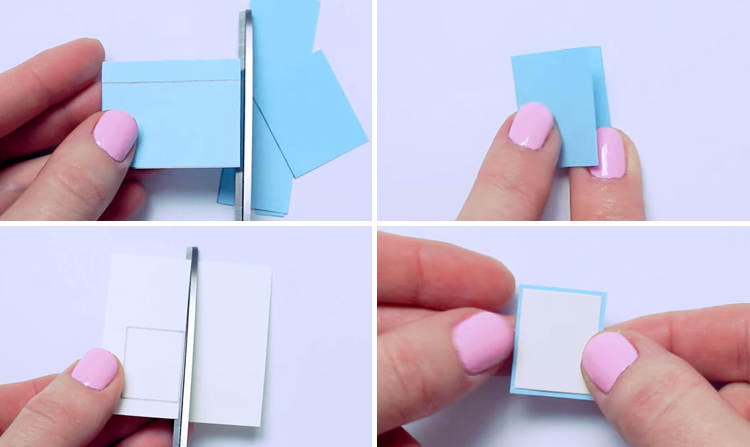 For this tutorial, we'll be making three miniature Christmas cards that are just the right size to carry your Christmas greetings. You ready? Then let's begin! To make the snowy Christmas decorations card, first take a pencil and ruler to measure out a 4cm by 2.5cm rectangle on light blue card stock. Use scissors to cut it down to size and erase any stray pencil marks that are left behind. After that, fold the card stock in half to create the base for your first miniature card. Next, take out your watercolor paper and measure out a 2.3cm by 1.8cm rectangle. Like with the card stock, use scissors to cut it down to size. You can erase the pencil if you wish, but it's not necessary. Just paint on the clean side of the watercolor paper in the next step. When you place the watercolor paper against the folded card stock, it should fit comfortably in the middle and have a border of the light blue paper around it.
Step 2: Painting a Snowy Background
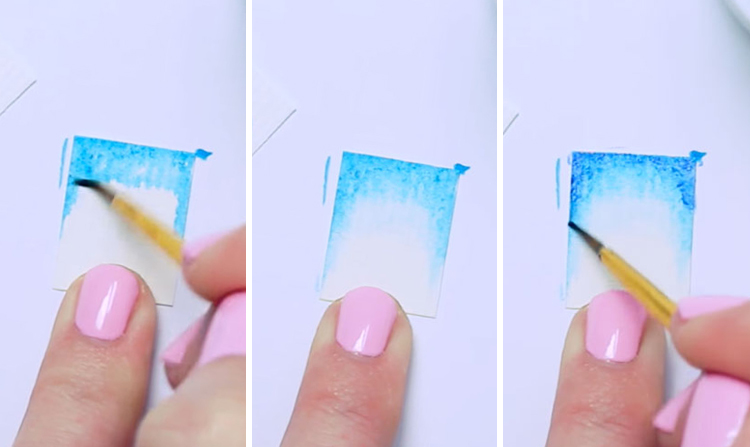 With a no. 0 round brush, dilute Cerulean Blue Hue and cover the top of the watercolor paper, painting in an arc and using the wet on dry technique (i.e. adding wet paint to a dry surface). Next, let the color fade into the white of the paper by doing a graded wash, gradually adding water to dilute the paint. Dab in diluted Cobalt Blue Hue around the outer edges of the painted area, painting wet-in-wet (i.e. adding wet paint to a wet surface) so that the two colors blend into each other. Make sure that the painted layers are dry before moving on to the next step.
Step 3: Doodling Christmas Decorations
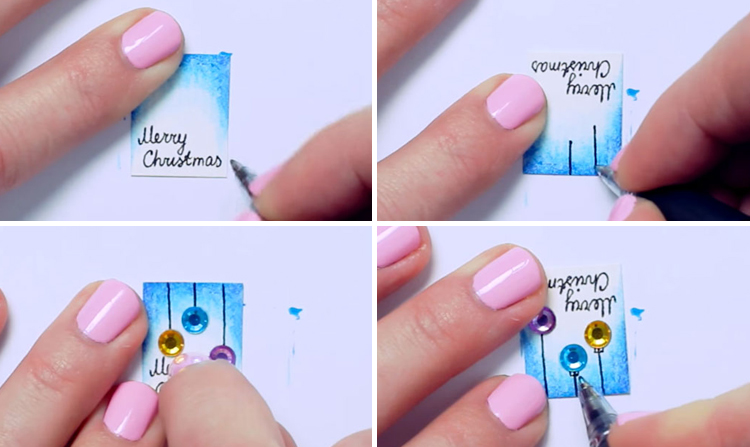 Once the painted layers have dried, take a black gel pen and write "Merry Christmas" (or any similar Christmas greetings) along the bottom of the card. Next, draw three vertical lines that extend from the top of the card up to ⅓ of the card. Vary the length of each line for more visual interest. Now take three sticky craft gems (alternatively you can use sequins and glue) and attach one at the end of each vertical line. Turn each into a Christmas ornament by adding little ornament cap details with the black gel pen.
Step 4: Finishing off the First of the Christmas Cards
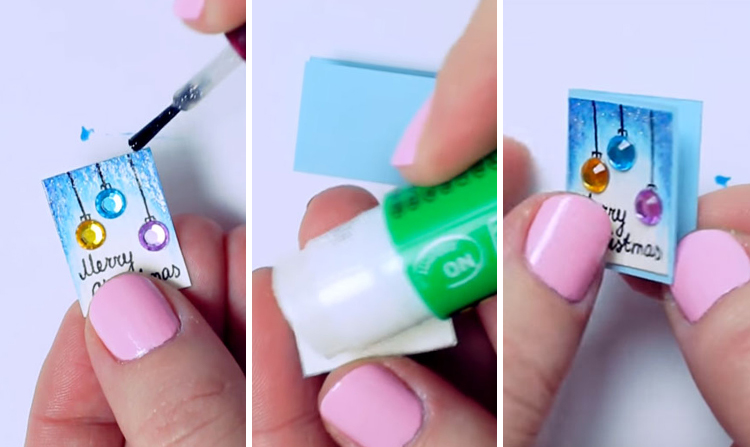 For the finishing touches of this greeting card, take a bottle of silver glitter nail polish and paint a layer across the top of the watercolor paper. It will give that snowy background an extra sparkle to its look. Finally, use a glue stick to attach the watercolor paper to the front of the folded card stock. Voila! The first of the miniature Christmas cards is done!
Step 5: Cutting Out a Christmas-Themed Shape
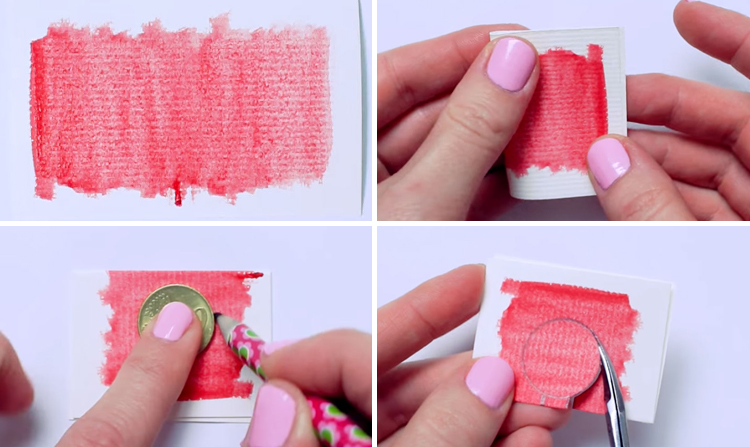 The second design in this set of greeting cards is definitely inspired by Christmas decorations because it takes the shape of one! With the no. 4 round brush, dilute Cadmium Red Deep Hue and lay down a flat wash (i.e. a single layer of color) on a new sheet of watercolor paper. Once the paint has dried, fold the watercolor paper in half and have the painted side face outwards. Take a coin and place it near the folded edge of the sheet, leaving 0.3cm or so of space from the edge. Use a pencil to trace around the coin, and add two vertical lines that connect the circle to the folded edge of the paper. Next, cut around the guidelines with a pair of nail scissors. To finish off the base of your card, use an eraser to gently erase any stray pencil marks from the card.
Step 6: Drawing with White Paint
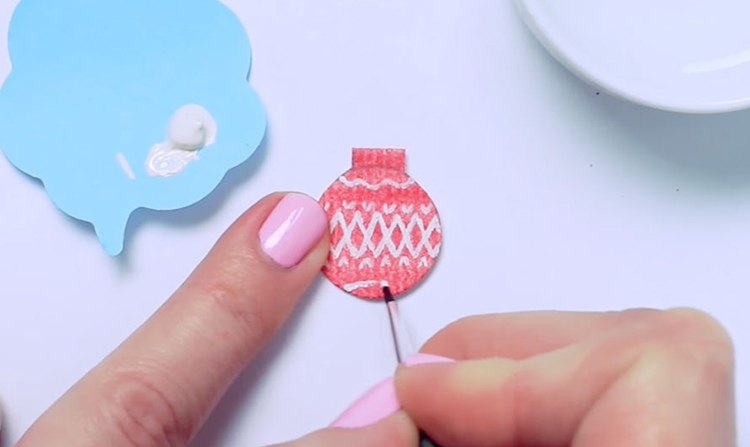 Pick up Chinese White with a no. 00 round brush and begin adding details to the front of the card. For crisp lines, mix just enough water to keep the paint thick but creamy. First do a horizontal zigzag pattern across the middle of the card, and do a second alternating zigzag pattern across it. Next, add small v-shaped marks in the spaces above and below the zigzags. Lastly, add a wavy line across the top of the ball, and a curved line at the bottom.
Step 7: Using Gold to Add Sparkle
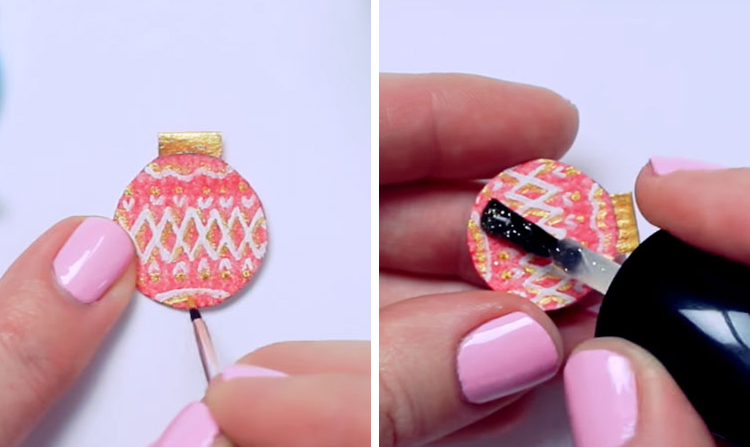 After rinsing your brush, use Gold acrylic paint (or use a gold gel pen) to add highlights to the Christmas card. Fill in the cap of the ball, and add some gold dots in between the small white V's. Once that has dried, take the Gold glitter nail polish and paint a generous layer over the entire front of the card. Like with the first of your Christmas cards, the polish will give this crafty decoration an extra sparkle. Plus it will act as a protective layer, preserving the details you just painted!
Step 8: Finishing Off with a Neat Bow
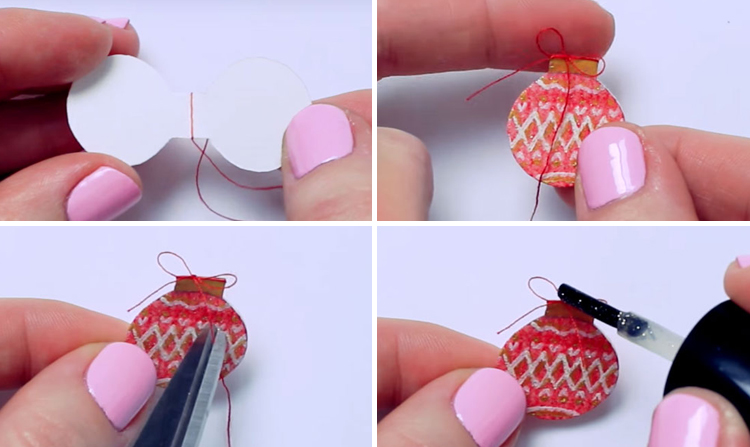 The final step is to put a bow on this little greeting card ornament - literally! Tie red sewing thread around the fold of the card, making sure that the knot is on the outside of the card. Next, make a bow and snip off any excess string with scissors. Put a dab of glitter nail polish in the middle of the bow so that the knot stays in place. You can also dab the ends of the thread to stop it from fraying. Two miniature Christmas cards down, one to go!
Step 9: Planning Out the Base for the Third Card
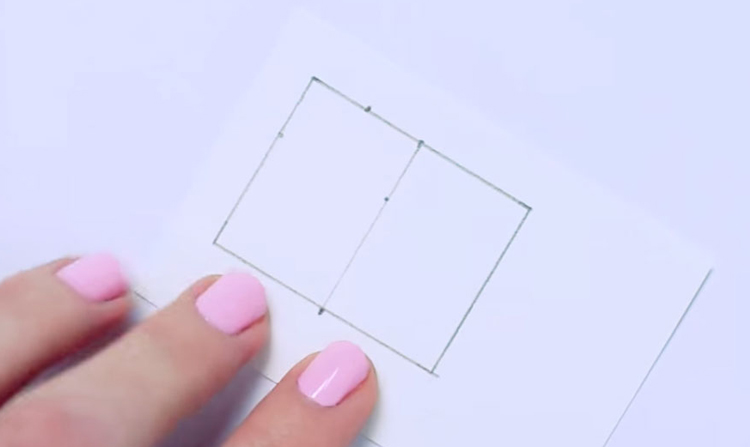 Out of the three Christmas cards in this tutorial, this one definitely looks the most complex. Are you paying attention? Okay, let's do this! Our last card is a gingerbread house with a little window that you can peek through. To create the base of the card, first take your third piece of watercolor paper and sketch out a 4cm by 3cm rectangle with a ruler and pencil. Mark the center of the longer sides of the rectangle (2cm) and sketch a line down the middle to divide the rectangle into two halves. Rotate the rectangle so that the two halves are sitting side by side. On the left half, measure 1cm down from the upper left corner of the rectangle, and mark it on the leftmost line and the center line. Next mark 1cm from the upper left corner across the topmost horizontal line (which is the middle of the left half). Refer to the images in this step for guidance if any of this starts to sound confusing!
Step 10: Sketching Guidelines
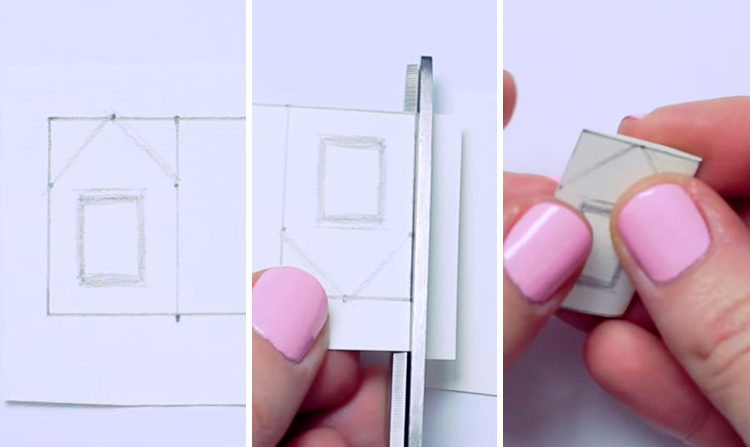 Okay, so you now have 3 points marked on the left half of the rectangle you just sketched. The next thing to do is to join the three points together by drawing two diagonal lines that form an upside-down V. The first diagonal line starts from the middle and joins to the point on the leftmost vertical line. The second line also starts from the middle but extends in the opposite direction, towards the point on the center line. These lines will act as your guide for the shape of the roof. Next, sketch a rectangle underneath the upside-down V. This will be your guide for where the window will be. Now take a pair of scissors and cut out the larger rectangle shape. Fold the rectangle in half, making sure that your sketch for the roof and window are facing outwards.
Step 11: A Window You Can Peek Through
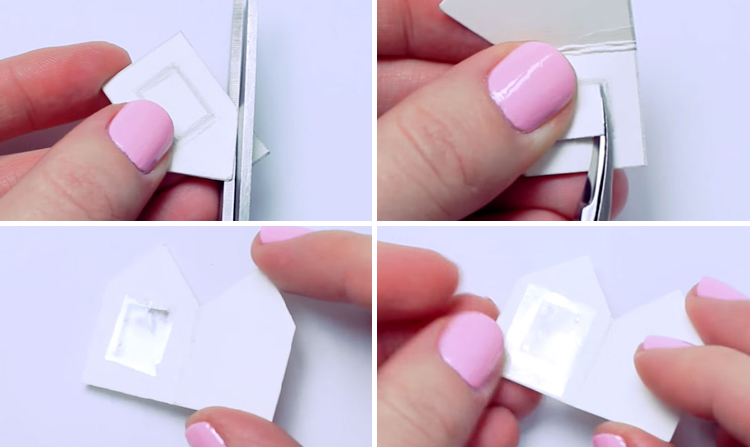 Using the guidelines you sketched, cut out the shape of the roof while the card is folded. Unfold the card and cut out the window, then gently erase any pencil lines you don't want to see. Next, cut out a small piece of clear plastic, just enough to cover the window. Take clear tape and measure out enough to secure the plastic to the paper, and attach the plastic to the inside of the card. When you fold the card together - wow, check it out! You have a little window in your house!
Step 12: Doodling the Details
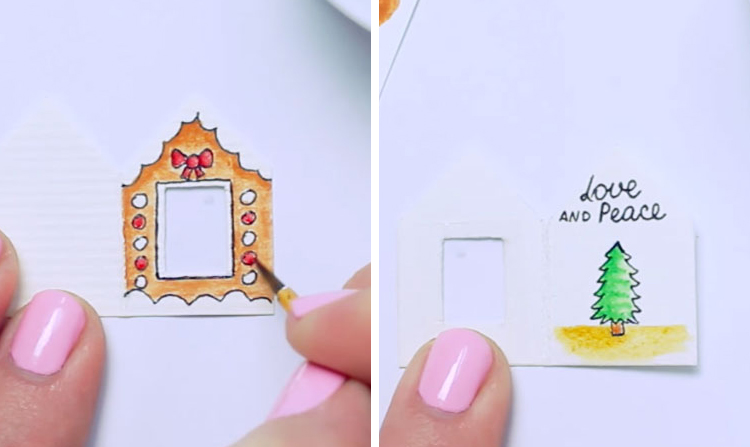
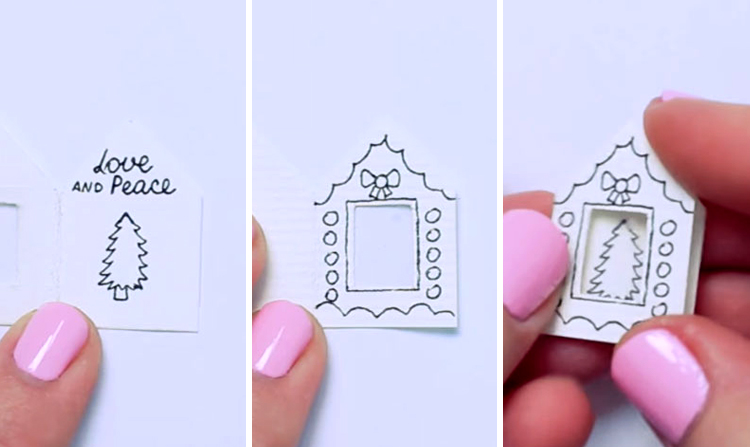 It's time to start decorating your gingerbread house card! With a black gel pen, write "Love and Peace" (or any similar Christmas greeting) inside the card, just above where the window might be. Next, draw a simple Christmas tree in the middle. Flip the card around and start working on the details of the front of the house. Add curled lines along the roof and along the bottom for the snow, and a border around the window. For added decoration, draw a bow above the window and a vertical row of dots on both sides of the window. When you fold the card together, you should be able to see the Christmas tree peeking out through the window. Fun!
Step 13: A Splash of Color
It's time to add a splash of color to this card!
Pick up Burnt Sienna with the no. 0 round brush and lay down a flat wash on the outside of the gingerbread house. Next, use Cadmium Red Deep Hue on the ribbon and some of the dots. Finish off this greeting card's exterior with dabs of Chinese White on the snow and the rest of the dots. For the interior of the card, start with covering the tree with a flat wash of Phthalo Green for the leaves, and Burnt Sienna for the tree trunk. Lastly, use Yellow Ochre to do a graded wash for the floor, gradually adding water until it fades into the white of the paper.
Step 14: Finishing Off the Last of the Christmas Cards
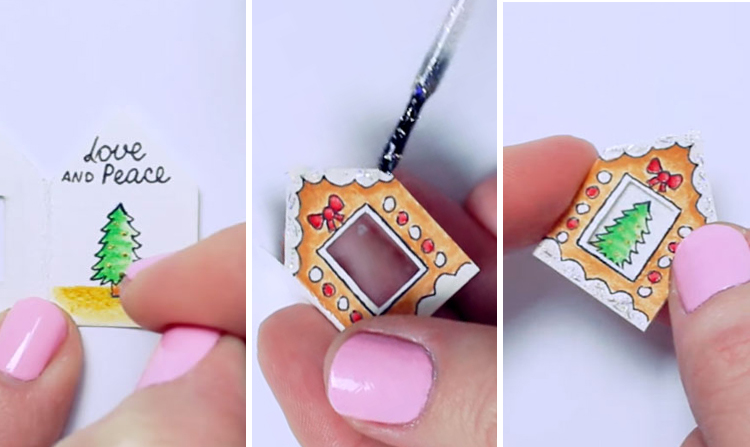 To finish off the card's interior, add dabs of Gold acrylic paint (or alternatively, a gold gel pen) to create decorations on the Christmas tree. Be sure to do this after the green paint has dried! For the final step, brush on generous amounts of silver glitter nail polish to the snowy sections of the gingerbread house exterior to get that extra bit of sparkle. Congratulations - you've made 3 cute Christmas cards! We hope you had fun creating these Christmas crafts along with us! If you'd like to watch how Idunn does them, here's her video:


