Follow along as the award-winning painter, Steve Curl, uses a more experimental style for an abstract watercolor painting. Want to watch abstract painting techniques on video? The full tutorial is available to members of our Beeblys WatercolorPainting.com.
Materials Used In This Watercolor Class:
- Parchment 100 tracing paper (size 9" x 12)
- A sheet of Arches cold press watercolor paper (140lb, size 12″ x 16″)
- Mechanical pencil with 0.5mm lead, or any HB/2B pencil
- Kneaded eraser
- Ruler
- Painting palette for watercolor paints
- A container of water
- A towel or rag to rest brushes on
- Tissue or paper towels
- Soap bottle with a pump and spout
- A pair of kitchen scissors
- A bulb of garlic
Paints (Holbein Artists' Watercolors)
- Permanent Yellow Orange
- Brilliant Orange
- Peacock Blue
- Compose Blue
- Cerulean Blue
- Cobalt Blue Hue
- Ultramarine Deep
- Prussian Blue
- Payne's Grey
- Neutral Tint
Brushes
- Stratford & York Warwick Series: Round sable brush (size 8)
Step 1: Composition Techniques For An Abstract Painting
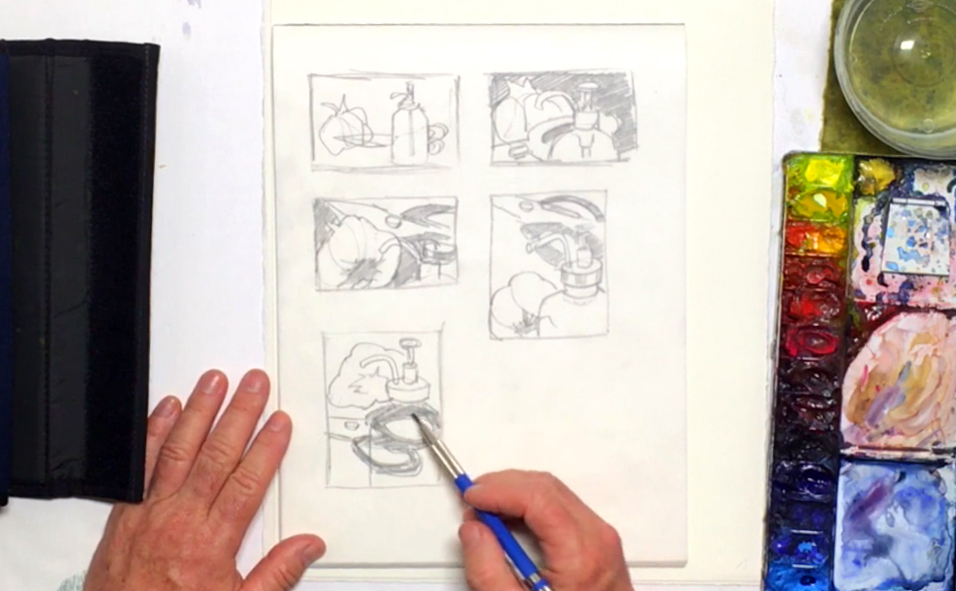 To start, you will first need to sketch out a few thumbnail drawings on the tracing paper to serve as both your visual reference and experimenting with different compositional concepts. Position your three objects (soap bottle, scissors, and garlic) in an angle you like, and look at them more as shapes to combine and transform within each composition. Because abstract painting is more about the overall design than individual or distinctive elements, let your creativity run free and allow yourself to come up with some unusual perspectives and tones. You do not need to draw the whole shape of the objects, or force everything into one frame. Focus on how each shape relates to another rather than being concerned with making each object look realistic. As you continue drawing different thumbnails, each one different from the rest, settle on the one you feel has the best design for an abstract painting. (Side note: Because you're using an abstract style, it is encouraged that you have some fun and shy away from following directions very strictly; nevertheless, if you want to replicate Steve’s work, feel free to follow along.) Below is a close-up of Steve's thumbnail sketches:
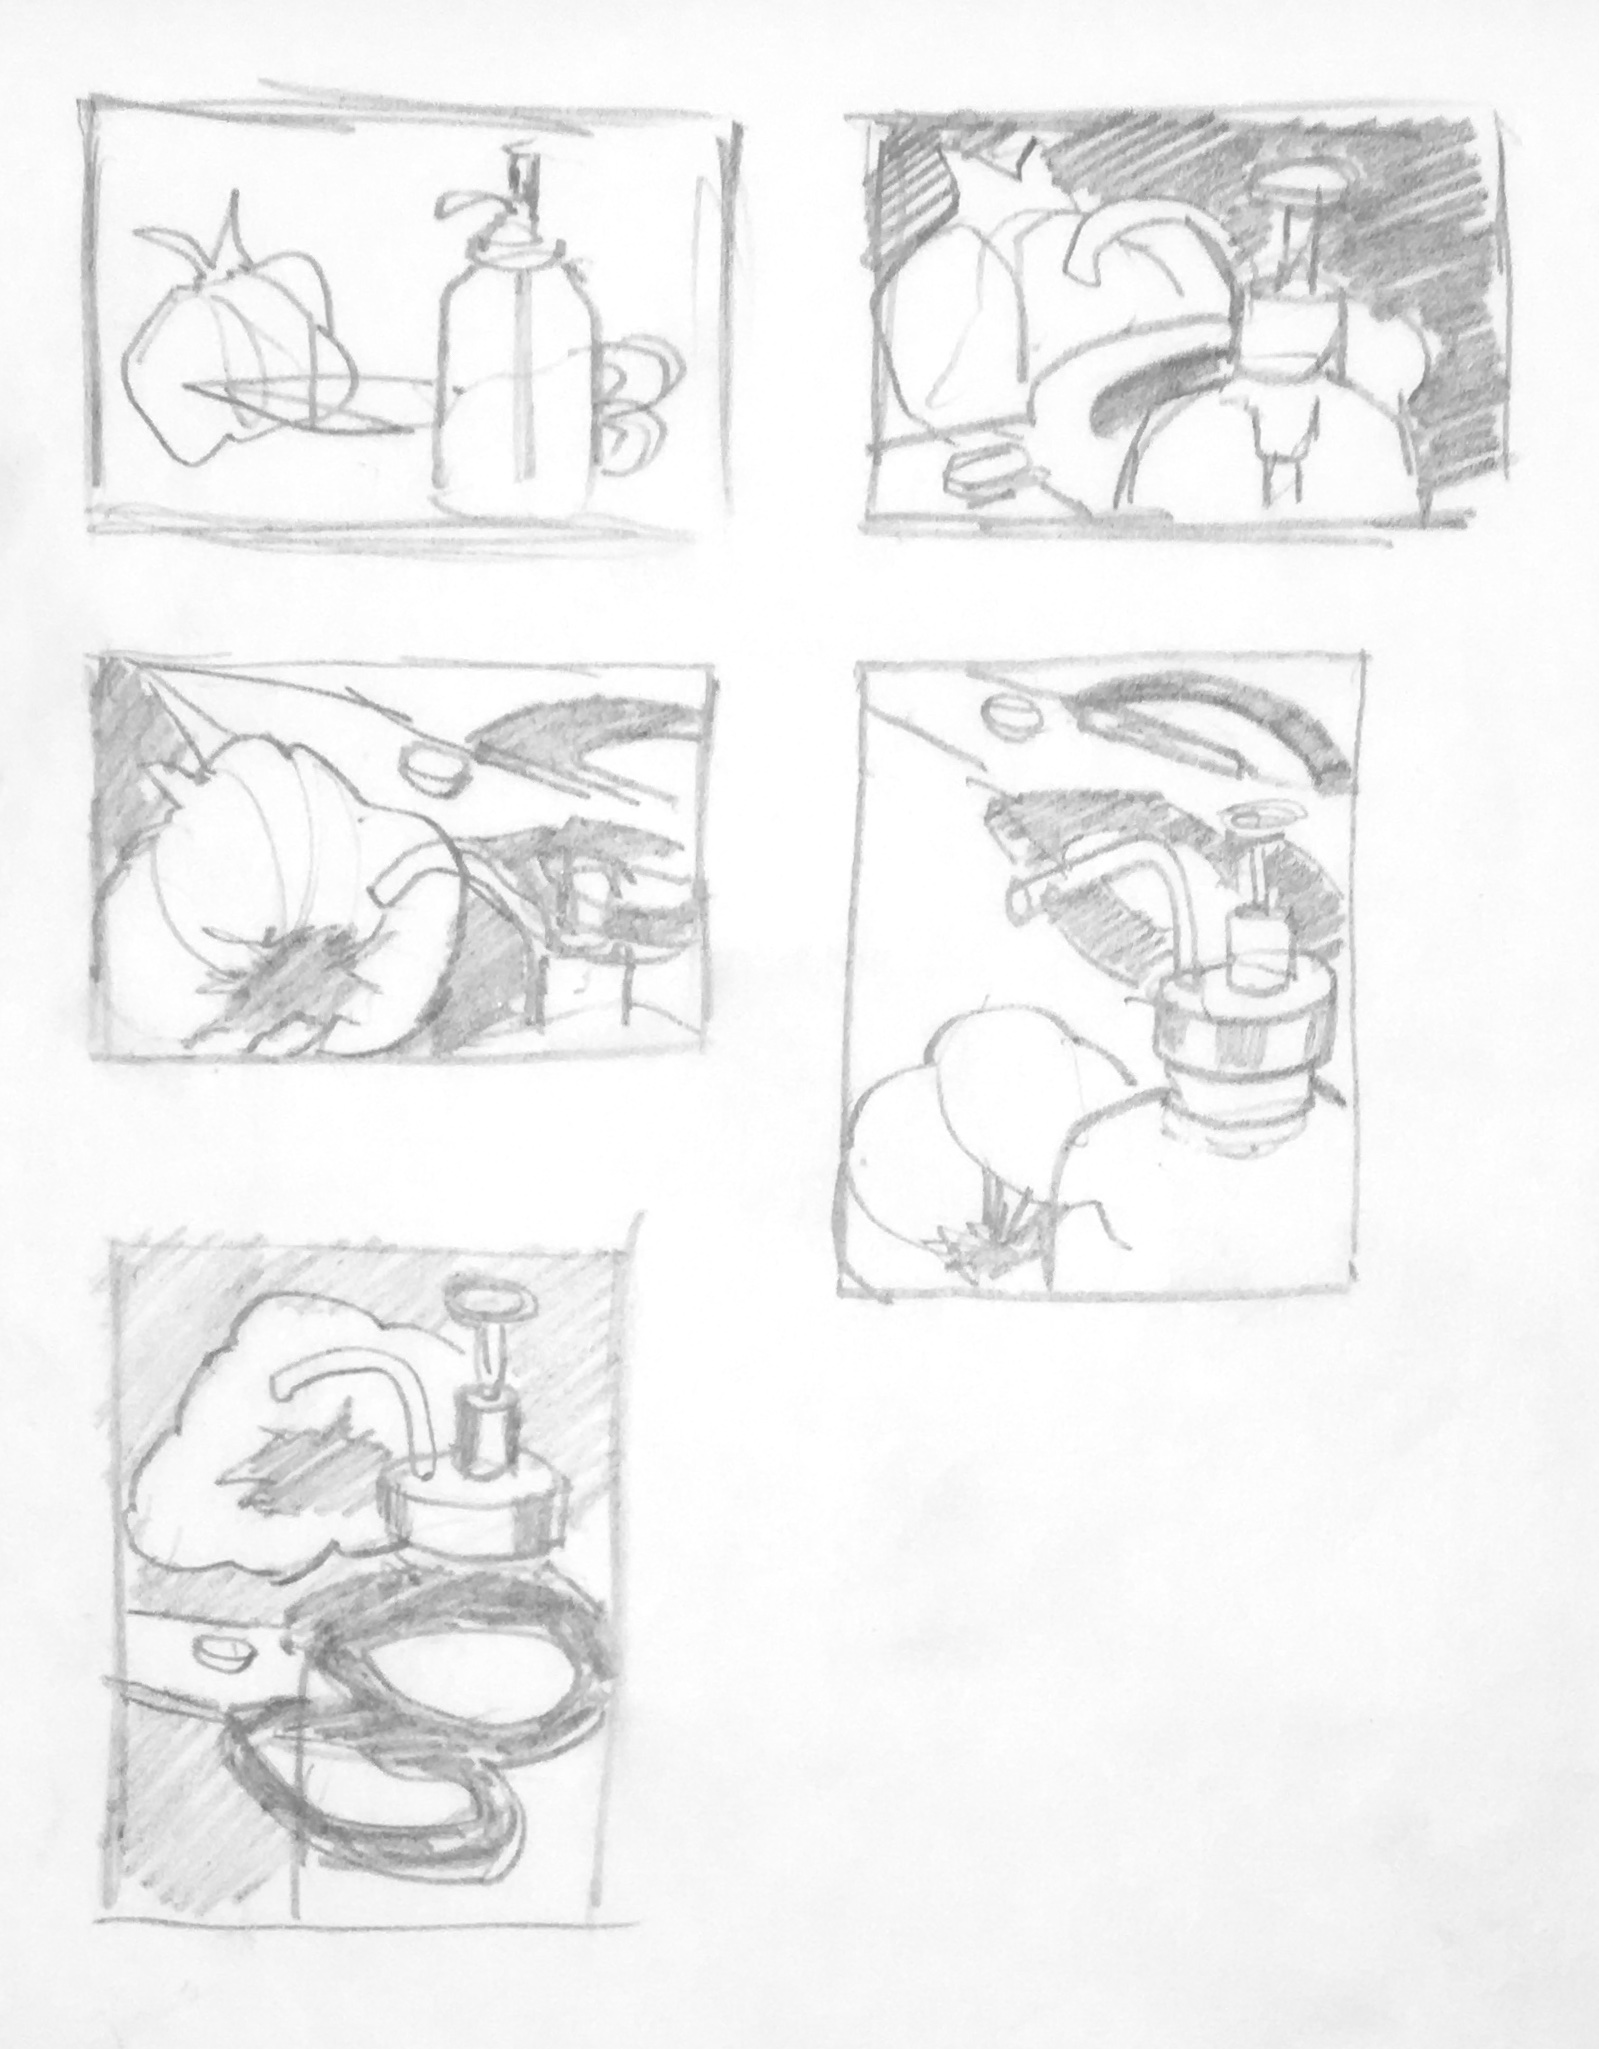
Step 2: Preparation Techniques For Starting An Abstract Painting
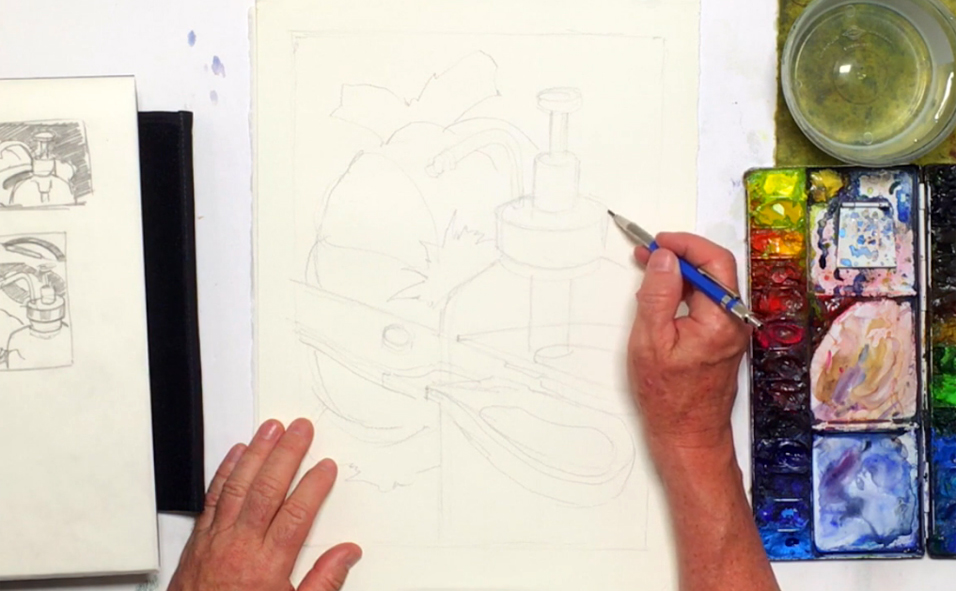 The first rule of painting any image is to draw a 1-2" border around your painting space to allow room for a potential matte to frame your finished work. You can save yourself a lot of money by settling for a typical matte frame you can purchase at any arts and crafts store, so it is highly recommended that you use a ruler to measure your borders. One standard size to use is 11” x 14”, which is featured in this demonstration. When your border has been drawn, lightly sketch in the outlines of your composition onto the Arches watercolor paper. Here, you can see that Steve draws the basic shapes of the bottle: the plunger, the spout, and the body, filling up the rightmost side of the canvas. He then pencils in the shapes the scissors create, with a few smaller details, and doesn't hesitate to draw over the space occupied by the bottle. Combining shapes from two different objects is quite common in abstract art, so you can give it a try too. Next, Steve draws an oversized garlic bulb to serve as a background element. He also outlines the shadows on the garlic to implement depth and perspective along the lower left-hand side of the painting. Below is a close-up of the sketch:
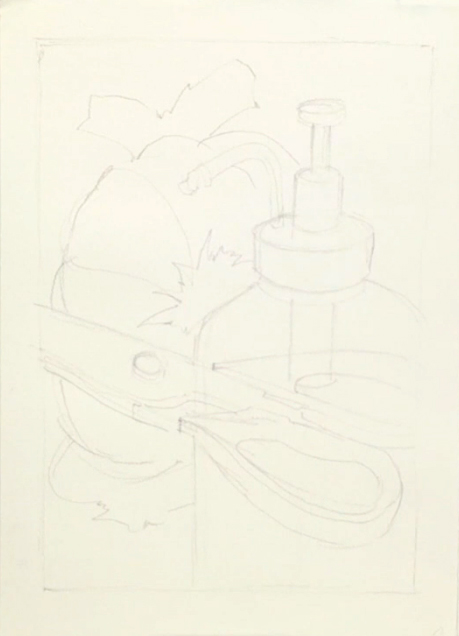
Step 3: Painting Blues
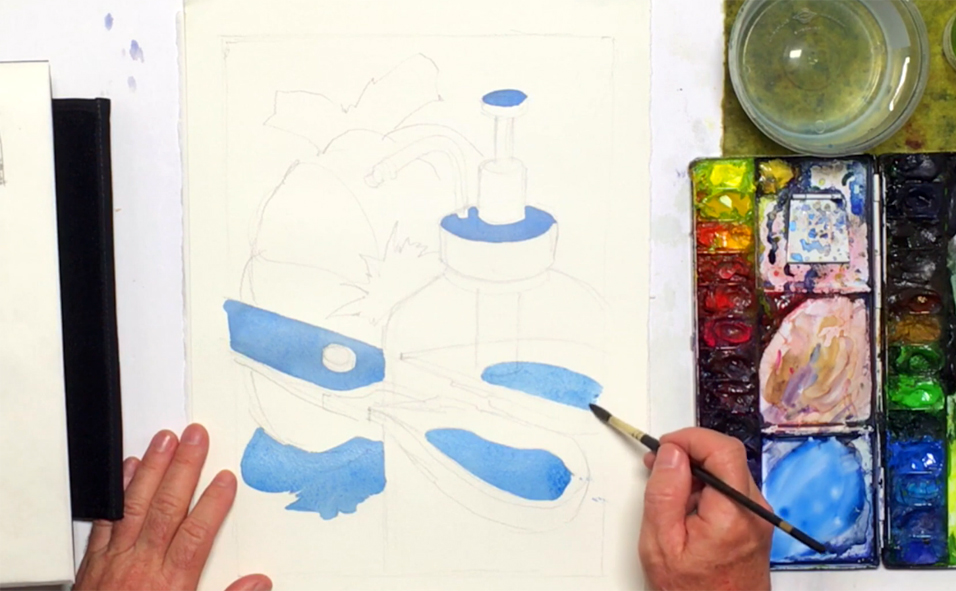 With the preliminary sketch complete, it's time to start painting. Start by using the round sable brush and mix Cerulean, Compose, and Peacock Blue on your palette, then using the wet-in-dry technique (the technique you'll use for the entire painting), paint the bottle's cap and the top of the plunger. Continue using the blue paint to fill in the scissor blades, painting around the screw that attaches the blades together, and stopping where the blades meet the jar. Use this same paint once more to paint the cast shadow of the garlic and the negative spaces (i.e. empty spaces formed via the surrounding objects) created by the bottle and the scissors' handles to display variety. At this point, the challenge you face is making your own choices for painting different parts of each object, and deciding which shapes you should tie together by using the same color. Remember that it's not about the objects, but using their shapes and transforming them.
Step 4: Using Color Theory To Make Things Pop
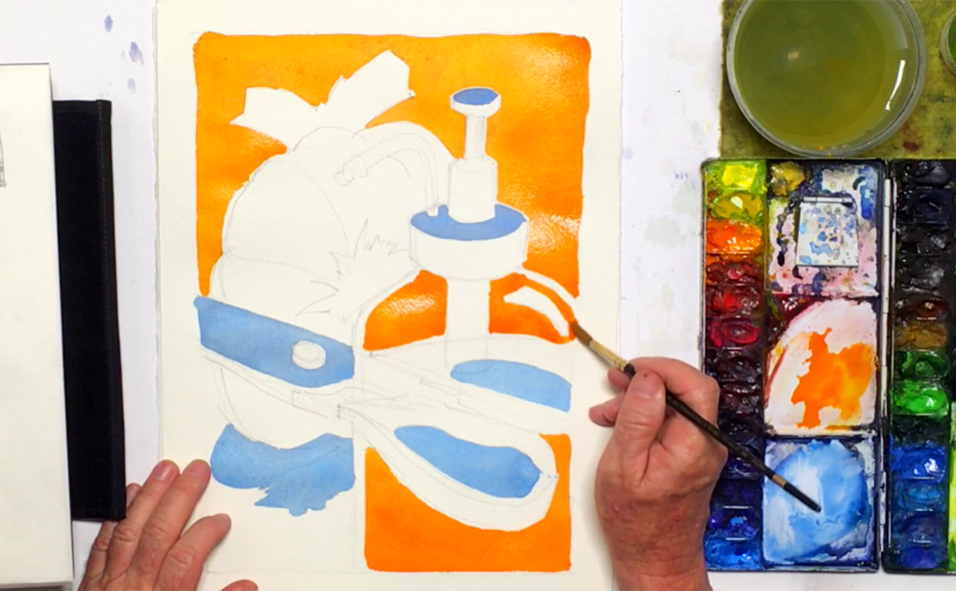 Let’s change it up by switching to a different color. Think of the complementary colors found in the color wheel (this is found under Color Theory). The complementary color (you can think of it as an "opposite" color) of blue is a combination of red and yellow, which makes orange. This means that orange paint will be the best color to use to make your painting stand out, so with that, mix Brilliant Orange with Permanent Yellow Orange, and paint the area around the garlic. You can turn your paper around to help prevent yourself from touching any wet paint, and to give a different perspective of your painting. Use the same orange mix to fill the space inside the bottle while avoiding the scissor handles and the inner tube, eventually filling up the rest of the negative space inside the bottle. Add any reflective white shapes you like by sketching them in and painting around the area, to give a bit more contrast and depth to your painting.
Step 5: Circles And Lines
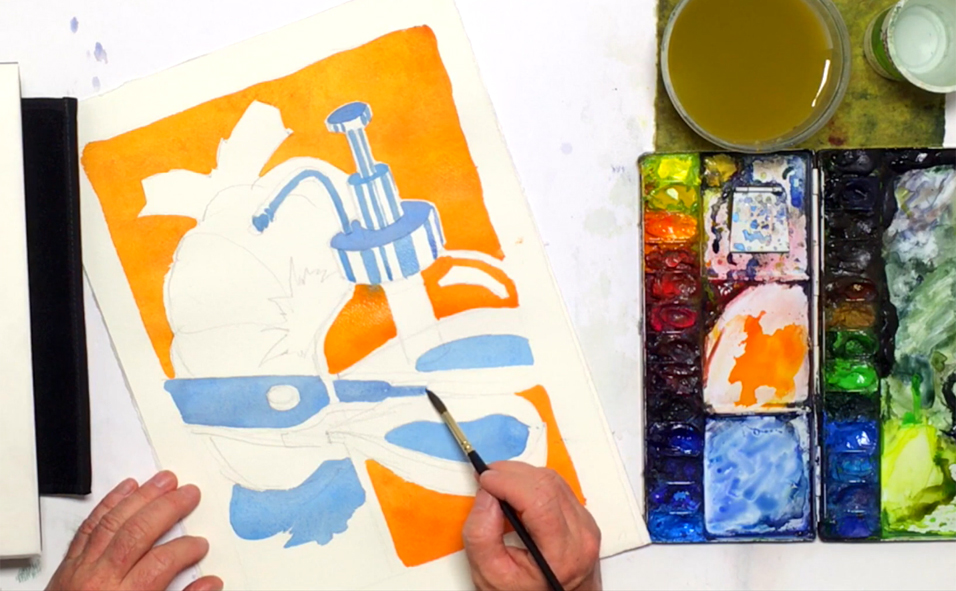 Go back to your blue mixture and carefully paint the rim on top of the bottle cap right below the plunger, effectively stacking the different “levels”. Apply blue paint to the spout as well, connecting it to the lid while leaving some white for a metallic effect. Next, sketch and paint some reflective lines on the sides of each cylindrical shape to break up the monotony of the oval forms. Keep stopping and stepping back to look at the overall effect of your colors and to get a fresh perspective on where your painting is going. Lastly, try not to touch the wet orange paint, or else the colors will smudge or bleed into one another (you can let the orange areas dry first if you're worried).
Step 6: Painting A Fuzzy Texture
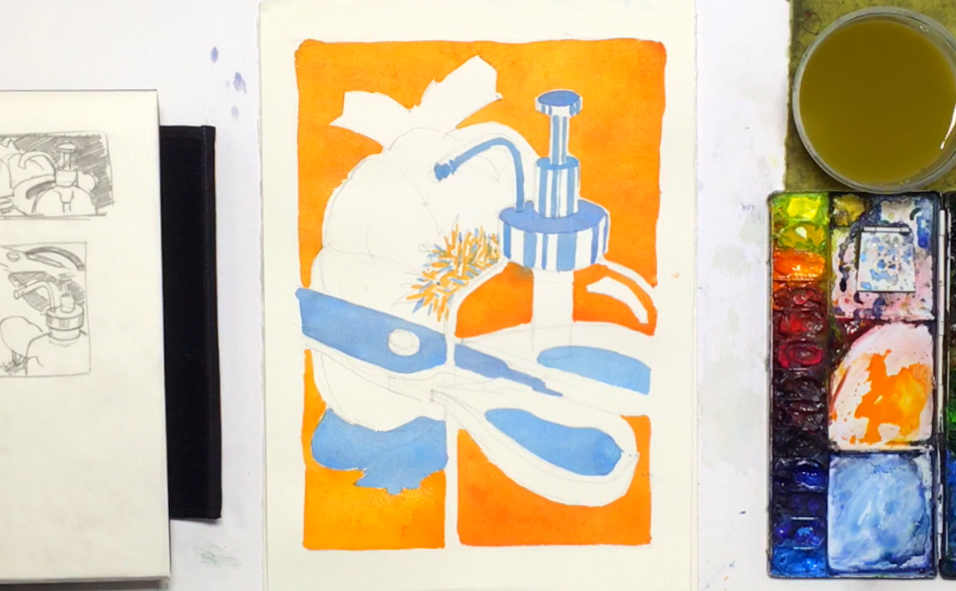 After you return from a quick break to freshen your mind, add some orange to the lower left corner of your painting without painting over the shadow of the garlic. Use the same color to paint the fuzzy texture in the center of the garlic by using the tip of your brush to taper your lines and making sure to leave small gaps between each strand of hair. Switch over to the blue mixture and repeat the same strokes in these gaps to create shadows in the texture, and to bring out the orange color. Again, try to avoid touching the wet areas to prevent bleeding.
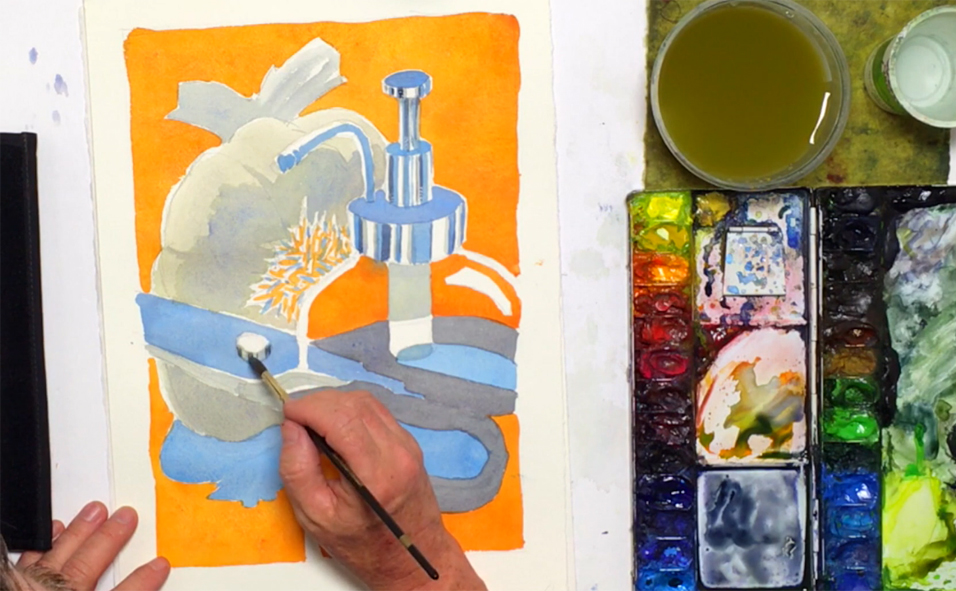
Step 7: Mixing Complementary Colors For A Neutral Tone
 With your pencil, add in some contour lines to the garlic shape for some extra depth. For its color, you can mix a new one by blending your old paint: when two complementary colors come together, they neutralize and create a grayish tone. So create this gray tone by mixing your orange with your blue, adding more orange for a warmer tone or blue for a cooler one, then paint in the garlic shape. Be mindful of the edges of the spout and the fuzzy texture you just painted to avoid bleeding colors. Continue using this gray paint to fill in the bottom of the garlic, the tube inside the bottle, the screw in the scissor blades, and to add extra lines to the reflective cylindrical edges of the pump. Add more Peacock and Cobalt Blue Hue to your gray paint for a cooler tone, and paint the peeling skin above the garlic. You can use the same color for the darker shadows within the garlic shape, which will add a little more depth and variety.
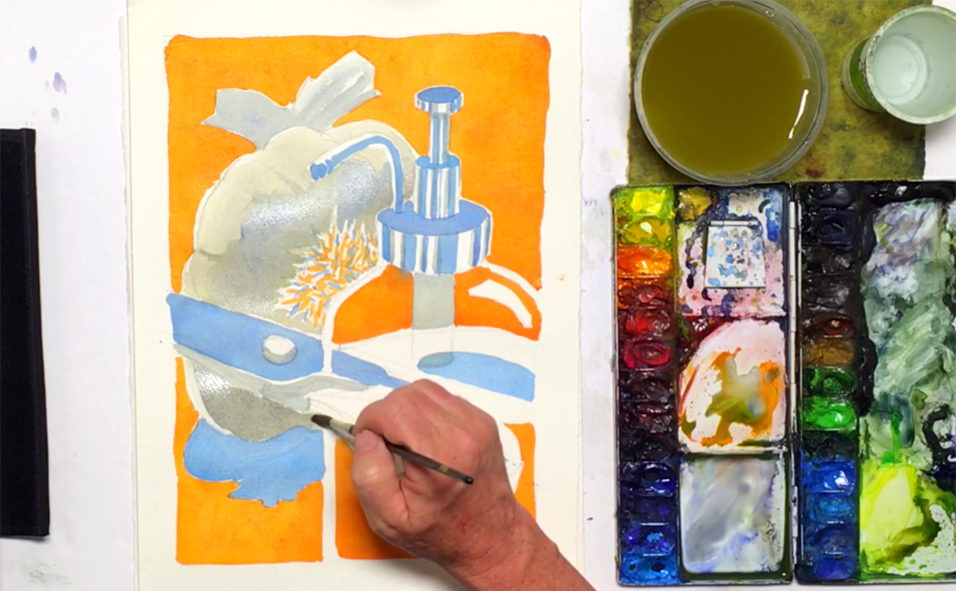
Step 8: Handling The Handles, And Negative Spaces
 Now it's time to address the scissor handles. Add some Payne's Grey, Cobalt Blue Hue, and more Brilliant Orange to your bluish-gray tone and paint in the handles, being careful to paint around the white highlights around the bottle's spout to create more variety and contrast. You can deepen the gray further and add even more contrasting lines to the reflective cylindrical edges of the bottle's pump. Don't forget to explore with the negative spaces as well, because by doing so, you break the barrier of reality, which is the first step to capturing the illusive and elusive nature of abstract art. Remember to not be too fixated or overly critical of any mistakes at this point, and allow yourself room for experimentation. Besides, you may find that these "mistakes" add to the abstract rather than detract!
Step 9: Using Line To Create Emphasis
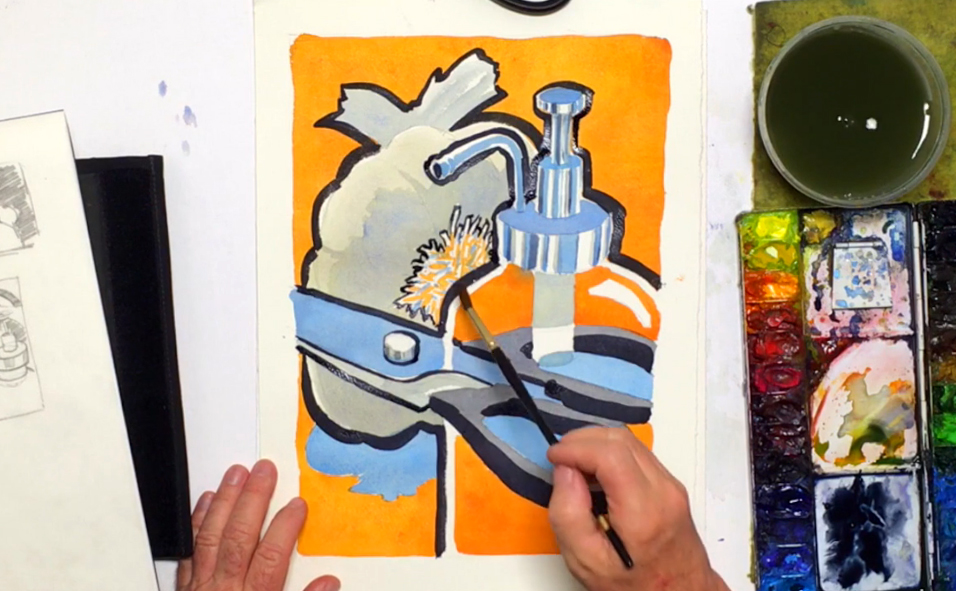 Moving on to the final step, mix together a very dark tone using a lot of Payne's Grey, Neutral Tint, Ultramarine, and Prussian Blue, then paint the shadowed edges of the scissors' handles. This establishes depth and brings another layer to your painting. Be mindful of the curves as you paint the outside edges of the handle closer to the foreground. Next, add a heavy outline to the bottom of the garlic, and connect it to the left edge of the bottle. Once that's done, outline the scissors' blades, the garlic, and the bottle to distinguish the three objects while connecting them at the same time. Continue on the right side of the bottle and pump, keeping the line consistent for balance. Finish off the abstract painting by painting a thin outline around the fuzzy texture in the garlic's center. Feel free to experiment with the thickness (i.e. "weight") of the line, as this will affect how heavy or important a shape feels in an image. Make sure to keep stepping back to evaluate the overall composition, and when you're satisfied with the result, let your painting dry. Congratulations: you've completed your abstract watercolor painting!


