Follow Steve Curl as he shows us how to study and paint different clouds and skies. Want to watch the video version? This tutorial is also available to members of our Beeblys WatercolorPainting.com.
Materials Used In This Watercolor Class:
- A sheet of Arches cold press watercolor paper (140lb, size 12" x 9")
- HB or 2B pencil
- Kneaded eraser
- Painting palette for watercolor paints
- A container of water
- A towel or rag to rest brushes on
- Paper towel
- Reference picture of wispy clouds (optional)
Paints (Holbein Artist's Watercolors)
- Permanent Alizarin Crimson
- Permanent Violet
- Cobalt Blue
- Cerulean Blue
- Manganese Blue Nova
- Ultramarine Deep
- Payne’s Gray
Brushes
- Silver Brush Black Velvet: Jumbo Round mop brush (medium)
- Stratford & York Warwick Series: Round sable brush (size 12)
- Stratford & York Warwick Series: Round sable brush (size 8)
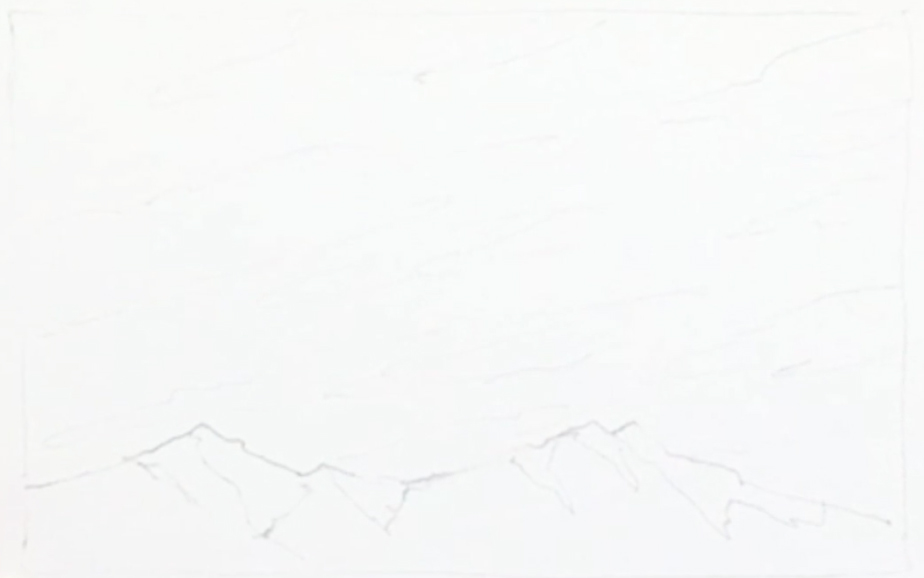
Step 1: Initial Outline Sketch

For this tutorial, it's best if you have either a live view of wispy clouds and mountains in the background, or a reference picture to work from. This way, you can study the shapes created by different colors and tones, and practice focusing on the design of your overall painting instead of simple objects. Doing so will help you discard any preconceptions on what certain things should look like instead of what you actually see. To start, sketch a frame around the area you'll be painting, then draw in the outlines of cirrus (i.e. "wispy") clouds. In order to emphasize the sky, use about two thirds of the drawing for the sky and clouds, then sketch in some mountains along the bottom. A basic plan or idea of the overall design is enough, as any details can be changed later. Sketch in the shadow shapes on the mountains as well (you can use a wrinkled, ridged paper towel to give you an idea of what they should look like).
Below is a close-up of Steve's sketch:
Step 2: Wetting The Paper

To paint the softness of the clouds, the wet-in-wet technique is the best method to achieve this as it makes use of an artist's control over both paint and water. First, wet the sky with the jumbo round mop brush, making sure to avoid the mountains as you go. Tilt the paper to check for dry areas.
Step 3: Painting Wispy Skies Using The "Wet-In-Wet" Technique
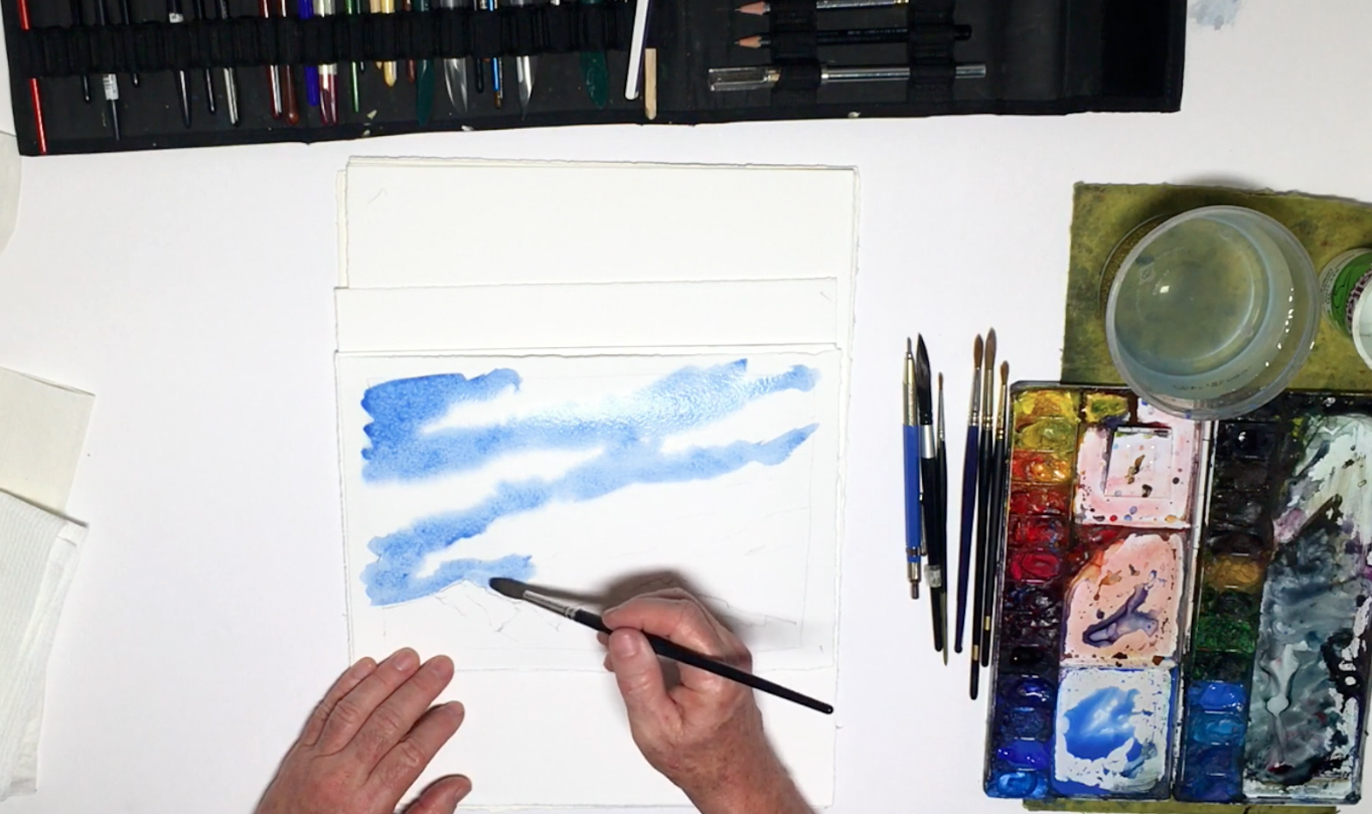
With the size 12 brush, prepare a mixture of Cerulean and Cobalt Blue on the palette, testing the color on a piece of scrap paper before painting the sky. Start from the top, being careful to avoid the clouds. As the paper is wet before painting, the paint will spread more and create soft edges around the clouds. If at any moment the paper dries out and the paint starts producing hard edges, use the size 8 brush and clean water to soften the edges were the sky meets the clouds. You can also use the paper towel and dab at areas that are too wet, or where the paint has spread too much into the clouds.
Step 4: Contrasting Soft And Hard Edges To Define Shapes

As skies get closer to the horizon line, they often begin to lose their depth (i.e. the hue changes), so as you get closer to the mountains, add some Manganese or Peacock Blue to the mixture to vary the color. As opposed to the clouds, the edge where the sky meets the mountains should be crisp, so keep an eye on the wetness of the paper. Feel free to paint past the initial frame you drew on the paper, and to have clouds drifting out of the frame.
Step 5: Painting Snow-Capped Mountains

When the sky is dry, sketch in some snow caps on the mountains, then on the palette, mix Cobalt and Ultramarine Blue with a touch of Alizarin Crimson with the size 12 brush. Paint in the snow caps' shadows of the mountains, making sure to keep them consistent with the lighting in your painting (e.g. if the light is coming from the left, then all the mountains' shadows should be on the right side).
Step 6: Adding Contrasting Shadows For An Aerial Perspective
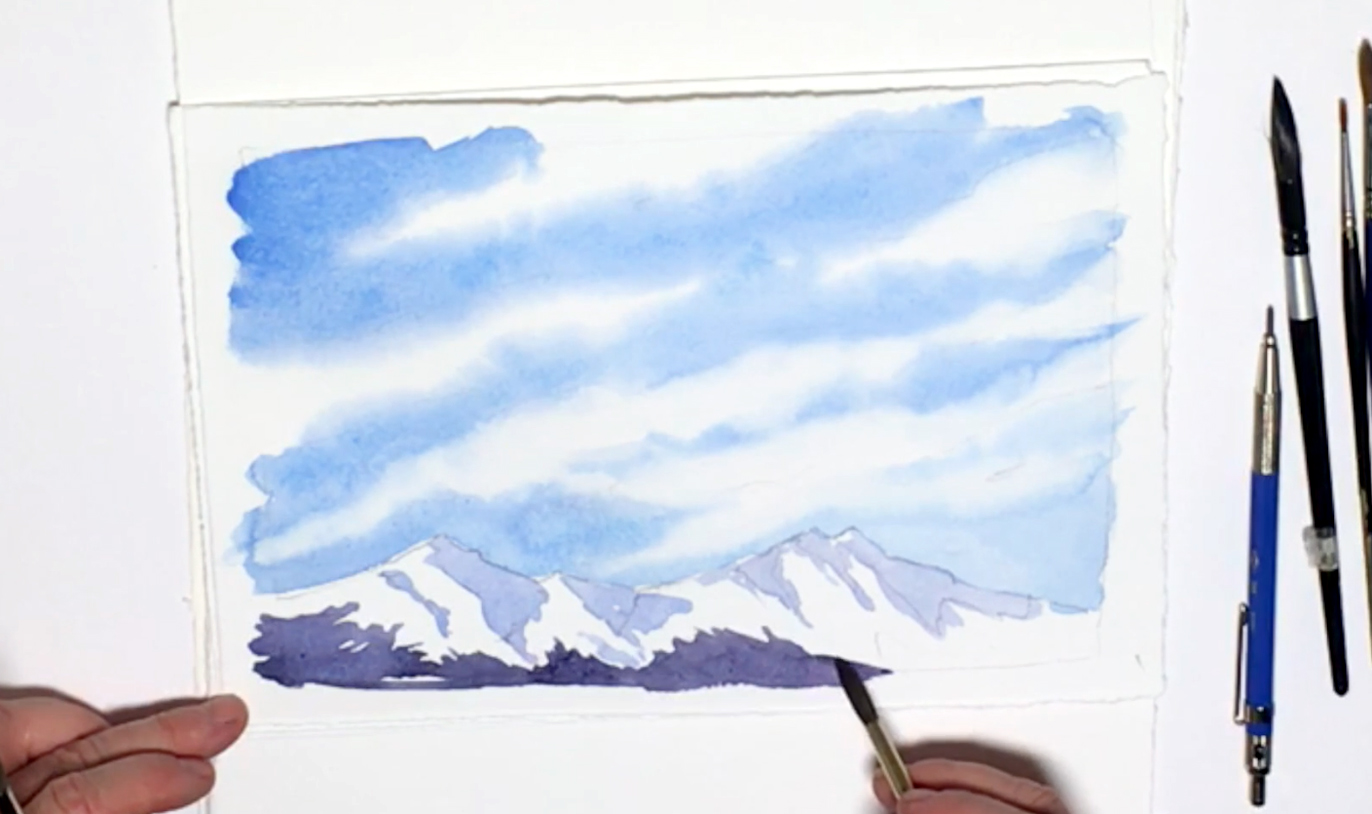
For the rocky part of the mountain (along the bottom), make sure to use a darker blue, as the aerial perspective (i.e. objects in the distance) will make the mountains lose its chroma and color saturation. This means the mountains at a distance will appear faded and blue, even though it would be a completely different color up close. To give your painting this sense of depth, add Permanent Violet, Alizarin Crimson, and a touch of Payne's Gray to the shadow color mix, using the size 8 brush to paint the rocky details along the base of the mountain. Avoid making the colors too warm, such as brown, red, or orange, as this will make objects appear closer and take the focus of the painting away from the sky. Add any finishing touches, and if needed, use a kneaded eraser to get rid of any extraneous pencil lines.


