Experiment with monoprinting watercolor prints by following Patty Brady's tutorial. Monoprinting is a hand-printing technique that, unlike other methods of printing (e.g. screenprinting, linoprinting), can only produce one copy of an image. This helps make the result look printed, yet completely unique at the same time. Considering using monoprinting as a watercolor technique for producing one-of-a-kind watercolor prints.
Materials used:
- Reference painting or photograph of the image you'd like to print (max. size 81⁄2 x 11")
- Grafix Impress: monoprint plate (size 9" x 12")
- Masking tape (width 1")
- Painting palette for watercolor paints
- QoR watercolor paints
- Set of watercolor paintbrushes (various sizes)
- Two cups of water
- A towel or rag to dry off the brushes
- Two sheets of Arches 88 printmaking paper (max. size 81⁄2 x 11")
- Blotting paper (size 9" x 12")
- Water bath (at least 9" x 12")
- Release paper, or a sheet of wax paper (at least 9" x 12")
- Fineline Applicator: fine tip (optional)
Step 1:
 Have your reference picture or painting ready, and place and center it underneath the monoprint plate. Your reference picture should not be bigger than the printmaking paper. When the picture is in the right place, use a little masking tape to tape the edges of the plate down with masking tape, enough to prevent it from moving while you paint.
Step 2:
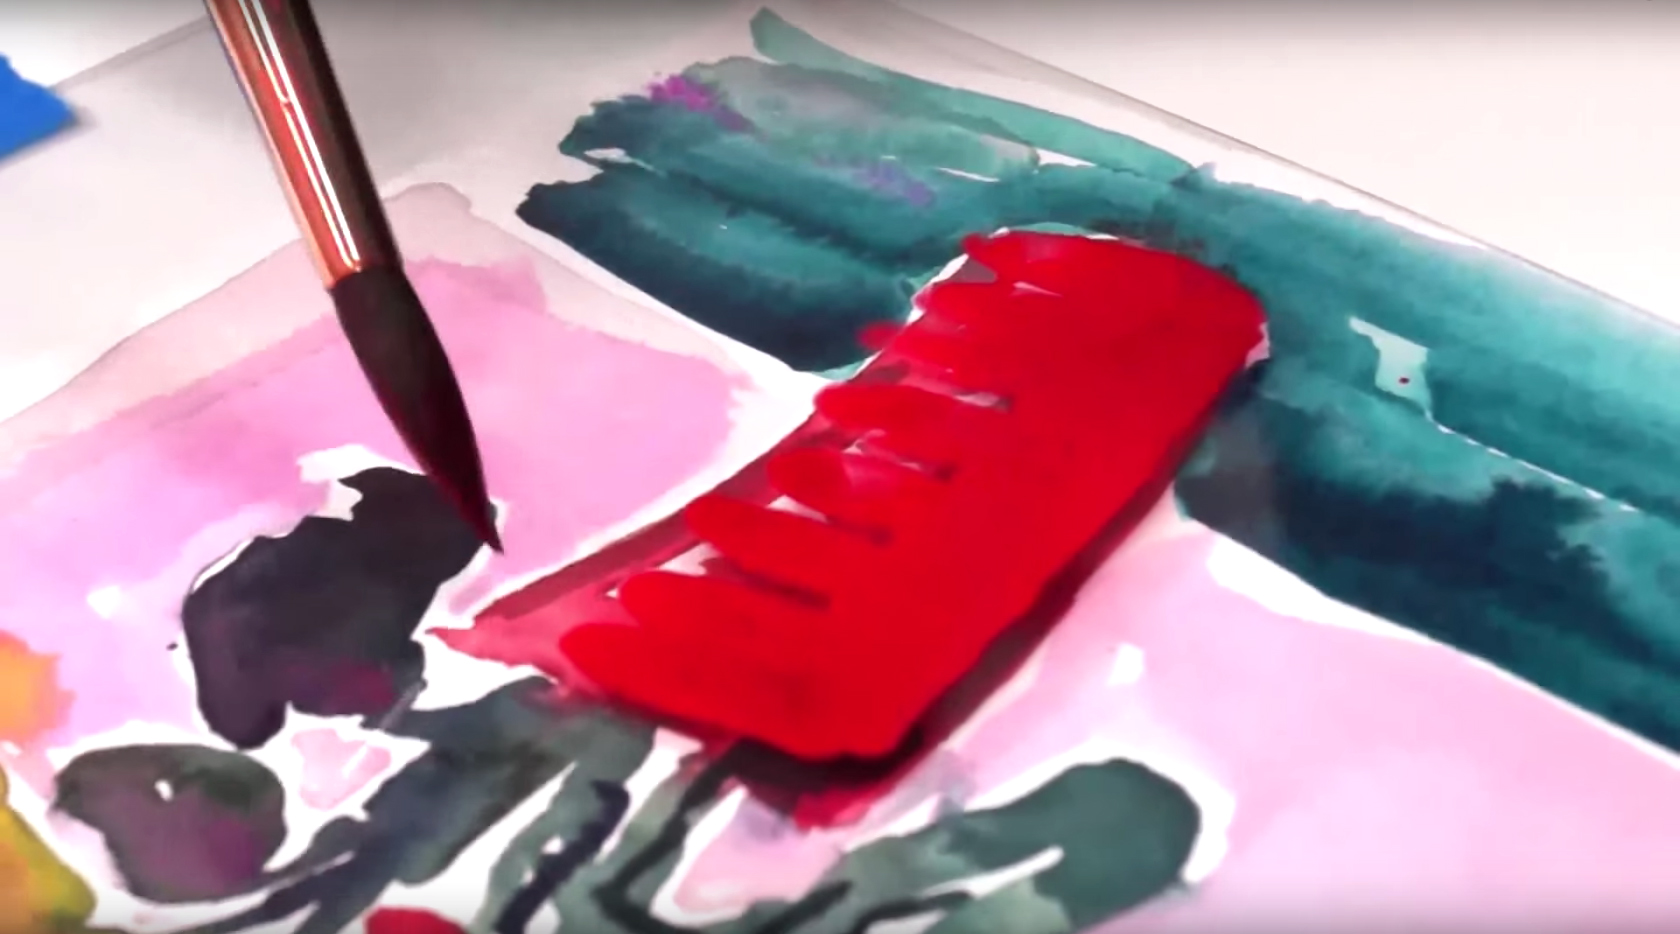 Prep the watercolors you need on the palette using the brushes and water, then start painting on the monoprint plate. When paint is applied to the plastic surface, the paint will start to buckle, which is fine as it will give your monoprint the "printed" effect. You can match the same colors to the reference image you're tracing, or experiment with different colors.
Step 3:
 You can also paint directly on the plate with the paint tube, then go over the paint with a clean, wet brush and move the paint around the printing plate. You can experiment with the amount of water you mix in, as this will produce different results on your final print.
Step 4:
 Let the paint on the printing plate dry completely after you're done. While waiting, you can paint a second plate, this time using the Fineline Applicator. Prepare the second printing plate the same way as mentioned in step one, then prepare the paint inside the applicator by pouring watercolor paint and distilled water (at about a 50:50 ratio) into the applicator and shaking it to mix the paint inside. Use a darker color for your applicator paint, as you will be drawing the outlines of your reference picture.
Step 5:
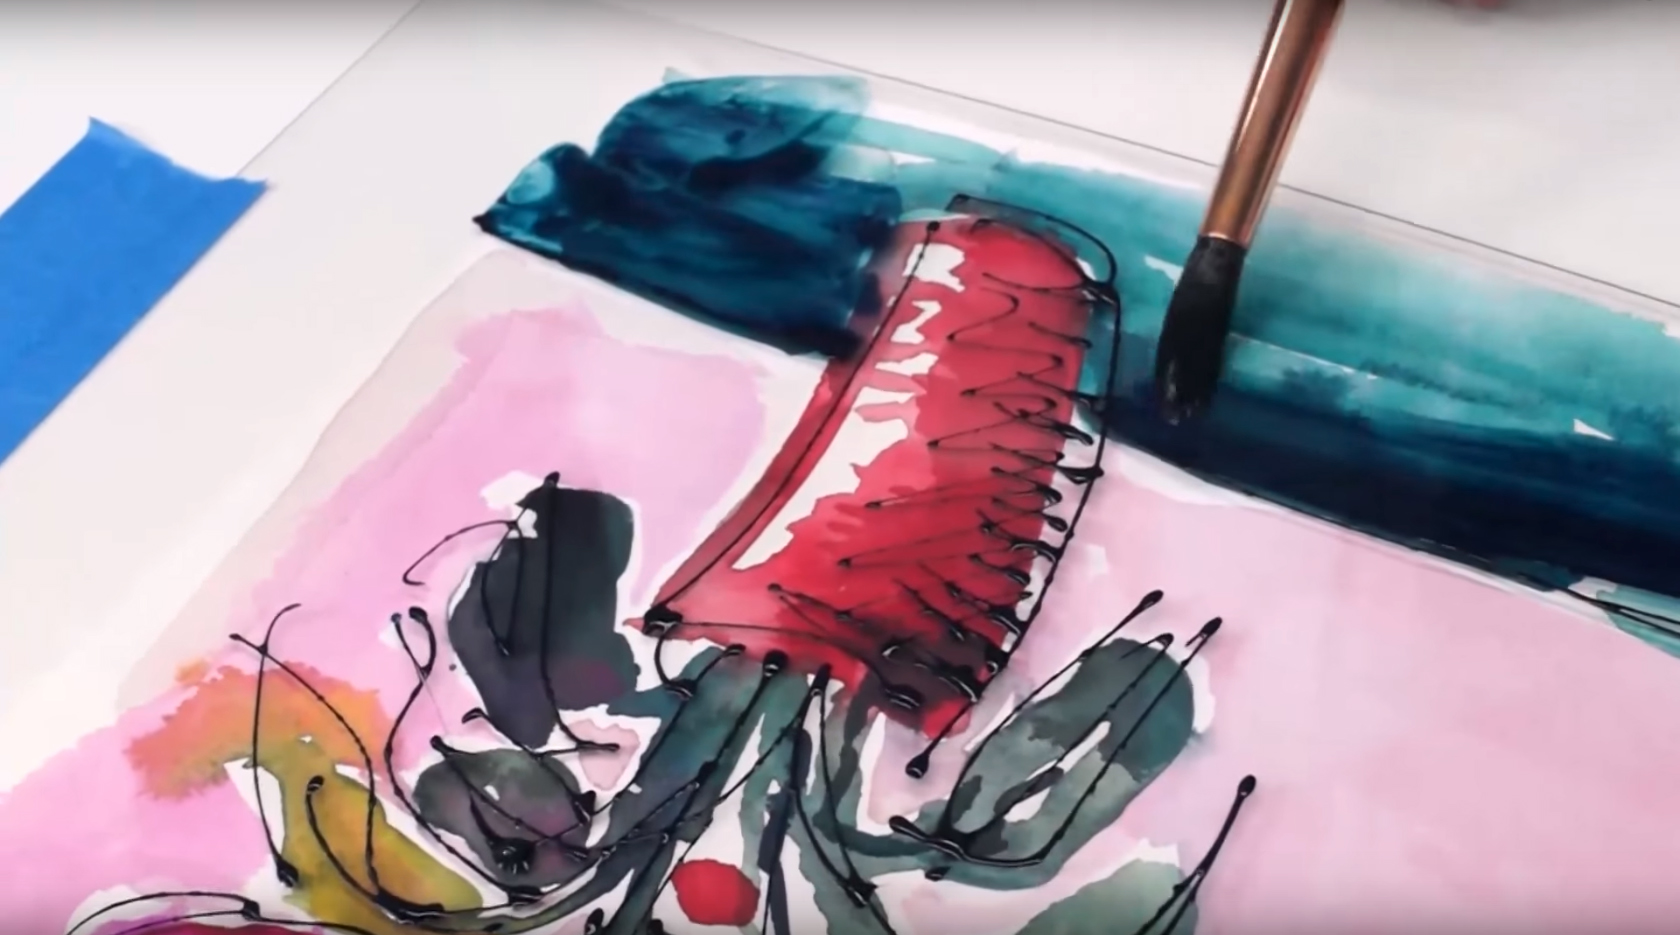 After drawing the outlines onto the printing plate, you can add some color in the same way as you did for the first plate, but being careful to avoid smudging the lines you just drew. Let this plate dry (it should take about 3 hours).
Step 6:
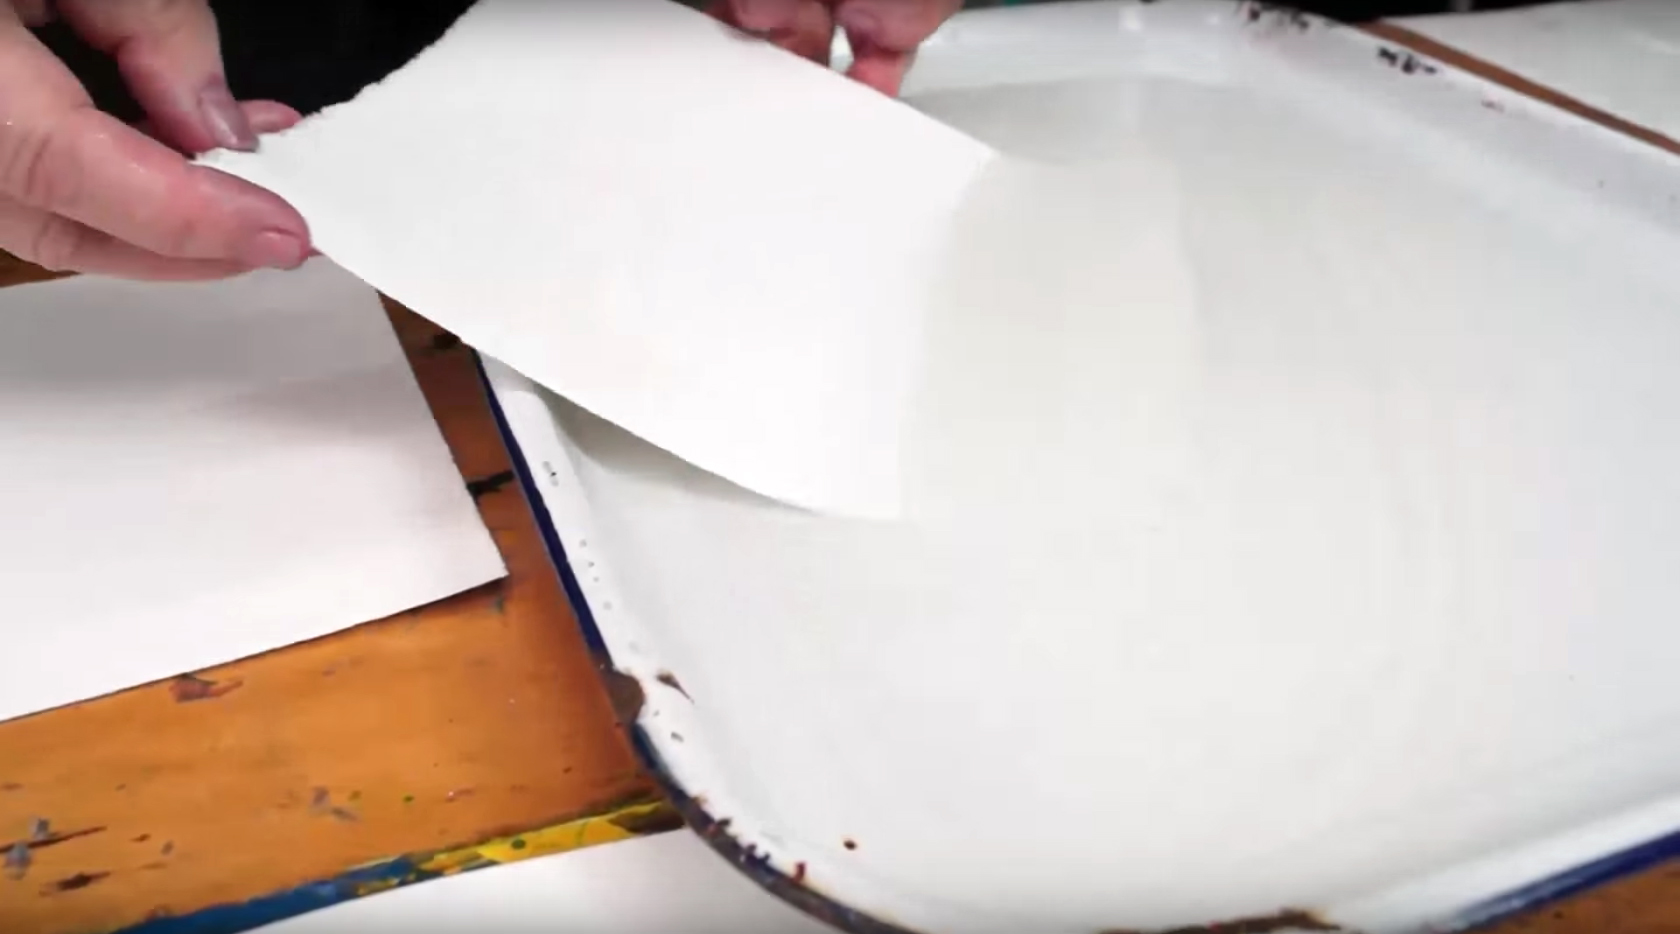 Fill the water bath until it has about a half-inch's depth of water, then submerge a sheet of Arches printmaking paper into the water bath for about 3 seconds. Take it out gently, then sandwich it between two sheets of blotting paper so they absorb the excess water from the paper. The paper should still be wet, but not so saturated that its surface appears shiny.
Step 7:
 Center the Arches paper on the printing plate, and carefully lay it on top. Protect the back of the printmaking paper with a sheet of release or wax paper before pressing down to transfer the paint on the printing plate to the paper. For the best results, use your fingers to burnish (i.e. flatten and get rid of any bubbles that may have been trapped underneath) the surface so that most of the paint can be absorbed by the wet paper. Next, peel the paper off, starting at the top two corners and gently lifting them off the plate. Allow the paper to dry on a flat surface, then repeat the process with your other printing plate and sheet of paper. The printing plates can be cleaned and reused as many times as you like, hence retaining the qualities of the printing process, while producing results that can never be duplicated. Here are the end results:
 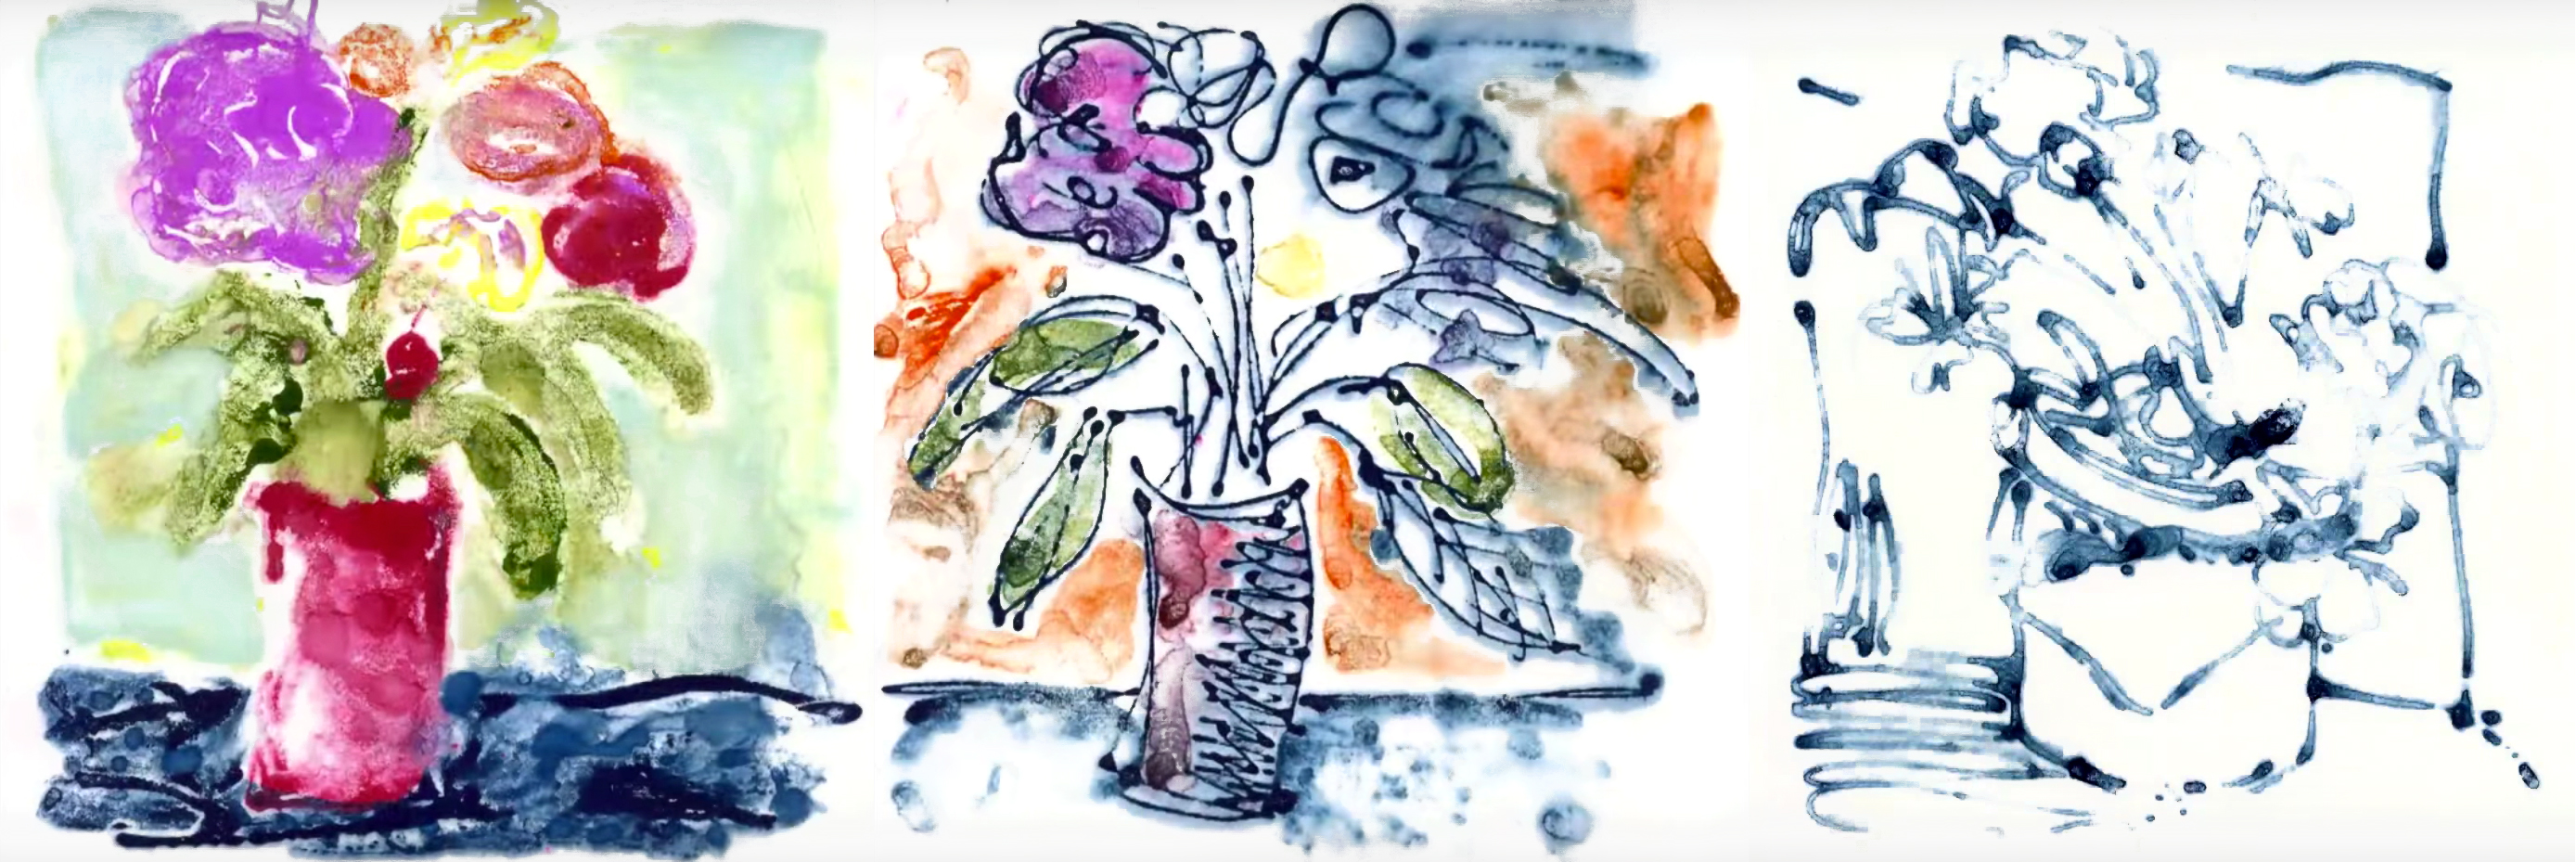 Special thanks again, Patty Brady, for the clever tutorial! Here's a video of the entire process:


