Learn this watercolor technique for beginner and intermediate artists by adding salt to create a unique effect. We found this watercolor technique shared by Jennifer McGuire to be a useful demonstration. Here's a review of this technique so you can get started…
Materials used:
- Table salt
- Kosher salt or Alaea Hawaiian sea salt (coarse crystals)
- Large round paintbrush
- Ranger: Perfect Pearls - individual pigment powder PPP17714
- Ranger: Mini Round Ink Blending Tools
- Small bowl and spoon
- Ranger: Tim Holtz Distress Watercolor White Cardstock (4.25" x 5.5", 118lb)
- Heat gun
- 5" x 7" Clear acrylic block
- WPlus9: "Going Places" stamp set (bunnies and clouds)
- WPlus9: "Wishing You" sentiments stamp set
- EK Success Powder Tool (anti-static tool) or dryer sheet
- Tsukineko Versamark Emboss Ink Pad Watermark
- Hero Arts white embossing powder PW110
- Neenah Classic Crest 110lb smooth solar white paper
- Fantastix Coloring Tool
- 3M Micropore tape
- Acid-free glue
- Silver string
- Ranger: Multi Medium adhesive (matte finish)
- Quilled Creations Precision Tip Empty Applicator Bottle
- Memory Box: "Starry Night Background" die
- Die cutting machine
- The Ton star sequins (silver, blue, iridescent)
- Lifestyle Crafts Quickstik tool
- Glaze pen (black)
- Wink of Stella Clear Glitter Brush Marker
- Mini Ranger Glossy Accents
- White cardstock (at least 6.25" x 7.5")
- Light blue notecard paper (at least 6.5" x 7.75")
- Trimmer or X-Acto knife and cutting mat
Paints
- Zig Kuretake Gansai Tambi watercolors: Ultramarine (#64)
- Blue (#66)
- Indigo (#67)
- Blue-purple (#38)
- Purple (#139)
Ink
- Distress Ink: Chipped Sapphire
- Hickory Smoke
- Worn Lipstick
- Tumbled Glass
- Wild Honey
- Hero Arts dye ink: Black
Step One
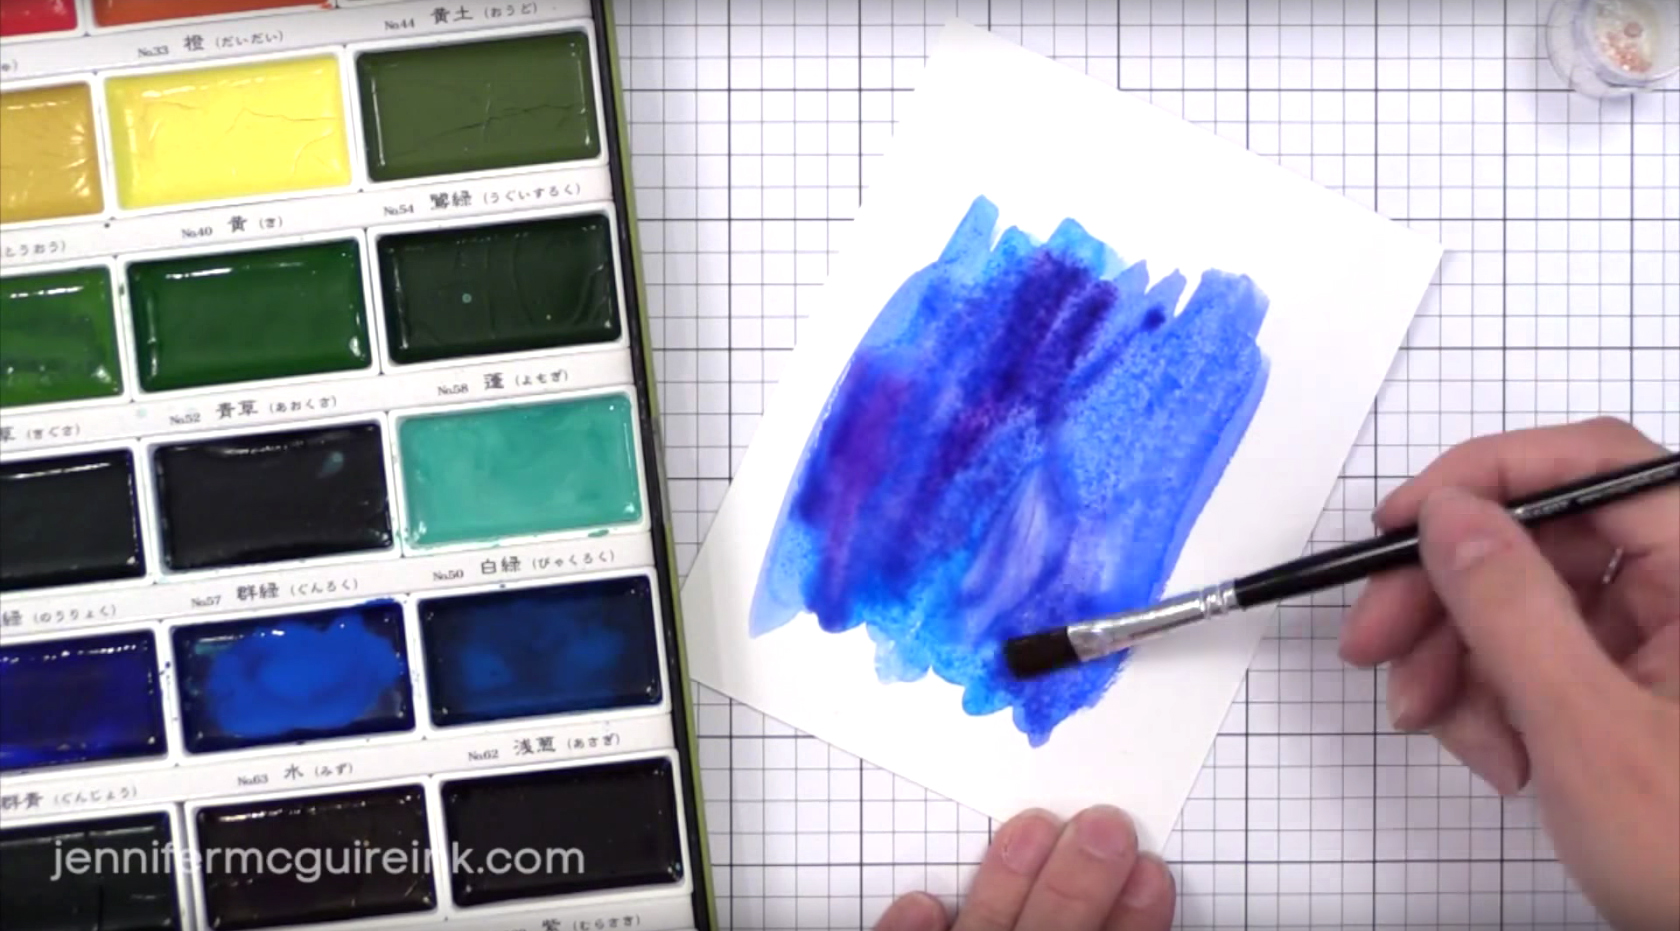 Mix a teaspoon of the Kosher salt or Alaea salt with a teaspoon of the Perfect Pearls pigment powder in a small bowl. The powder adds a pearly shine to the result, so this is an optional (but fun) variation. Add more for a shinier effect. Set aside, then paint 2 sheets of Tim Holtz white cardstock paper (4.25" x 5.5") with different blues and purples - one with more water mixed in, enough to saturate the paper and cause the paint to pool on the surface.
Step Two
 Sprinkle the salt mixture immediately onto the more watery version, then sprinkle some table salt on top. Set aside. For the other piece, dry the paint a little with the heat gun before sprinkling the salt mixture on top. For this watercolor technique to work effectively, the paper should still be wet, but not pooling with paint. Set aside and wait for the paint to dry completely before brushing the salt off, and scraping any excess off with the acrylic block.
Step Three
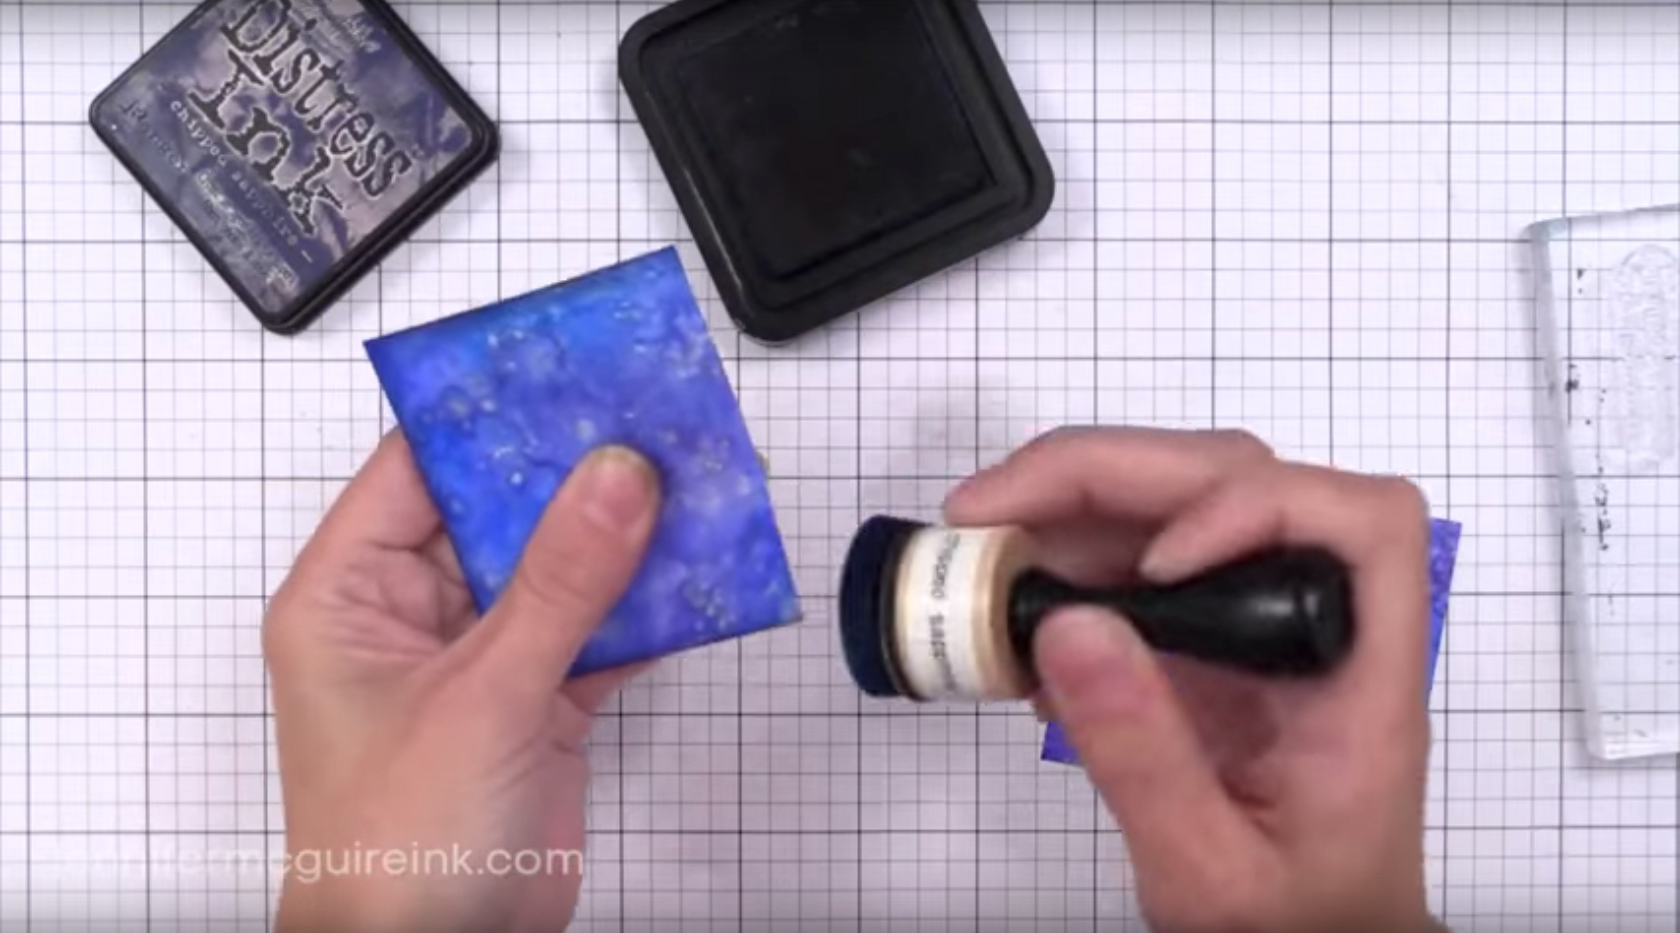 Trim the edges with the trimmer or X-Acto knife, and using the mini round ink blending tool, brush some Distress Ink (colour "Chipped Sapphire") along the edges of the watercolour background. This helps to define the edges of your background.
Step Four
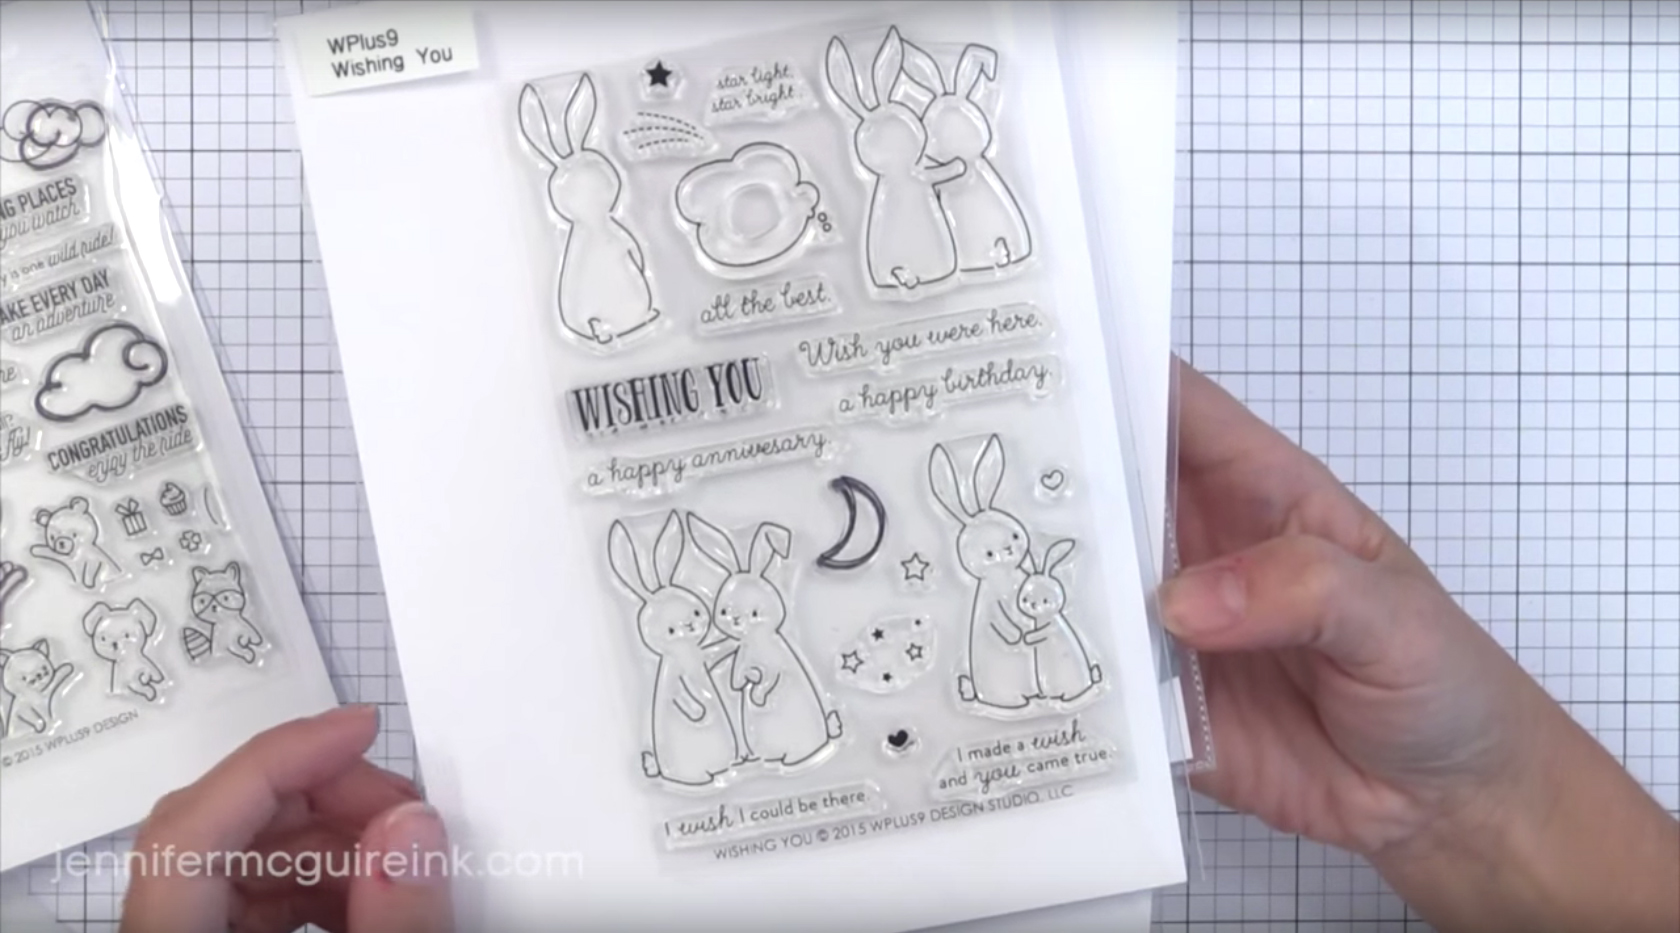 Cut out the bunny and clouds from the WPlus9 "Going Places" stamp set, and any sentiment from the "Wishing You" stamp set. You can buy and use their precut dies, or "fussy cut" (i.e. precisely cutting out a certain image or pattern out of a set) them out yourself using the X-Acto knife.
Step Five
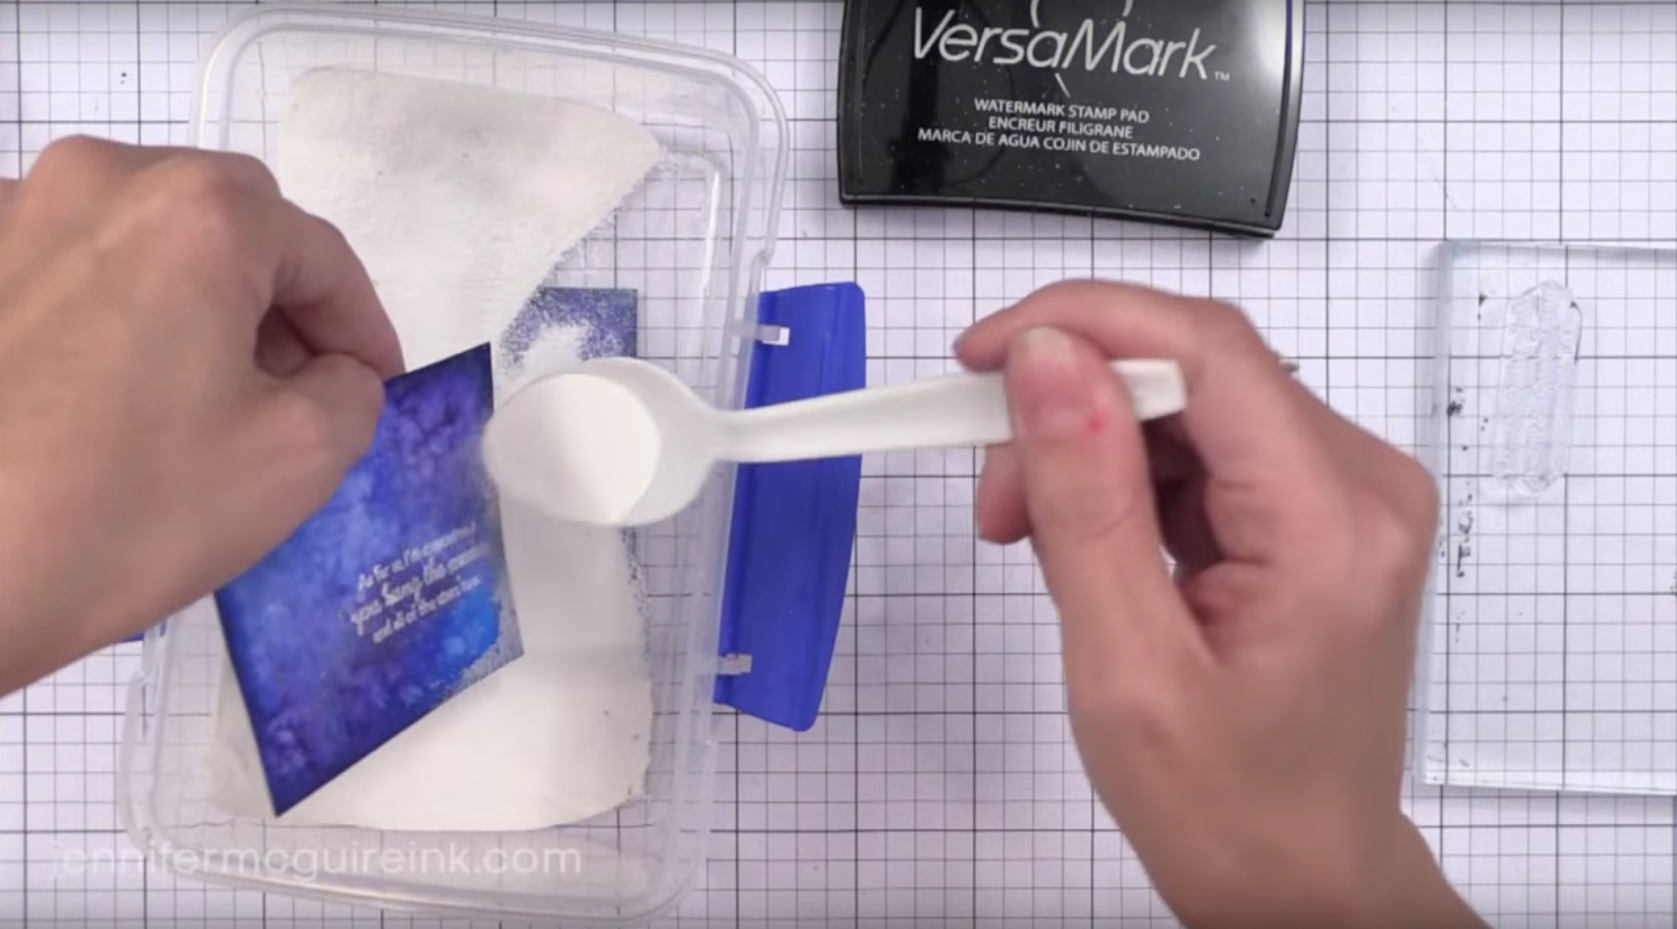 Using the anti-static powder tool (EK Success Powder tool) or a dryer sheet, brush the powder over the area on the background where the sentiment will appear, then stamp the sentiment with the Versamark embossing ink. Add the Hero Arts white embossing powder to the stamped sentiment, and gently brush off the excess powder without touching the sentiment.
Step Six
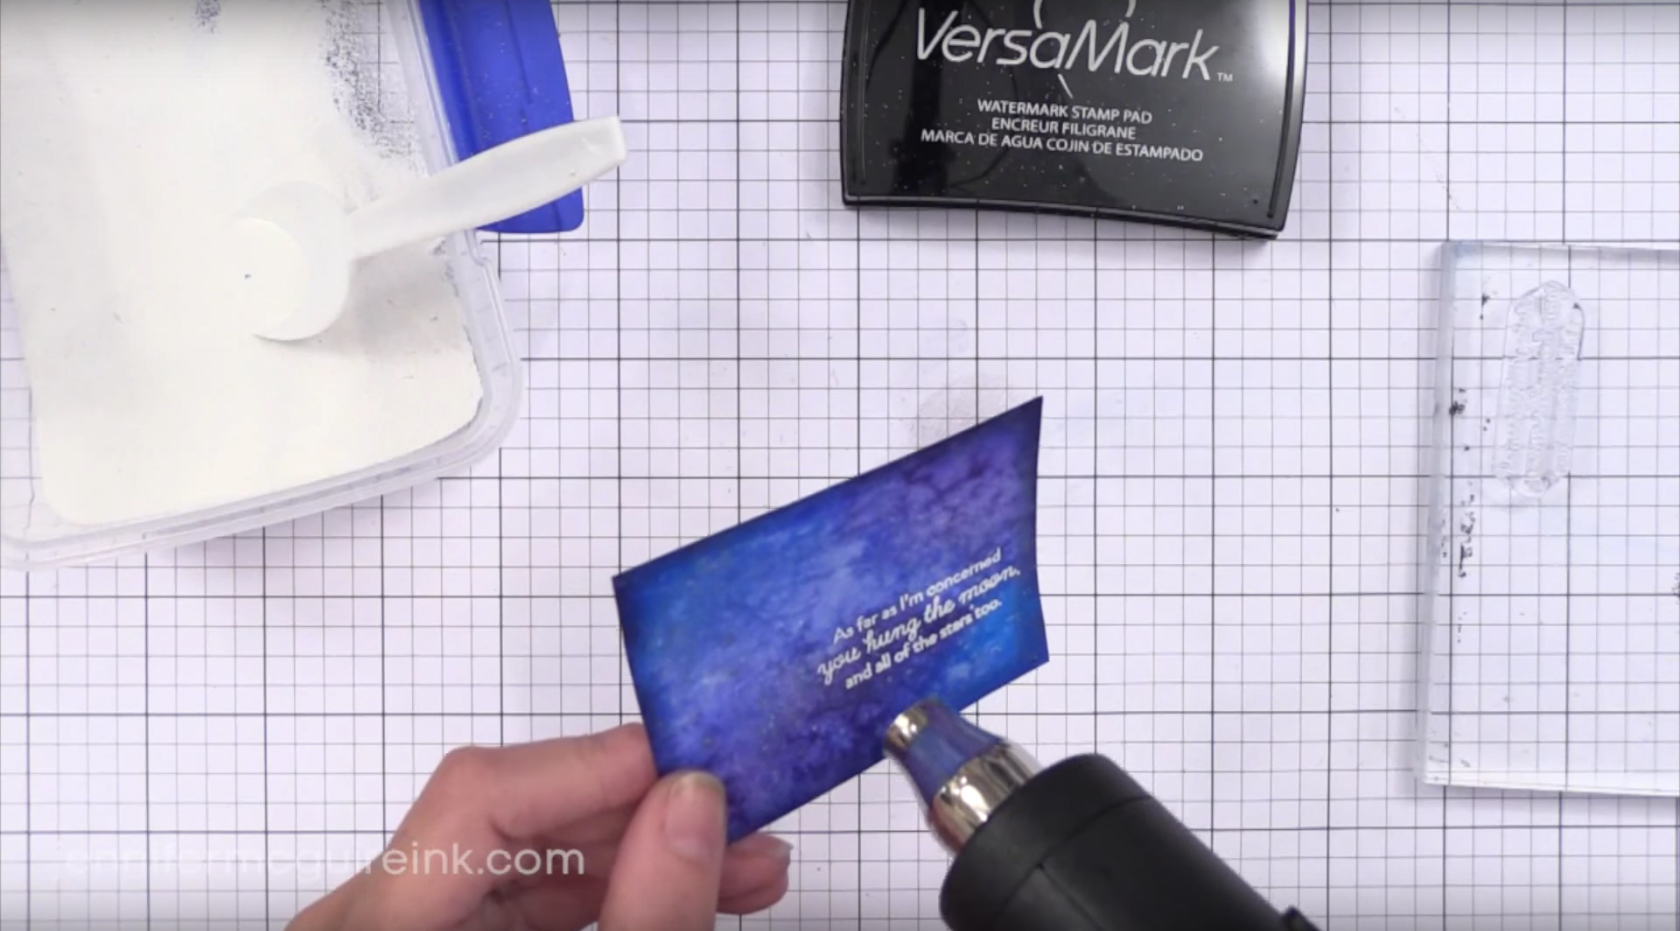 Heat set the sentiment with the heat gun. After it has cooled down, you can buff away any extra powder that was left behind from the anti-static powder tool.
Step Seven
 Stamp the bunny and clouds on the Neenah white cardstock paper (or any white cardstock paper) using Hero Arts black dye ink. After cutting out the bunny and cloud shapes, use the Distress Ink (color "Hickory Smoke") and the ink blending tool to brush some ink around the edges of the bunny, leaving the belly and face a bright white for more contrast. Another option is to use watercolor or Copic markers to color them, although this will take more time.
Step Eight
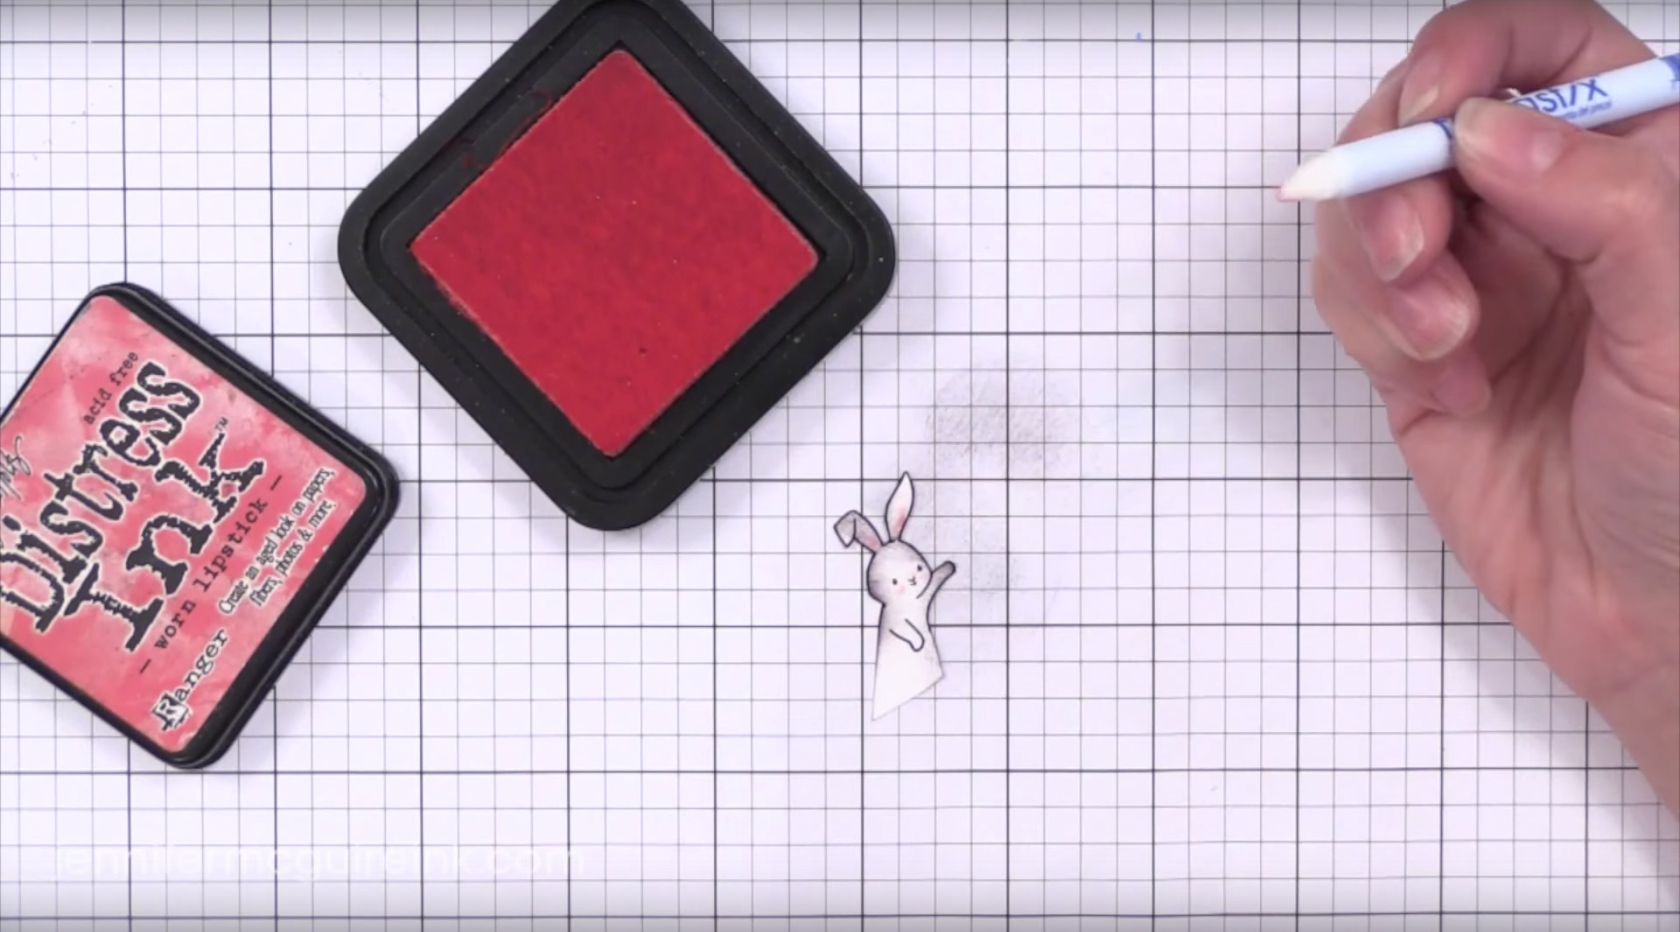 Small areas can be colored using the Fantastix colouring tool, which has a spongey but pointy tip for detail ink work. Add Distress Ink (color "Worn Lipstick") to the ears, nose, and cheeks of the bunny. As for the clouds, use "Tumbled Glass" Distress Ink and brush along the edges using the ink blending tool. For the moon, use "Wild Honey" Distress Ink.
Step Nine
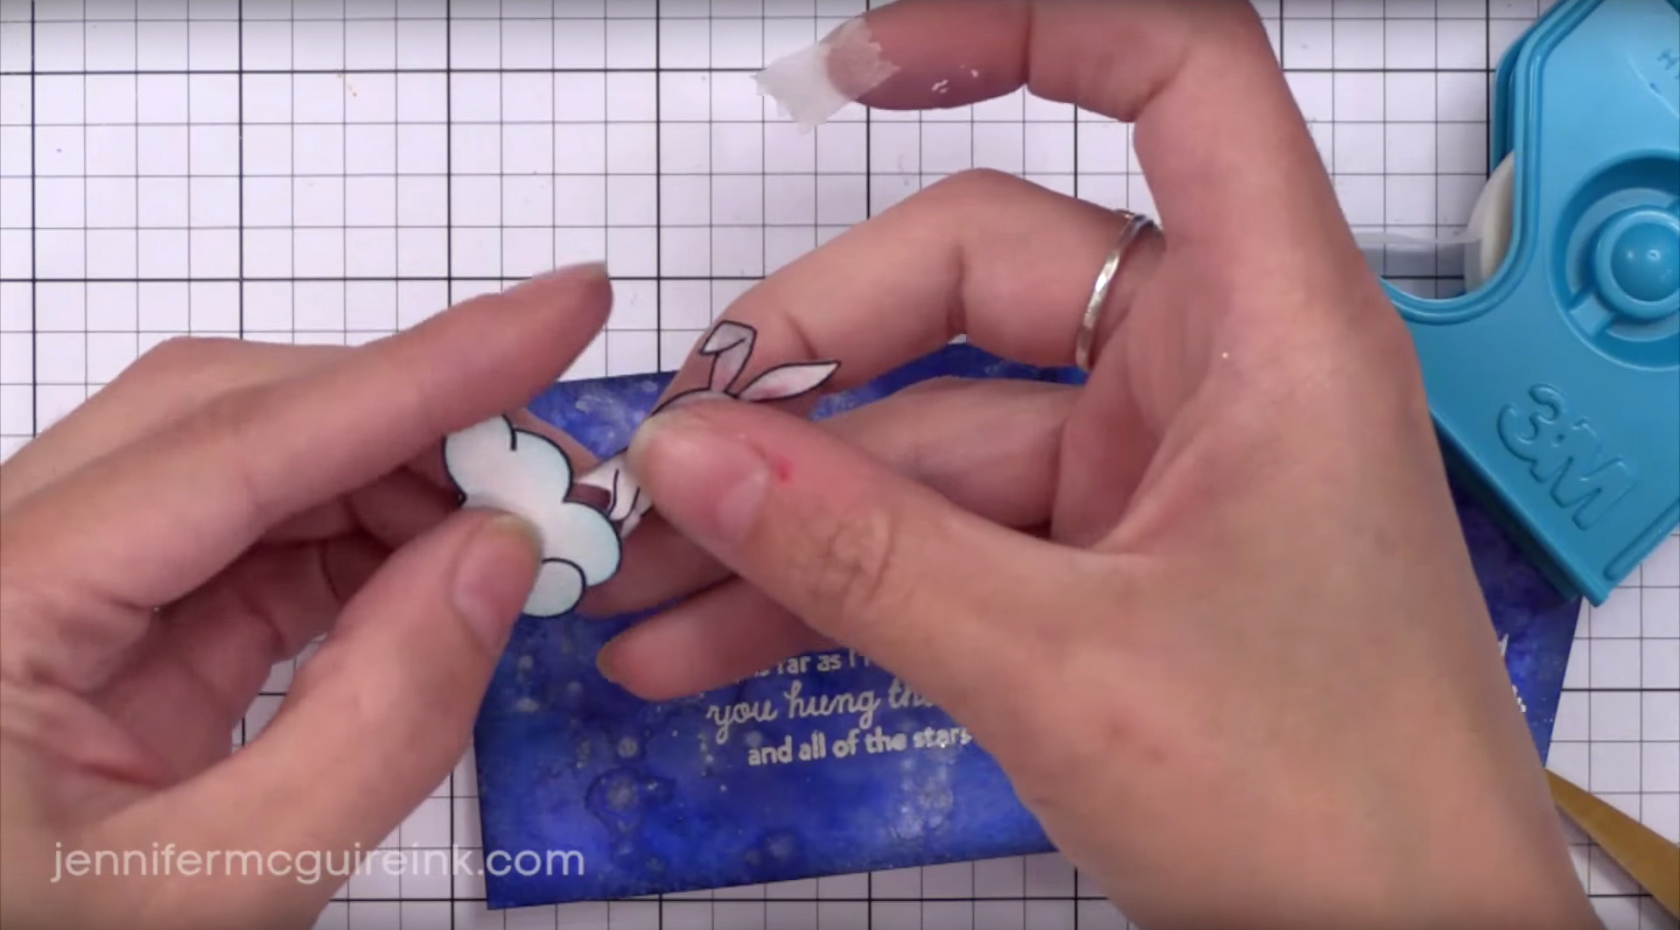 After everything has dried, it's time to assemble all the pieces together. The bunny is designed to tuck behind something, like the edge of a piece of cardstock or a balloon, so you can carefully cut out the bunny's right arm and tuck a cloud underneath. Use a piece of Micropore tape to secure the cloud in place, then glue all the bunny and cloud pieces to the watercolor background with acid-free glue. An alternative to glue is to use foam dots or tape.
Step Ten
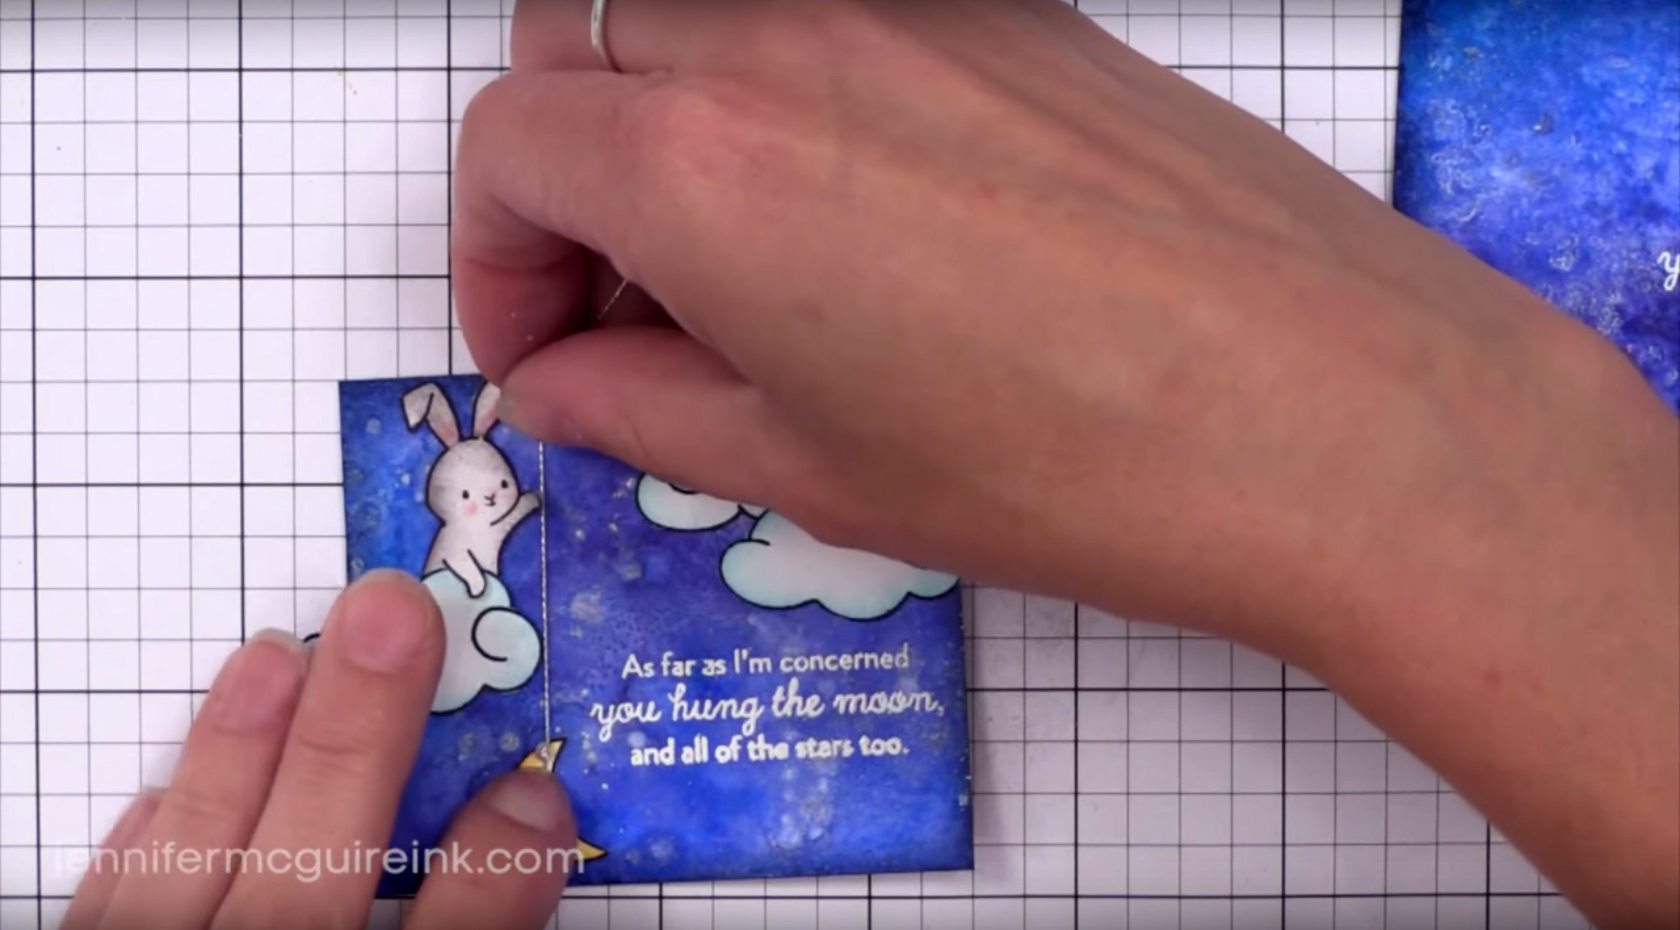 To connect the moon to the bunny's paw, tie a knot at the end of a 4" length of silver string, and trim the excess off the bottom. Then, add a dot of Multi Medium adhesive to the top of the moon and the back of the bunny's left paw, before placing the knot end on top of the moon and tucking the other end behind the paw. Trim off the excess on the top. The Multi Medium is a type of strong adhesive that dries matte, but if you want to make sure the string is secure, you can place the acrylic block on top while the adhesive dries.
Step Eleven
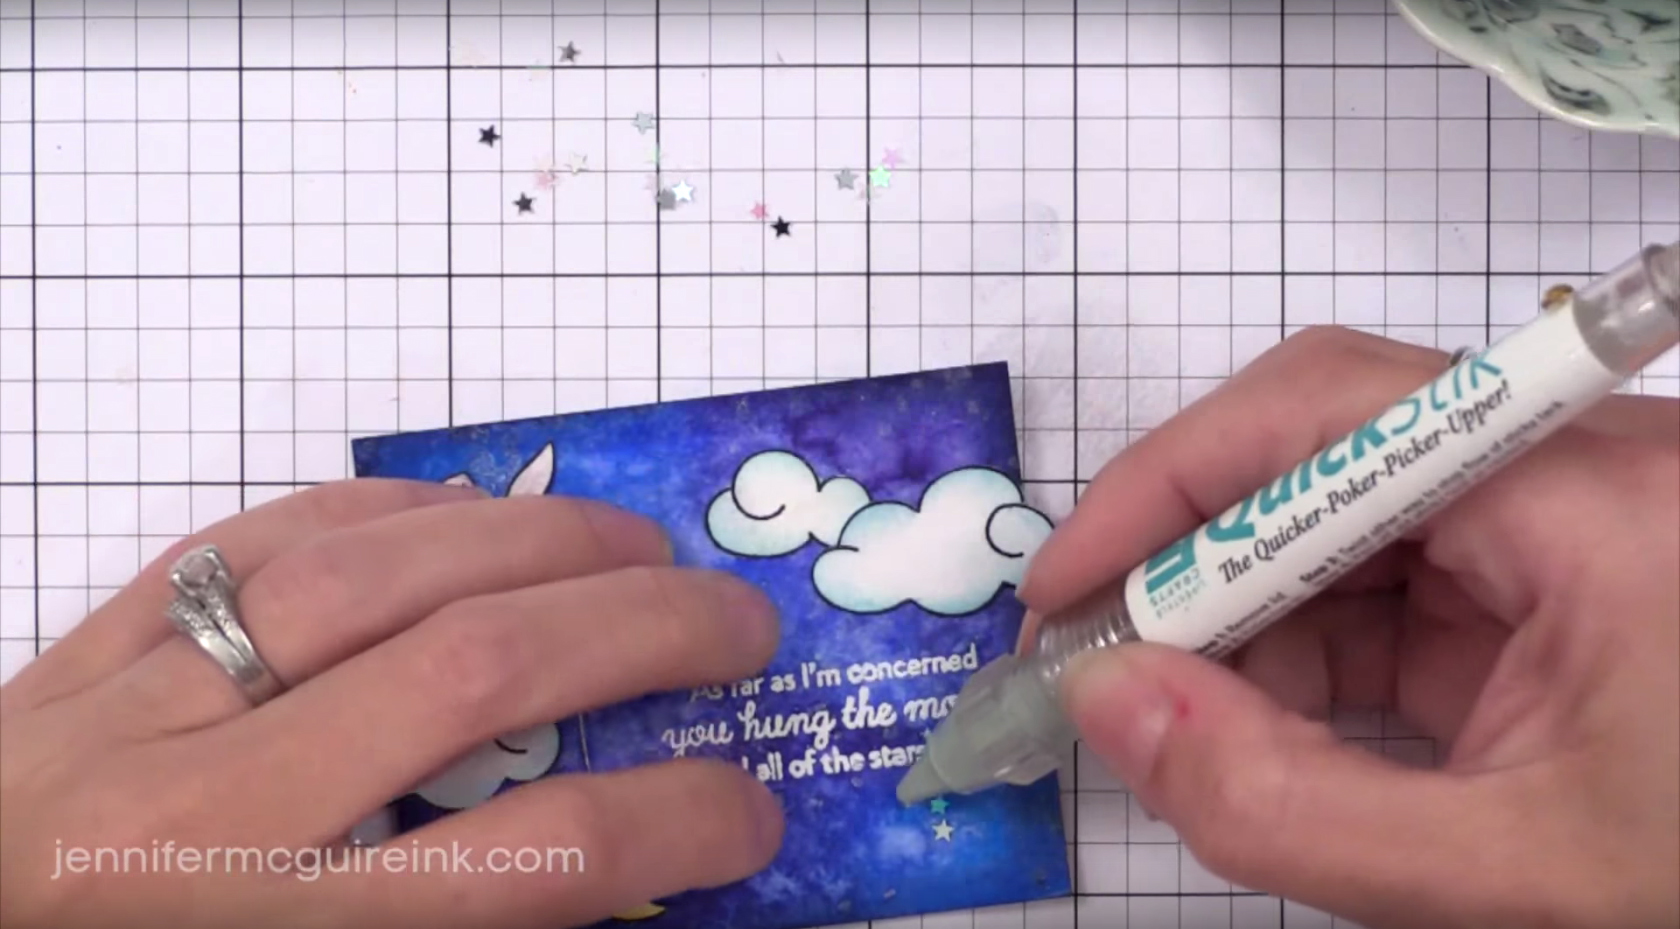 Dot the Multi Medium onto the background where you want stars to appear. Using the Quickstik tool, place silver, blue, and iridescent star sequins from "The Ton" one by one onto the glue dots. You could also sprinkle the stars on and shake off the excess, but this method will be less precise. Finish the bunny with a Glaze pen by dotting its eyes to make it pop.
Step Twelve
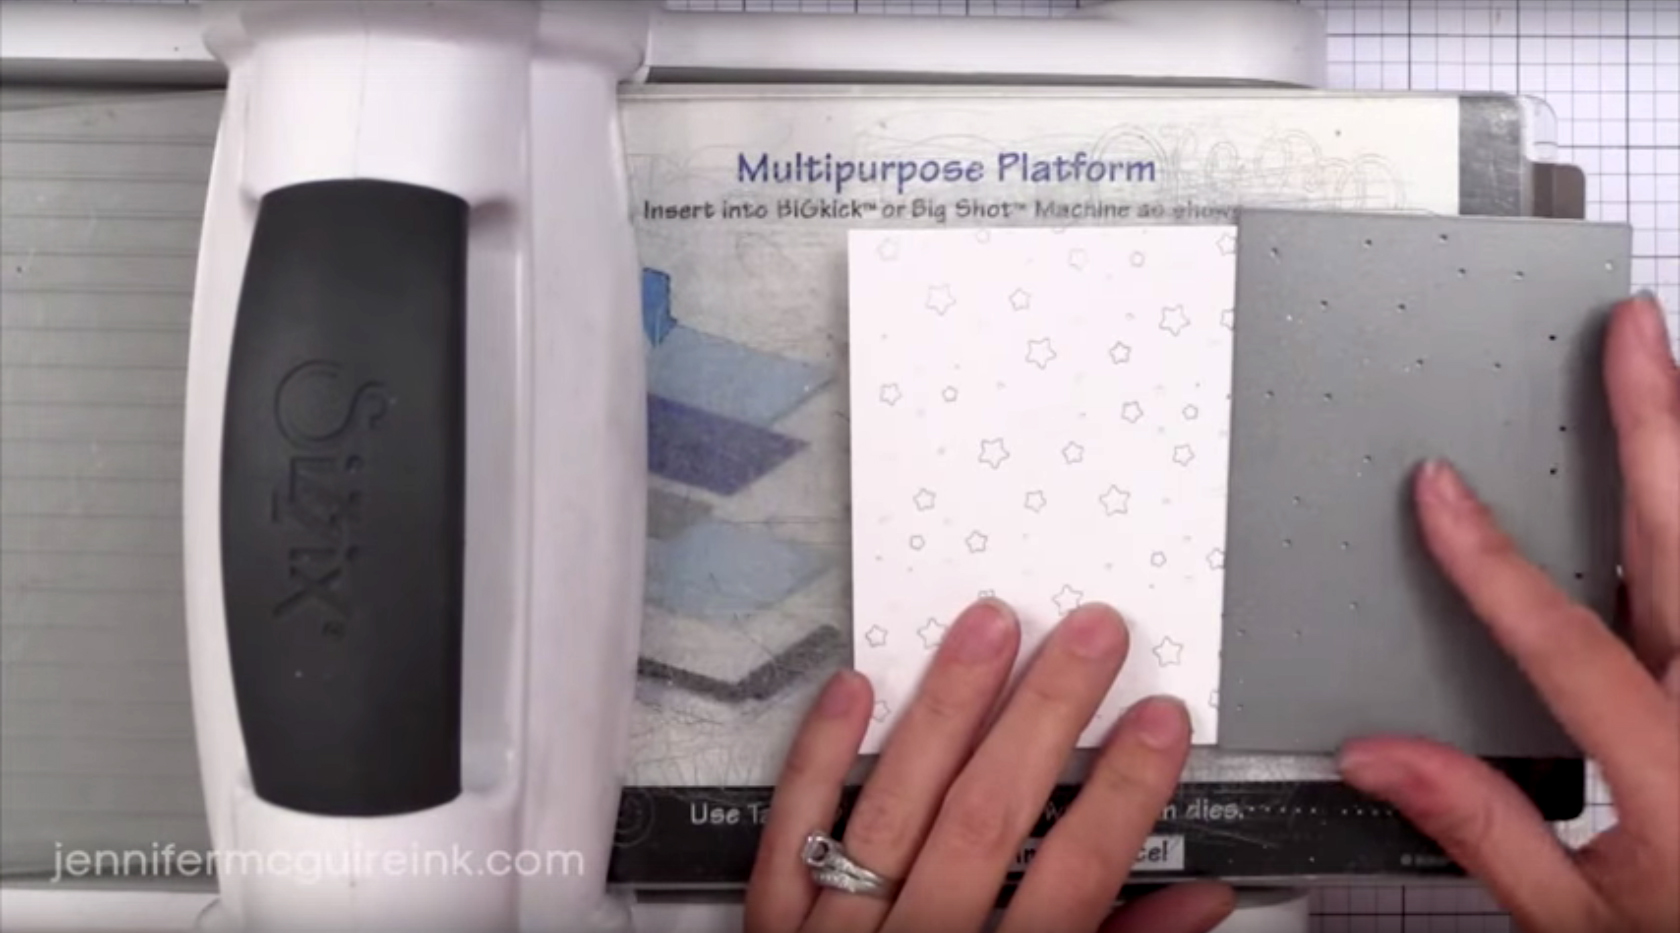 To frame your card, use the "Starry Night" background die with the die cutting machine and run the die through twice over white cardstock that is at least 6.25" x 7.5" in size. This should leave at least a 1" border around your card. This die cuts out and embosses stars at the same time, giving both a raised and cut textured surface. You can pop out the cut stars if desired. When you're done, trim the card to the size you want.
Step Thirteen
 Glue the "Starry Night" background frame to a piece of light blue notecard paper, leaving about a 0.125" border. Trim off any excess.
Step Fourteen
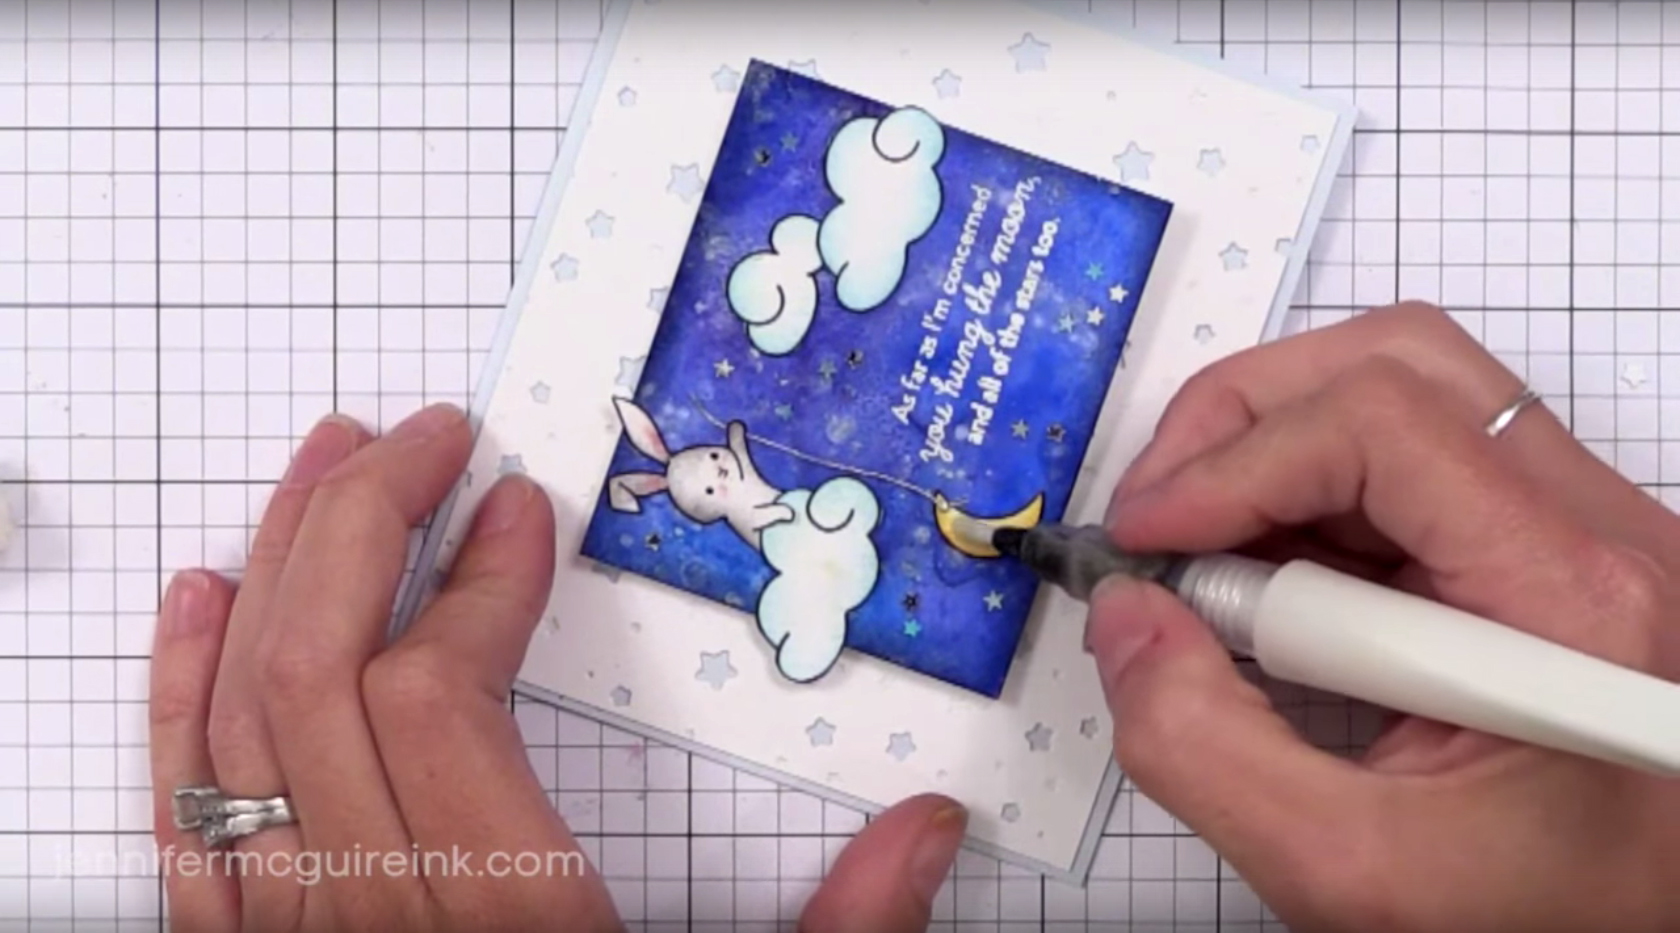 For the finishing touches, add a few layers of the Wink of Stella to the moon to give it more shine, and cover that with the Mini Ranger glossy accents to intensify the effect even more. Thanks Jennifer for giving us this fun way of using salt and watercolor! Here's a video of the entire process from start to finish and you can also check out Jennifer at her website:


