Finding the depth in art
We function in a multidimensional universe and have to funnel our creativity into only two or three of those dimensions. In sculpture and related fields of art we are concerned with three dimensions. In drawing and painting however, we have to convert our 3 dimensional (3D) visual experience into 2 dimensional (2D) symbols. Perspective, in it's various forms, aids us in taking a 3D view and evoking the same visual sensation within the limits of two dimensions. The basic rules are simple and based on the visual reality we view through our stereoscopic vision. The mechanics of perspective have been learned and lost a few times throughout history. Plato and his contemporaries wrote of 5th Century Greek painters who used optical perspective to create realistic backdrop scenes for plays. In the murals revealed in the ruins of Pompeii (79 A.D.) an intuitive understanding of linear perspective is revealed in their colorful efforts of rendering art in a realistic manner. With the fall of civilizations, knowledge is often lost. In the 15th century when Renaissance artists were striving to recreate three dimensional space the rules of perspective were discovered anew by sculptor and architect Filippo Brunelleschi (1377–1446). Brunelleschi rediscovered the concepts of vanishing point and the Orthogonal lines that we use in mathematical/linear/geometrical perspective. Linear perspective was thereafter embraced by various branches of the visual arts. 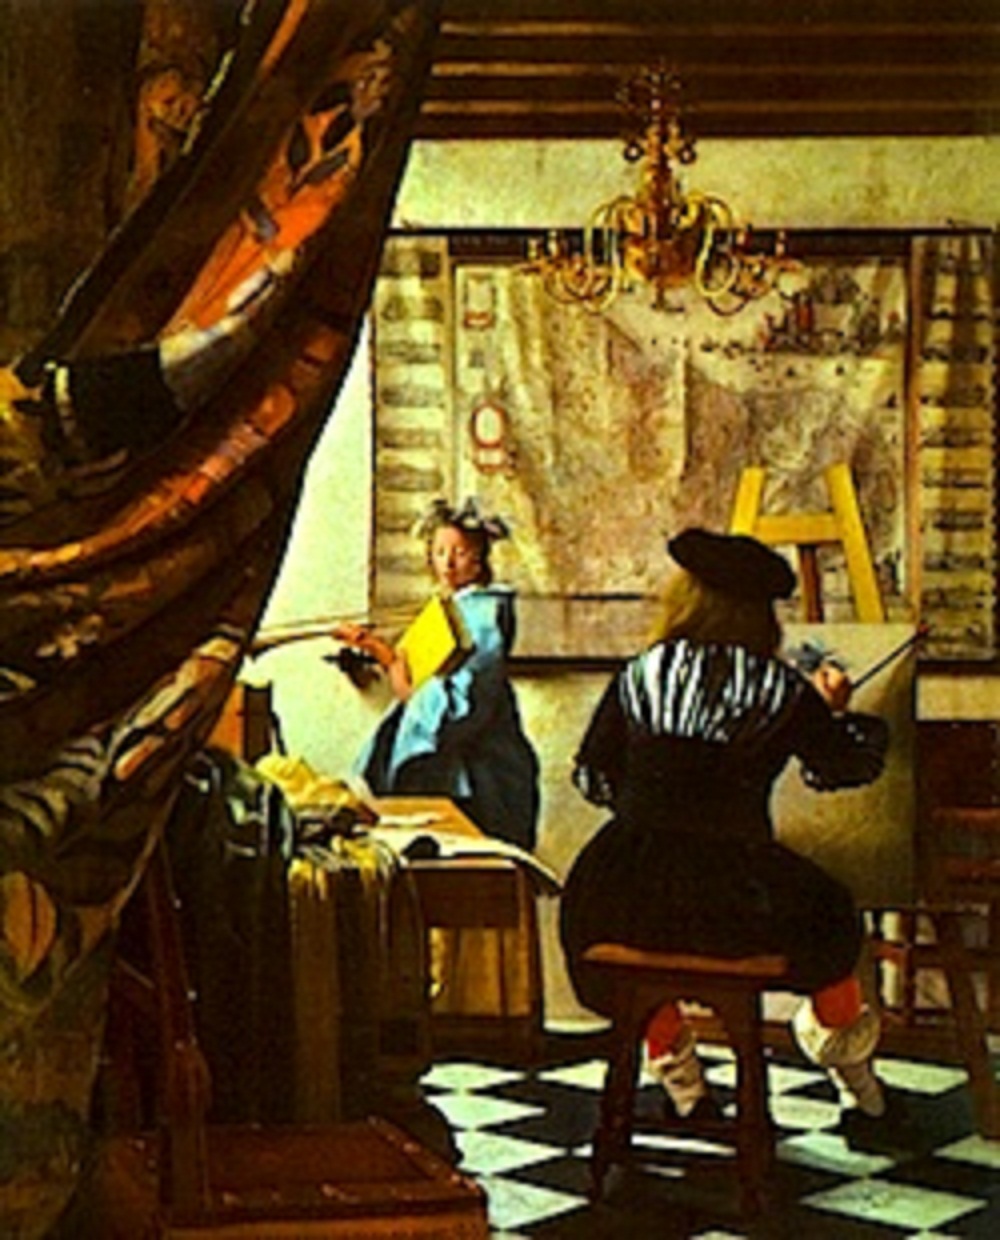
Orthogonal Lines
Orthogonal lines are the "visual rays" that emanate from (or converge to) the vanishing points on the horizon line. They are also known as the "Lines of Convergence." We use these lines to aid us in accurately rendering 3-dimensional objects and scenes. 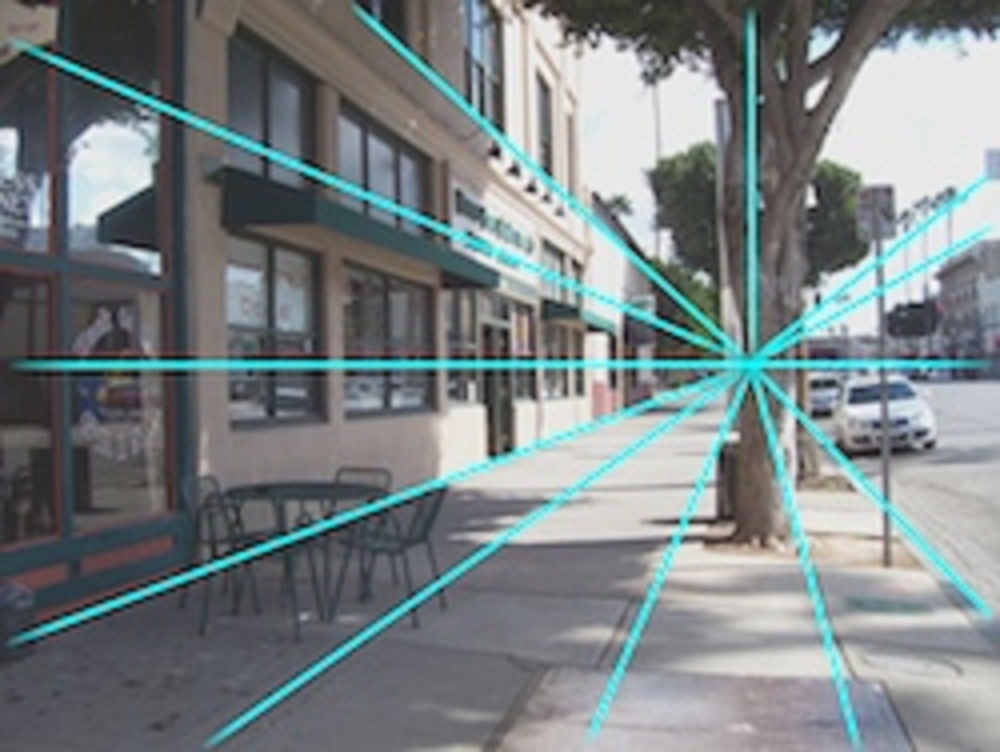 The lines of perspective: Orthogonal Lines
Foreshortening
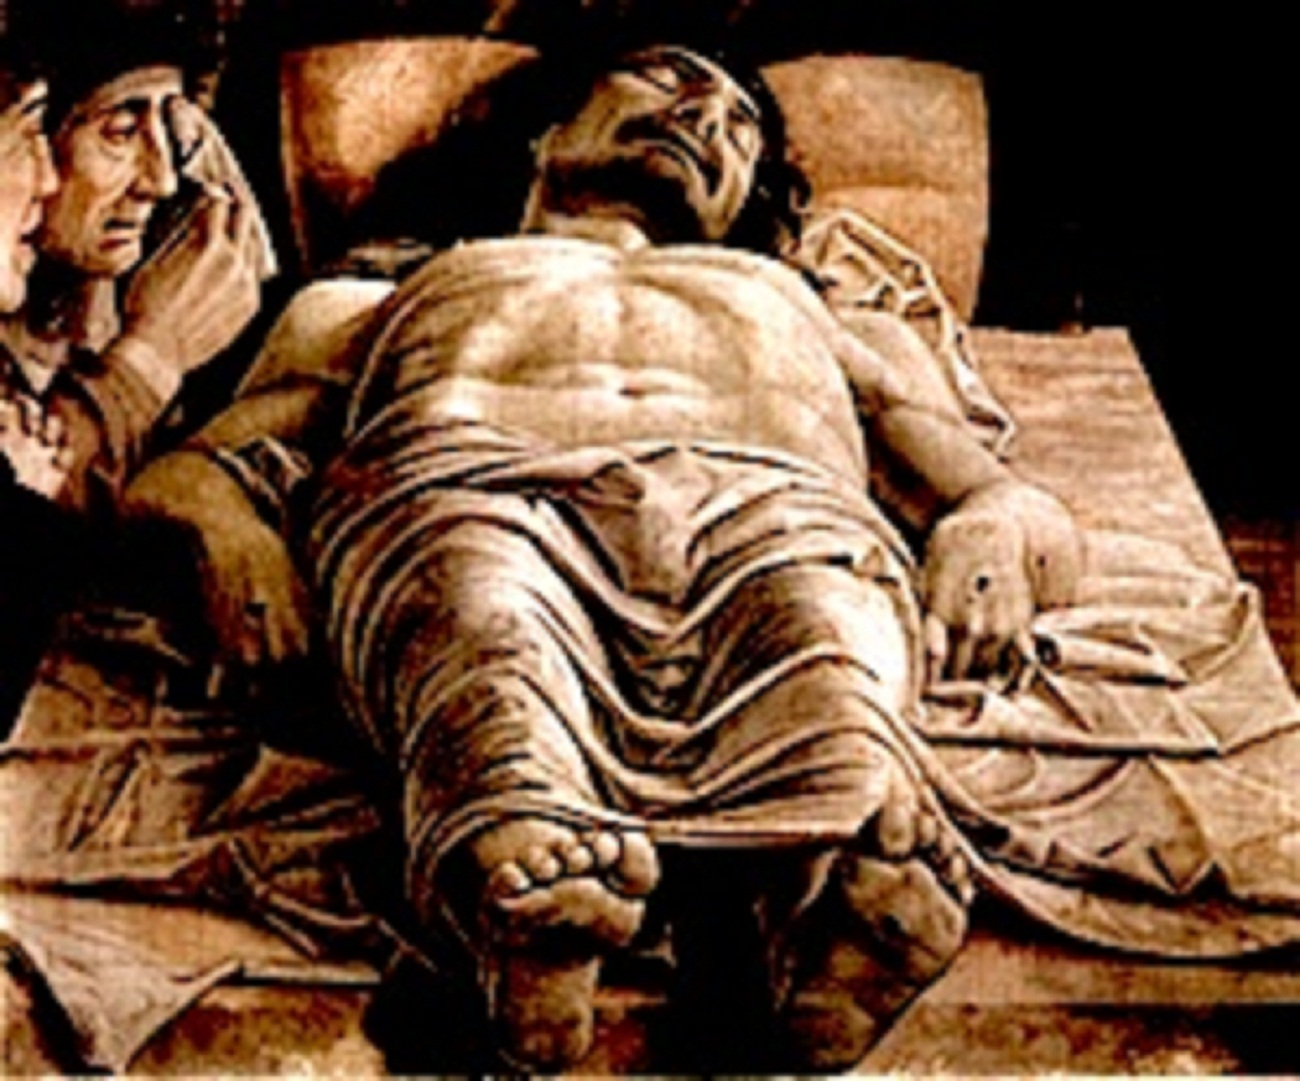 "Dead Christ" by Mantegna (c. 1500) When an object is angled toward the viewer its length appears shorter than it actually is. Foreshortening objects such as tree branches, arms or hands, etc. requires your careful observation to recreate the effect accurately in your drawing. Andrea Mategna (1431-1506) displayed his mastery of rendering the figure in the foreshortened repose of the Christ figure in "Dead Christ" circa 1500.
Altered Perspectives and Warping
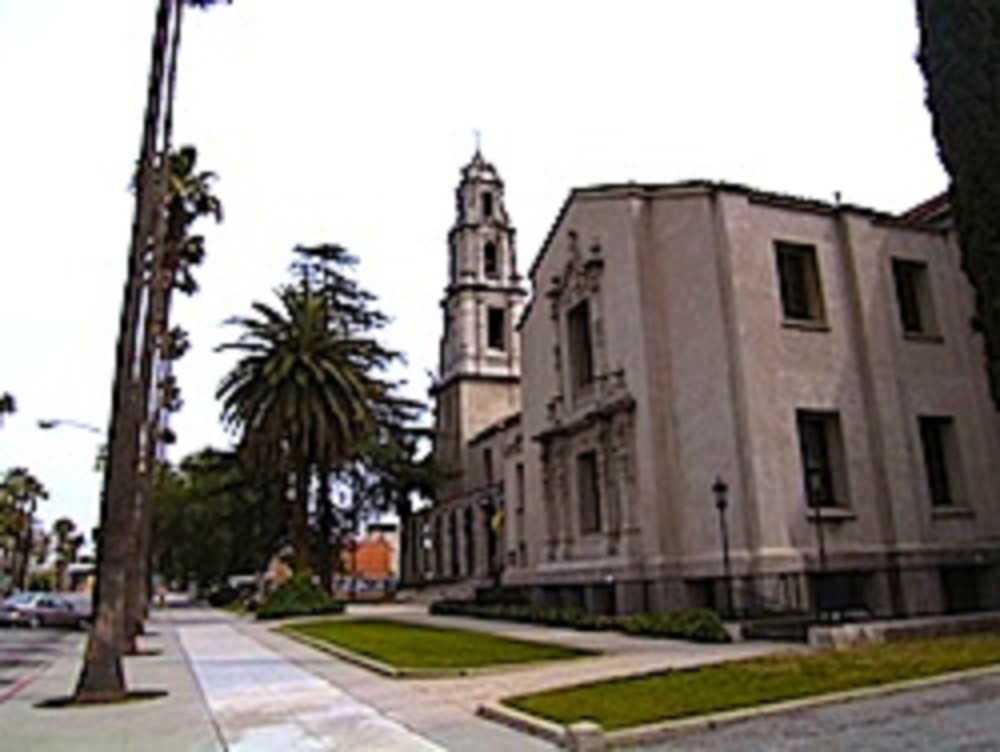 Scene with lens warped perspective. Be careful when drawing directly from photographs. Camera lenses often distort the true perspective in the photographs they make. You can avoid this problem by sketching directly from nature. Of course, M.C. Escher took perspective and twisted it inside-out without the aid of a camera.
 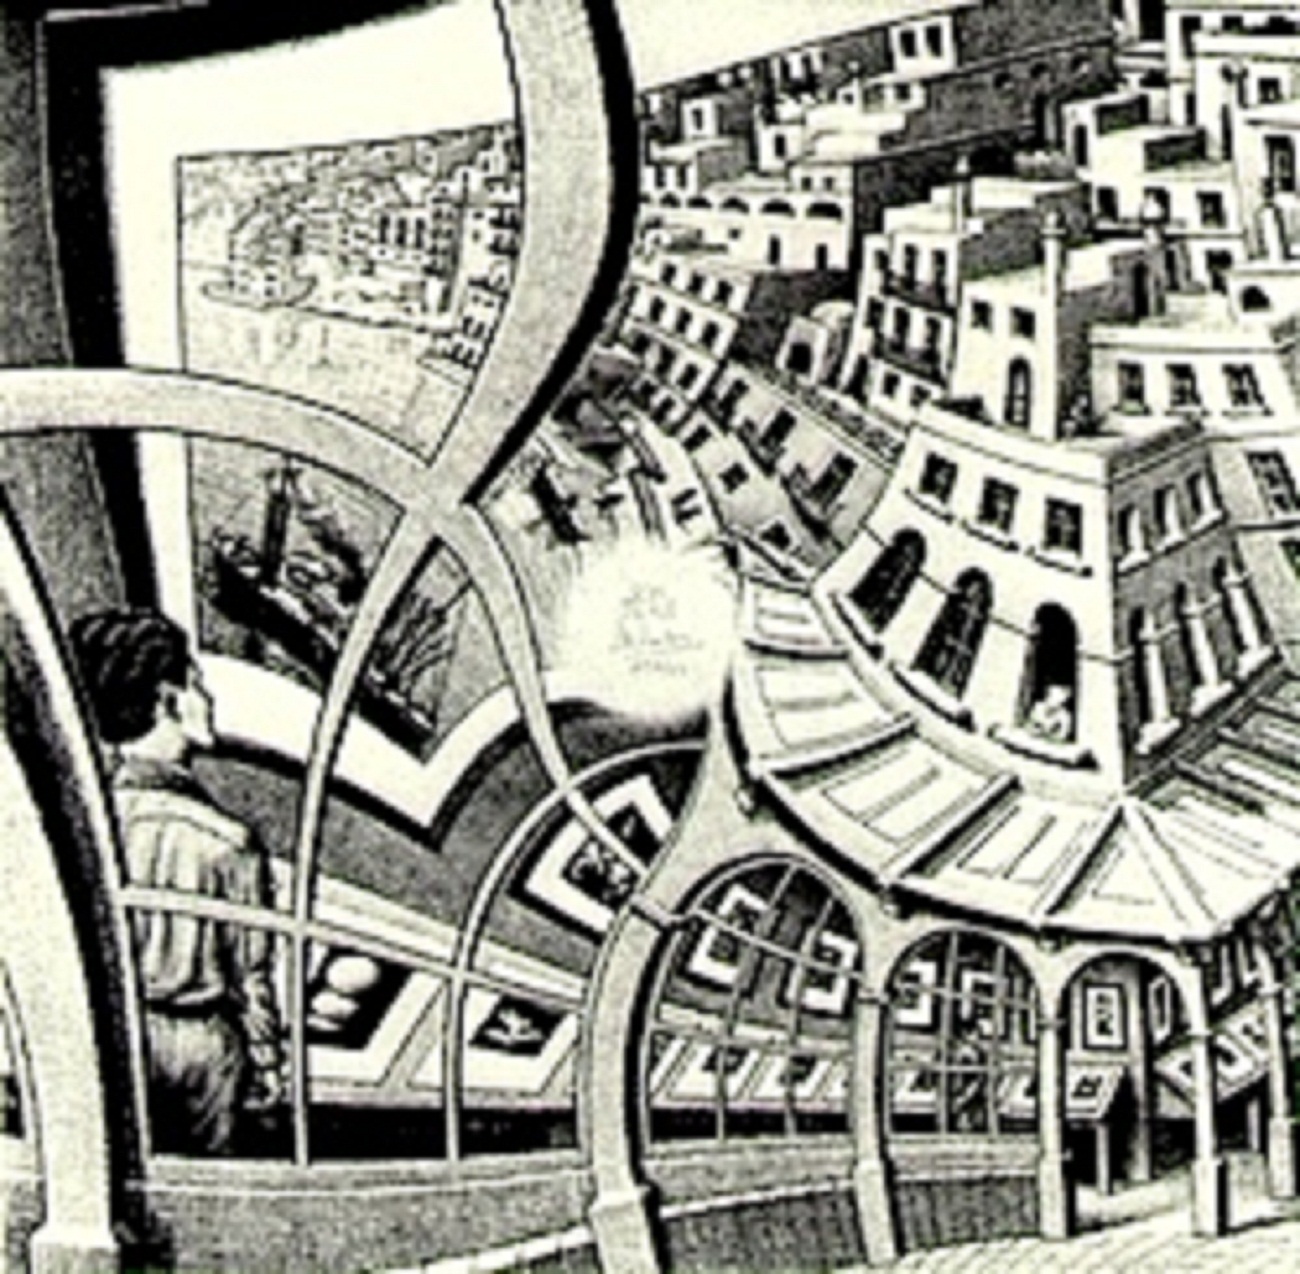 M.C. Escher warped perspective.
How deep is YOUR art?
Take time to learn to use perspective before you start breaking the rules. Paul Cezanne was one of the first to flatten the space in a picture. The Cubists took this to the extreme and abandoned 3- dimensional perspective altogether. But first they all learned the rules by training themselves to draw what they see accurately. Look around you. Look up. Look down.
Perspective: Viewpoint, Horizon, and Vanishing Point
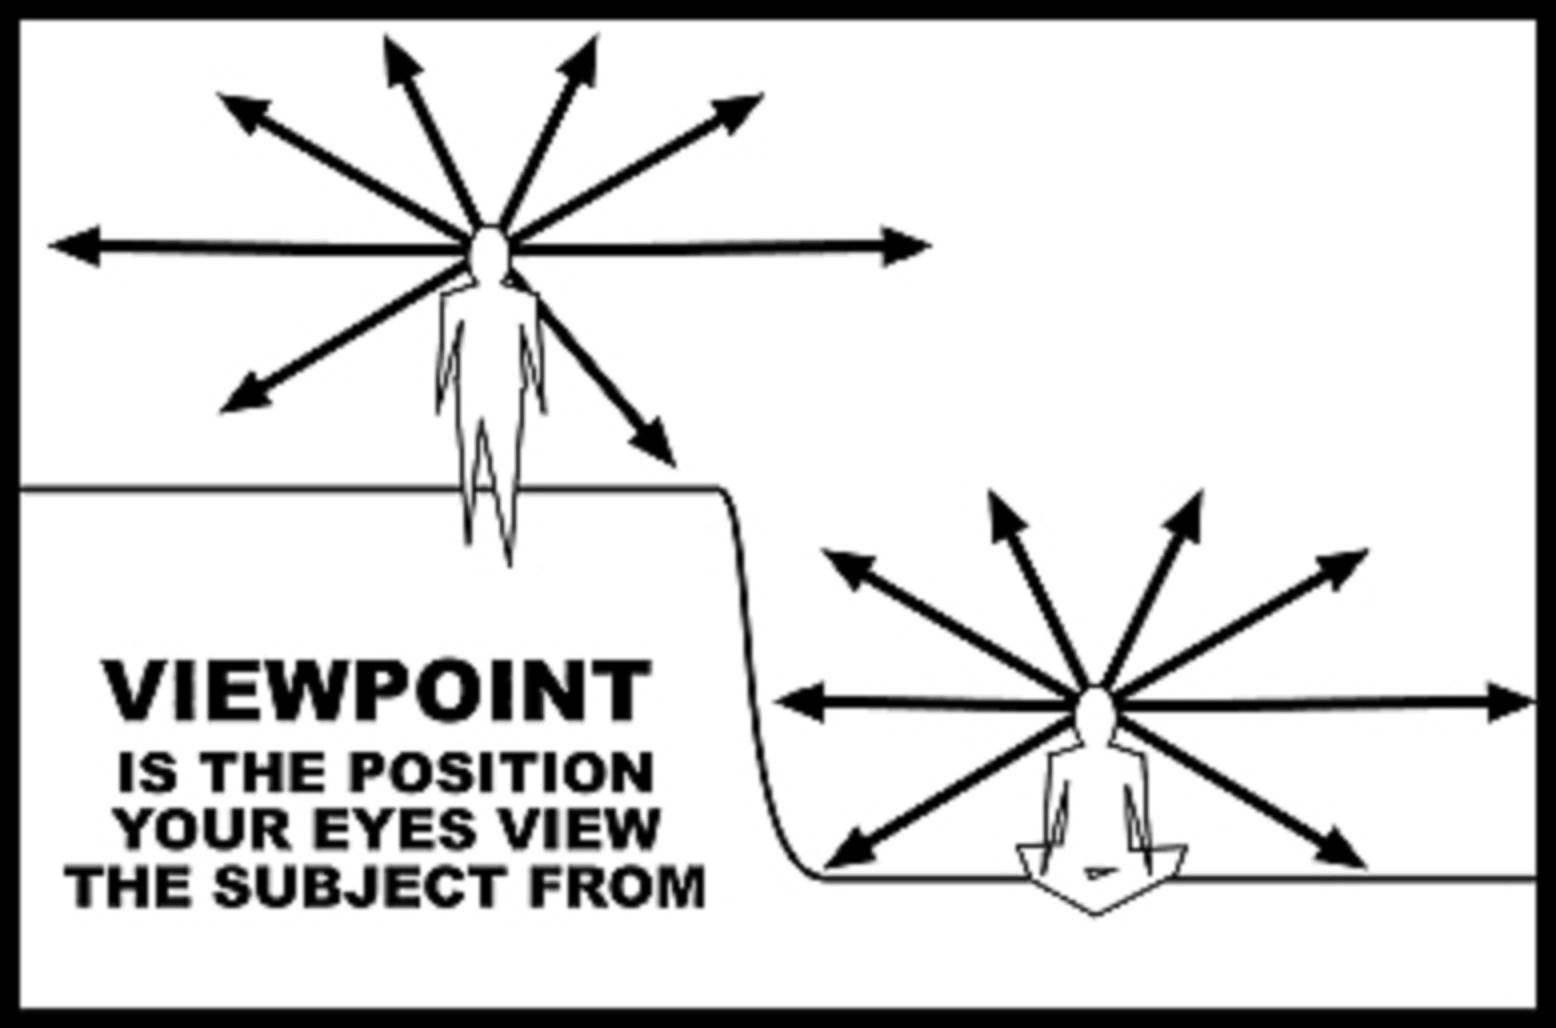
What's your Viewpoint?
This is the basic positioning of your eyes, just like pointing a camera. What's the best Line of sight, the straight line between you, the Observer, and the Object or focal point of the scene before you? Study and consider what you're looking at. Is this the best viewpoint to find the best composition? Where are you physically in relation to the scene you are considering painting? Are you elevated, looking downward at your subject? Are you looking up? Standing, sitting, or kneeling? Flying? Once you know where you are find the horizon. 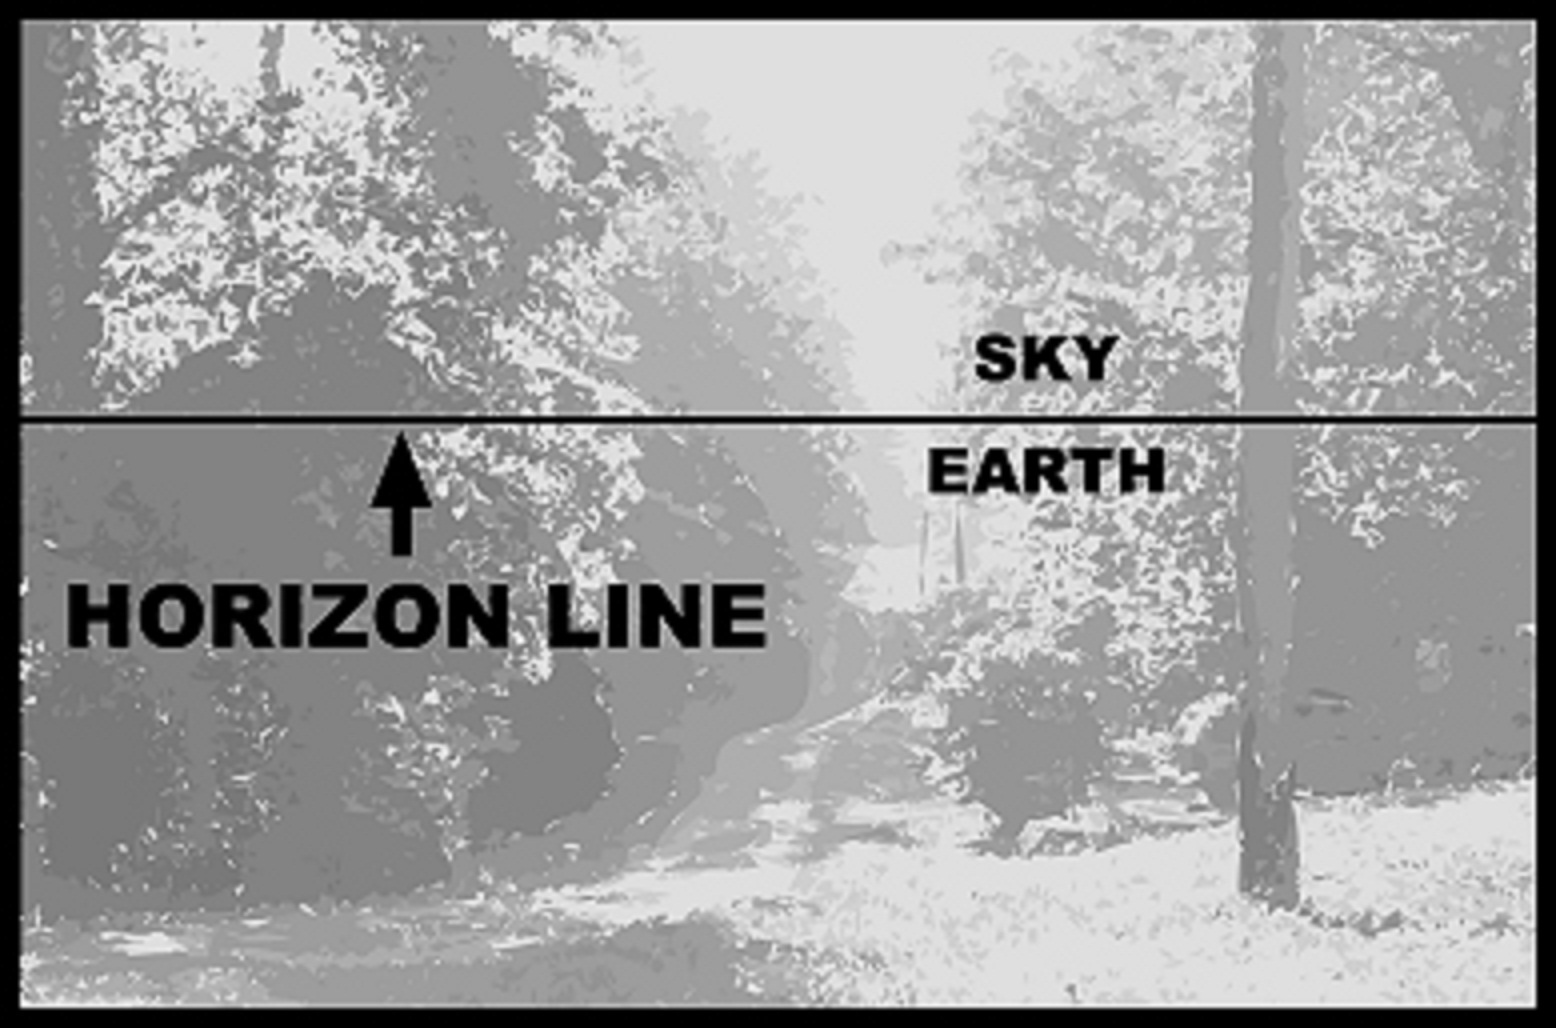
Where's the Horizon?
See where the sky meets the land? That's the horizon line. It's on the horizon. If objects are blocking your view of the horizon line, turn around until you can determine where it is in relation to your line of sight and extend that knowledge into your chosen view. 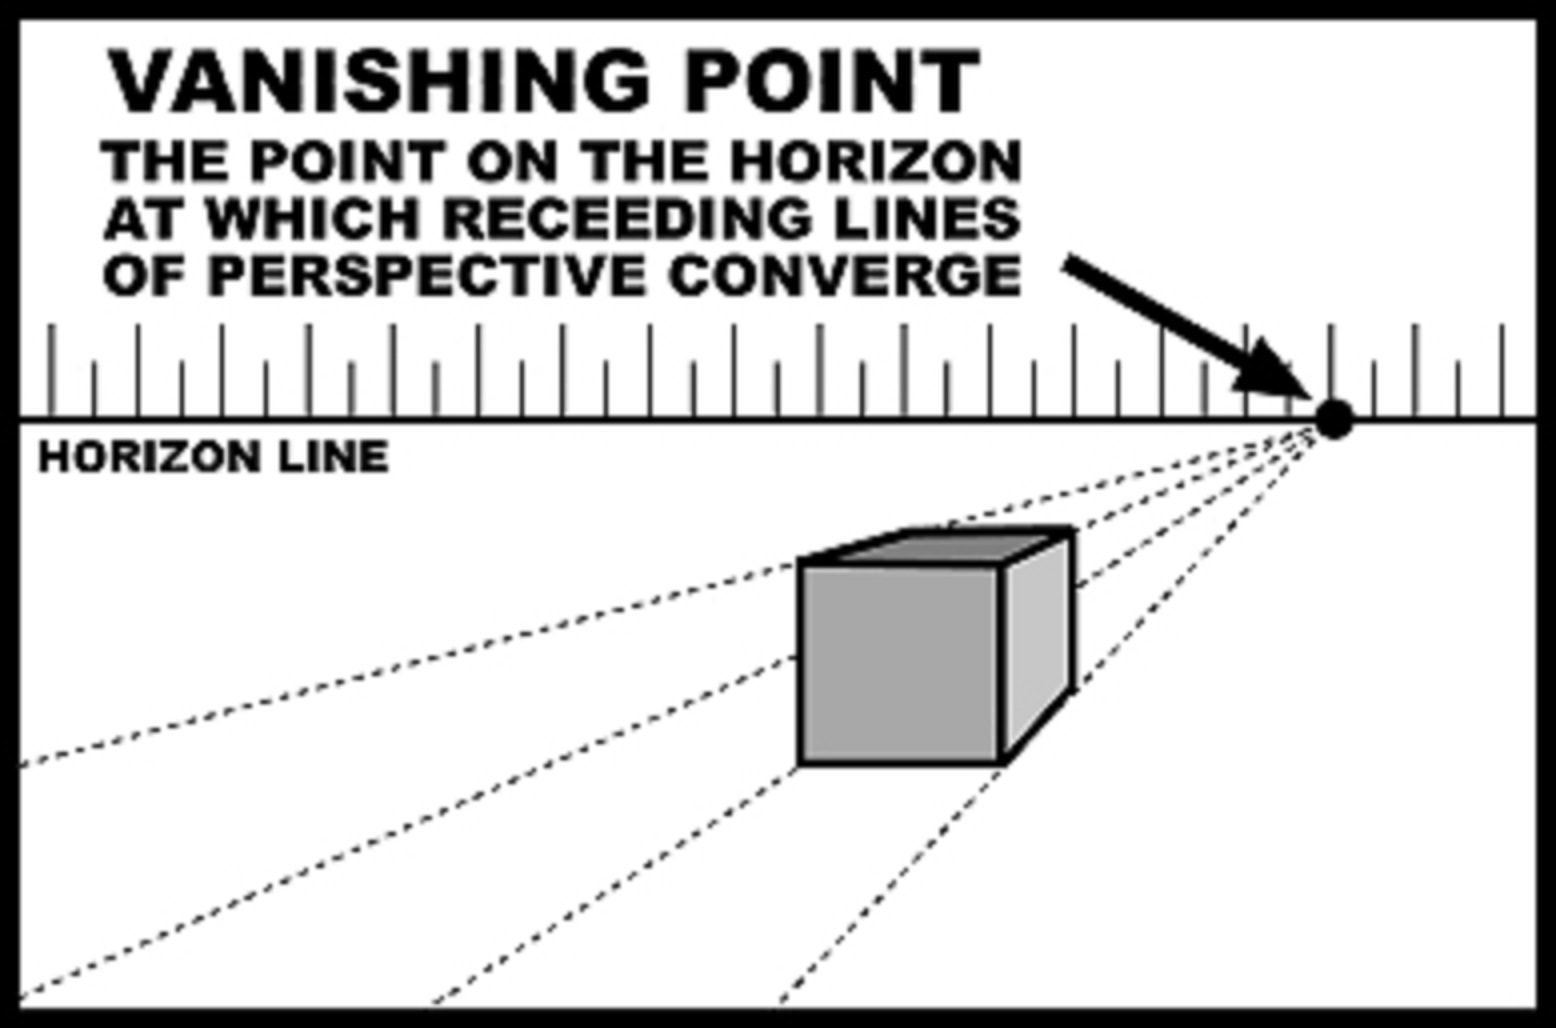
The Vanishing Point
The vanishing point is a point in the far distance at which your eyes can no longer see. Since the farthest we can see here is to the earth's horizon that's where most vanishing points live. Perspective lines start at the vanishing point.
1, 2, & 3 Point Linear Perspective
You can imply perspective by the relative size of objects, layering foreground, mid-ground, and background elements, changing focus by sharpening or softening details, and lightening or darkening elements as the atmosphere changes the quality of “seeing” things in the distance. If you can combine linear perspective with natural perspective, you can make a convincing drawing that easily allows the observer to “suspend belief” and be drawn into your creation. 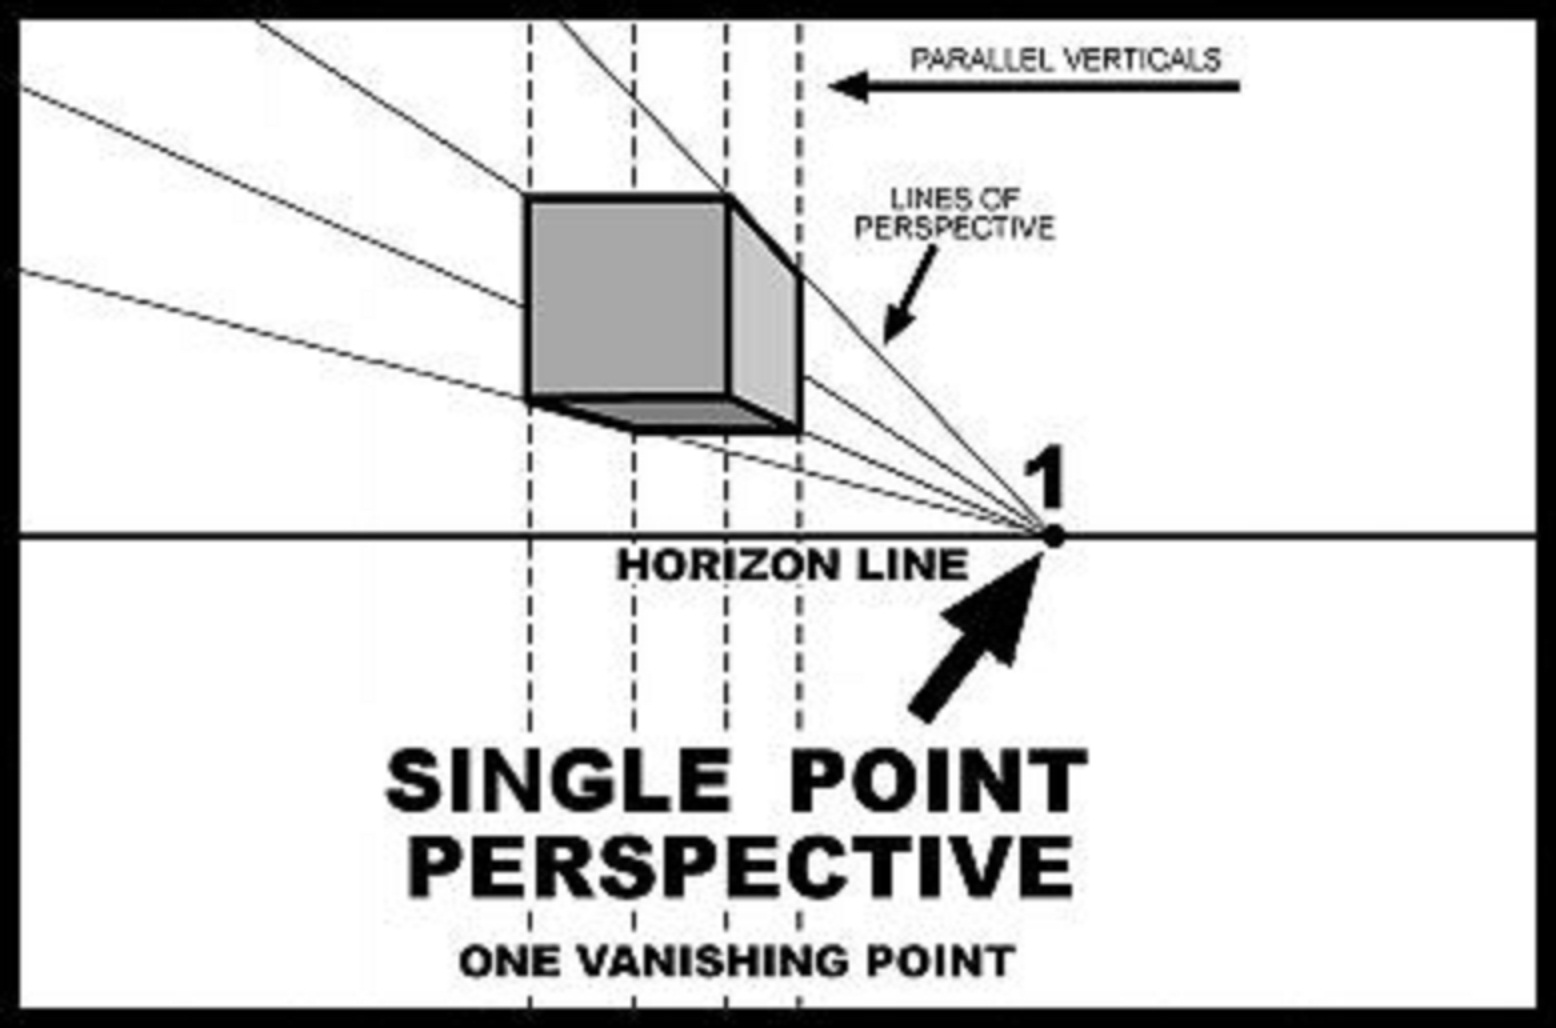
1 - One Point Perspective
Single Point - One Vanishing Point
The front plane of the object is directly in front of you, verticals parallel, and all lines of perspective meet at a single vanishing point on the horizon. Objects you draw in one point perspective are drawn face on. Practice: 1) Draw a horizon line and center a vanishing point. 2) Draw a square or rectangle off to the side of the vanishing point, overlapping the horizon line. 3) Lightly draw (or visualize) orthogonal "visual rays" from the vanishing point through the edges of your object. 4) Then draw the vertical lines of the back of the object using the rays as a measure. 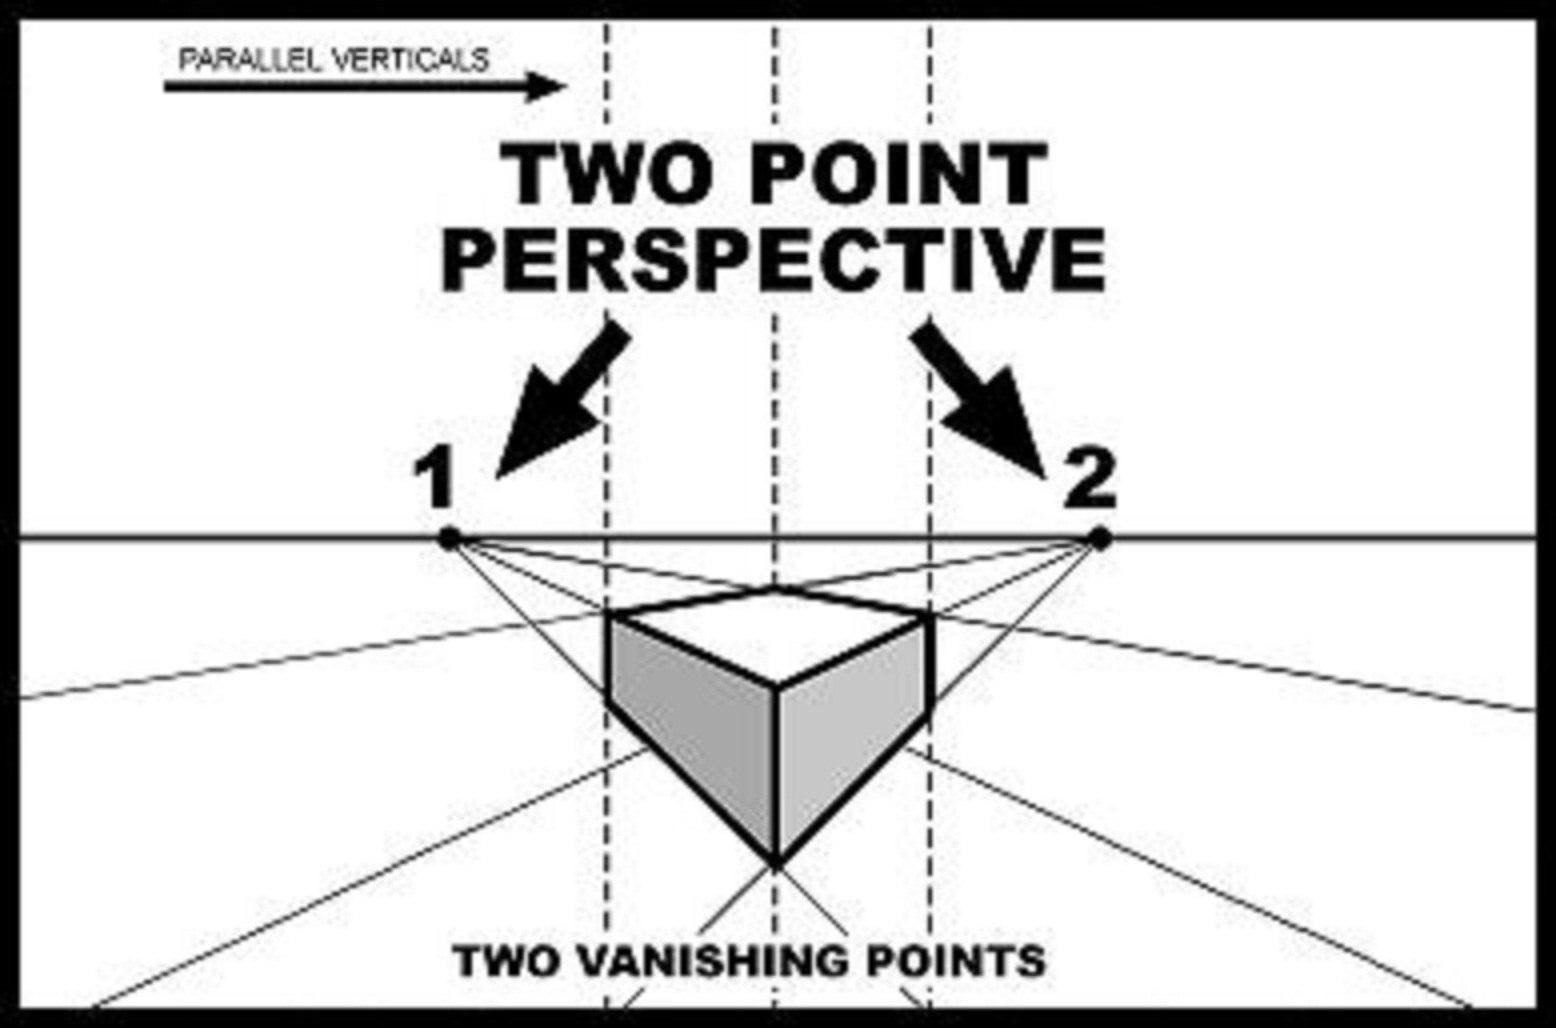
2 - Two Point Perspective
Two Vanishing Points
When an object or viewpoint is rotated and two sides of an object are angled away from your view, each side of the object has it's own unique lines of perspective. You now must use two vanishing points, one for each plane of the surface in view with the vertical lines parallel. Practice: 1) Draw a horizon line and place two vanishing points on the far right and left sides. 2) Draw a vertical line indicating the closest edge of the object facing you. 3) Lightly draw (or visualize) orthogonal "visual rays" from each vanishing point to the line of the front edge of your object. 4) Then draw the vertical lines of the left and right edges of the object using the rays as a measure. 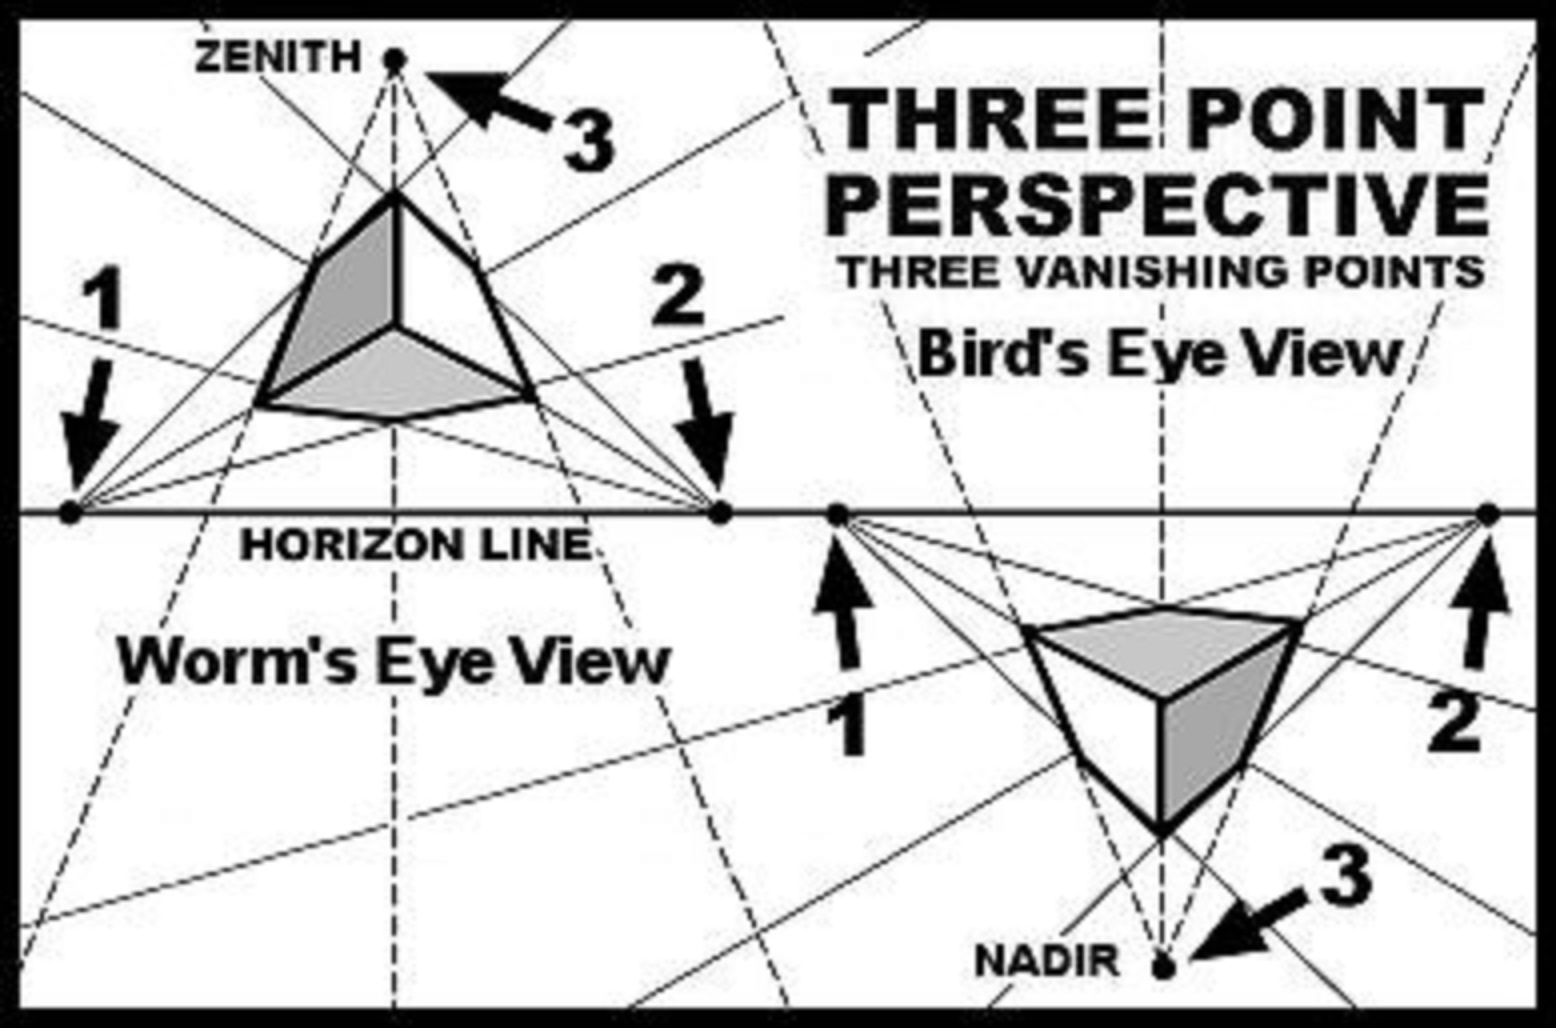
3 - Three Point Perspective
Bird’s Eye, Worm’s Eye - Three Vanishing Points
If your point of observation is higher or lower a third vanishing point comes into use. Think of looking up at tall skyscrapers and seeing three vertical sides angle to a third vanishing point, far distant, as they reach toward the sky. From the Worm’s Eye view (looking up) the upper vanishing point is called the Zenith. From the Bird’s Eye or Helicopter view (looking down) the lower vanishing point is called the Nadir. Practice: 1) Draw a horizon line and place two vanishing points on the far right and left sides. 2) Draw a vertical line bisecting the horizon line and place a third vanishing point above (or below) the horizon line. 3) Lightly draw (or visualize) orthogonal "visual rays" from the top vanishing point past the horizon line. 4) Then draw orthogonal lines from the left and right vanishing points and bisect the orthogonal lines from the top vanishing
Fixed Point Perspectives
Isometric, Dimetric, & Trimetric
Isometric, Dimetric, and Trimetric drawings are made for illustrating objects to convey technical information. They use parallel lines but utilize no vanishing points. They are not used to create realistic 3 dimensional drawings. That doesn’t mean you can’t use them when you need to express a certain feeling in your art.
Implied and Atmospheric (Aerial) Perspective
When trying to draw natural scenes like landscapes, seascapes, mountain views, or woodland settings, you are hard pressed to find a straight line with which to show 3-dimensional depth. Fortunately there are other techniques that can be employed to trick the eye of the viewer into perceiving the depth of the scene. Sometimes these are referred to as zero (0) point perspectives. You can imply perspective by the relative size of objects, layering foreground, mid-ground, and background elements, changing focus by sharpening or softening details, and lightening or darkening elements as the atmosphere changes the quality of “seeing” things in the distance. If you can combine linear perspective with natural perspective, you can make a convincing drawing that easily allows the observer to “suspend belief” and be drawn into your creation. 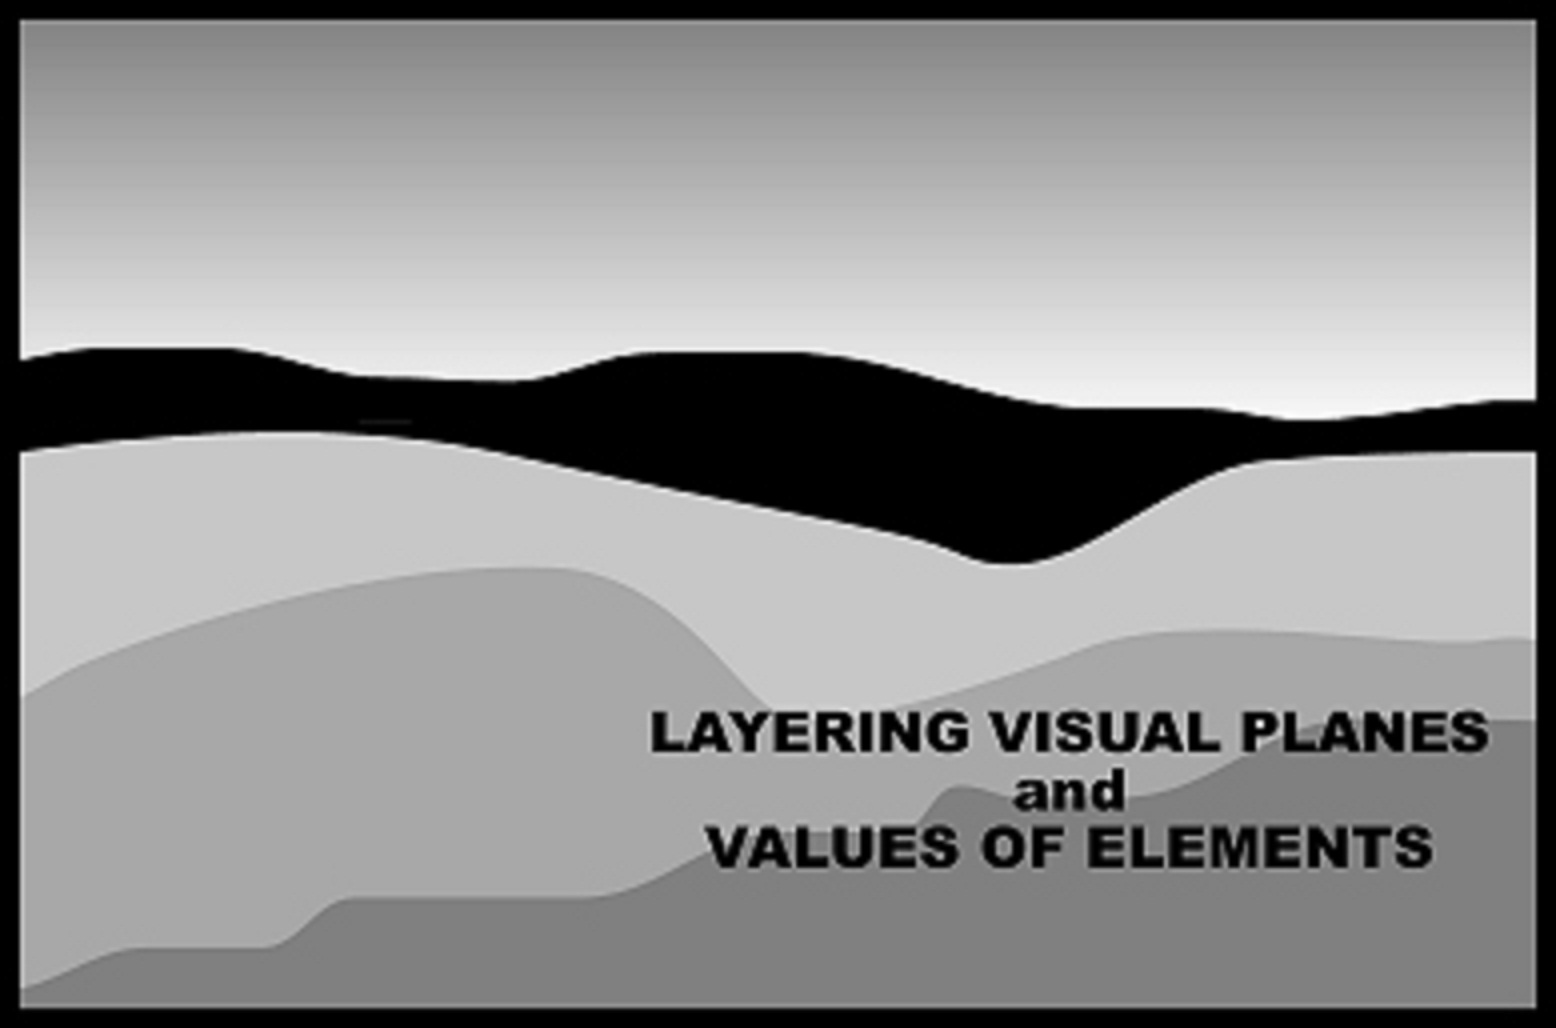
Layers and Values
By layering visual elements one on top of another, perspective can be implied by the front to back ordering of the elements. Two dimensional art is traditionally viewed according to the conventions of stacking or layering visual elements from the bottom up as foreground, mid-ground, and background. As a matter of course, observers assume the bottom of a drawing or painting is closest to their viewpoint and the top is the farthest from their viewpoint. Just as a diorama uses layer-upon-layer of scenes from front-to-back to achieve depth, you can try to utilize the same convention in your drawings to achieve the illusion of depth. 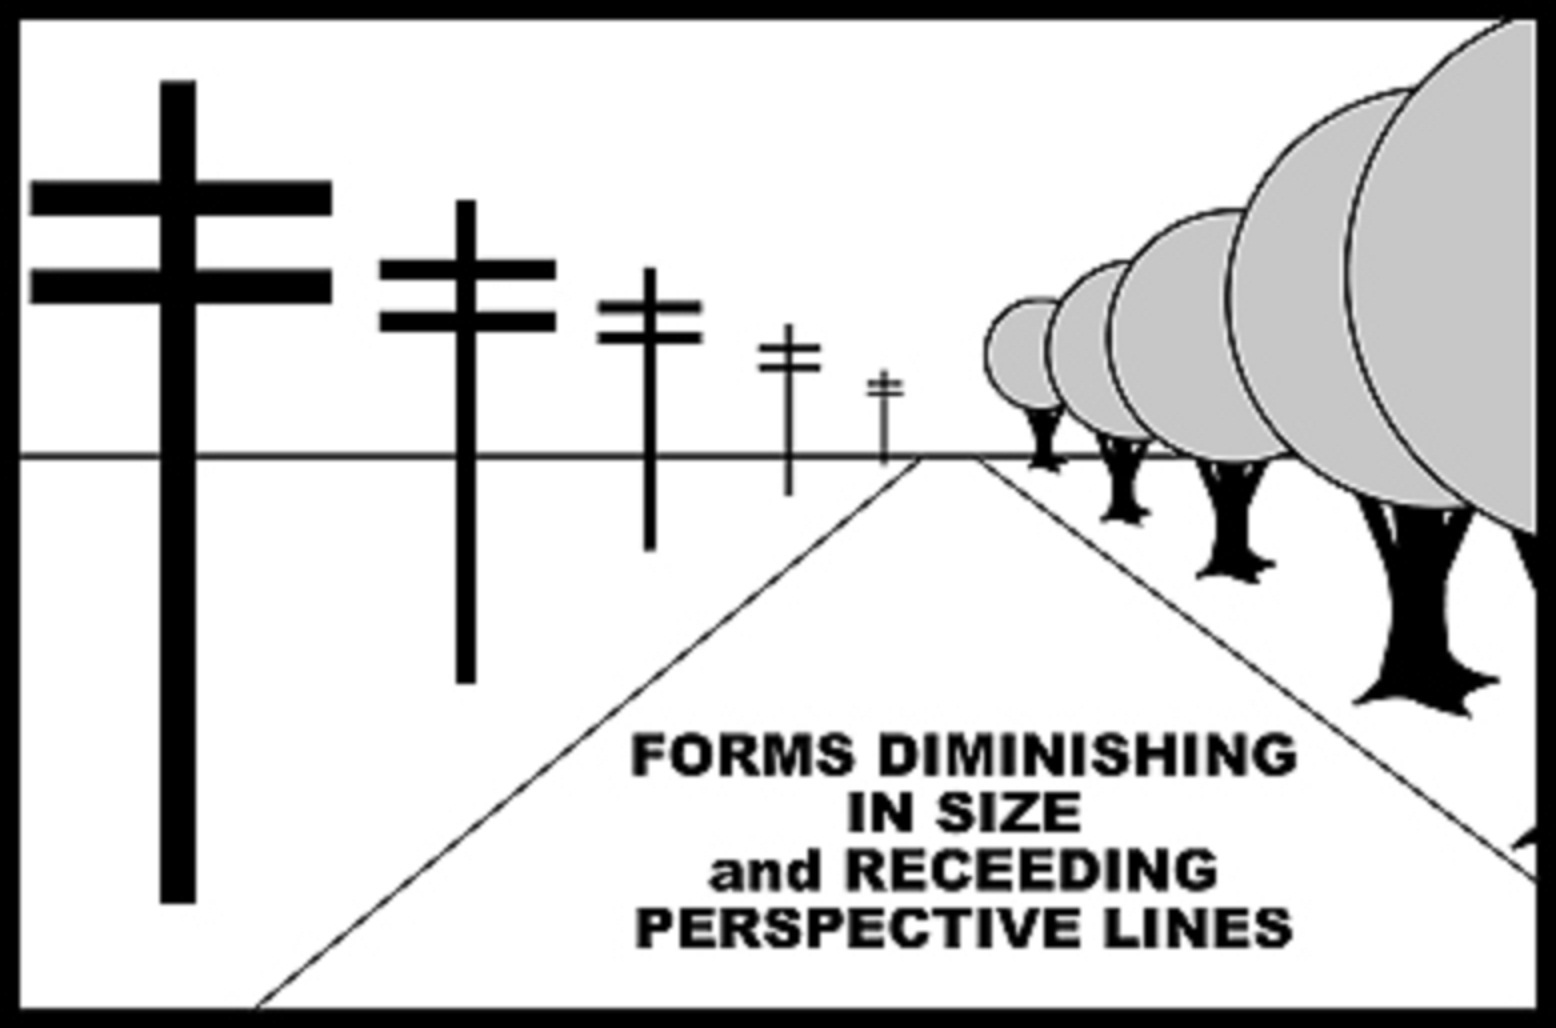
Relative Size of Elements
Things look big when they are closer to the viewer, small when they are far away. Have a Sesame Street moment and consider this basic fact. If you place an object in your drawing it must relate in size to other elements in the drawing. In linear perspective, when elements get closer to the horizon line, their apparent size is smaller and less detailed than the same elements seen close up. If you are drawing repeating elements in a landscape like trees, the tree trunks in front of you take up more space in your field of view, and you can make out individual leaves and branches. As they recede away from you they take up less space in the drawing you can’t see the texture or details of branches and leaves. You must now simplify and rely on the shape or contour that tells you it is still a tree. At the farthest you can see, the trees start to merge with the shape of the horizon. 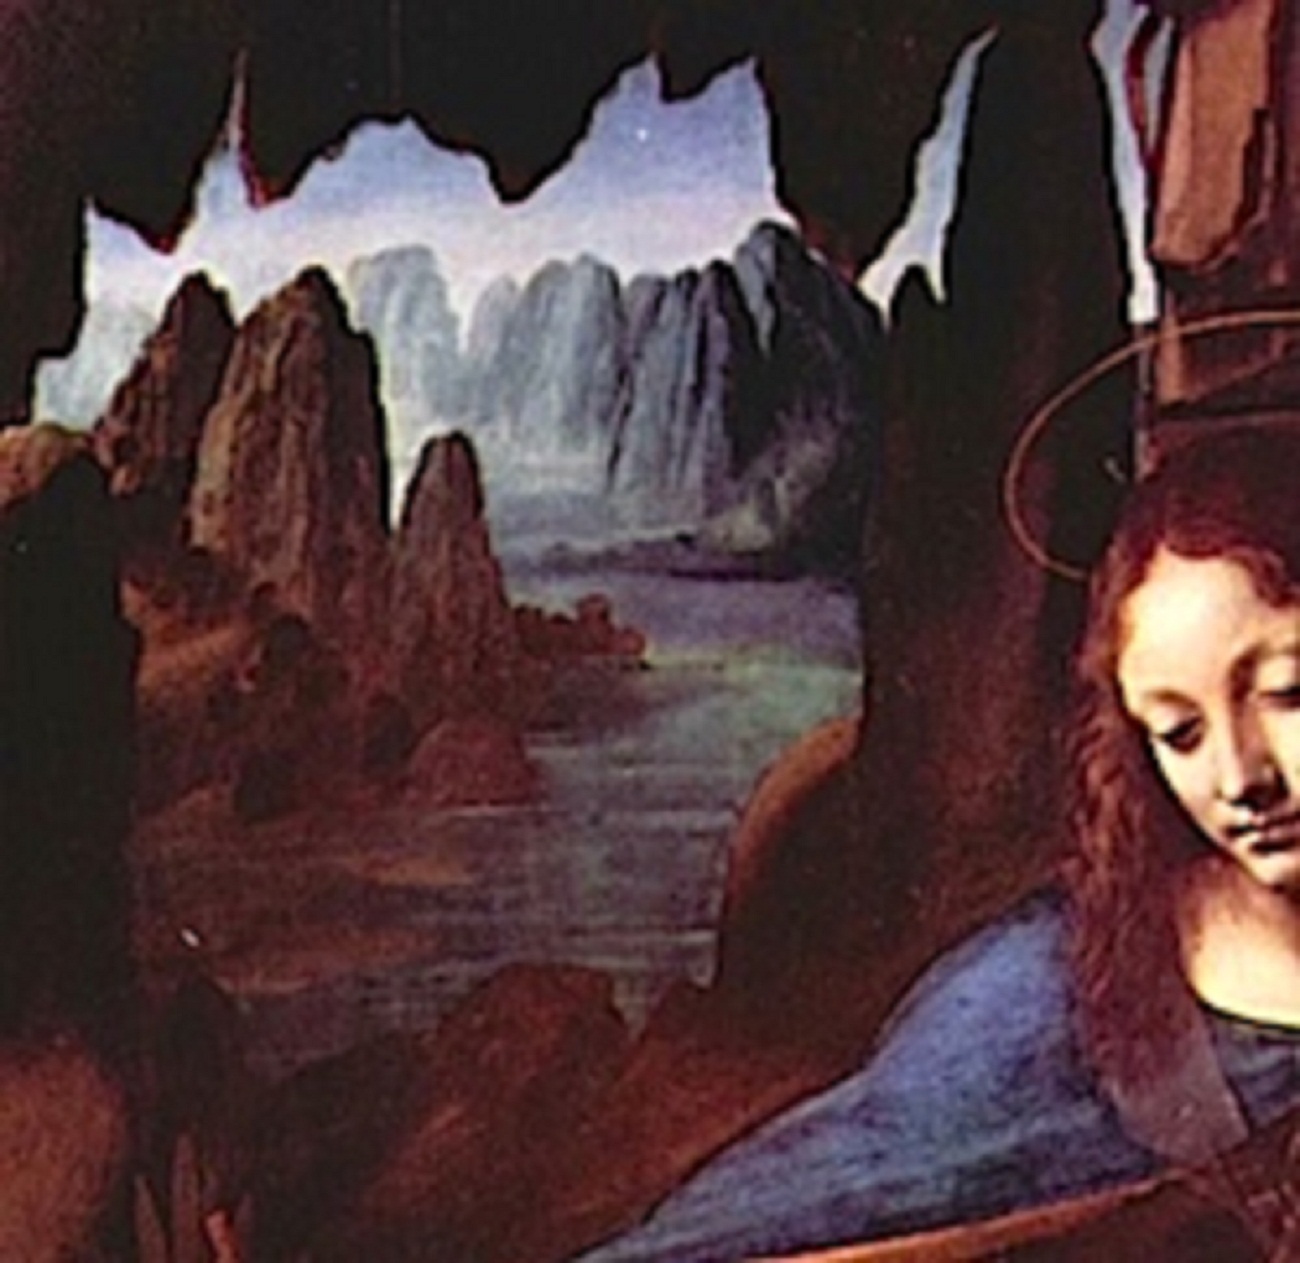 Leonardo da Vinci's Aerial Perspective Leonardo, The Virgin of the Rocks (detail), 1491-1508 Photo © The National Gallery, London
Aerial Perspective (Atmospheric/Environmental)
Leonardo da Vinci was the first to record his thoughts and theories concerning Aerial (Atmospheric) Perspective, or the Perspective of Disappearance. Artists of his time were concerned with realism in their art. Linear perspective was a big step, but with careful observation it became apparent that other natural phenomenon were at work altering the look of distant objects. Moisture and dust in the atmosphere are not that apparent when viewing things close by. As you look at objects further away from you, you are also looking through a thicker mass of air. The moisture and dust building up over distance scatter the light and lighten the appearance of objects, lessening the contrasts of light and shadow and blurring details. Environmental factors like fog, steam, smoke, water mist, or pollution intensify local Aerial Perspective effects. When working in color, the distant shapes also take on a bluish cast as their true color intensity is lessened visually. This bluing effect is the more local version of what makes the sky blue. Air molecules (like oxygen and nitrogen) are very small and selectively scatter the shorter (smaller) waves of the visible light spectrum, violet and blue. When you look up during a clear sunny day, the cumulative effect of all this selective light bouncing around gives us our blue sky. Over shorter distances this scattering of short wave light tints distant vistas as you look closer to the horizon.


