An interesting foray into nighttime lighting effects using a nautical theme, the West Break Water Lighthouse in Cleveland, Ohio. Watch and see how things unfold as Greg paints his way through a dusky nautical theme.
Materials used:
Brushes
- #8 Kolonok Kolinsky Red Sable
- #5 Kolonok Kolinsky Red Sable
- #0 Winsor & Newton Series 7 Red Sable
Paints
- Sap Green
- Hooker's Green Dark
- Burnt Umber
- Burnt Sienna
- Ultramarine Blue
- Cerulean Blue
- Alizarin Crimson
- Permanent Rose
- Indian Yellow
- Ivory Black
Paper
- Cut sheet (5.5" x 7.5") Whatman #200 cold pressed, deteriorated.
Miscellaneous
- #2 Pencil
- Kneaded Eraser
- Palettes - Robert E. Wood & Eldajon.
- Water container (2) and clean water
- Hair dryer (optional)
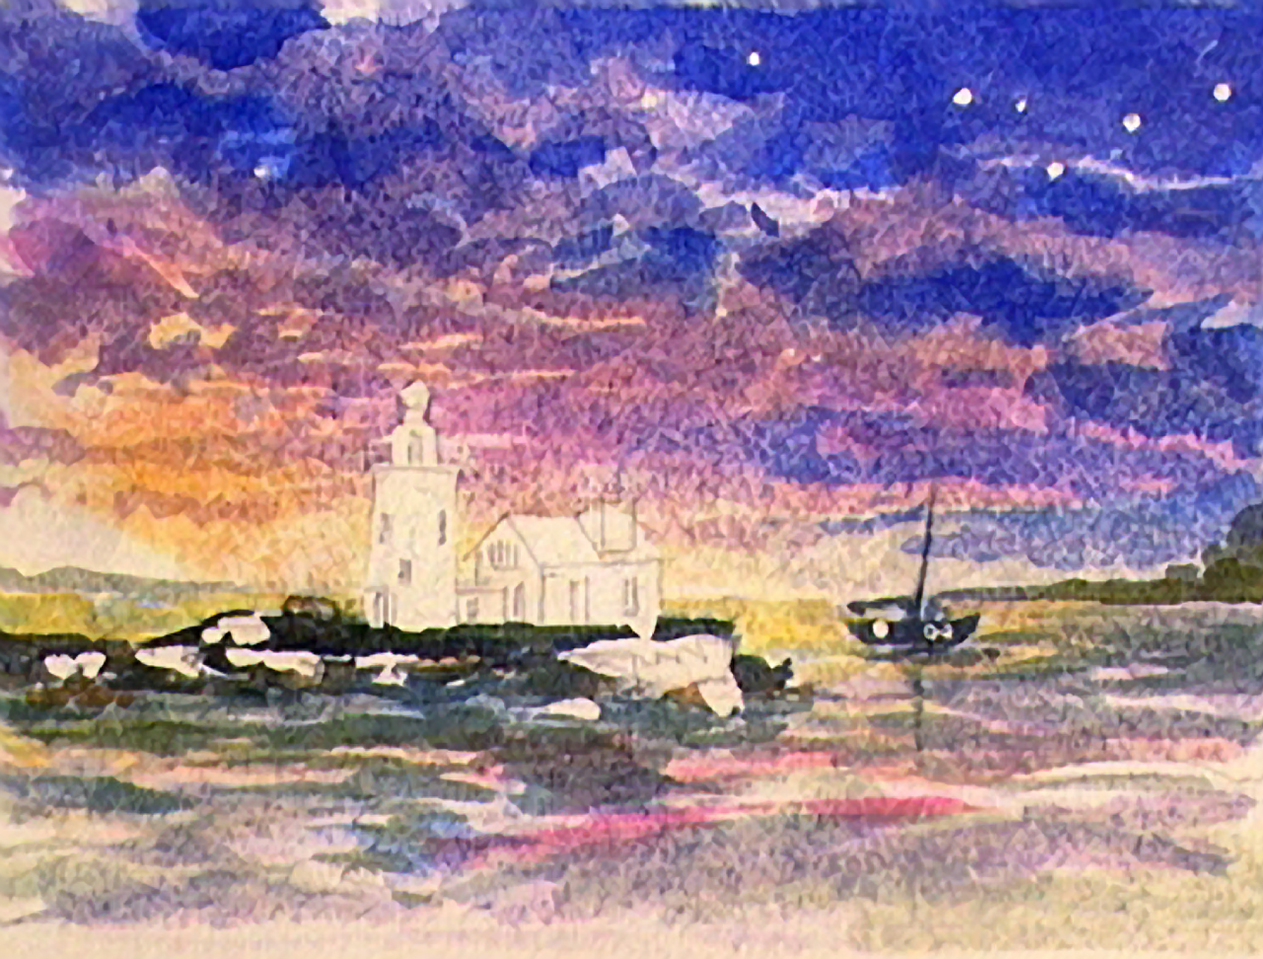
Step 1: Why, it's another lighthouse
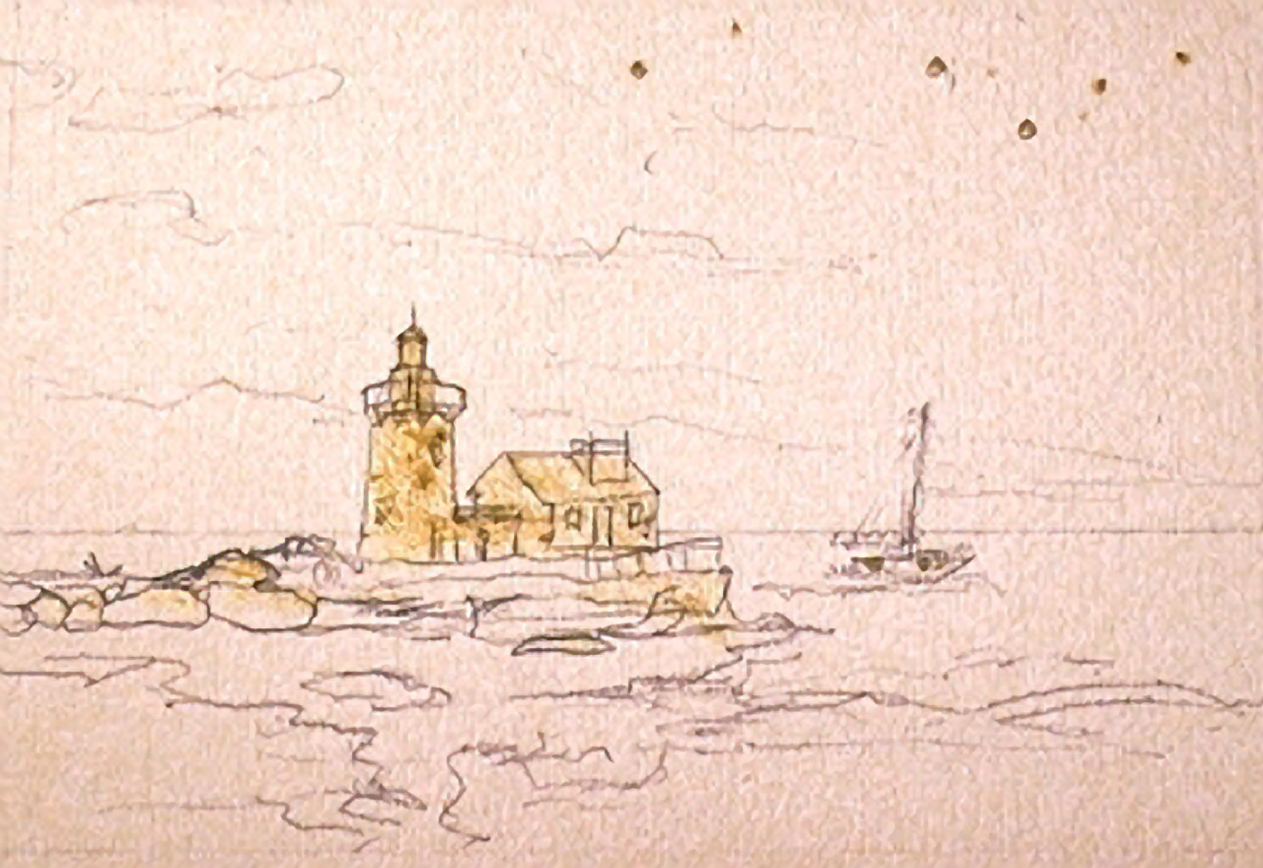 I had several digital reference photos of the West Break Water Lighthouse in Cleveland, OH for reference. None were quite right except to show what the structures looked like. I was wanting to try painting the lighthouse at dusk but I had no reference for the lighting or coloration. I decide to wing it. I placed the lighthouse where I wanted it in the composition and lightly sketched the setting around it. I apply liquid frisket to the lighthouse buildings and rocks and allow it to dry.
Step 2: Look! Up in the sky...
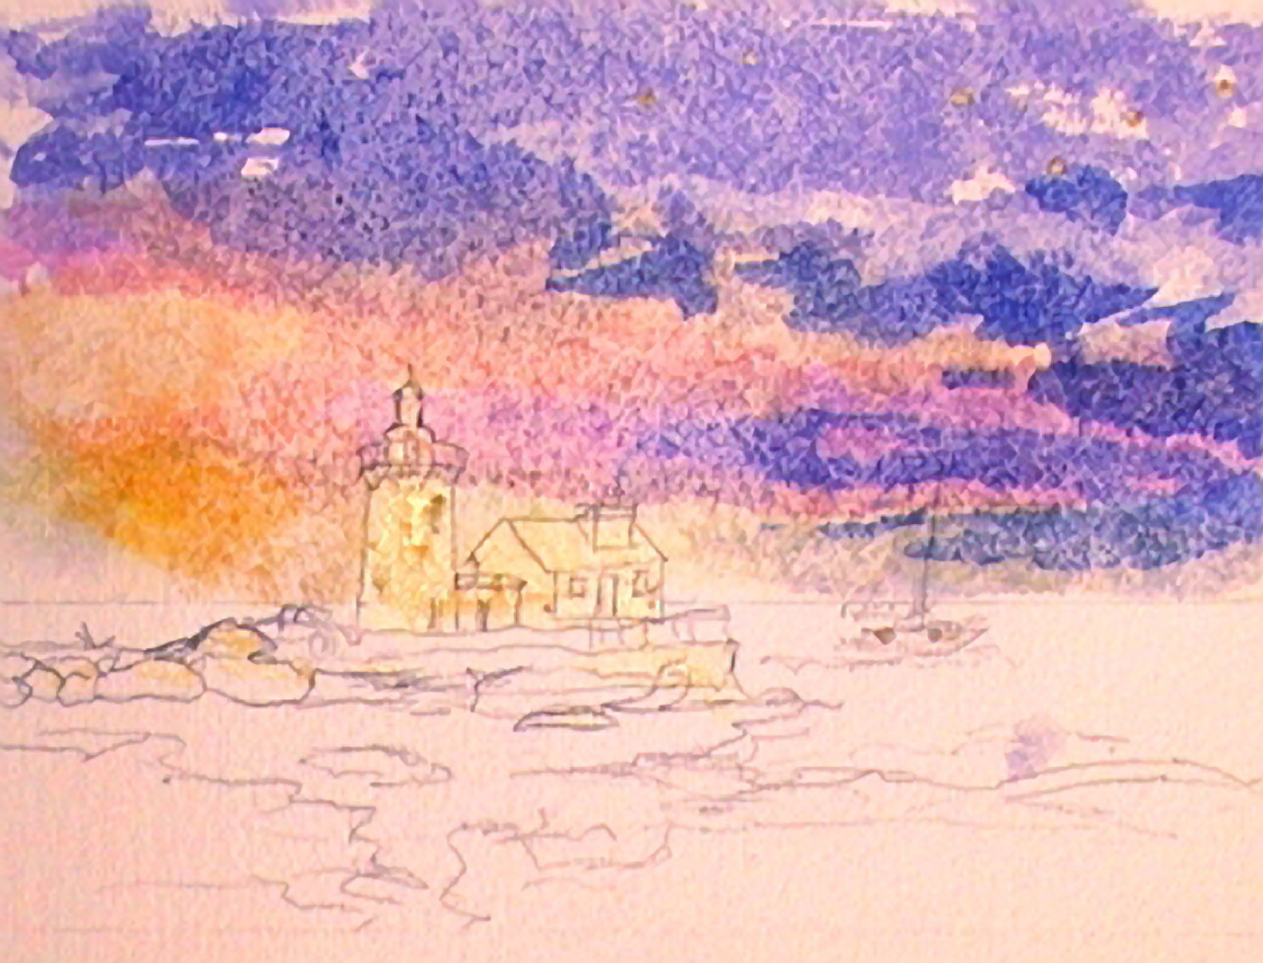 I envisioned a colorful last glow of sunset dramatic sky including stars coming out. This was to backlight the lighthouse as the beams of light became visible in the darkening sky. Hokey, but I've never tried it. I started by moistening some areas of the sky randomly with clean water and my #8 round red sable. Mixing a medium Cerulean Blue wash I painted the top of the sky, gradually adding water towards the middle. A light valued mixture of Permanent Rose was next. I quickly laid this wash at the edge of the blue and allowed them to flow together a bit as I shaped some more clouds. I added a light Indian yellow wash to carry the sky to water and land level. While the sky was still moist I mixed some Ultramarine Blue with Cerulean and added darker bands and accents to the sky.
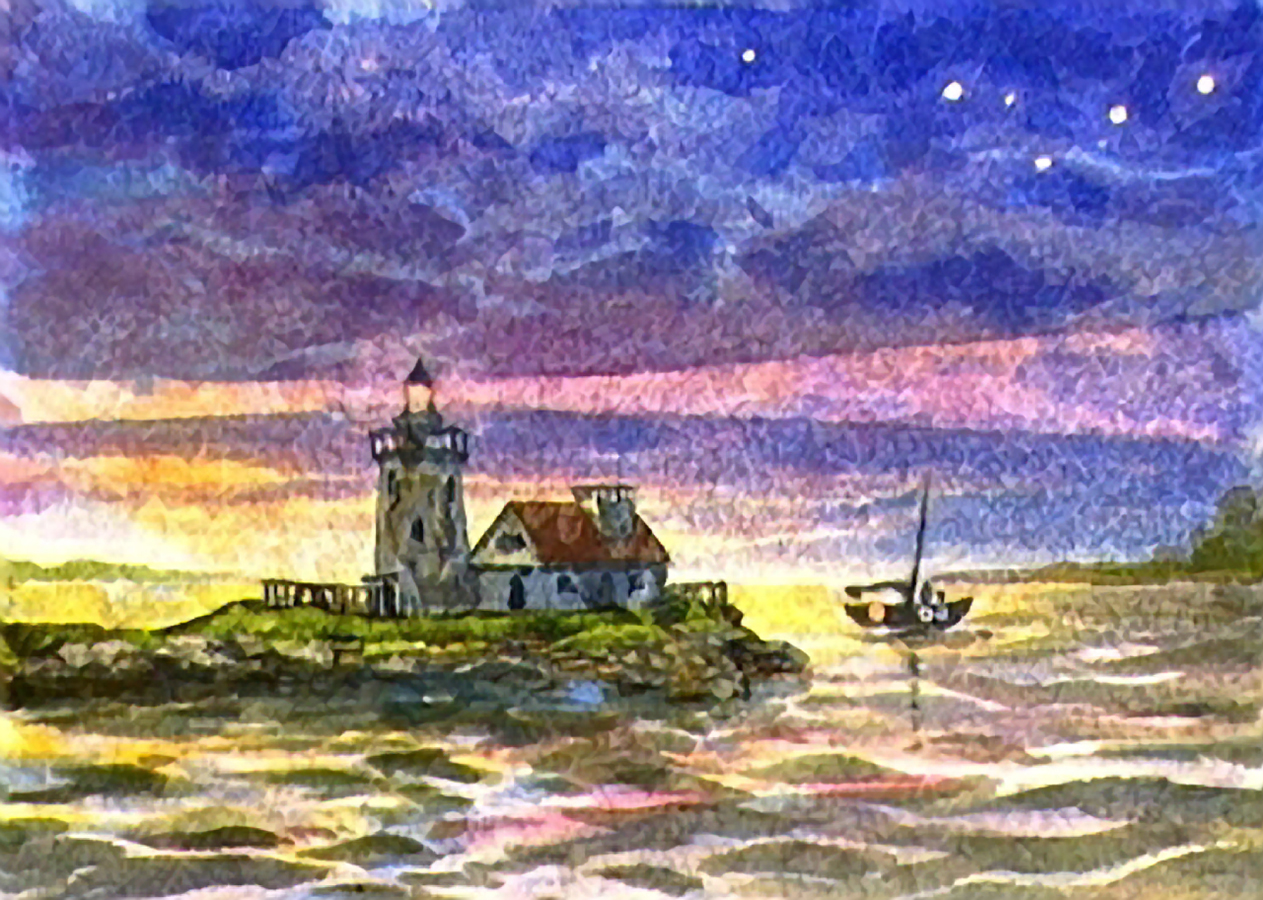
Step 3: Goin' for the gold
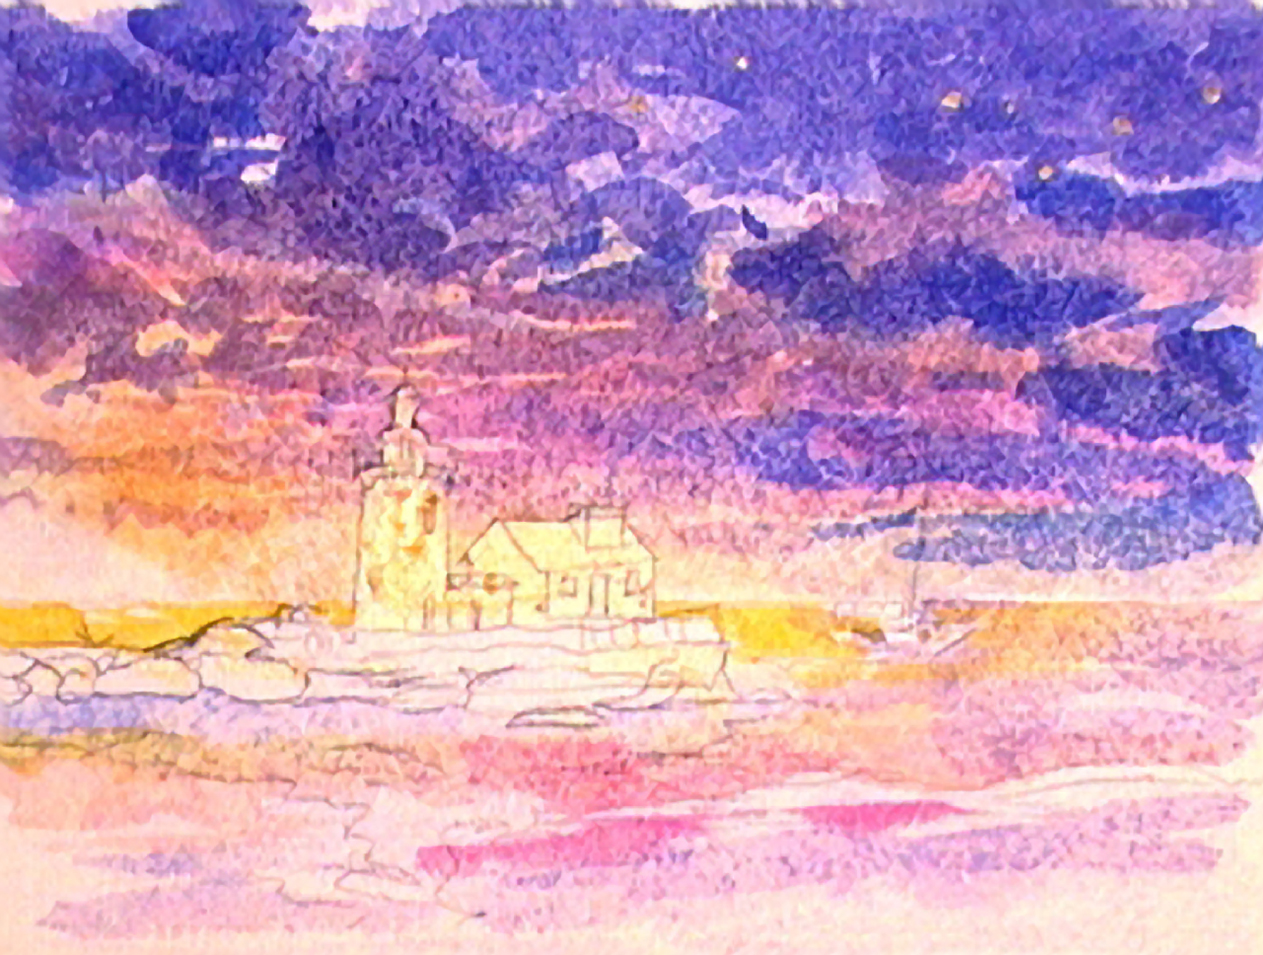 I finally finished noodling with the cloud shapes using a #5 round sable and various violet shades from the blues and Permanent Rose on my palette. I moistened my paper at the bottom and started adding the reflected sky coloring into the waves on the fore and middle ground using some of the violets and blues left on my palette. I let it dry. At this point I commit to an over-the-top approach and paint the distant lake reflecting a bright yellow glow from the sunset.
Step 4: Well grounded
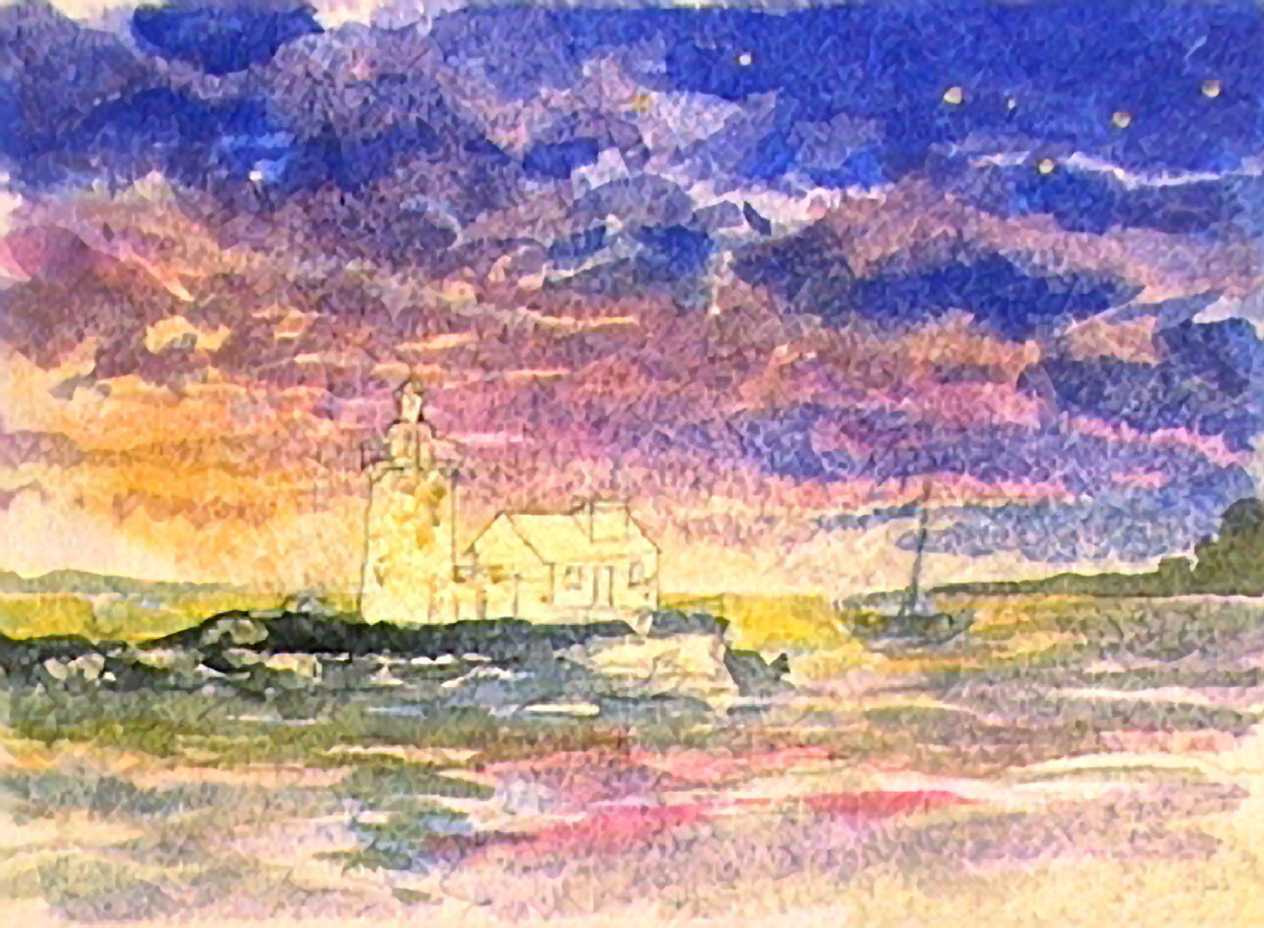 Mixing a medium cool gray from Ultramarine Blue and Burnt Umber I paint in the silhouette of the boat. After a quick rinse I add some Sap Green to the gray and paint in the distant hills of the coast. Using a glaze of Cerulean Blue I painted the rocks and road to the lighthouse and pulled this directly into the water catching reflections in the waves. While this was still moist I worked into the rocks and road with a dark blue/umber gray, Burnt Sienna, and Sap Green. I then mixed an even more intense Ultramarine Blue for the sky and painted a darker layer, adding more depth. Before I cleaned my brush and palette, I picked up more sky colors and defined more areas of waves in the water.
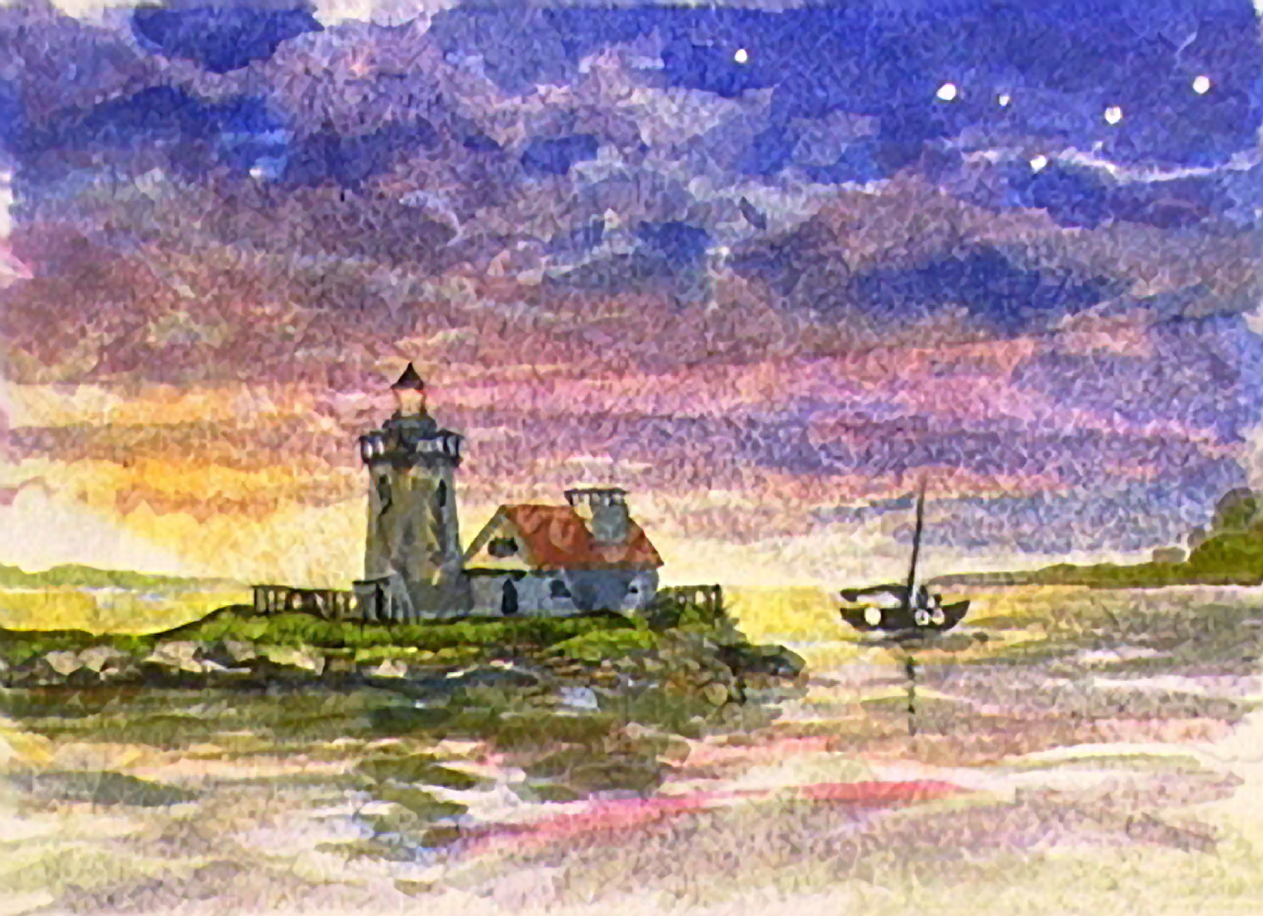
Step 5: Getting darker
 I decide to add another layer of brushwork on the rocky outcrop before I dry the painting and remove the frisket. Because of the unseen mold in this paper, the sizing has been damaged. When I removed the frisket from these softened areas, big chunks of paper wanted to come with it. This will show up as unintended texture in the lighthouse and out building. This was an executive decision. I redrew the drawing details that were lifted with the frisket, picked up my #5 round red sable brush, and considered my next move.
Step 6: Hidden surprises and determination
 I started by painting a glaze of Cerulean Blue over the shadow areas of the buildings. I found the damaged areas of paper sucked up paint like a blotter and would not hold a detail without diffusing. Next I glazed a local color onto the buildings using a mixture of Indian Yellow and Burnt Sienna. I gallantly ignore the large blobs of oddly colored damaged paper in the middle of each building and proceed to add roofing details using Alizarin Crimson. Seeing the land was too dark, I scrubbed the dry wash with the tip of my #5 round red sable and clean water and blotted to lighten the area. I finish by laying some warm and cool grays on the exposed rocks and land mass.
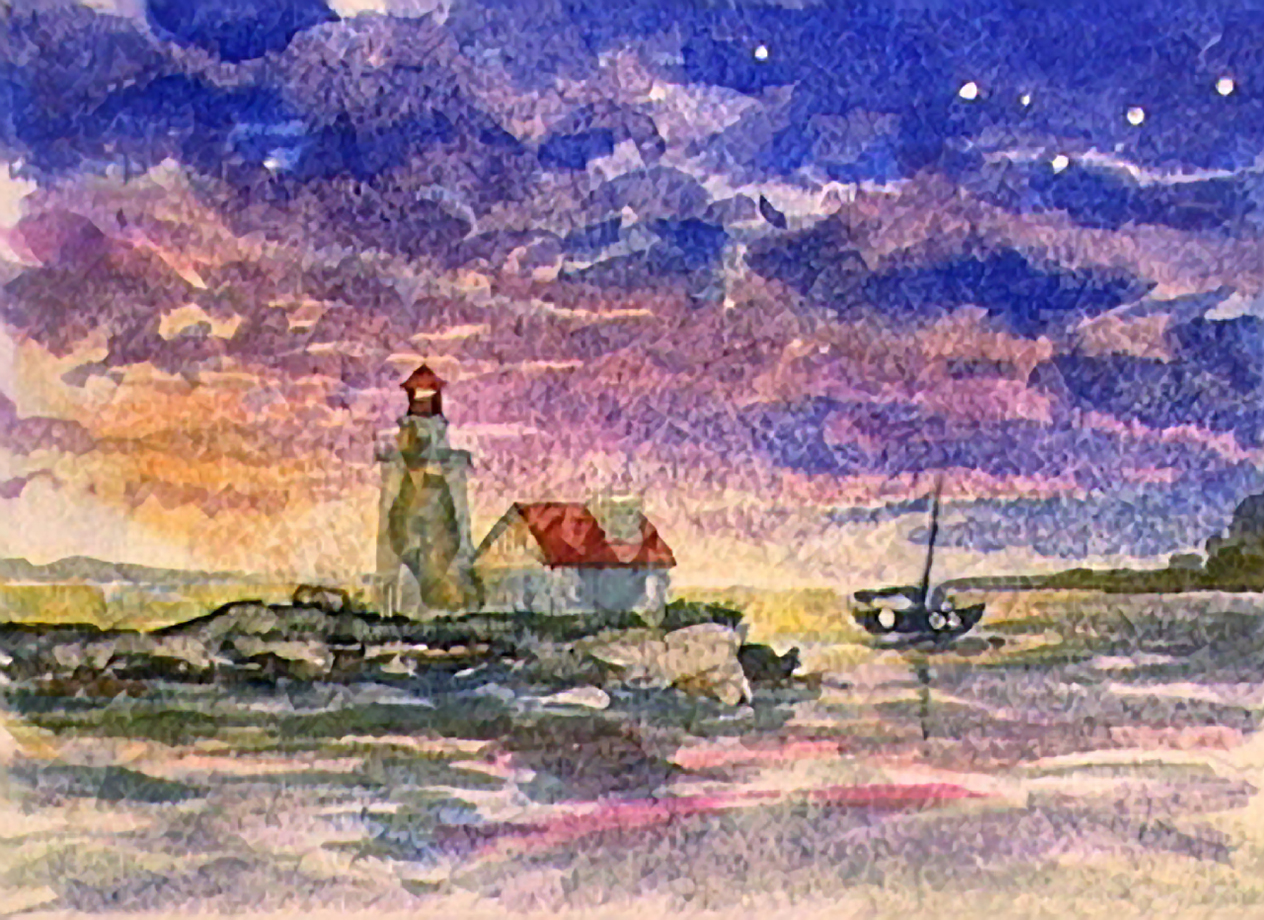
Step 7: Bailing a sinking ship
 I mixed some thicker paint and using a #0 round red sable I dabbed some details onto the buildings using Ivory black and Cerulean Blue. I mixed up a clean medium toned mixture of Ultramarine Blue and glaze the whole sky except where the beams of light are. The wash bleeds into a soft spot on the edge of the left beam. Deciding that there should be a glow around the top of the lighthouse, I take a #2 flat acrylic bristle brush and clean water and scrub the top off the lighthouse in a circular fashion. Between scrubs I blot with a tissue to check my progress. I then scrubbed the beams of light to lighten them, too. When that dried I added new details to the top of the lighthouse and glazed the
Step 8: Finished
 I glazed the sky with Ultramarine Blue two more times, drying the painting between glazes. I then mix up some interesting warm gray-greens using Hooker's Green, Burnt Sienna, and Cerulean Blue and use these mixtures and my #5 round red sable to add a range of dark accents to the waves. I stop myself before I do any more damage and allow the painting to dry. To finish I removed the frisket and then erased the pencil lines with a kneaded eraser I used the #0 round sable to sign my name in the lower right corner with a Burnt Sienna wash.


