A walk-through in the creation of a small painting of the Lorain Lighthouse on Lake Erie.
Materials used:
Brushes
- #8 Kolonok Kolinsky Red Sable
- #5 Kolonok Kolinsky Red Sable
- #0 Winsor & Newton Series 7 Red Sable
Paints
- Sap Green
- Hooker's Green Dark
- Ultramarine Blue
- Cerulean Blue
- Alizarin Crimson
- Permanent Rose
- Indian Yellow
- Raw Sienna
- Burnt Sienna
- Burnt Umber
Paper
- Cut sheet (5.5" x 7.5") Whatman #200 cold pressed, rather badly stored.
Miscellaneous
- #2 Pencil
- Kneaded Eraser
- Grafix Incredible White Mask Liquid Mask
- Palettes - Robert E. Wood & Eldajon.
- Water container (2) and water
- Hair dryer (optional)
Step 1: Whatcha drawing?
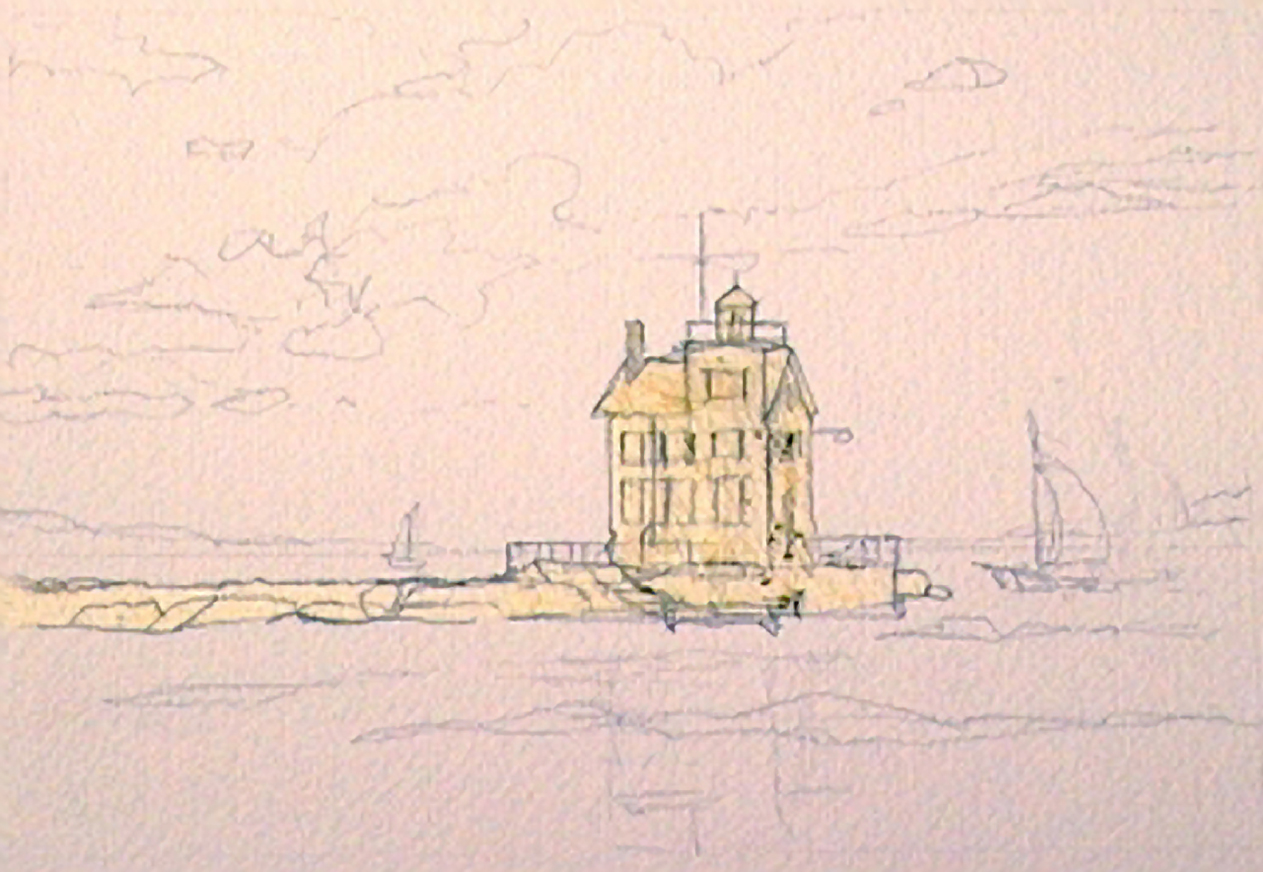 Start out by knowing what you are going to paint, and drawing the shapes necessary to have a framework to hang your painting on. Do some visual research on the elements you'll be using in your painting beforehand. I used digital reference photos of the Lorain Lighthouse on Lake Erie to draw and cut a cardboard template to size so I could move it around and play with the composition. Once I decided where to draw it, I added the sky and sea areas, and then masked the lighthouse area with liquid frisket. As the frisket dried I played with scribbling in a few sail boats on the horizon to mix things up a bit.
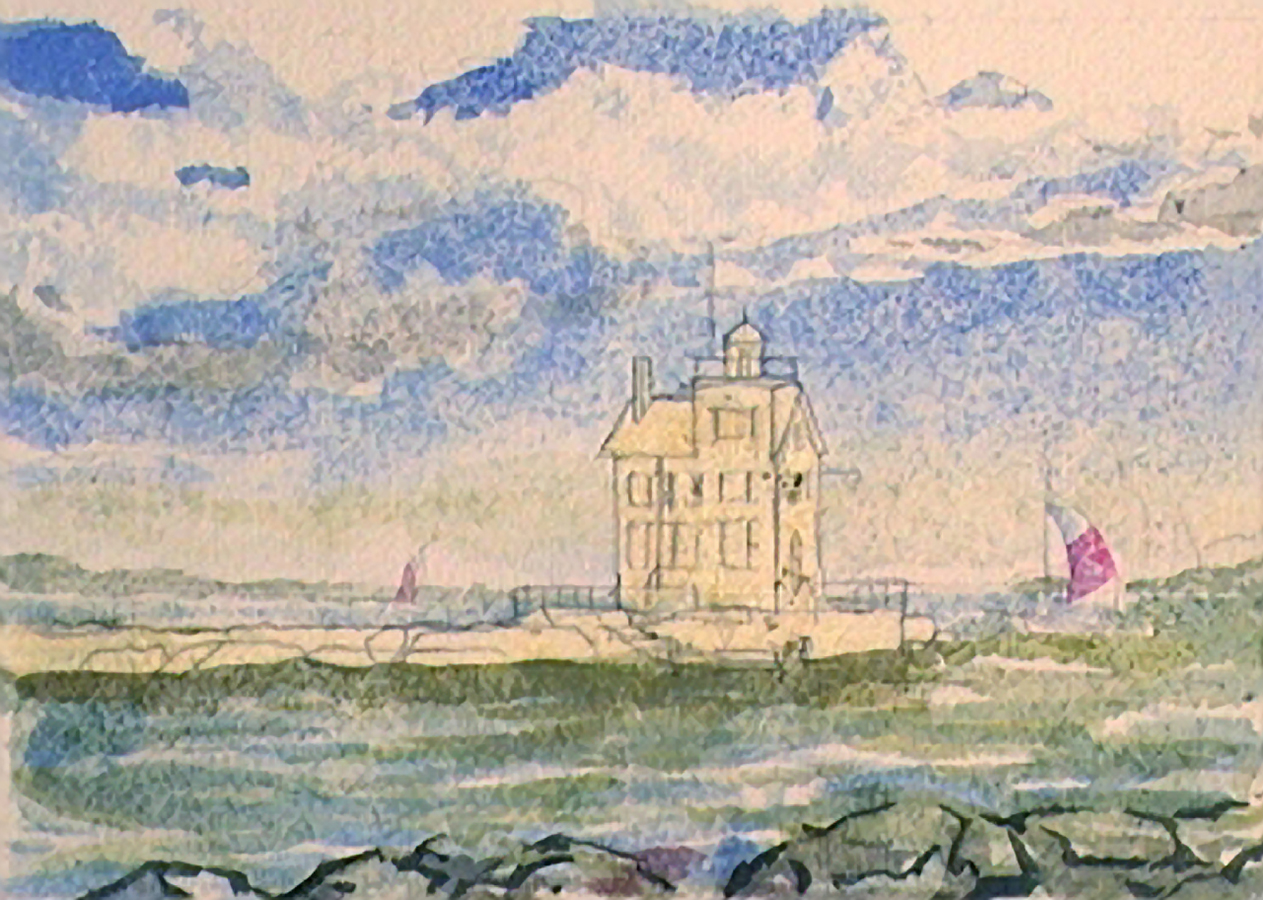
Step 2: Head in the clouds
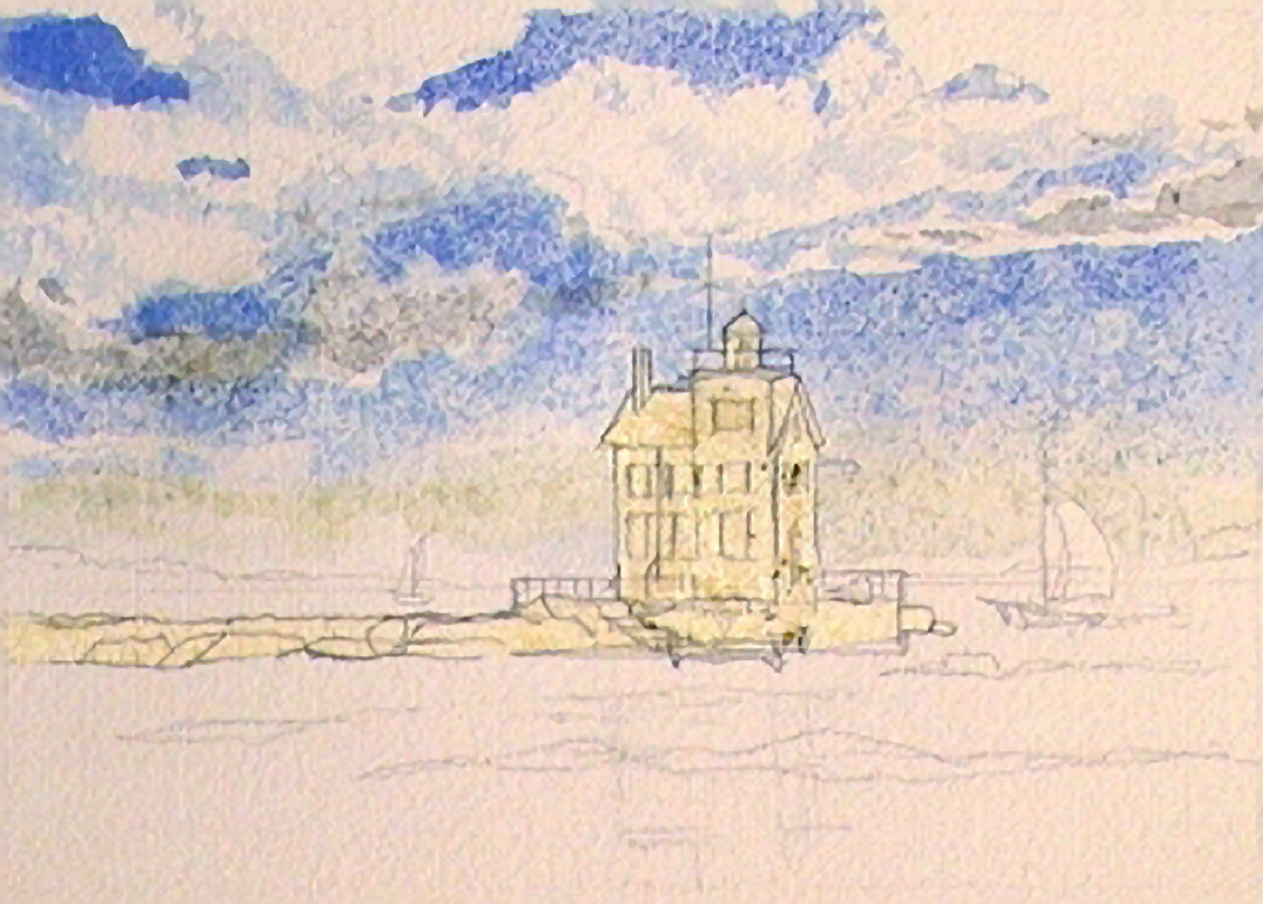 Using the Round #8 red sable, I mixed up a medium wash of cerulean blue and after I wet some areas of the sky with clean water I proceeded to paint the sky, varying the intensity and shaping the clouds edges flowing in and out of each other as the wash softened. While this was still damp I added a touch of ivory black to the cerulean to get a silvery gray for the cloud bottoms and added more shape the base of the clouds. I remoistened the lower horizon and flowed in a light wash of Indian yellow which glazed and faded into the underlying blue. I intensified the upper sky color with a deeper blue while it was still moist.
Step 3: Oops, what's this?
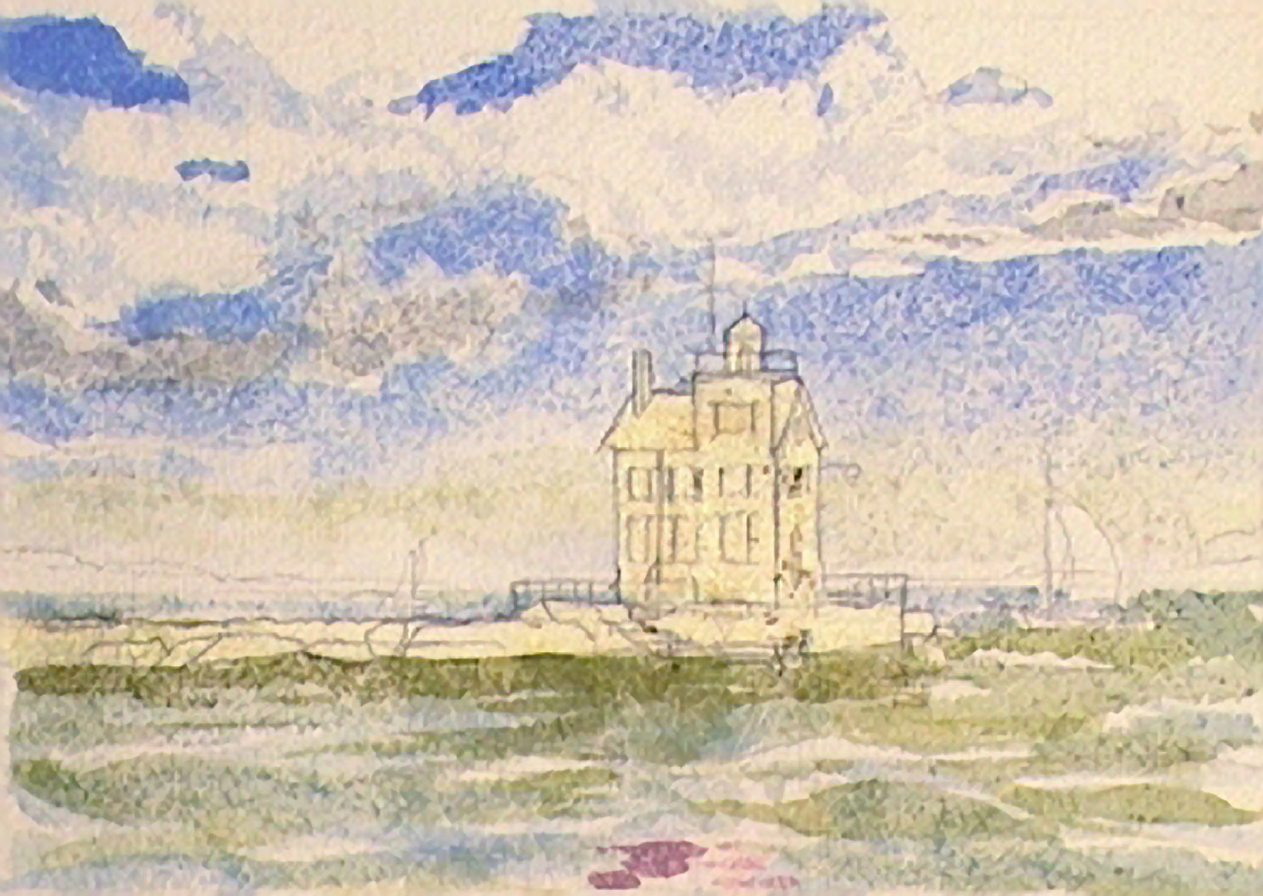 This is when I realize the paper I'm using is the paper I allowed to become moldy when it sat partially explose in basement storage. You couldn't see the mold or the damage until you added paint and then you saw areas had the sizing eliminated from them. The blotchy damaged areas soaked up paint like blotter paper. Interesting. Unintended texture. Using the same cerulean blue mixed for the sky I painted the first wash of the water area looking for a reflective effect. Then I let everything dry. Next, using Sap Green, Hooker's Green and Burnt Umber I mixed several variations of greens for the lake water. I moistened some areas of the water before I started working a rhythmic design with the waves in the foreground. I paid some attention to the reflecting version of the lighthouse in the water anticipating a red roof with an Alizarin/Permanent Rose mix.
Step 4: I wanna rock
 For some reason the foreground area annoyed me so I hastily used my #5 brush to draw some near-shore rocks using a mix of Hooker's Green, Cerulean Blue, and Burnt Umber. I'll spend the rest of the painting trying to make this addition work in some way. As the rocks dried I mixed a bluish-gray for the small strips of land masses on either side of the bay and loosely painted them. Grabbing some loose cerulean I lightened it up with a touch of water and took a swipe at the largest sail on the right to add form to it's motion. I then went back over the now dry rocks with some grayed and cooled down greens left over from the first few lake water washes.
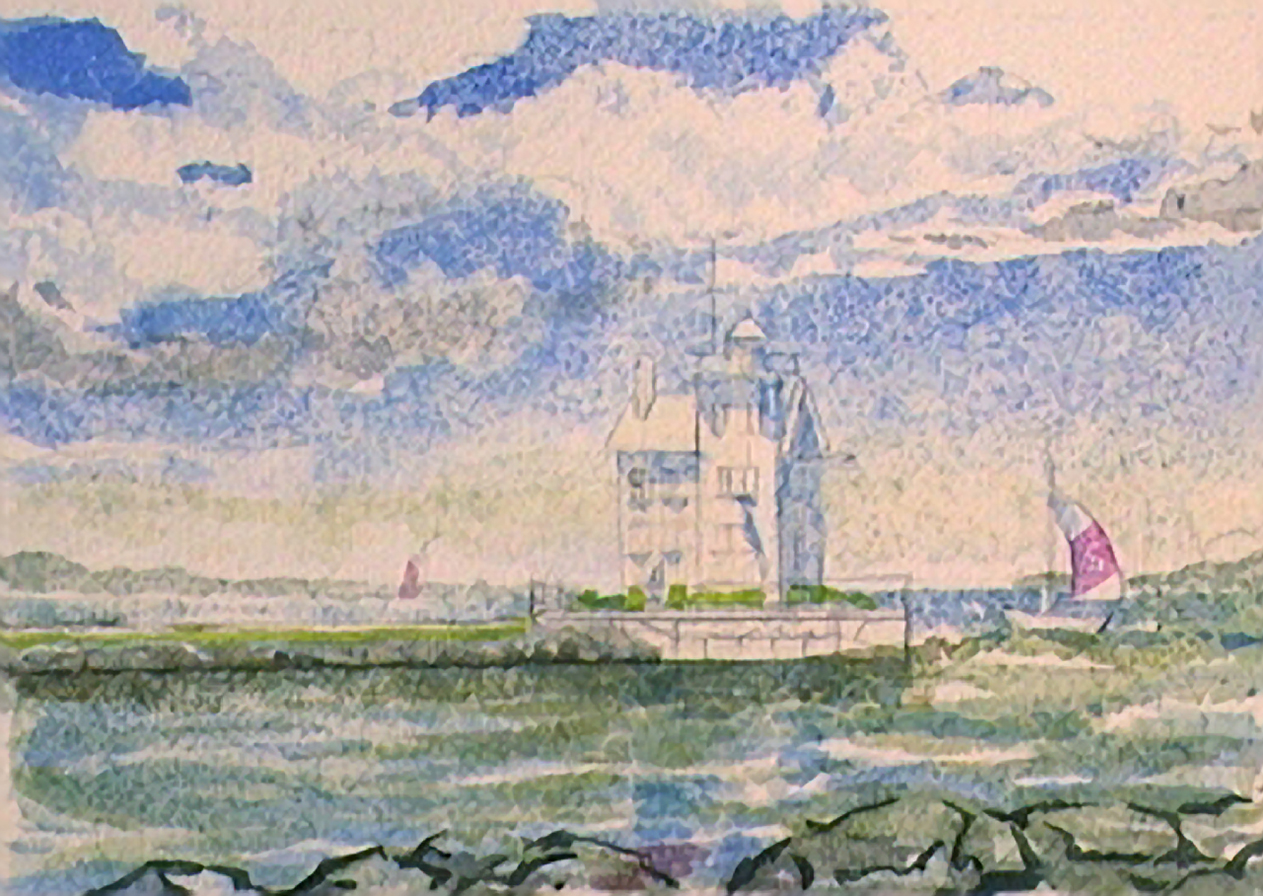
Step 5: Pause for refinement
 I overlayed some more cerulean washes on the lake waves, defining the patterns a little more. As a last touch before removing the frisket I used Alizarin crimson and Permanent Rose to add some color on distant sails. I let the piece dry thoroughly before removing the frisket. When the frisket was removed I had to redraw the details of the building and rocks, the pencil drawing had lifted off the paper with the frisket.
Step 6: Out of the shadows
 After thoroughly removing the frisket and redrawing lost areas, I painted the shadow areas on the lighthouse in the same blue as the sky. Next I used blues, grays, and greens to paint the causeway leading to the lighthouse. I fished these colors from the various mixtures already on my palette. While I had a clean mixture of Hooker's green in my #5 brush I invented some landscaping at the base of the building. I studied the forms at the base of the building and redrew them, a light colored rail and pier was up against rusty pylons that shored up the base of the building.
Step 7: From the ground up
 Using local color of Raw sienna, Burnt sienna, and Alizarin crimson I quickly indicated the basic shapes surrounding the bottom of the building at the waterline. I next mixed some Alizarin crimson with a touch of Sap green to gray it a bit and painted the red roof tops of the lighthouse. I notice the foreground rocks were starting to get in the way, so I used a grayed down Cerulean to tone down their prominence in the foreground.
Step 8: Building up details
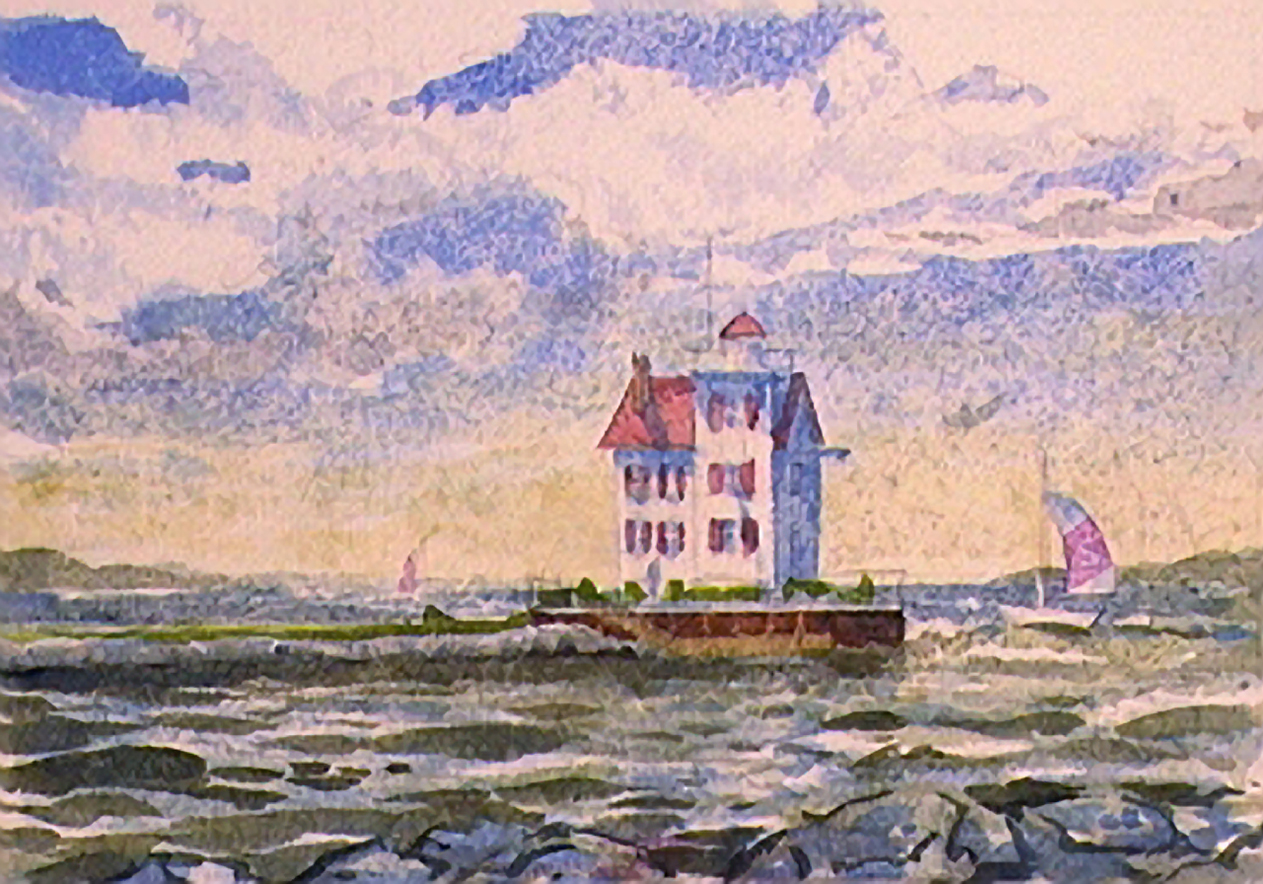
 I intensified the value of the shadows on the lighthouse, solidifying the form a bit more, and dropped an indication of a chimney shadow on the roof. Still working with the #5 Round Sable I blended Hooker's green with Burnt umber to get a richer color for the darker wave forms and started picking out the darks reflecting at the base of the lighthouse and the foreground water areas above the rocks. Rinsing my brush, I dipped into some left over Cerulean blue wash and took another swipe at the sailboat on the right.
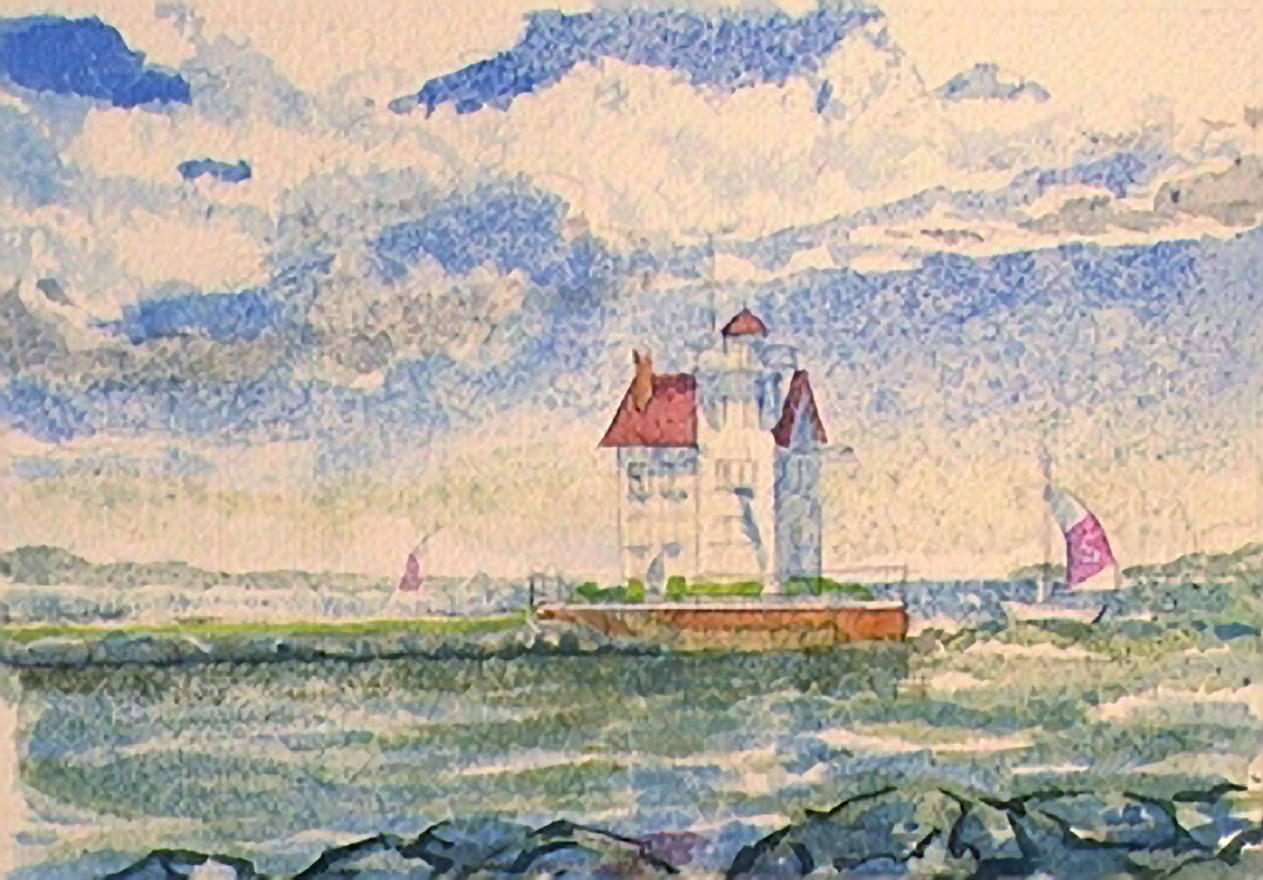
Step 9: Painting the trim
 After the last additions dried, I picked up some of the red roof wash from before and indicated shutters on the building with some small quick strokes of paint. I added some ultramarine to the Raw sienna, Burnt sienna, and Alizarin rusty brown and ochre washes to darken them. I then painted a few anchoring details on the rusty break walls and wooden pier. Returning to a mixture of Hooker's green and Sap green I used my #5 round sable to paint the final shapes of the shrubs and grassy areas at the base of the lighthouse.
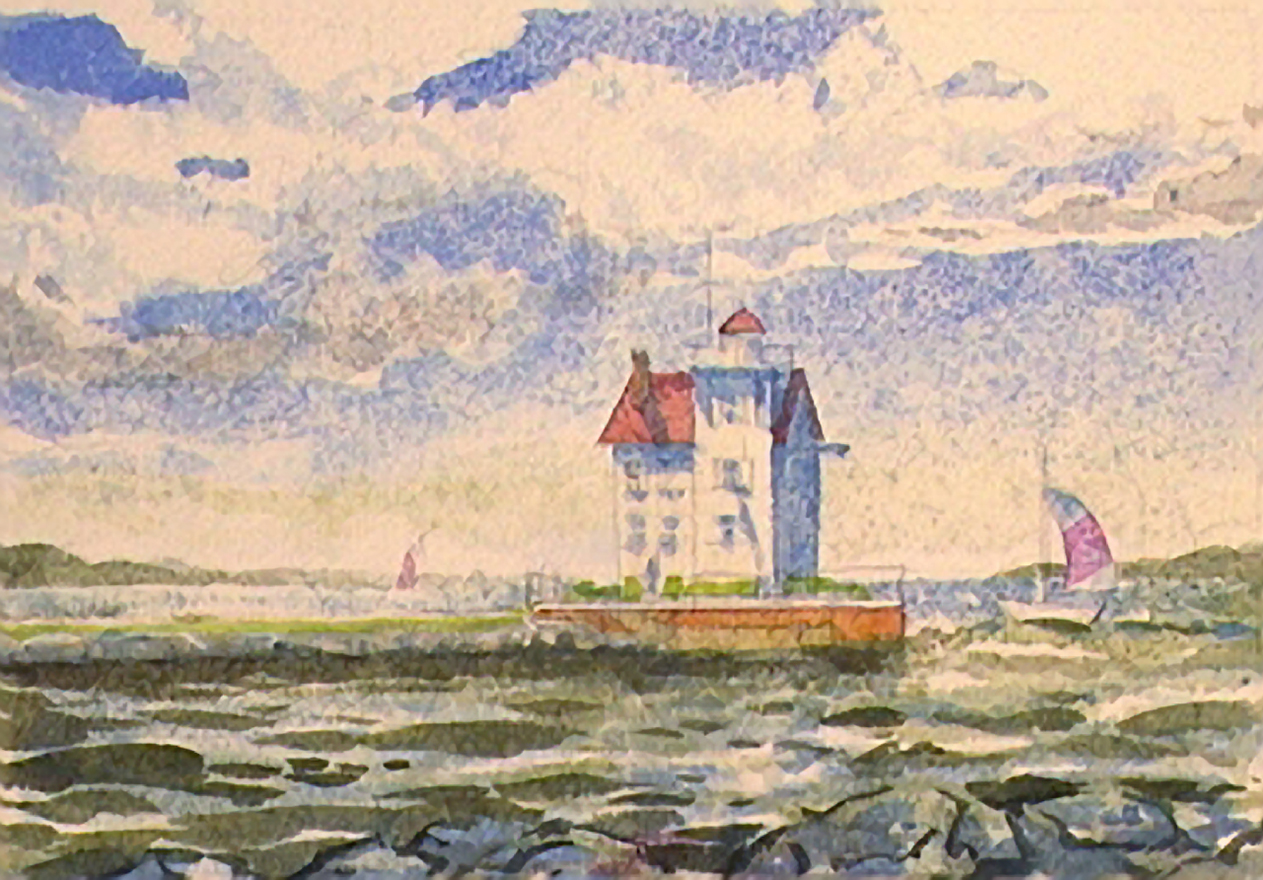
Step 10: Finished Painting
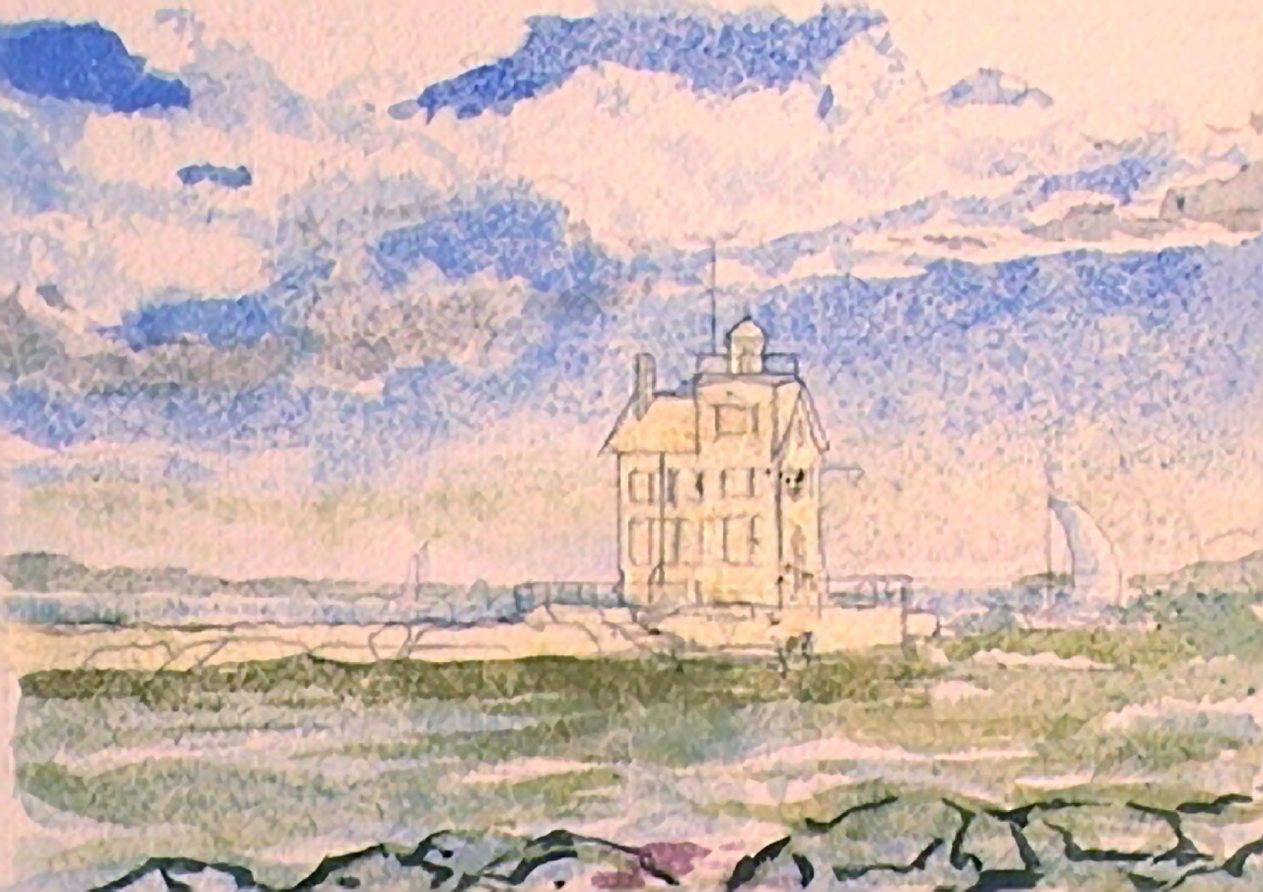
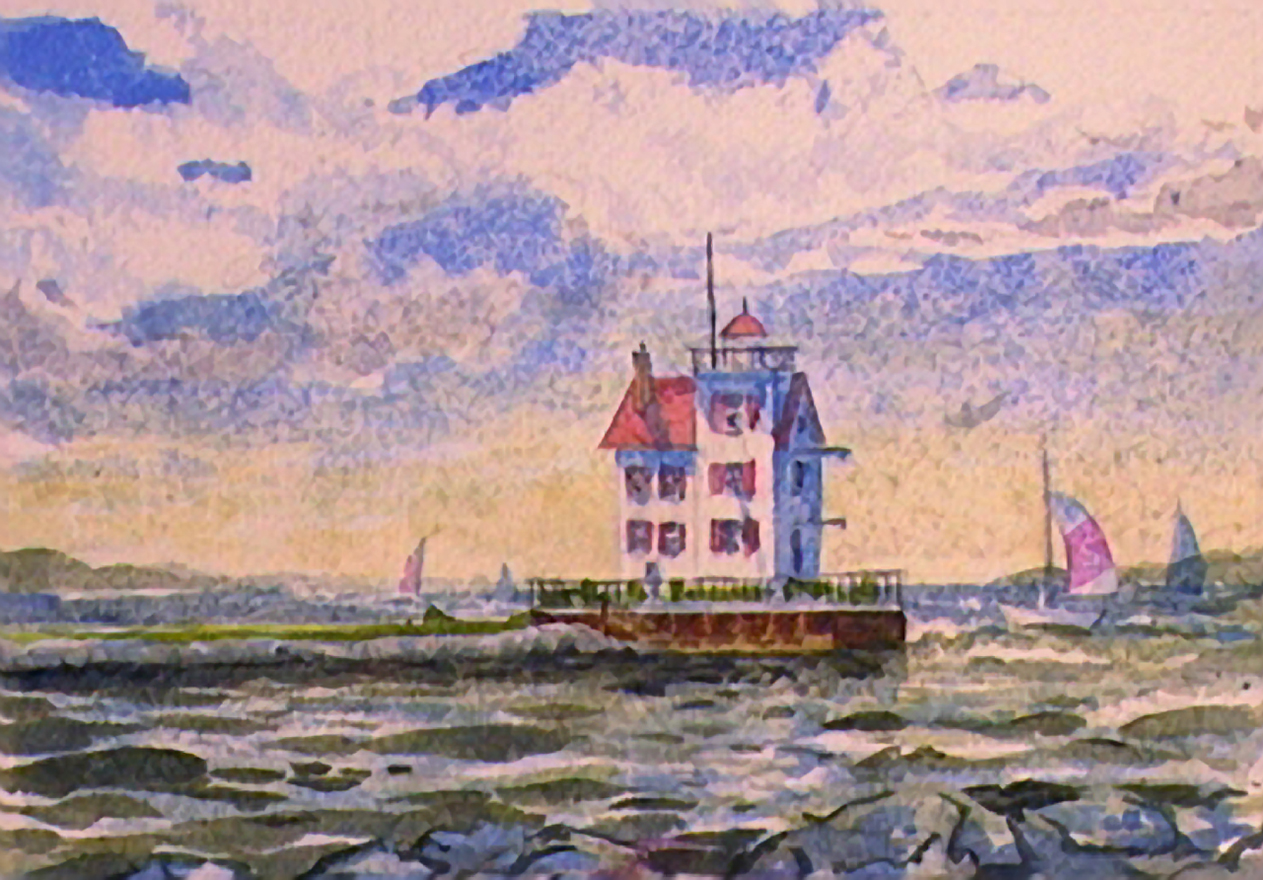 Using my #0 round red sable I found a suitably dark gray in the mess on my palette and added the final details on and around the building, mostly rails and poles. After this dried, I used a softened kneaded eraser to remove any pencil lines from the painting. I placed a mat over the painting to see if it was done. It was. I used a Burnt Sienna wash in my #0 round red sable to sign my name. Next??


