This is the perfect season for inspiration, so let's create a watercolor painting of a Japanese cherry blossom tree (a.k.a. sakura tree) using easy watercolor techniques! This one's pretty easy; it won't take more than 5 minutes of your time. Just follow the quick steps below!
Materials Used:
- Sketchbook (size 12" x 16")
- Cold press watercolor pad (140lb, size 12" x 16")
- 2B Pencil
- Blow dryer
- Roll of toilet paper
Paints (Holbein Artists' Watercolors)
- Crimson Lake
- Jaune Brilliant #2
- Cadmium Yellow Lemon
- Peacock Blue
- Burnt Umber
- Prussian Blue
- Cobalt Green
- Brilliant Orange
- Indigo
Brushes
- Round brush (no. 12)
- Round brush (no. 8)
Step 1: Sketch Your Cherry Blossom Tree

Practice sketching the general shape and tones in a tree by establishing where the light hits and where the shadows will be cast. In this tutorial, our artist, Mr. Shibasaki, creates some shapes to illustrate the shading of the tree itself, as well as the "holes" where there are gaps in the leaves, to make the painting more realistic. He also recommends not to make the sketch too precise. He starts with practicing a simplified tree, then for the real painting, he sketches out an actual, spiky tree shape with irregular holes. In the same way, when you get a good grasp on where the light is coming from and where to add the holes, you can move from practicing in your sketchpad to drawing a more detailed tree in your watercolor pad.
Step 2: Paint The First Layer of Your Japanese Flowers
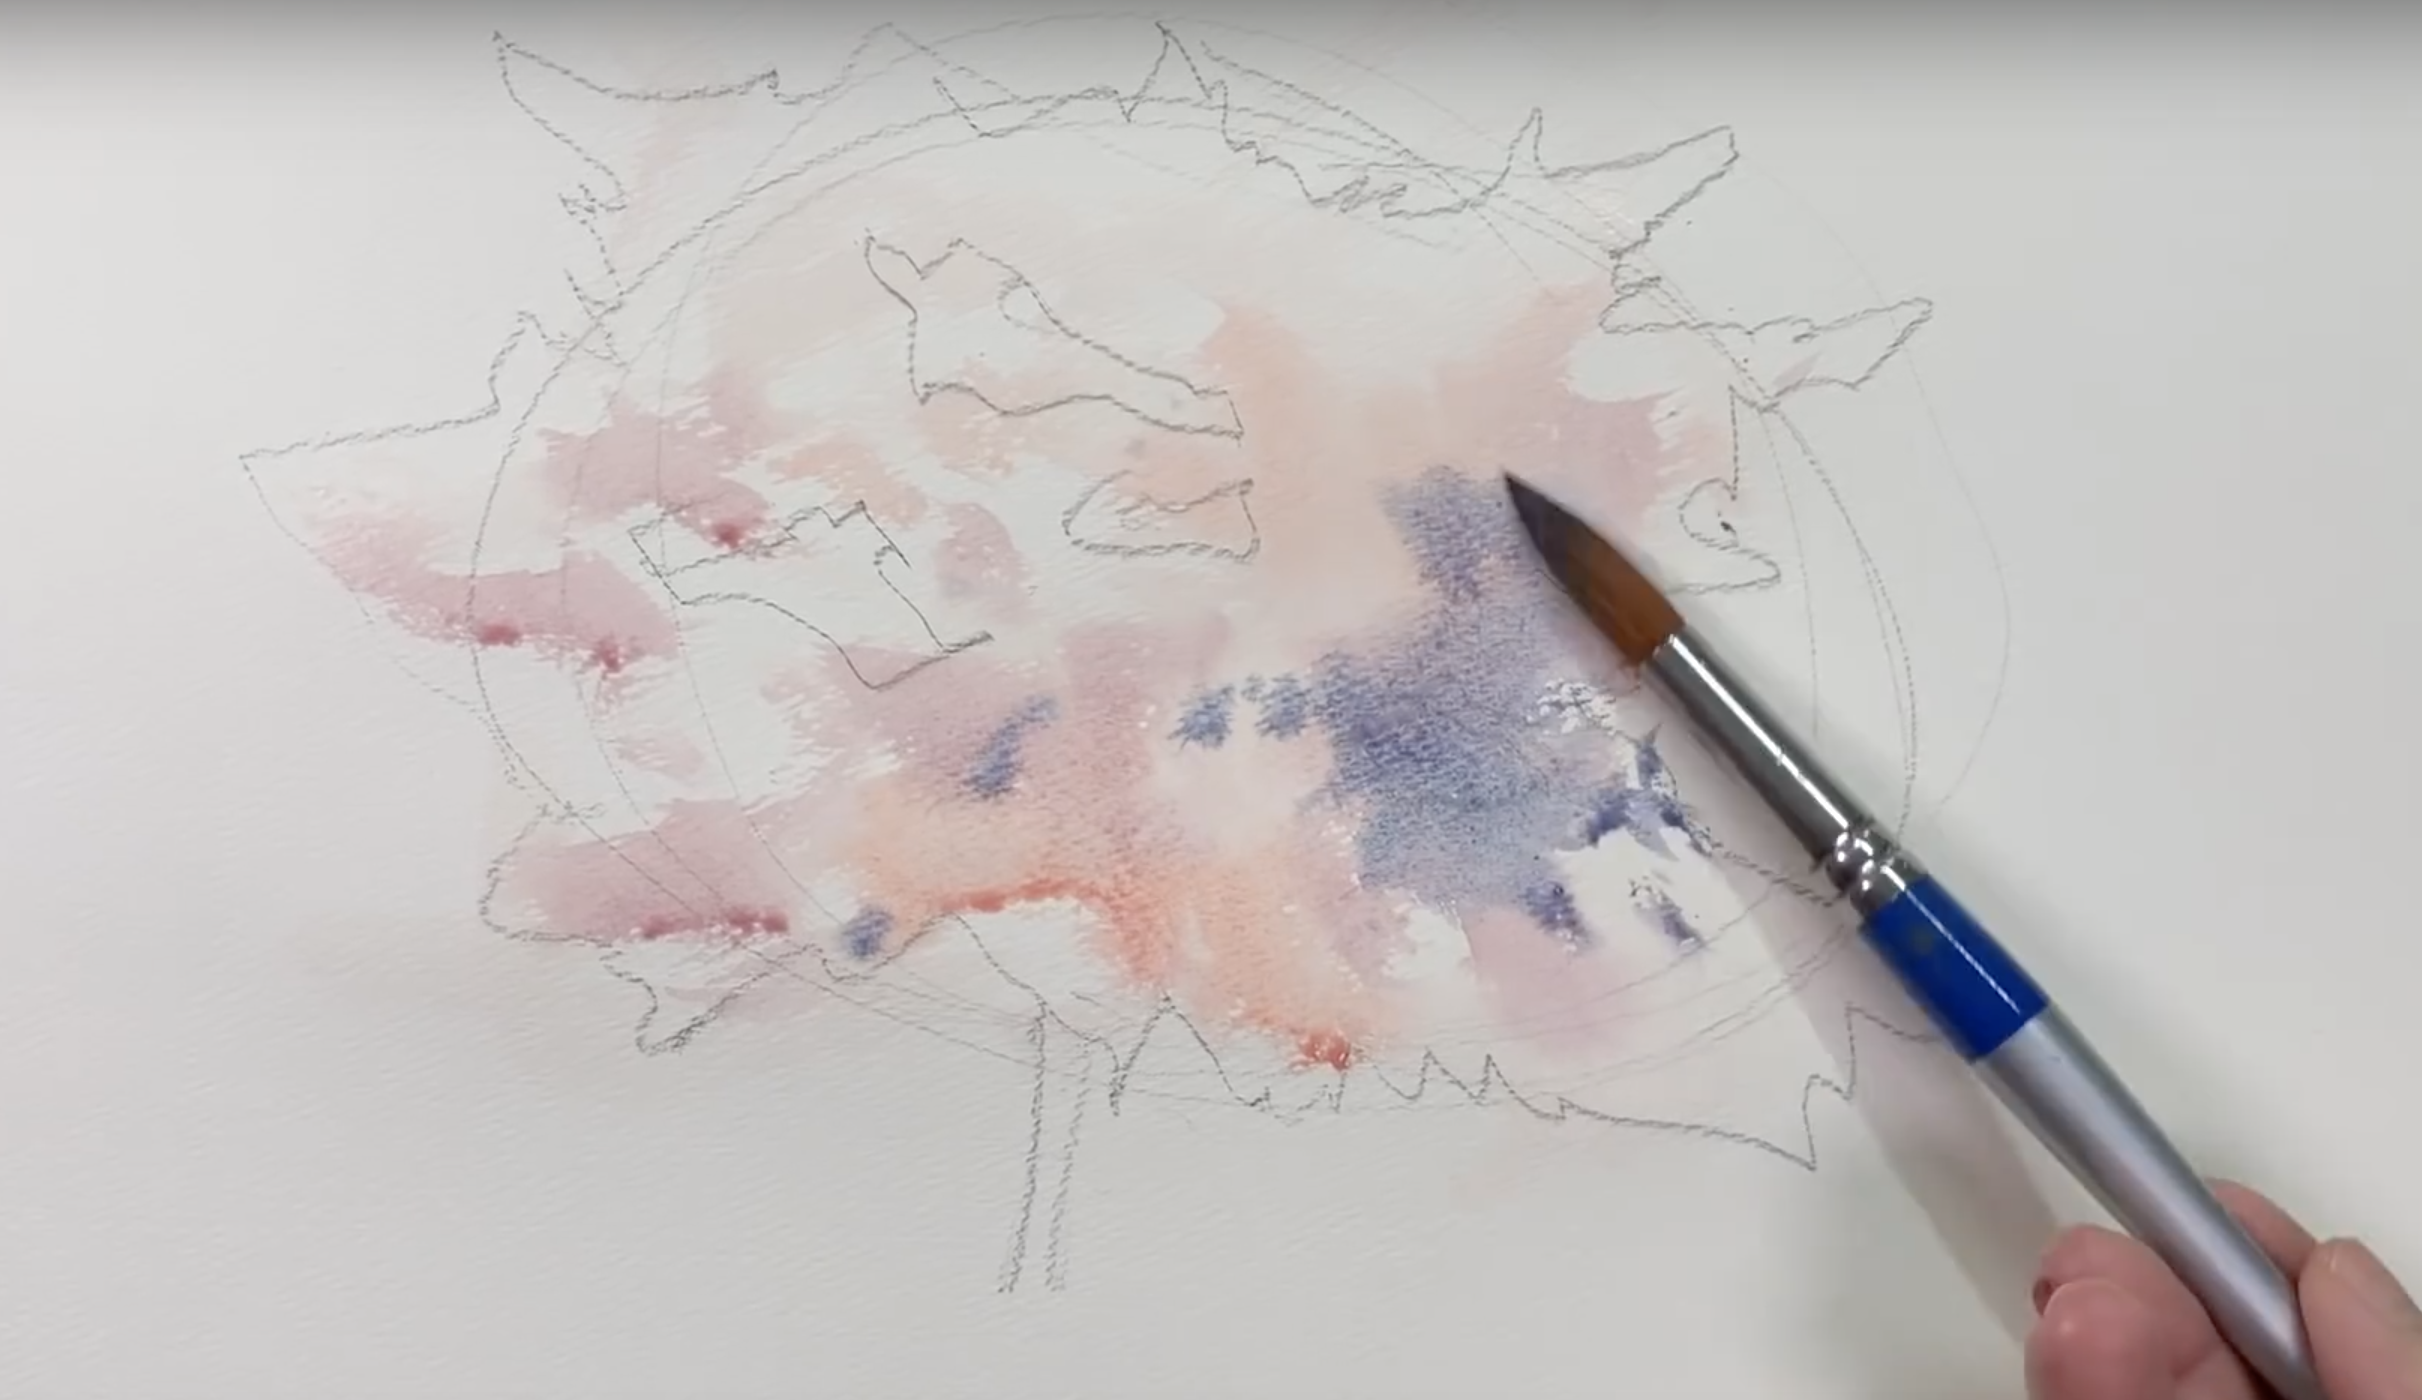
Using a round brush (no. 12), start with very light brushstrokes of a diluted mixture of Crimson Lake and Jaune Brilliant #2. And while painting loosely, use the wet-on-dry technique (i.e. wet paint on a dry surface) to paint the upper area of the tree while avoiding your highlights. For the middle and lower sections of the tree, paint on a denser layer of the same colors. And then add a bit of Peacock Blue to your mixture, and dot this in several areas for some mid-tones. Repeat the same process, but again do this with a thicker wash of paint. This will give you a darker purple hue. You can also try splattering the paint towards the center for a more natural effect.
Step 3: Let the First Layer Dry

Leave the first layer of paint to dry, or if you can't wait, use a blow dryer. Remember that the colors you've used on your tree painting will actually look lighter once it's dry.
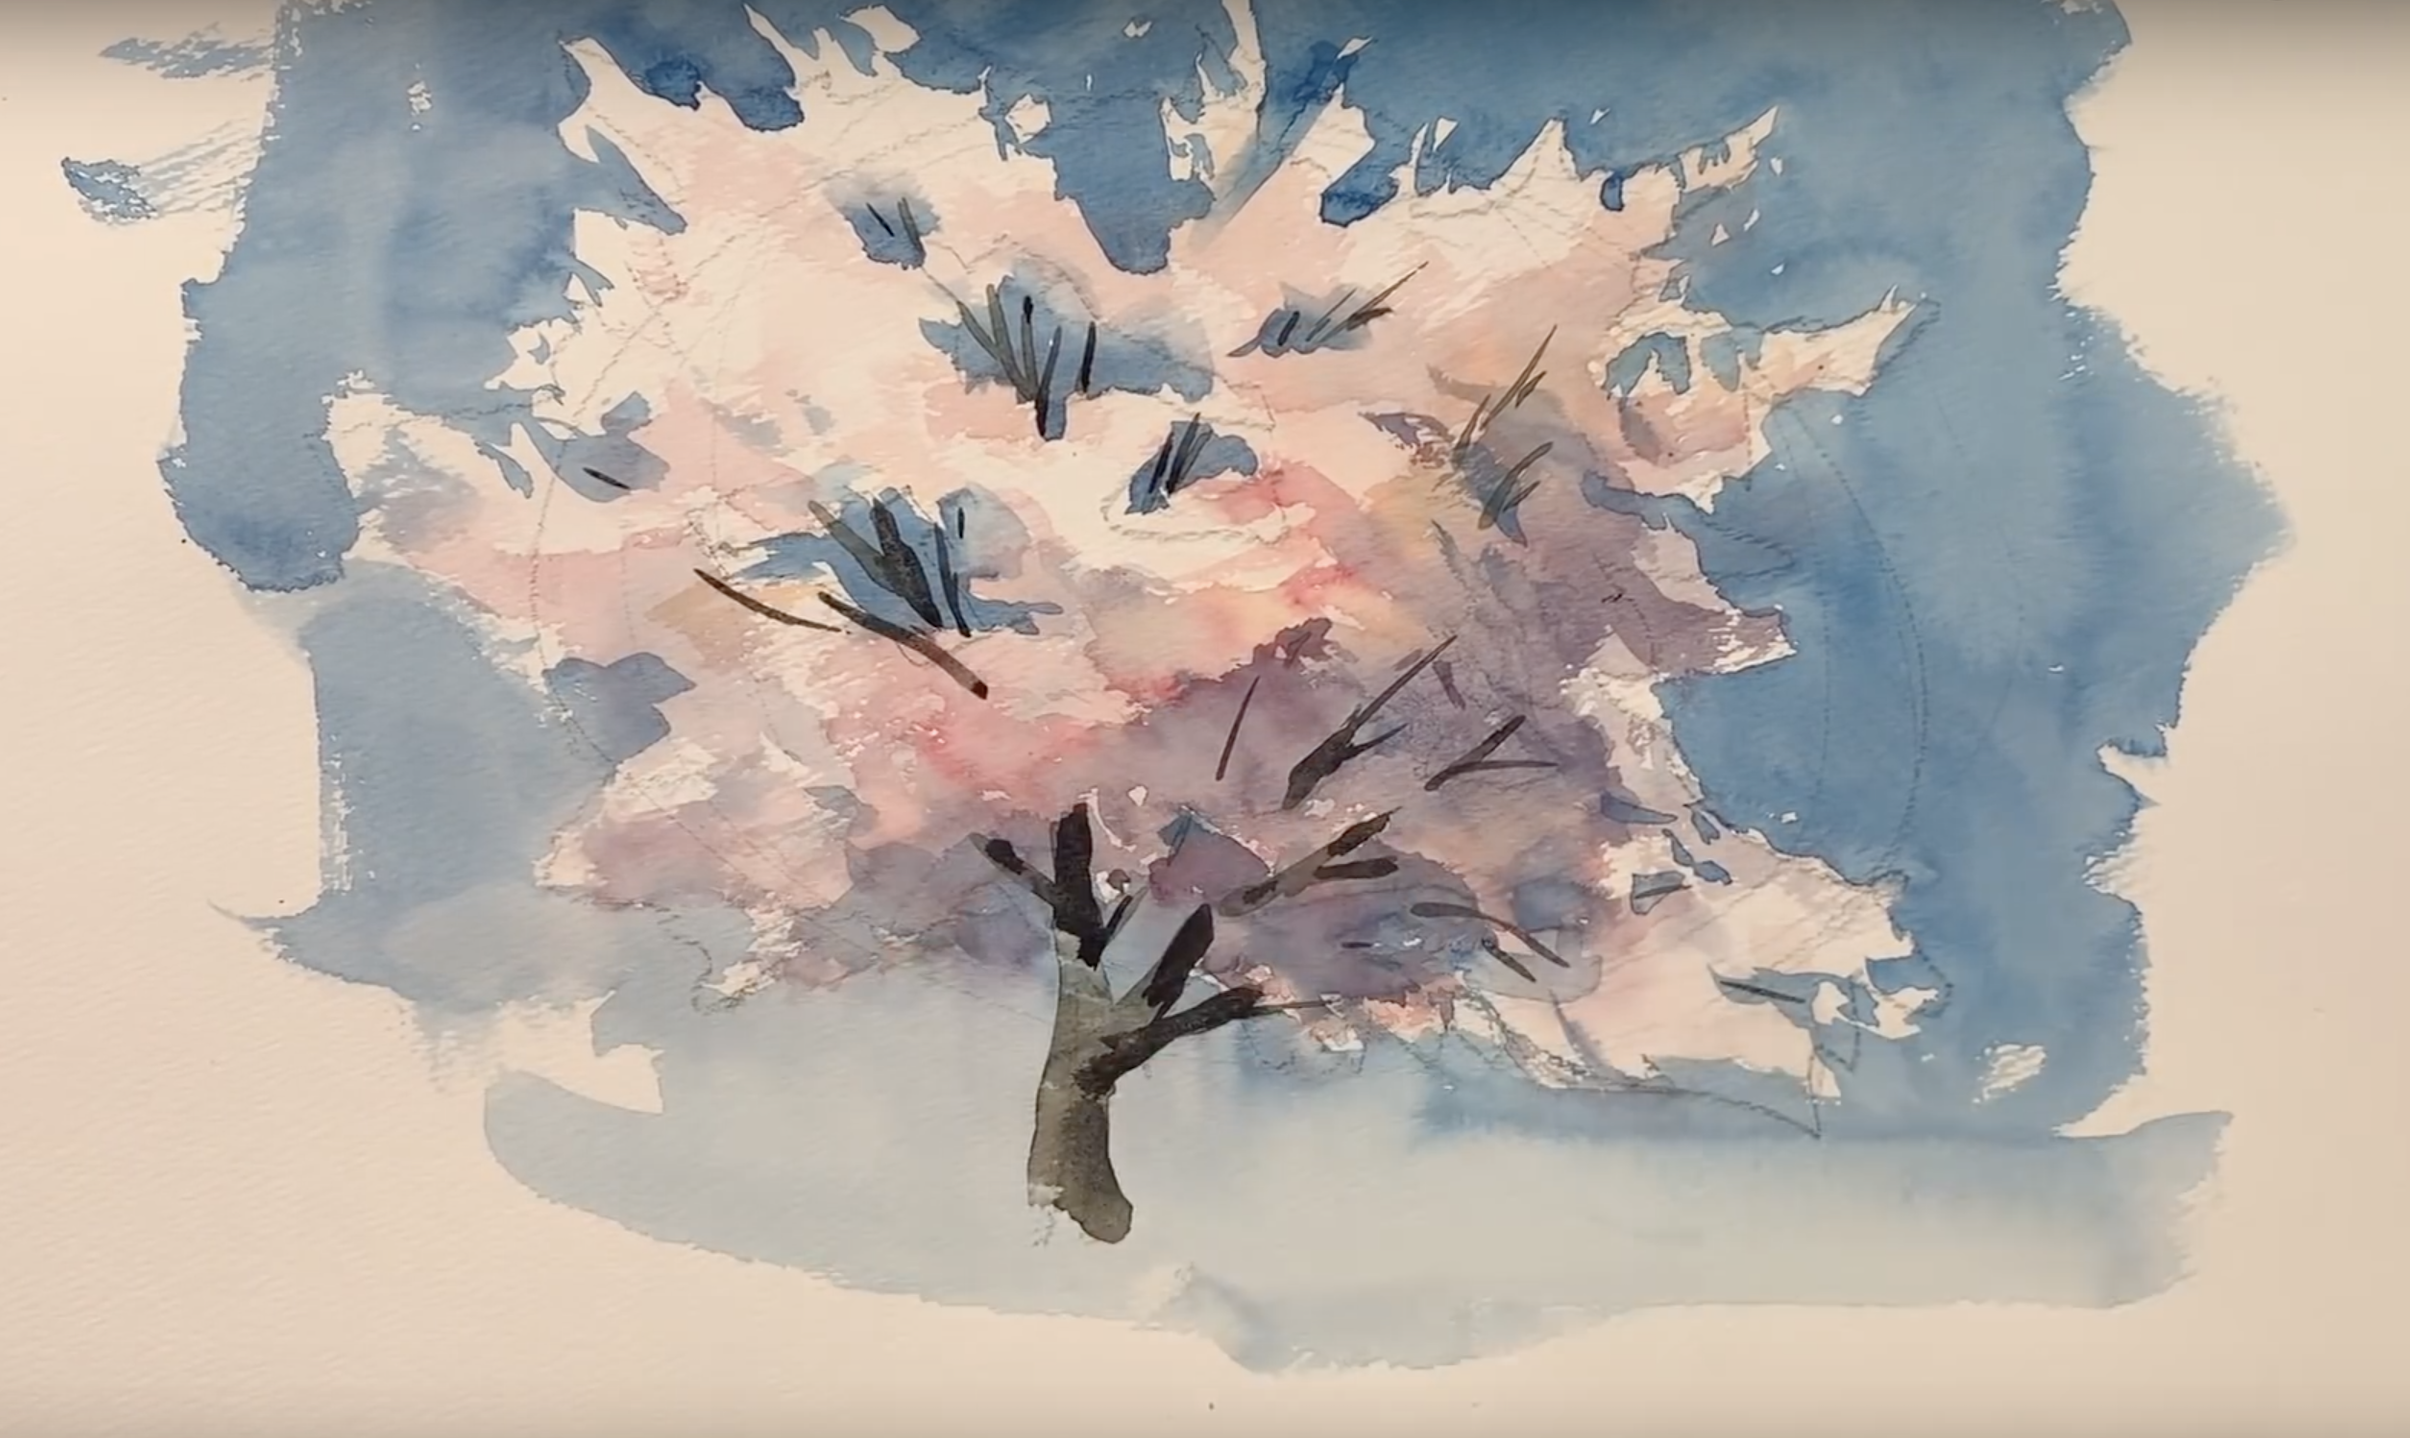
Step 4: Layer on More Colors on Your Sakura Blooms
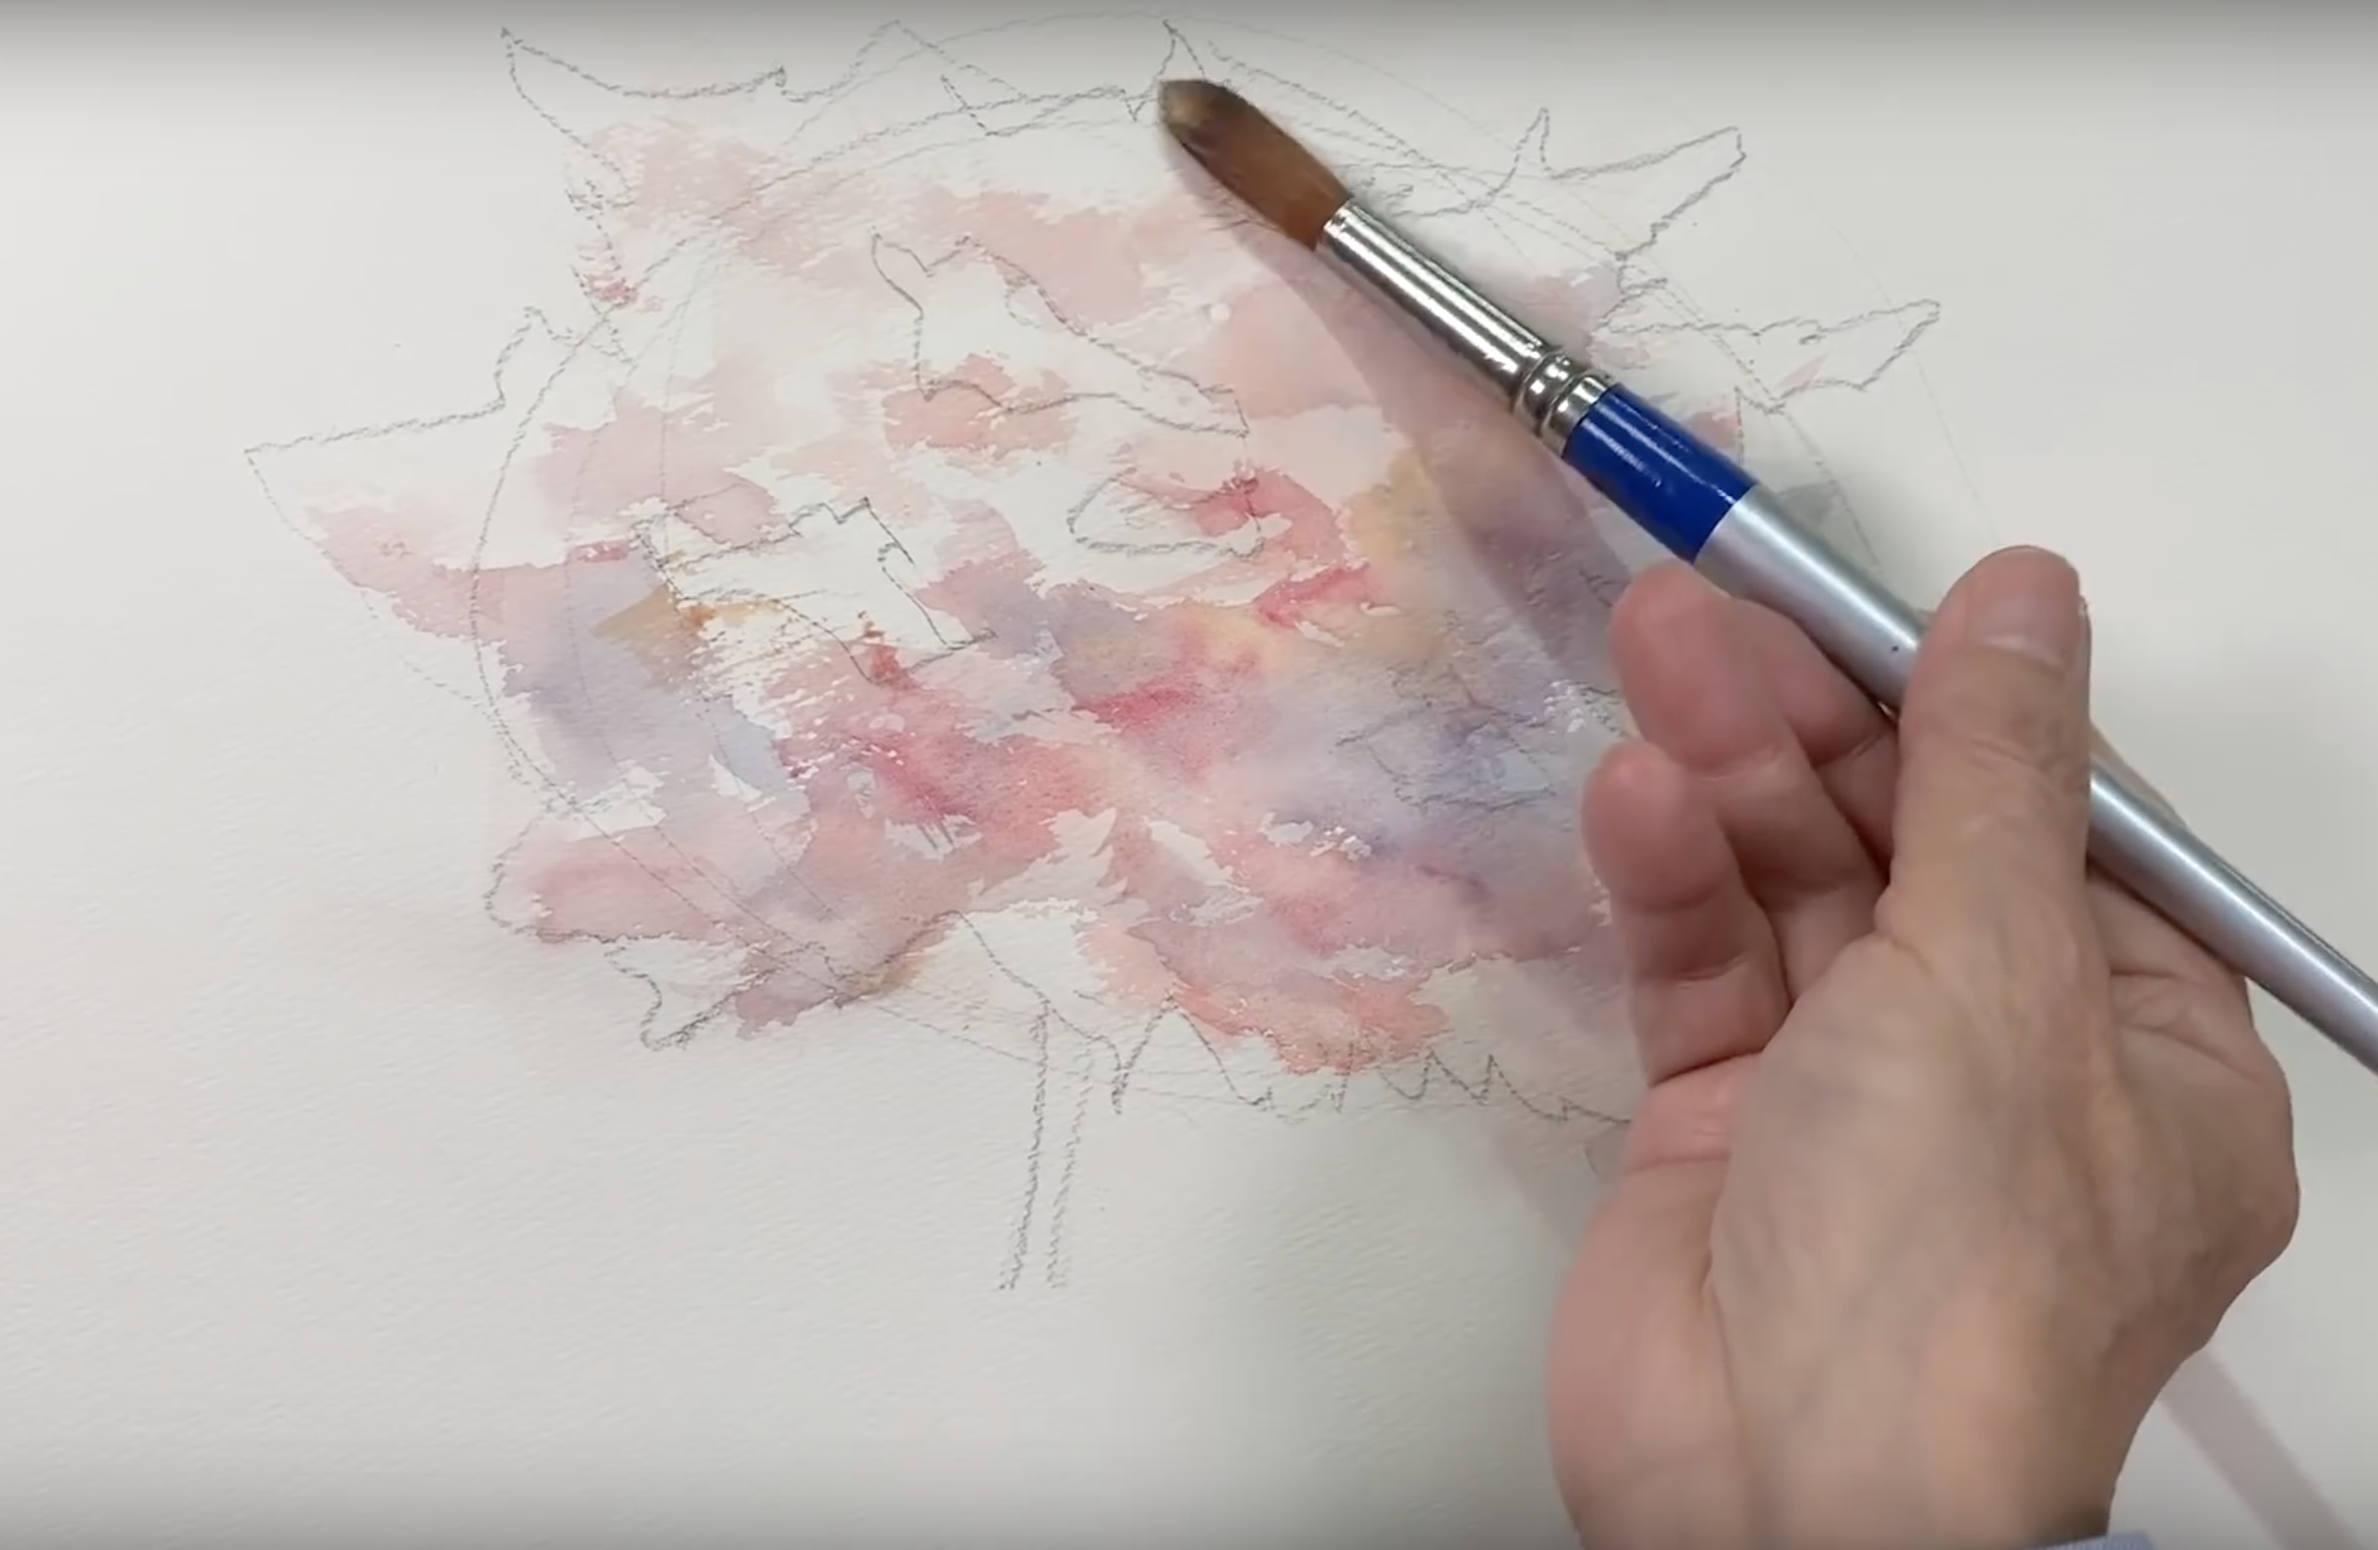
Create the same mixture of color, then do some layering and splattering. To do this, make sure you add just enough water to the paint and that the paper is completely dry so that you won't reactivate the first layer and have it blend with this current one you are doing. Then, gently tap the paint onto the center of the tree. You can also added a bit of Cadmium Yellow Lemon to the paint for variety, dabbing lightly for a softer feel. This second layer will give your tree painting added dimension, and will most definitely help make your tree look more natural.
Step 5: Emphasize the Shadow Tones of Your Tree Painting
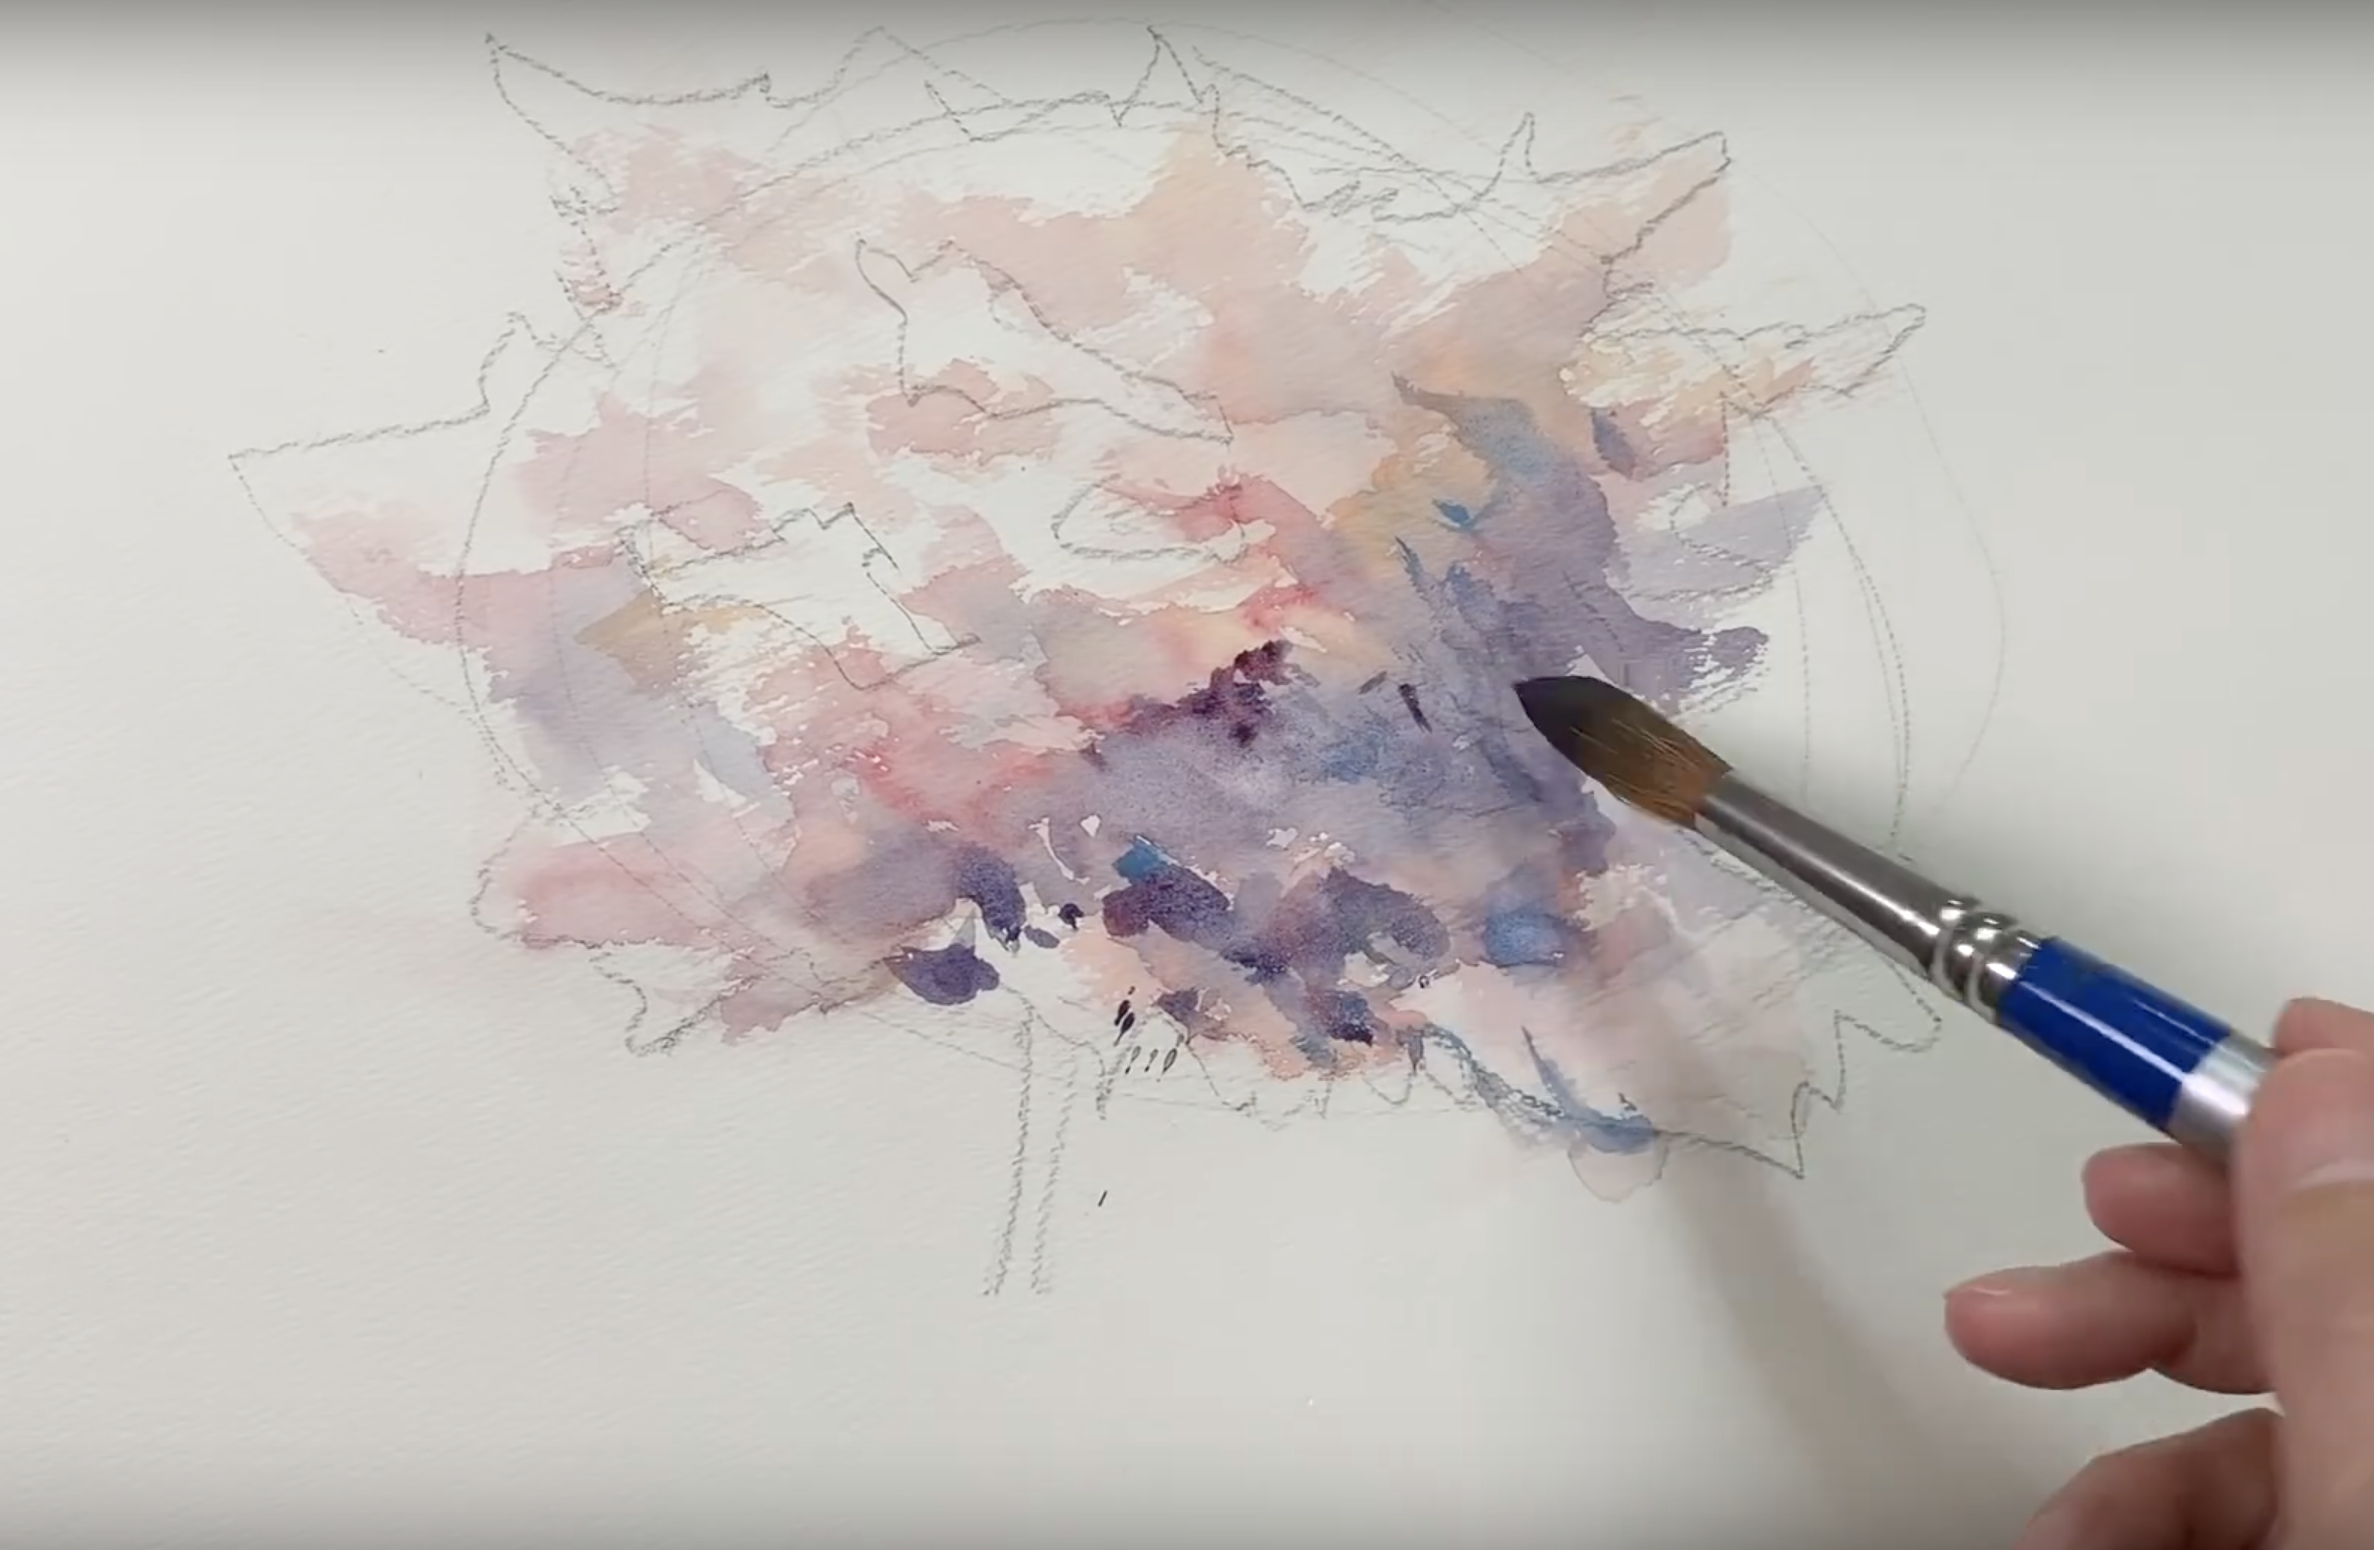
By mixing more red and blue paint, you'll get a deeper shade of purple. You can use this to paint the lower right section of the tree, where there is the least amount of light. Adding and emphasizing these shadow tones are essential as they will give dimension to your watercolor painting. Use light strokes and a tapping motion again to create layers of these easy watercolor techniques!
Step 6: Set Your Japanese Tree Against the Blue Sky
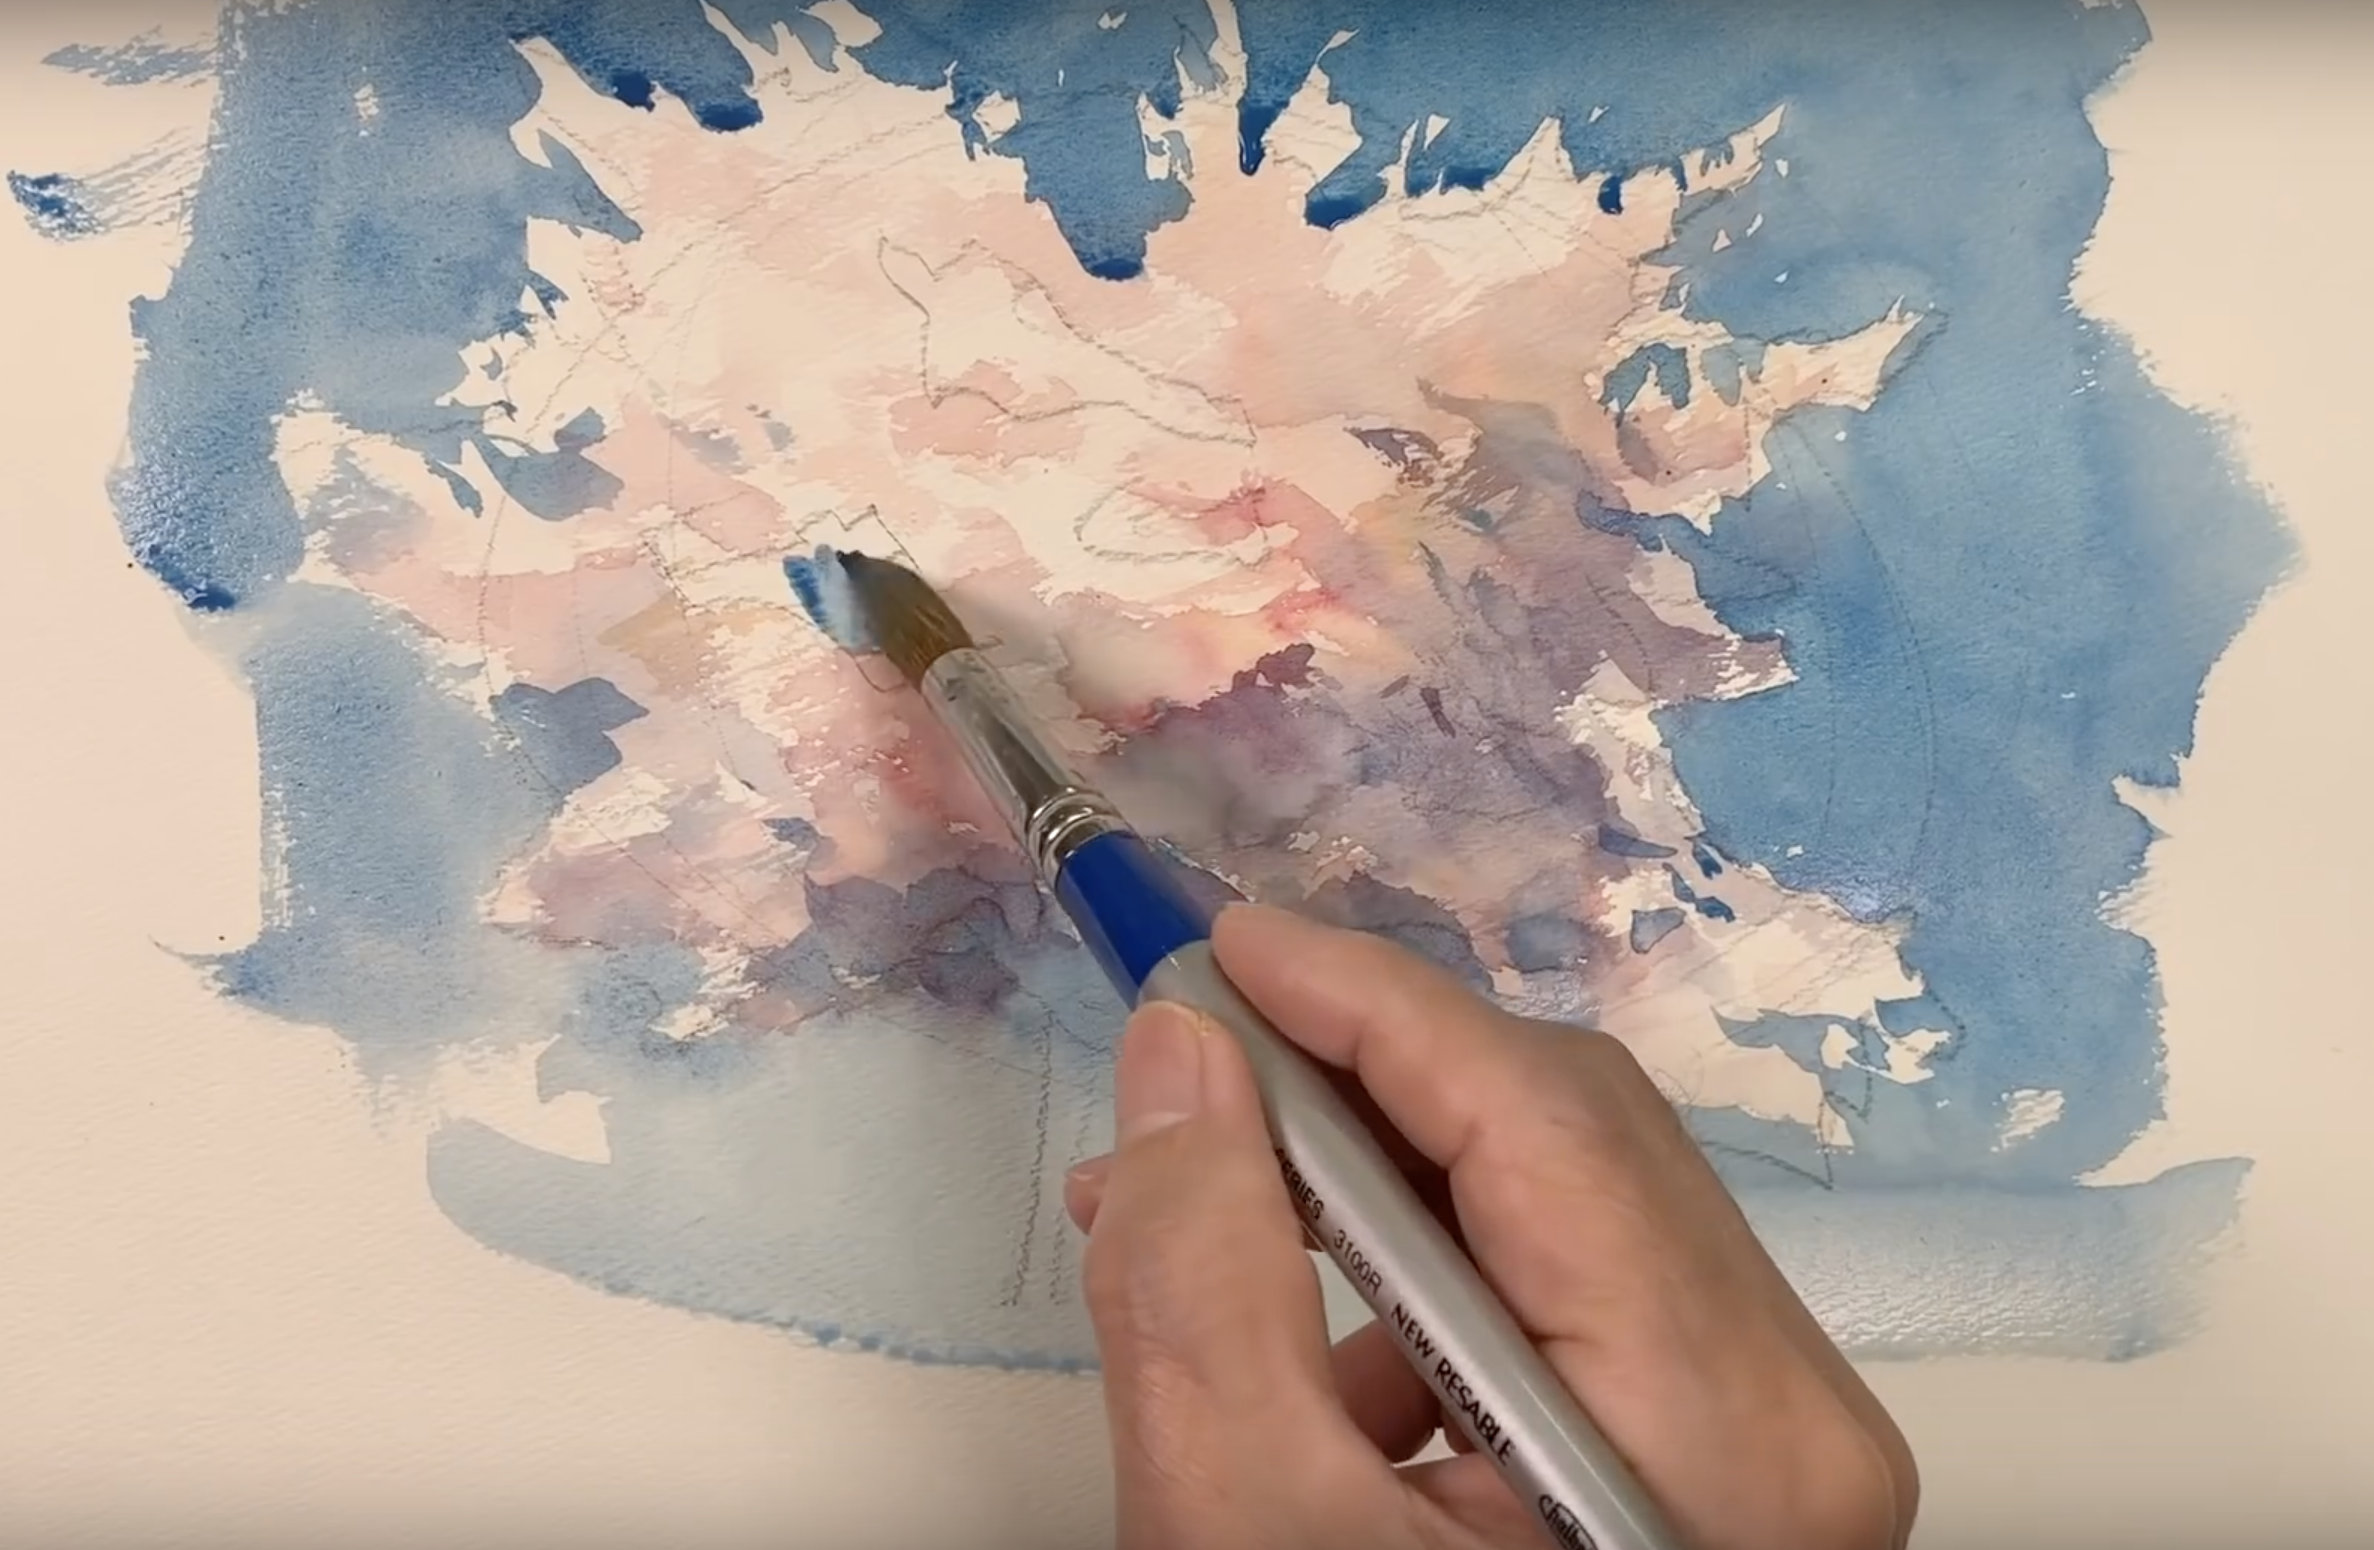
Once the flowery portion of your tree is done, you can paint in the sky, which serves as the backdrop of your tree painting. Using the wet-on-dry technique, paint on the Peacock Blue background. Use the blue to "cut" around the shape of the tree. But remember that you don't have to follow your original sketch for the tree! Remember, we used several easy watercolor techniques earlier to create a fluid and soft-looking sakura tree, so keep this in mind when you do the sky in order to maintain the fluidity and naturalness of the whole painting.
Step 7: Add the Branches and a Trunk
Fill in the "holes" in the tree with the same blue used for the sky, roughly following your sketch as you see fit. You can dry these quickly with a blow dryer before adding some small branches on top. To paint these branches, switch to a no. 8 round brush and add Burnt Umber to the Peacock Blue paint used previously. Next, "draw" in your branches and tree trunk, making sure the branches are radiating outwards from the main trunk. For a bit of texture, or in case of excess paint, use the edge of a toilet roll and lift off some of the paint from the trunk. To emphasize the shadow tones here, add Prussian Blue to your brown mixture, and add it to the shadow areas in the trunk and branches. Again, it doesn't have to follow your sketch too closely.
Step 8: Ground It By Using Several Easy Watercolor Techniques
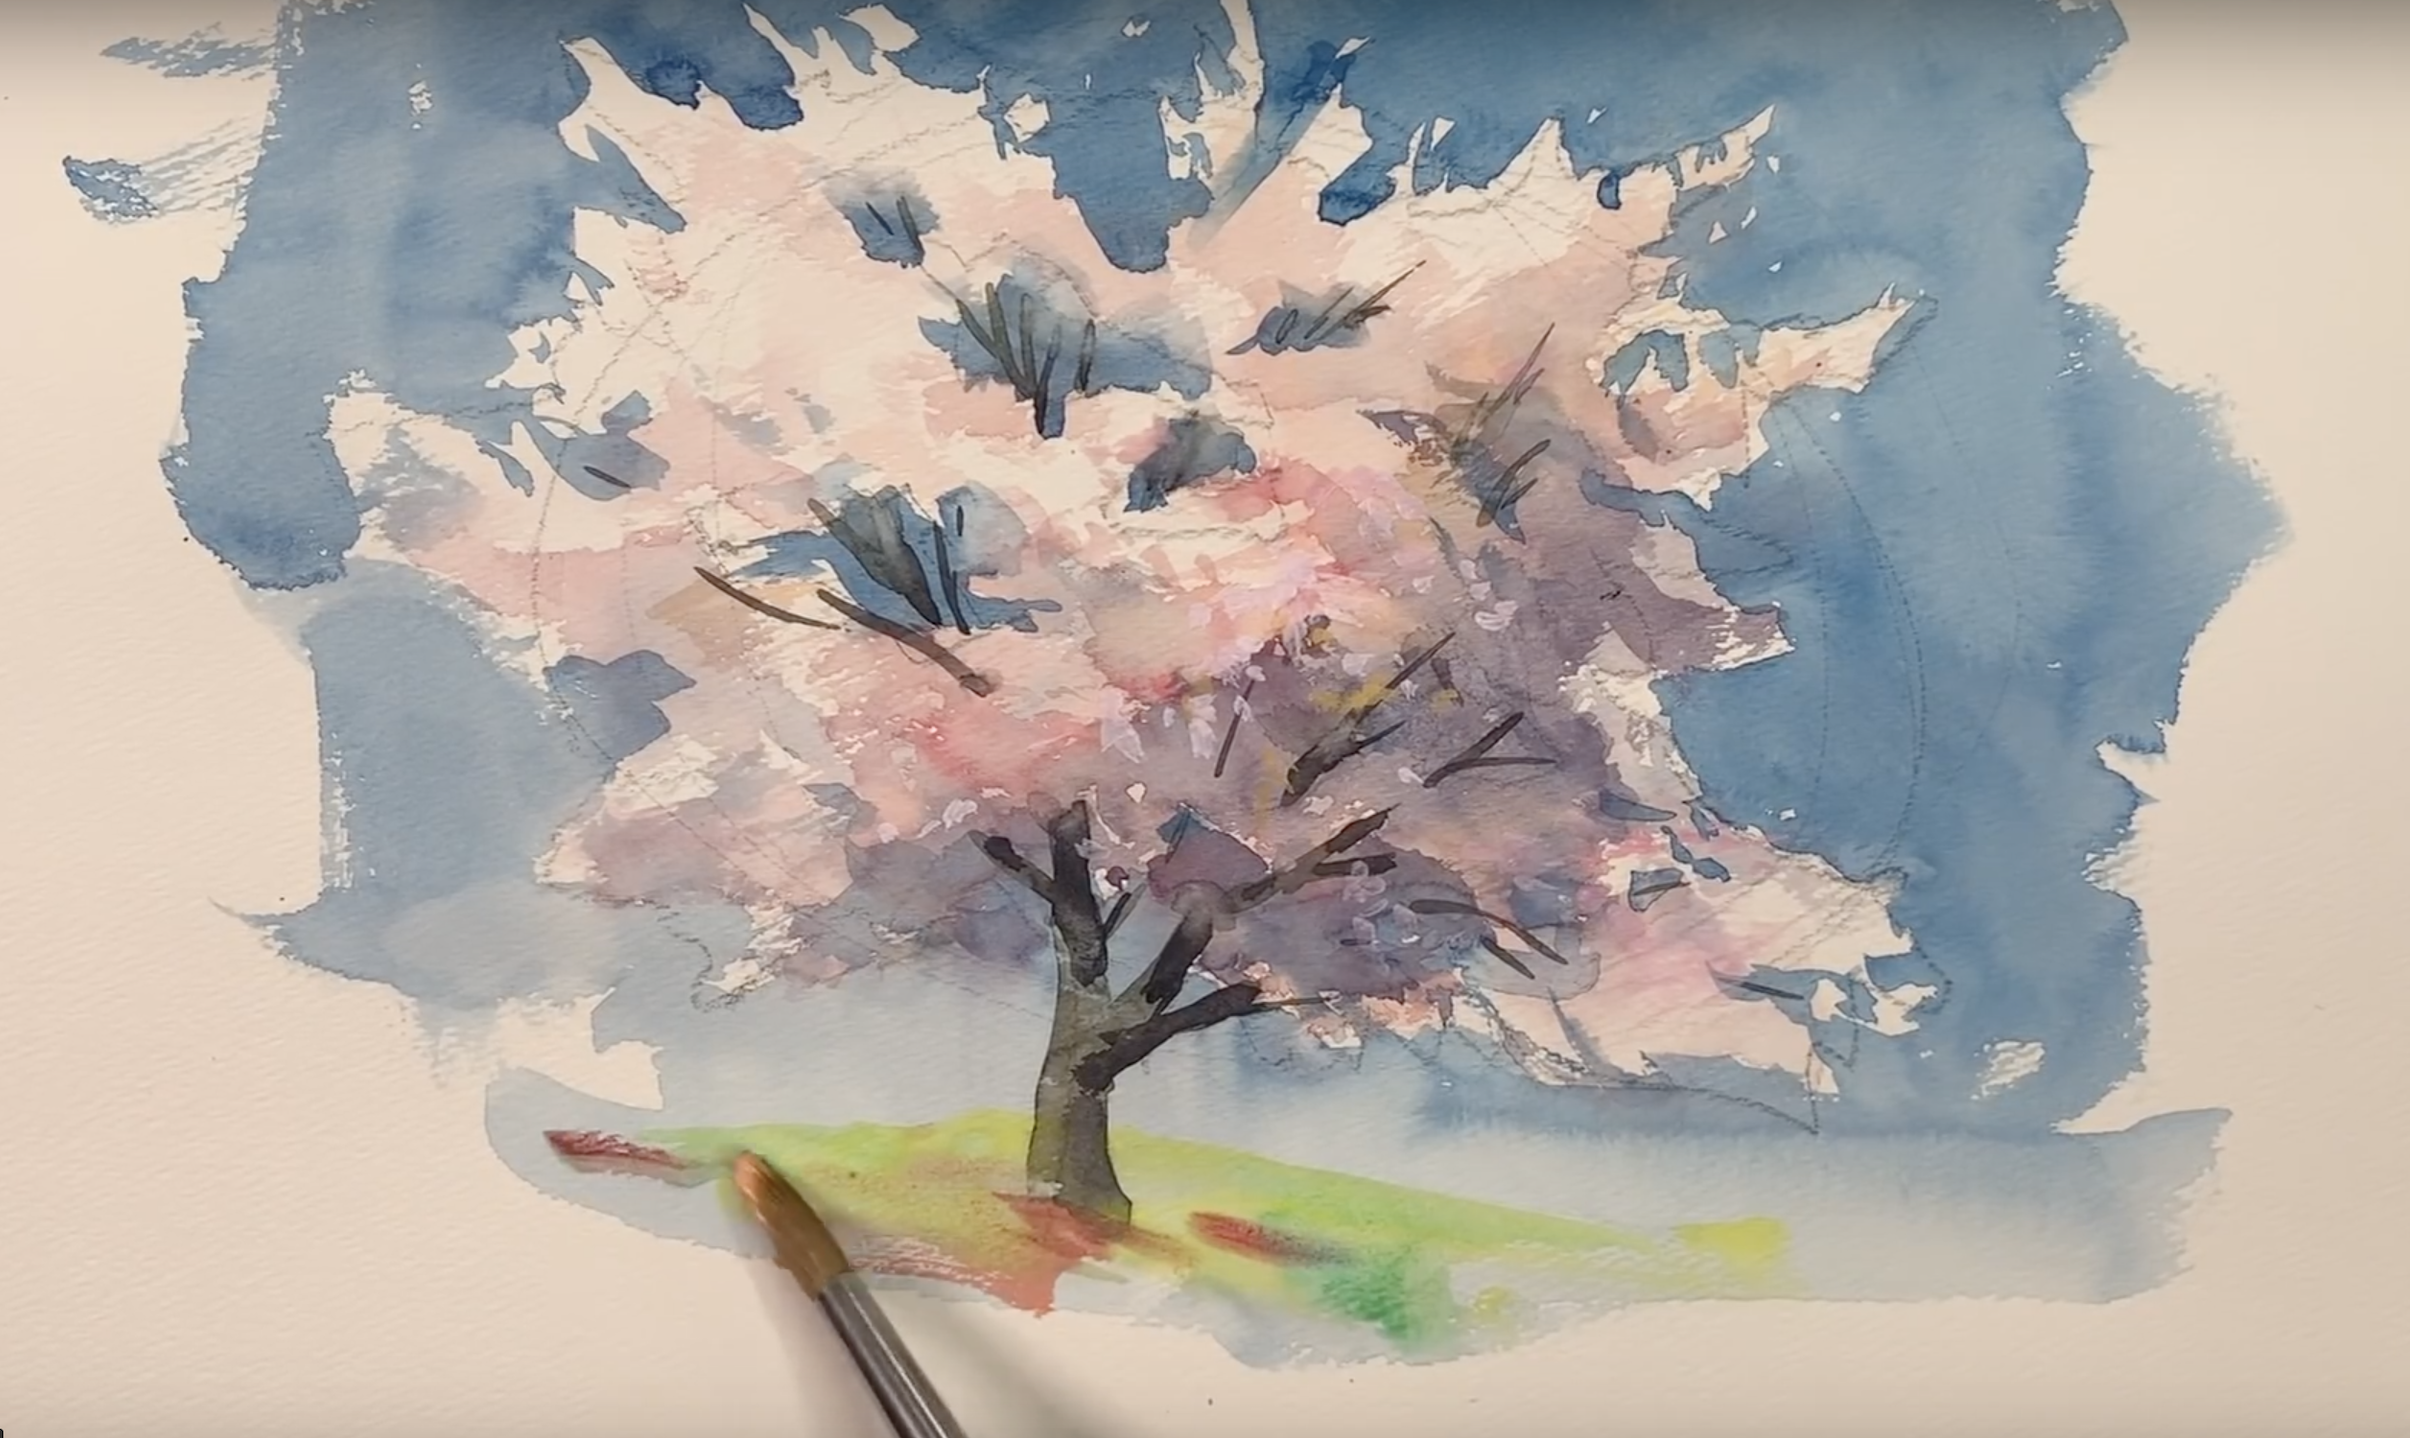
For the ground, use the vibrant colors of Cadmium Yellow Lemon and Cobalt Green to layer a few strokes in using both the wet-on-dry and the wet-in-wet techniques. Pro Tip: For a softer blend, adding wet paint to a wet surface - called the "wet-in-wet" technique - is perfect! Then, mix Jaune Brilliant #2, Brilliant Orange, and Crimson Lake, and brush the resulting color lightly on the ground to represent cherry blossom petals that have fallen to the ground. Finally, add a light sweep of diluted Indigo to illustrate the tree's shadow. And you're done! With just a couple of easy watercolor techniques, you can capture the ethereal beauty of springtime in Japan, or even Canada or the U.S.!
Thanks for sharing this video with us, Mr. Shibasaki.
If you'd like to view the video version of this tutorial, just click on the link below.
Don't forget to turn on the subtitles!


