Thinking about adding a bit of fun to your watercolor paintings? Experiment with these unique-looking watercolor textures to add that extra bit of sparkle to your next masterpiece! You'd be surprised at what you can create with items from around the house. Thanks for sharing your painting tips, Teela!
Materials Used In This Watercolor Texture Lesson:
- A sheet of Canson XL cold press watercolor paper (140lbs, size 9" x 12" divided into 4)
- 3 containers filled with 1½ cups of clean water
- Painting palette for watercolor paint
- Paper towels or a rag
- ½ teaspoon of table salt
- Bleach
- Glass pipette or eyedropper
- Plastic cling wrap
Dr Ph Martin's Hydrus Fine Art Watercolors
- Cobalt Violet
- Phthalo Blue
- Ultramarine
- Quinacridone Magenta
Brushes
- Round brush (no. 12)
- Round brush (x2, no. 10)
- Round brush (no. 6)
Step 1: Begin with the Basics
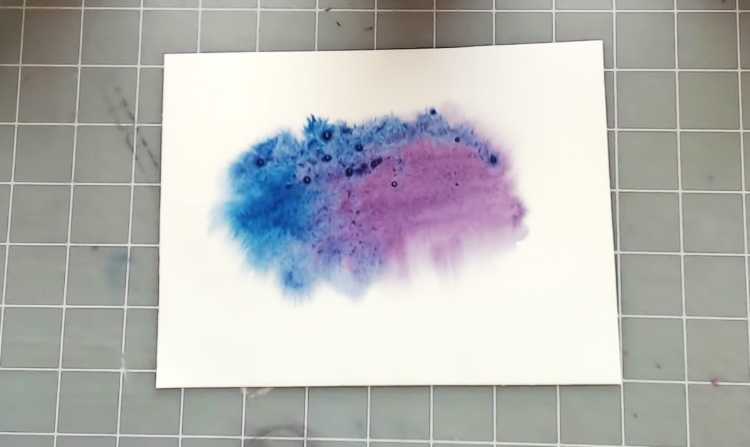 For this tutorial, we'll be learning how to paint watercolor textures in 3 exciting new ways. Before you begin, arrange your workspace so that you have the 3 containers of water within easy reach. For the purposes of this tutorial, it is best to keep your containers separate to prevent the different types of water from mixing together. However, you can reuse the first water container for rinsing out your brush, while the other two will be used for different techniques later on. Another thing to note is that you can use watercolor paint from tubes or pans if you don't have access to liquid watercolor. Just prepare the paint in your palette beforehand by diluting it with water. Now let's start with the basics - namely, a flat wash. First, wet your watercolor paper with a no. 12 round brush loaded with plain water. Next, load a no. 6 round brush with Cobalt Violet and lay down the paint onto the paper via the wet-in-wet technique (i.e. adding wet paint to a wet surface). Because the surface is wet, the paint flows freely onto the paper and has a soft-edged look. Add a layer of Phthalo Blue, allowing the paint to mix together naturally, then set it aside to dry. Once completely dry, the paint will have a flat, smooth finish. We will be comparing this piece to the textures you'll be learning next.
Step 2: A Sprinkle of Salt Water
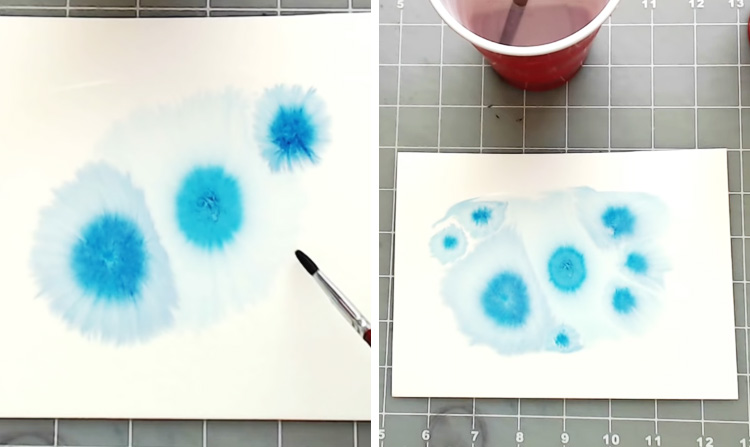 Now that you've warmed up with a basic technique, it's time for some experimentation! Add ½ teaspoon of table salt into your second container of water and stir together with the first of your no. 10 round brushes. Once the salt crystals have completely dissolved, lay down a wash of this saltwater onto a fresh sheet of watercolor paper, then rinse out your brush. Try not to leave your brush soaking in the saltwater for too long because this might ruin its bristles. Switch back to the no. 8 round brush and load it with Phthalo Blue. Use the tip of the brush to dab dots of paint onto the wet surface, working wet-in-wet, then sit back and watch that blue tint bloom! Try to spread out the dots of paint so that they don't interfere with each other too much. Once you are satisfied, let the paint dry - and voila! You have learned the first of 3 unique watercolor textures!
Step 3: A Few Drops of Bleach
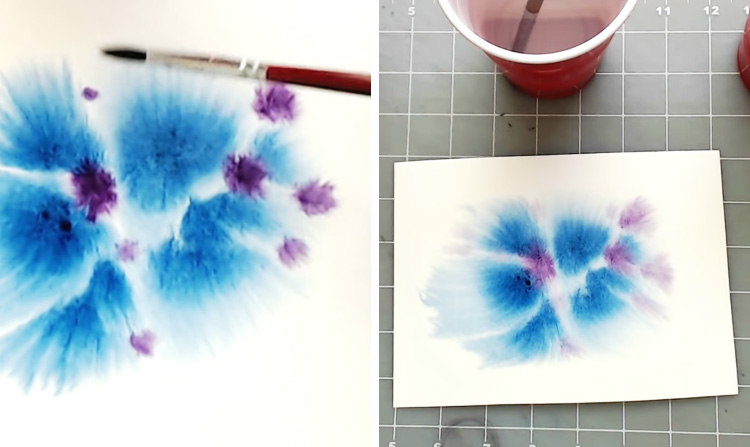 Onto the next painting tip! Take your third cup of clean water and use a glass eyedropper or pipette to add five drops of bleach to it. Blend thoroughly with your second no. 10 round brush. It's important to use a fresh brush for this so that you don't cross-contaminate your water sources. Bleach is a strong solution that isn't normally used for this sort of thing so please remember to handle it with care! Now, like in the previous step, lay down your bleach and water mixture onto a new sheet of watercolor paper. Load the no. 6 round brush with Phthalo Blue and, again, dab drops of paint into the wet surface via the wet-in-wet technique. To add more fun to this watercolor painting, drop in some Cobalt Violet as well. Don't forget to rinse out and set aside your brushes after you're done; leaving them to soak in the water containers (especially the ones mixed with salt and bleach) can easily ruin the bristles if you're not careful! Even while wet, it's easy to see that the paint reacts in a different way from the previous texture. Exciting, right? Set this one aside to dry because it's time to tackle the last painting tip!
Step 4: A New Use for Plastic Wrap
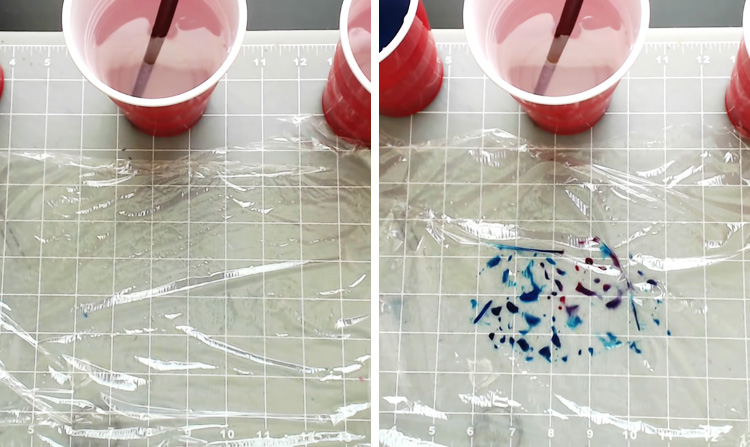 This one will be a bit different from the other watercolor textures. Ready to try it out? Here we go! First, take out a sheet of plastic wrap that's roughly larger than the watercolor paper and lay it out as flat as possible on your workspace. Next, take the no. 6 round brush and drop clean water into the plastic wrap, concentrating most of it in the central area. Once that's done, load the brush with Phthalo Blue and drop it into the plastic wrap, allowing it to mix with the water that has beaded up on its surface. Do the same with Quinacridone Magenta and Ultramarine, concentrating the paints on opposite sides of the paint puddle to give it a more interesting look.
Step 5: Creating Watercolor Textures With Interesting Edges
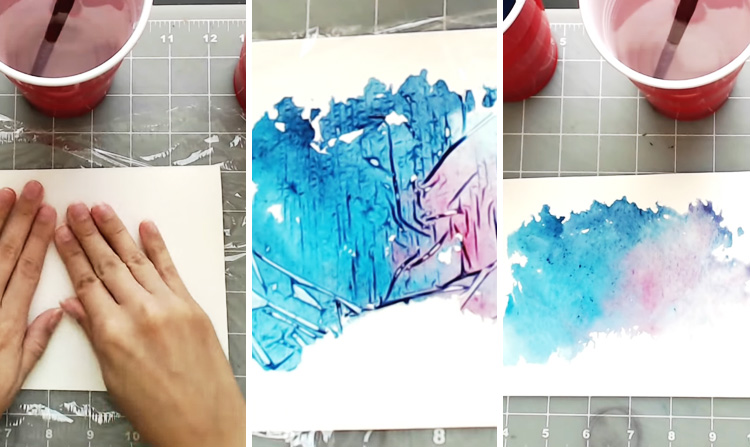 So, you have a piece of plastic wrap with a puddle of different colors in front of you. What happens next? Traditionally, painting with watercolors means adding paint to paper, but in this case the order has reversed. Now that you have your paint laid out in front of you, the next step is to add the paper! Lay your watercolor paper directly on top of the paint and smooth it out gently with your fingers. If any paint squeezes out from the sides, clean it up with a rag or paper towel. Next, flip the paper around so that the plastic wrap side is now facing up. You can massage the plastic wrap to manipulate the air bubbles along the surface, but try not to mess around with it too much - doing so may cause you to lose the interesting edges that this particular texture is capable of making. When you are satisfied with what you have, simply pull the plastic wrap completely off the page and allow the paint to dry. Now give yourself a pat on the back for a job well done because you have just learned how to create three new watercolor textures! If you'd like to see how Teela does them, here's her video:


