Watercolor calligraphy is not as intimidating as it looks. In fact, it can be quite fun! In this YouTube tutorial, we'll take you through a few quick techniques that you can try out to improve your hand lettering skills. Thanks for sharing your tips, Jetpens!
Materials used:
- Canson XL Mix Media Pad (98lb, 9" x 12")
- A container of water
- A plastic mixing palette
- Artist's or masking tape
- Higgins Eternal Black Ink
- Molotow GRAFX Masking Liquid Pump Marker (2mm or 4mm)
Kuretake Gansai Tambi Watercolor Palette (36 color set)
- White
- Deep Violet
- Pale Aqua
- Blue
- Bluish Gold
- Gold
- Deep Pink
- Wine Red
- Ever Green
Brushes
- Royal & Langnickel Zen Watercolor Brush Series 83 round brush (no. 6)
- Pentel Aquash Water Brush (medium)
Step 1: Preparing Your Colors
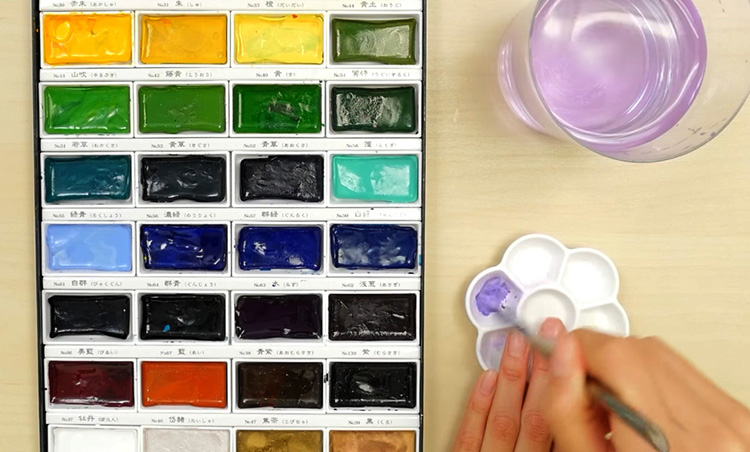 The nice thing about watercolor calligraphy is that you don't need many tools to try it out. You just need paint, a separate palette to mix your colors in, a round brush, and thick watercolor paper. To prepare your colors, add warm water to the paint and allow it to sit for a minute or so. This will soften up your paint and make the pigment as bright as possible when you use it later. Add the colors you want to use to your palette, and dilute with water until it reaches the consistency of milk. You can also mix colors into the hues you want at this time. In the YouTube video, for example, the artist decides to make a pale purple mixture by mixing together White and Deep Violet.
Step 2: Writing With Your Brush
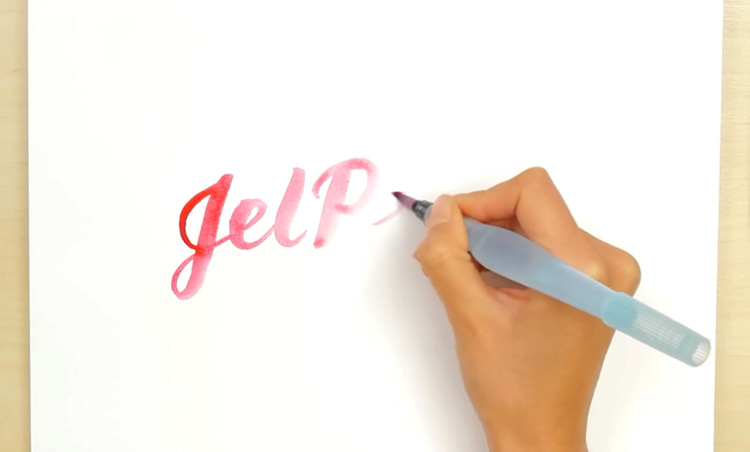
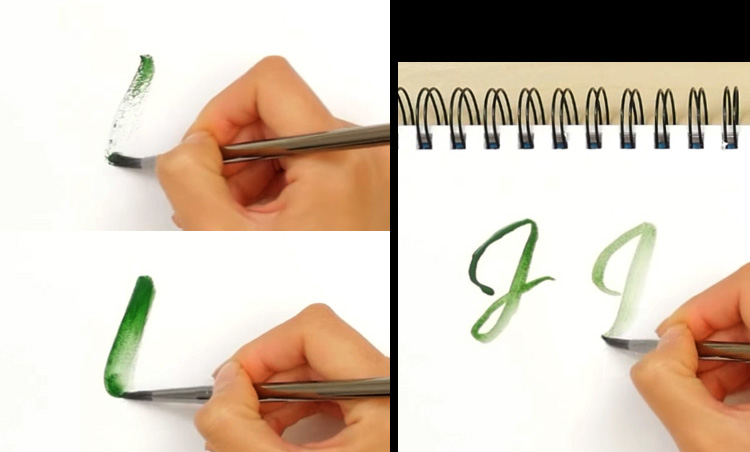
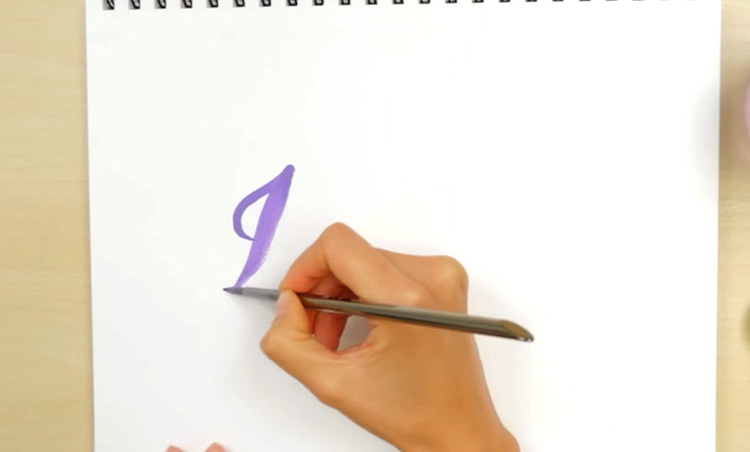 Load your round brush by dipping it into the paint and twisting the bristles around to ensure it gets an even coating. If you run out of paint in the middle of doing your hand lettering, you can always reload the brush and continue from where you stopped. When you start writing, vary the thickness of your strokes by controlling how much pressure you apply to your brush. As a general rule, keep your downstrokes thick and upstrokes thin.
Step 3: Multicolored Watercolor Calligraphy
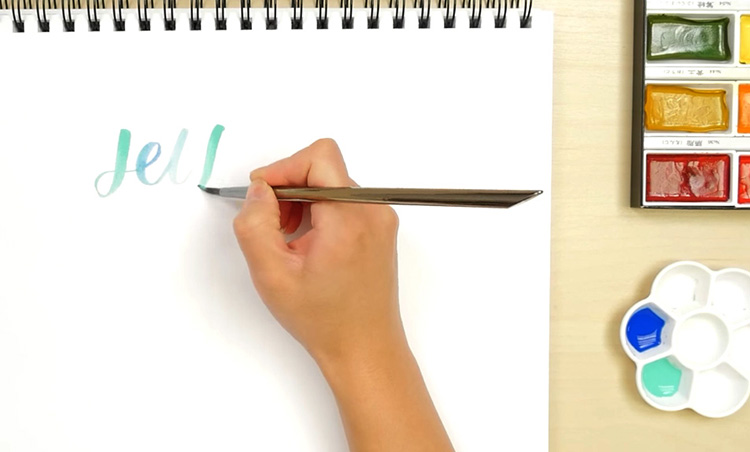 Guess what? You don't have to limit yourself to one color for this technique. There are several ways you can add more than one color to your watercolor calligraphy experiments, and here's one: First, start hand lettering with one color. In the YouTube video, the artist chose to begin with Pale Aqua. Next, when the paint begins to run out, pick up another color (in this case, Blue) and continue where you last left off. Try to work quickly while the paint is still wet so that the colors blend into each other as you lay down the paint.
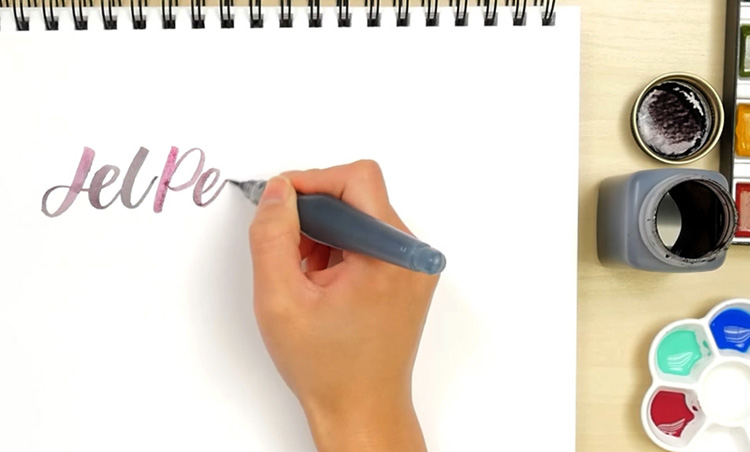
Step 4: Dabbing Colors Into Water
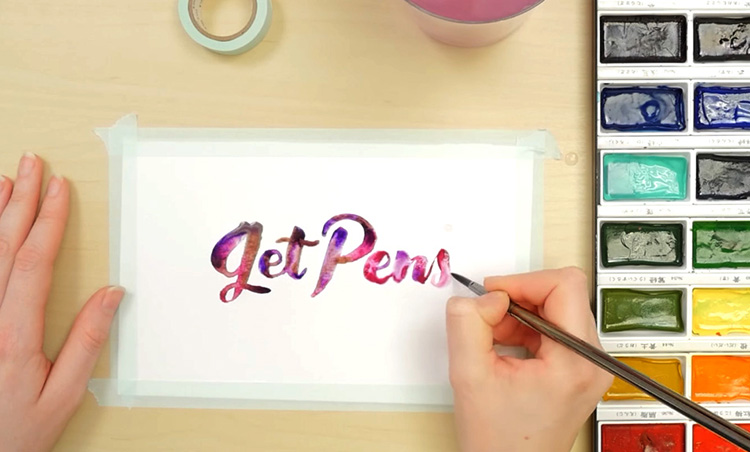 The second method of adding more colors to your calligraphy is this: First, do your hand lettering with a clean brush loaded with water. While it is still wet, dab paint into it and allow the different colors to blend into each other as they dry. To recreate what the artist does in the YouTube video, use Pale Aqua, Bluish Gold, Gold, Deep Pink, and Wine Red. For both techniques, you can add as many colors as you like without having to worry about cleaning out your brush in between colors.
Step 5: Fading Out With A Water Brush
 Now let's try something different with a new tool: a water brush, which is a type of brush that is attached to a water reservoir. A water brush allows you to add water to the brush bristles by squeezing the reservoir. It is often used for its portability because it replaces the need for a water container. Load the brush bristles with paint, as usual, and begin writing with it. Instead of reloading it with paint when the color runs out, continue to write while adding water via squeezing the reservoir. This will cause the colors to gradually fade towards the end of the word.
Step 6: Mixing Ink with Watercolors
 Here's another fun water brush technique you can try! Instead of loading your water brush reservoir with water, use diluted black ink. Be sure the ink is water-soluble so that it doesn't clog up the brush. As you do your calligraphy, dip the brush in color (the artist uses Wine Red in this tutorial) and continue writing. The color will come out in a subtle way as you squeeze ink into the brush bristles.
Step 7: Negative Space Watercolor Calligraphy
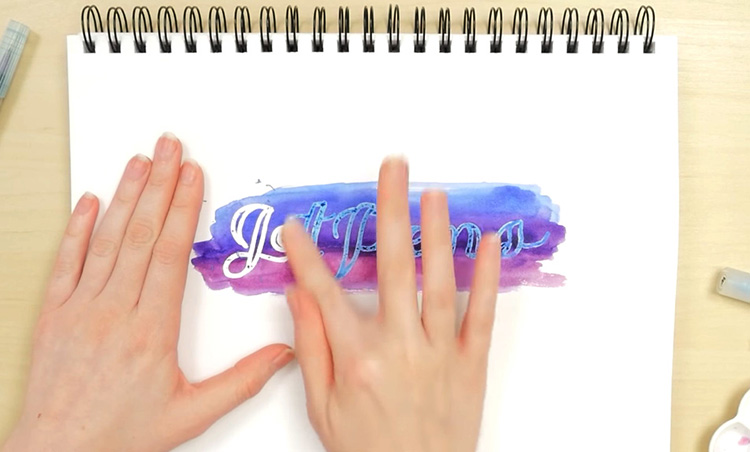 The last technique you can try involves using another new tool: a masking fluid pen. This pen produces a liquid that solidifies when applied and can be rubbed off afterwards. It is often used to cover up small areas in a painting that you want to paint later after laying down a wash. In this step, use the masking fluid pen to do your hand lettering. Once it dries, pick up a round brush and lay down a wash over the masking fluid. In the tutorial, the artist does a graded wash by laying down a wet layer of Blue over half of the calligraphy, and continuing with Wine Red. Once the wash has dried, peel off the masking fluid by rubbing if off gently with your fingers.
Step 8: Tips and Tricks
 Here are some tips to keep in mind as you practice these techniques: First, if you're having trouble creating solid lines, the issue could be that your paint is too thick. The solution for this is simple: add water to your paint. As mentioned in step 1, make sure your paint is diluted to a milk-like consistency. Second, if the trouble is in creating smooth, flowing lines, consider adjusting your grip on the brush. Holding your brush closer to the tip will give you better control over your lines. And that's it for this watercolor calligraphy tutorial! If you want to watch these techniques in action, here's Jetpen's video:


