If you've run out of ideas, here's a fun one: let's create an easy flower painting with a beginner technique cooked up by Jay Lee! In this tutorial, we'll be using an ordinary cosmetic tool for a quick watercolor exercise with great results. Thanks for sharing such a neat trick, Jay!
Materials used:
- A sheet of Saunders Waterford (190g to 300g/m²), Arches Aquarelle (185g/m²), or any hot press watercolor paper
- ShinHan Watercolor Aluminum Palette A30
- A container of water
- Paper towels or a rag
- 3-4 packs of cotton swabs
- Rubber bands
ShinHan Professional Watercolors
- Red
- Red Violet
- Violet
- Red Ochre
- Emerald Green Hue
Brushes
- Round brush (no. 6)
- Round brush (no. 12)
Step 1: Preparing your Painting Tool
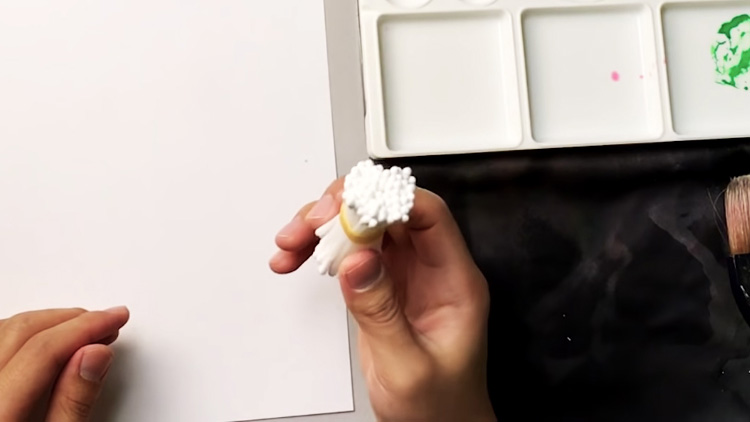 Cotton swab bundles are an important tool in creating this easy flower painting. To make one, grab a handful of cotton swabs and hold them together with a rubber band. Wrap the rubber band as tight as possible so that none of the cotton swabs come loose. Make sure that the cotton swabs are more or less of even height by lightly taping one side on a flat surface. You can also vary the size of the bundle.
Step 2: Preparing your Paint
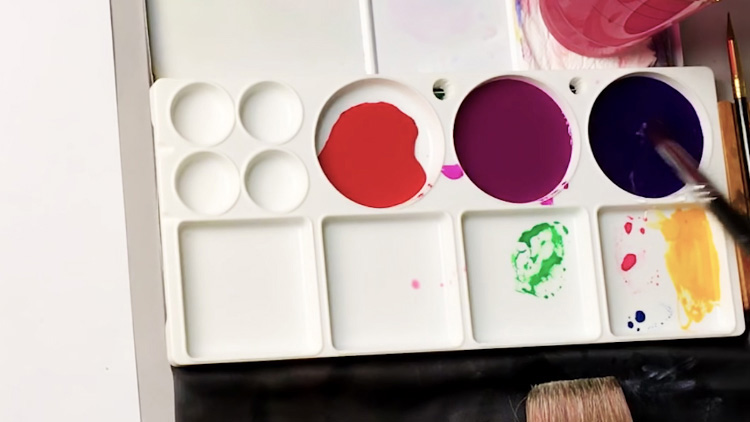 The next thing you need to do is prepare your paint. Squeeze out Red, Red Violet, and Violet onto separate wells in your palette, then add water into each one. Use a paintbrush to mix the paint and water until the paint is evenly diluted. Remember to rinse out your brush before you mix the next color to keep your colors pure.
Step 3: Loading the Cotton Swab Bundle
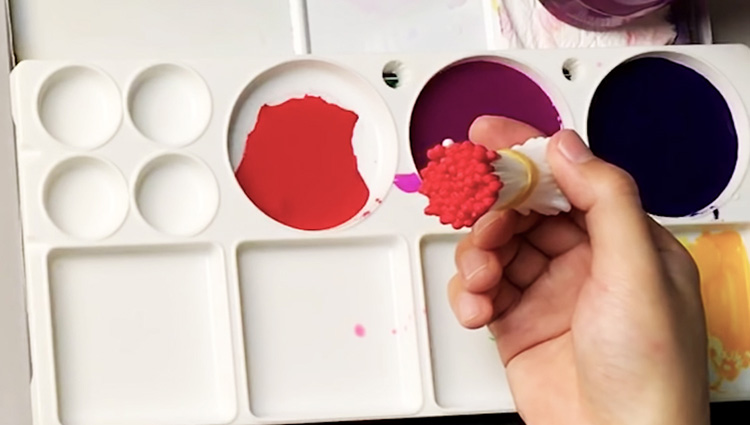 Take a cotton swab bundle and load it with Red. Do this by pressing one side into the paint until the cotton tips have absorbed a decent amount. You can reload your cotton swab bundle this way throughout your painting process. Remember to use one bundle per color to avoid polluting your colors.
Step 4: Laying Down the First Layer
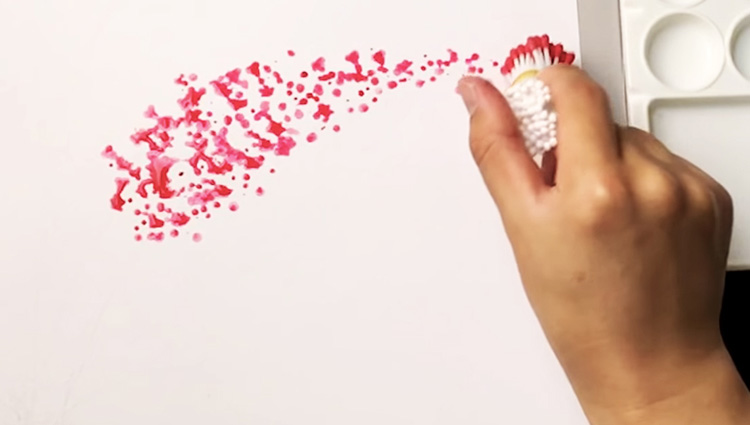 Now it's time for the fun part! Lay down the first layer by dabbing your loaded cotton swab bundle onto your paper. Your makeshift tool will produce a unique dotted texture that you can play with to make an easy flower painting. To achieve the raindrop-like form, simply change the way you hold the cotton swab bundle. If you hold it vertically, you can cover a lot of space, so do this for the body of the flower. To create the tapered tip switch to a diagonal grip and use the sides of the bundle. This will give you narrow coverage and more control. Keep in mind that the amount of pressure you apply will also give you different effects to play with. More pressure will give you darker, bigger dots, while a lighter touch will give you softer, smaller dots.
Step 5: Building up Colors
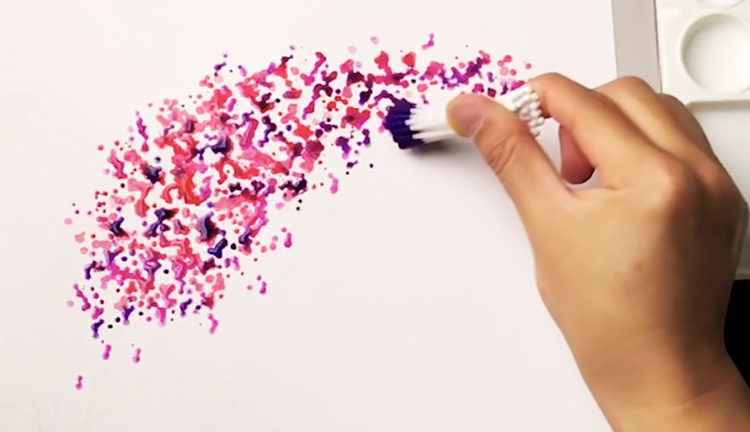 Pick up another cotton swab bundle and load it with Red Violet. While the first layer is still wet, dab it onto the paper so that the two colors blend into each other. Keep the pressure light to prevent the Red Violet dots from blending with the Red dots completely. Once that layer is finished, add a third layer of color with Violet, also working wet-in-wet but using a smaller bundle to cover a smaller area.
Step 6: Adding a Second Watercolor Flower
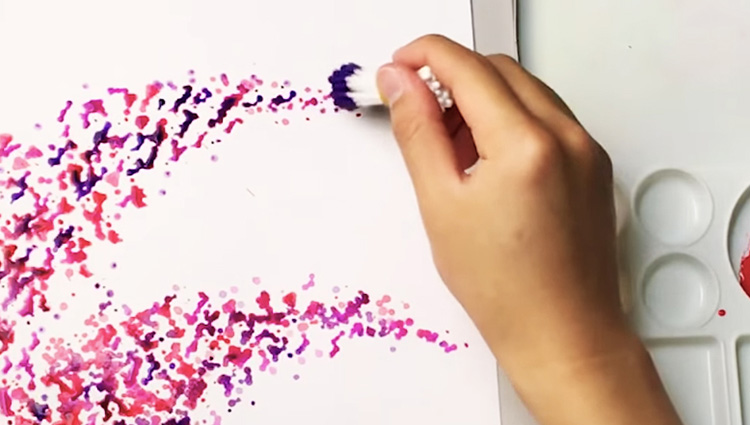 Now that the first flower is finished, let's give it a companion! You can repeat steps 3 to 5, positioning this new watercolor flower above the one you just made. The best part about this beginner technique is that you don't need to be overly careful about where you put your paint. Since both flowers don't have a defined outline, it's okay to let them blend together where they overlap!
Step 7: Drawing the Stems
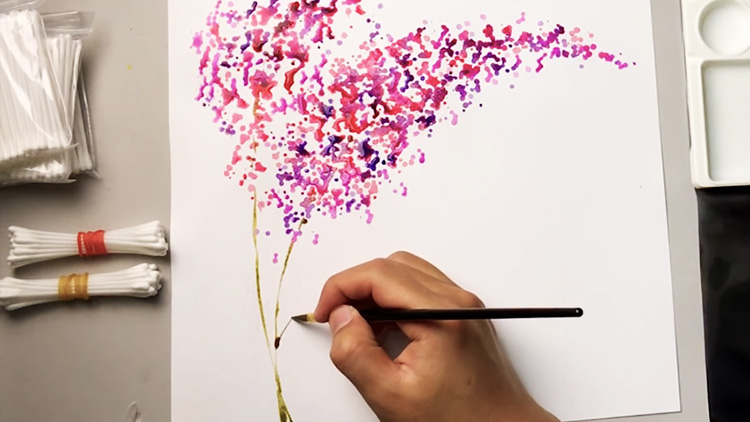 We're almost done, so let's add a few details to tie this easy flower painting together. Pick up a no. 6 round brush and mix together Red Ochre and Emerald Green Hue. With the tip of your brush, lightly draw in the stem of each flower. Extend the stem into the base of the flower by adding small dabs of your green-brown mixture into the reddish dots. This creates the effect of the stem peeking out through the flower petals. Finally, add smaller stems that branch out diagonally.
Step 8: Painting Tapered Leaves
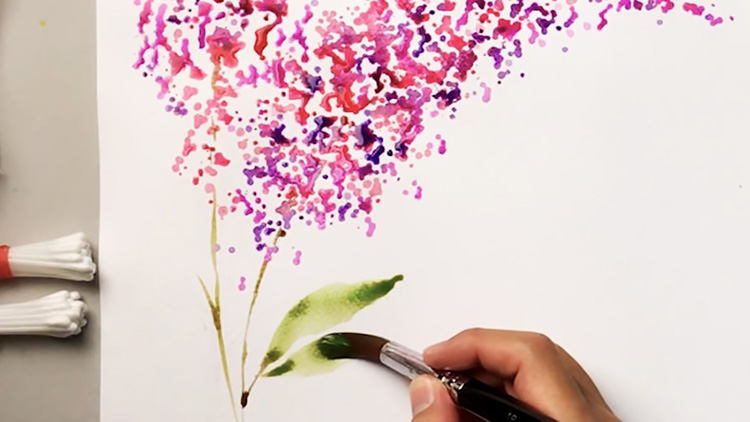 Now for the final element: the leaves! Switch to a no. 12 round brush and add more Emerald Green Hue to strengthen the green tint. Paint the big leaf in front by using a brushstroke that tapers off at the edges. To do this, start the stroke with your brush tip, apply pressure to make the stroke wider in the middle, then ease off the pressure at the end. Add the other half of the leaf in the same manner, and remember to leave a line of white space in the middle to indicate the center of the leaf. For smaller leaves, you only need to use the tapered edges brushstroke once. Don't forget to join the leaves to the stems via the wet-on-dry technique. And there you have it, an easy watercolor flower painting created with a simple, makeshift tool! If you want to see Jay demonstrate this beginner technique, here's his
tutorial video:


