Having trouble painting the complexity of a whole tree? We found this watercolor technique by Leonardo Pereznieto for splatter-painting a beautiful cherry blossom tree. It's fun and beautiful. What more can you ask for? Thanks Leonardo for sharing your techniques with the world!
Materials used for this watercolor technique:
- Arches Watercolor Paper (hot press, 140lb, 10" x 14", 100% cotton)
- Masking tape (width 1")
- Wooden board for support (at least 10" x 14")
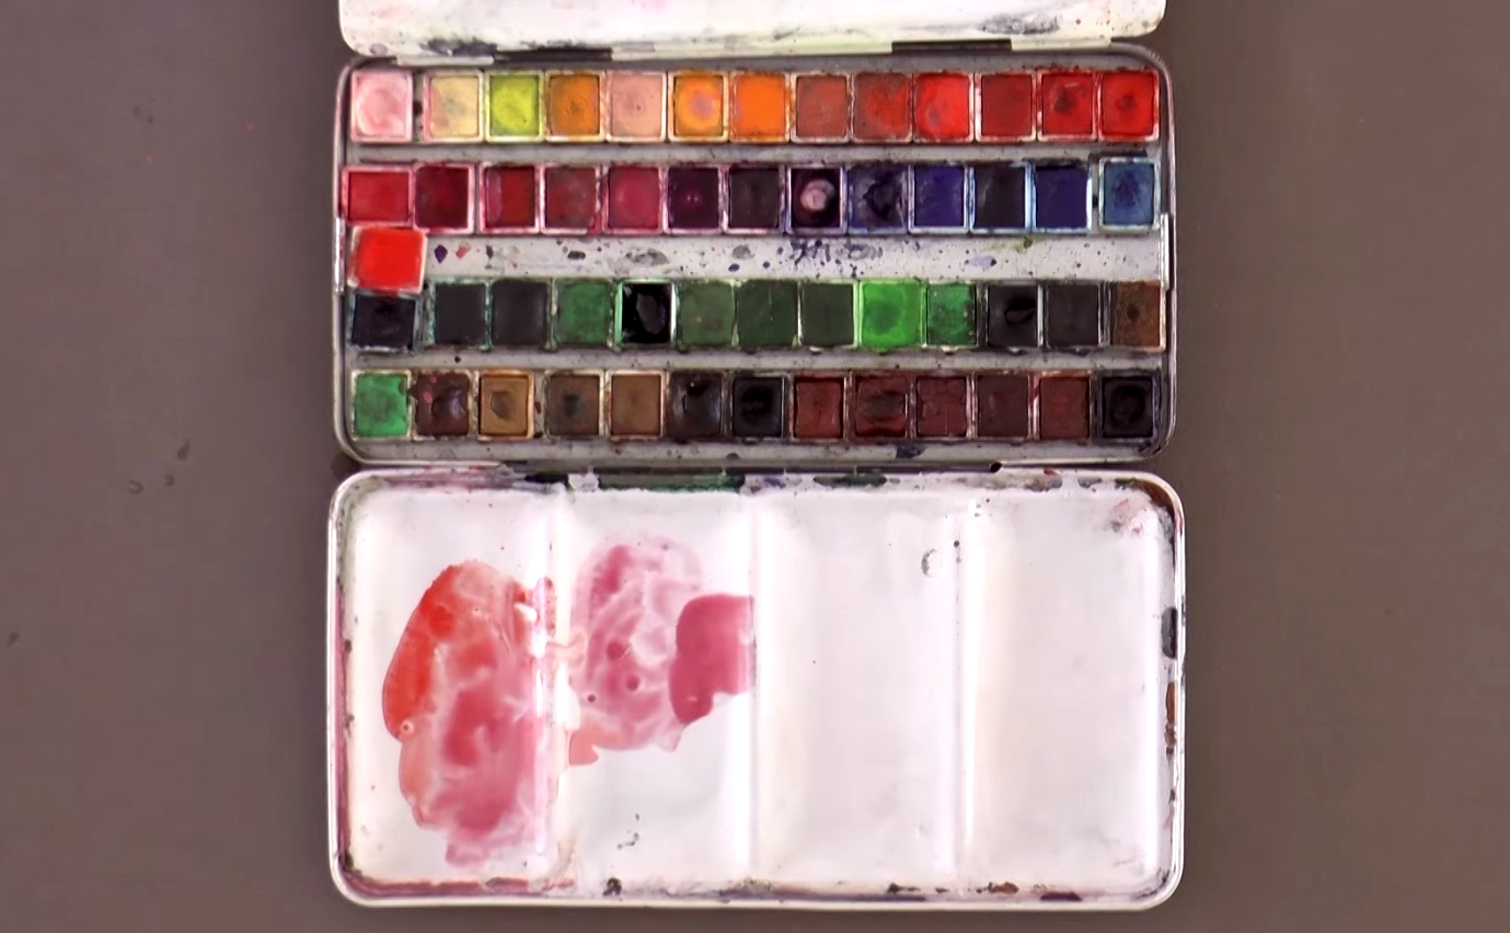
- A palette for watercolor paint
- A container of water
- Tissue
- A wooden rod that you don't mind getting paint on, or any similar stick of the same thickness as a microphone
- Pre-cut paper masks (optional)
Paints
- Schmincke Horadam Aquarell Watercolor: Translucent Orange
- Cadmium Red Light
- Deep Red
- Quinacridone Violet
- Titanium Opaque White
- Sepia Brown
Brushes
- Rosemary and Co.: Pure squirrel hair pointed round brush (size 00)
- Pure squirrel hair pointed round brush (size 2)
- Pure squirrel hair pointed round brush (size 10)
Step 1:
 Prepare your workspace. As you will be splashing paint around, make sure you move aside anything you wouldn't want paint to get on, or cover it with a rag or an old T-shirt. In general, it's best to keep your work area tidy when you're painting. Tape the Arches Watercolor Paper to the wooden board, making around a ½" border around the paper. This is optional, as you won't be painting any washes or wetting a large area on the paper, but having a good backboard for your painting gives you more control and prevents your paper from moving when you're working. Next, prep your paint using the size 10 brush and water with these colors: mix a touch of Translucent Orange with Cadmium Red Light for a light red, Deep Red with Quinacridone Violet and Cadmium Red Light for a dark pink, and then take the lighter red mix and add a little Titanium Opaque White for a soft pink.
Step 2:
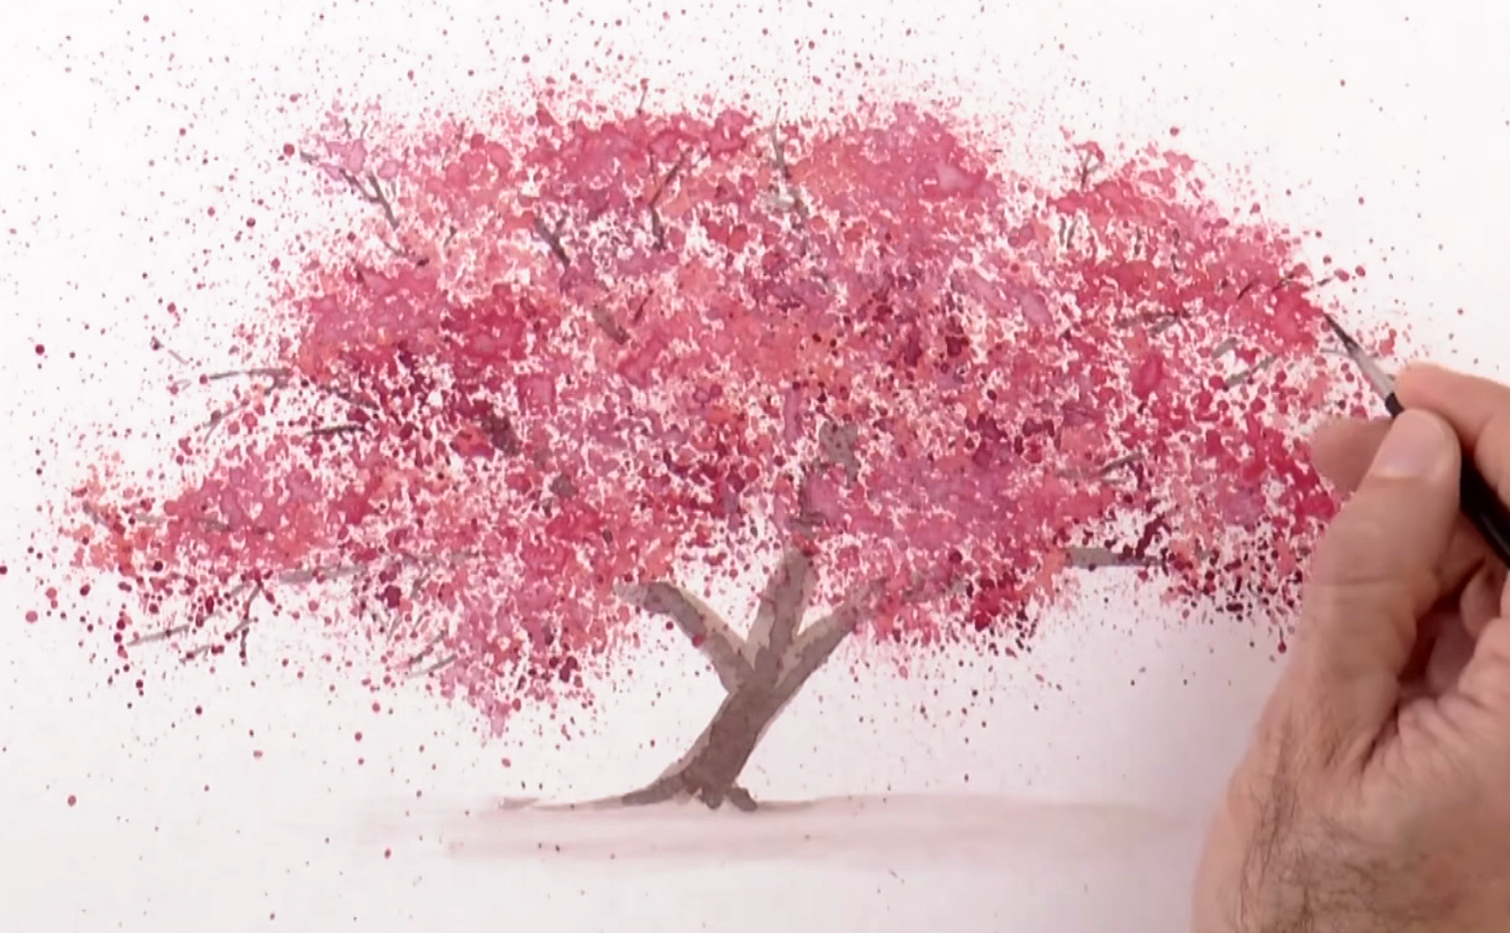
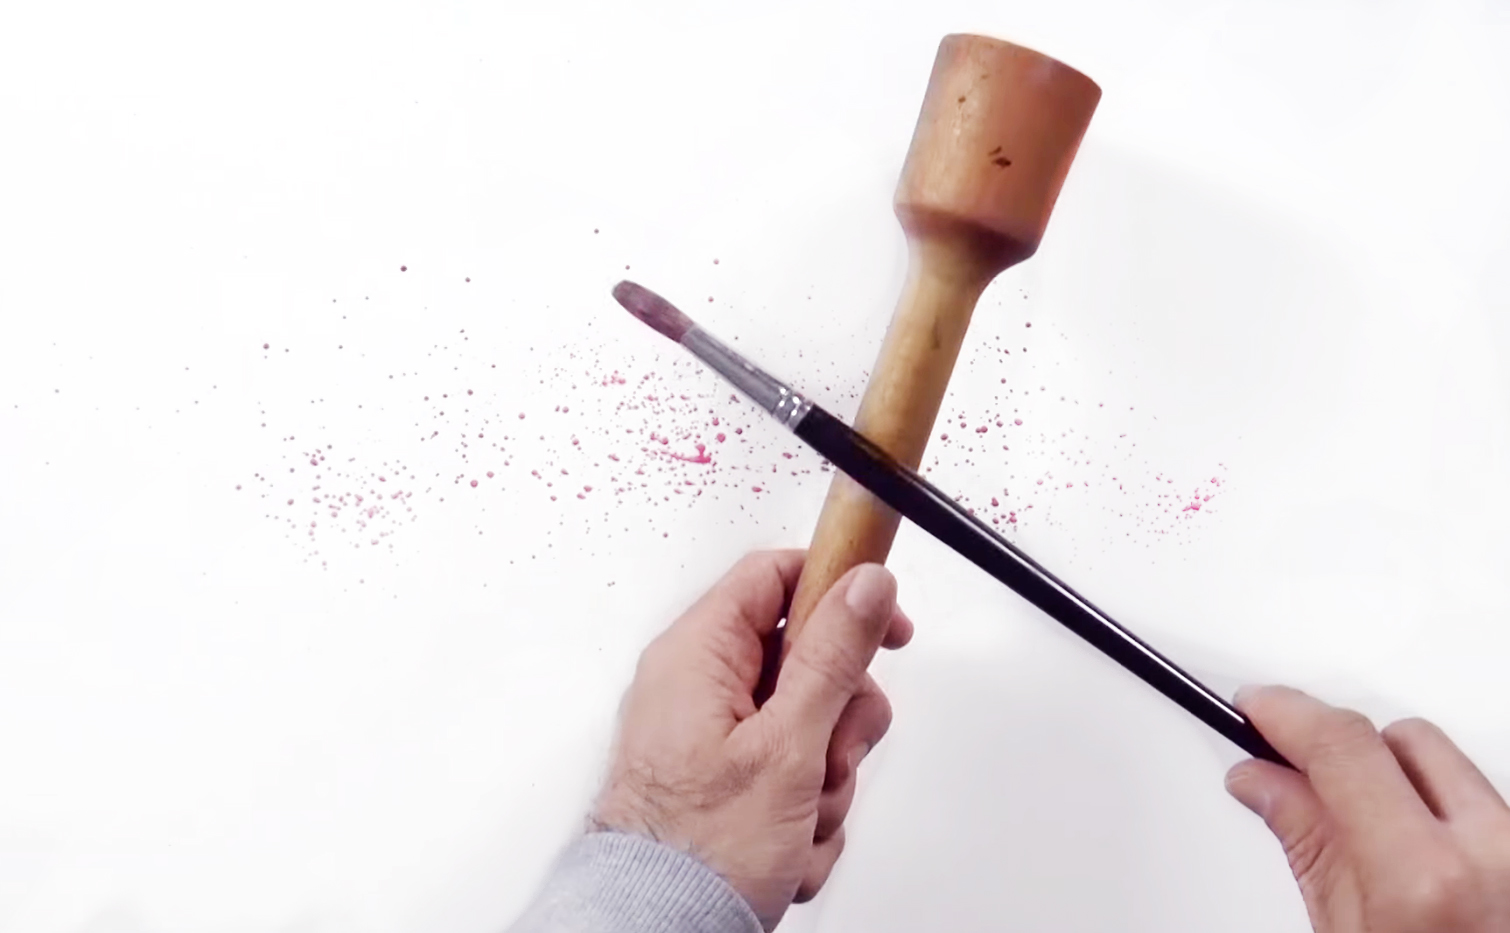 Pick up some of the dark pink mix with the size 10 brush so it's quite saturated (but not enough to cause unwanted drips), and hold the brush parallel to your paper before lightly tapping your paintbrush against the wooden stick so that specks of paint fall onto your painting. It's best to hold the stick perpendicular to your brush so you can see where the paint is landing, and when you can, rest the tip of the stick in areas where your paper isn't wet. It's also good to practice on a piece of scrap paper or newspaper beforehand until you have a good idea of how and where the paint will land. You should eventually be able to judge how wet your brush should be, how hard you should tap your brush, and know how the distance between your brush and the paper will affect the paint splatter. When you're confident with your splatter technique, you can start creating the shape of the cherry tree's foliage. You're working from dark to light, so focus on the bottom areas of the tree.
Step 3:
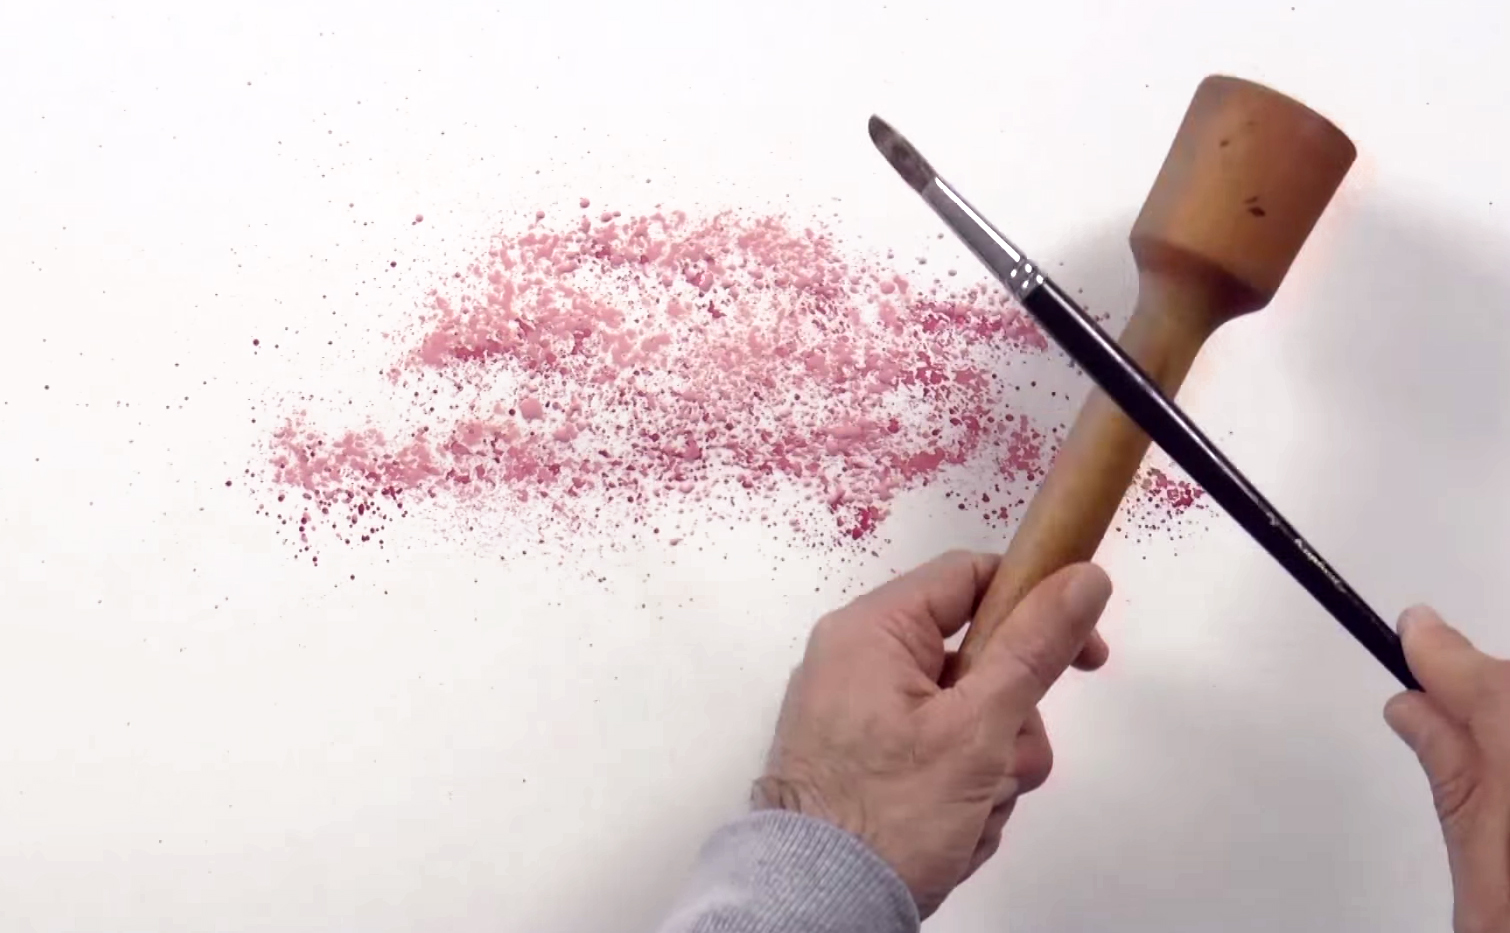 For the second layer, use the pink mixture and start creating lighter and darker areas in your painting. Try not to get a uniform pattern of paint splatters, as this will ruin the natural look of the way flowers grow (they tend to grow in clusters rather than being evenly spaced out). When this layer is dry, you can add a third layer by mixing a little more Titanium Opaque White into your pink mixture for even lighter areas. These areas should be seen near the top of each cluster of flowers.
Step 4:
 If you're having trouble keeping the rest of the paper clean, or with getting the right shape for your tree, one option is to use paper masks. This is basically made from a sheet of paper that's the same size as your watercolor paper, but with the shape of the tree cut out in the middle. You can lay this mask on top of your watercolor paper while you splatter, which helps constrain the area where paint flecks will appear, but if you do use this method, make sure you keep shifting the paper mask around to prevent getting a rigid edge around your tree. Also, don't place the mask on wet paint, or else it will smudge your work.
Step 5:
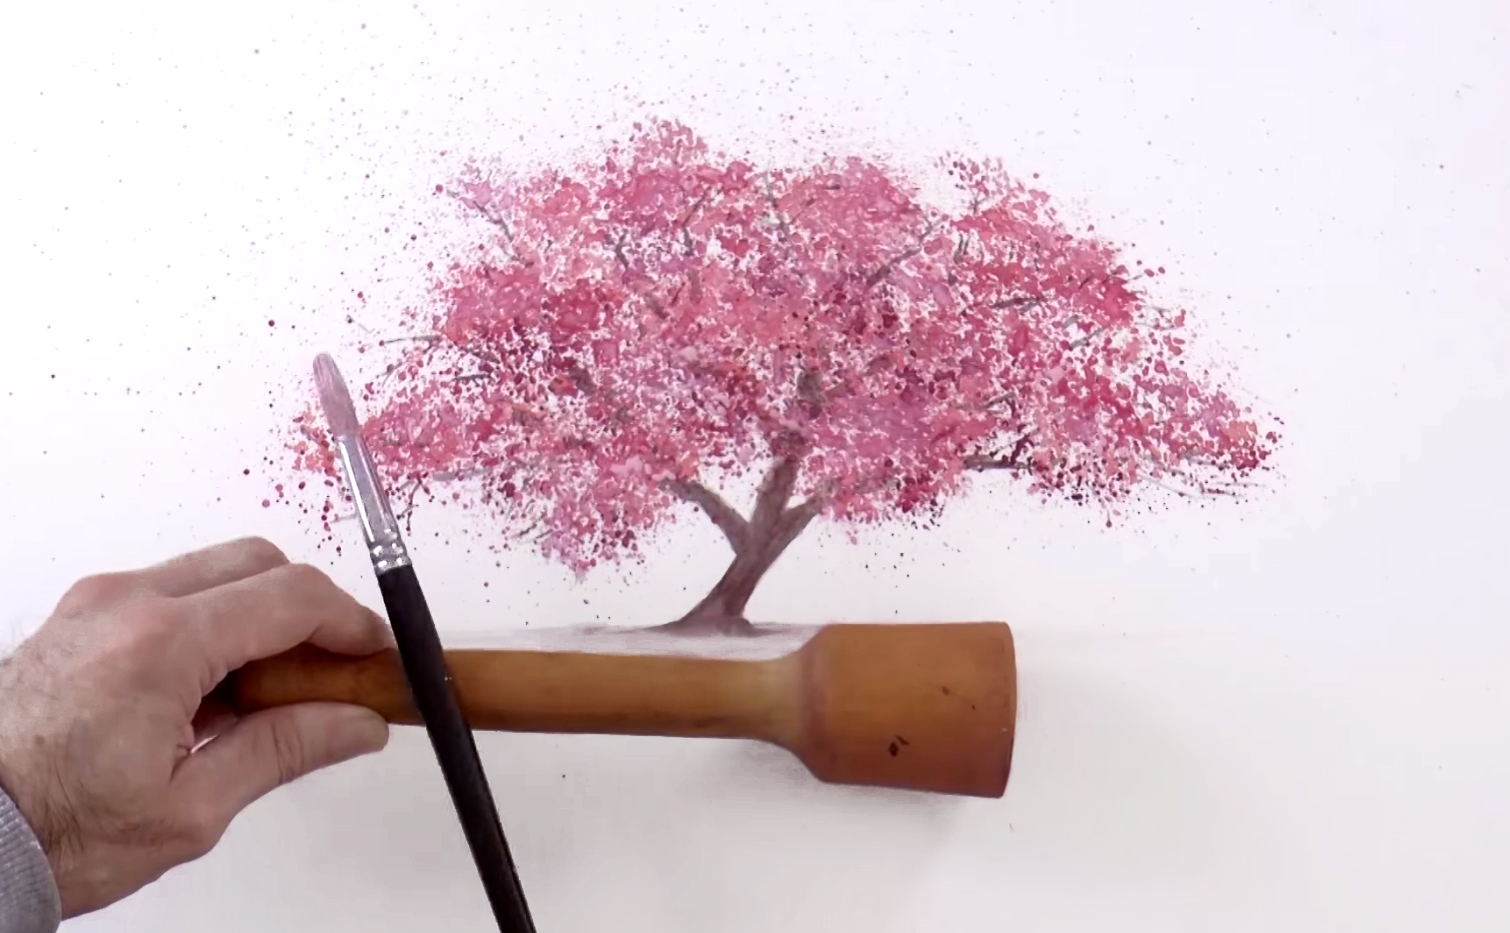
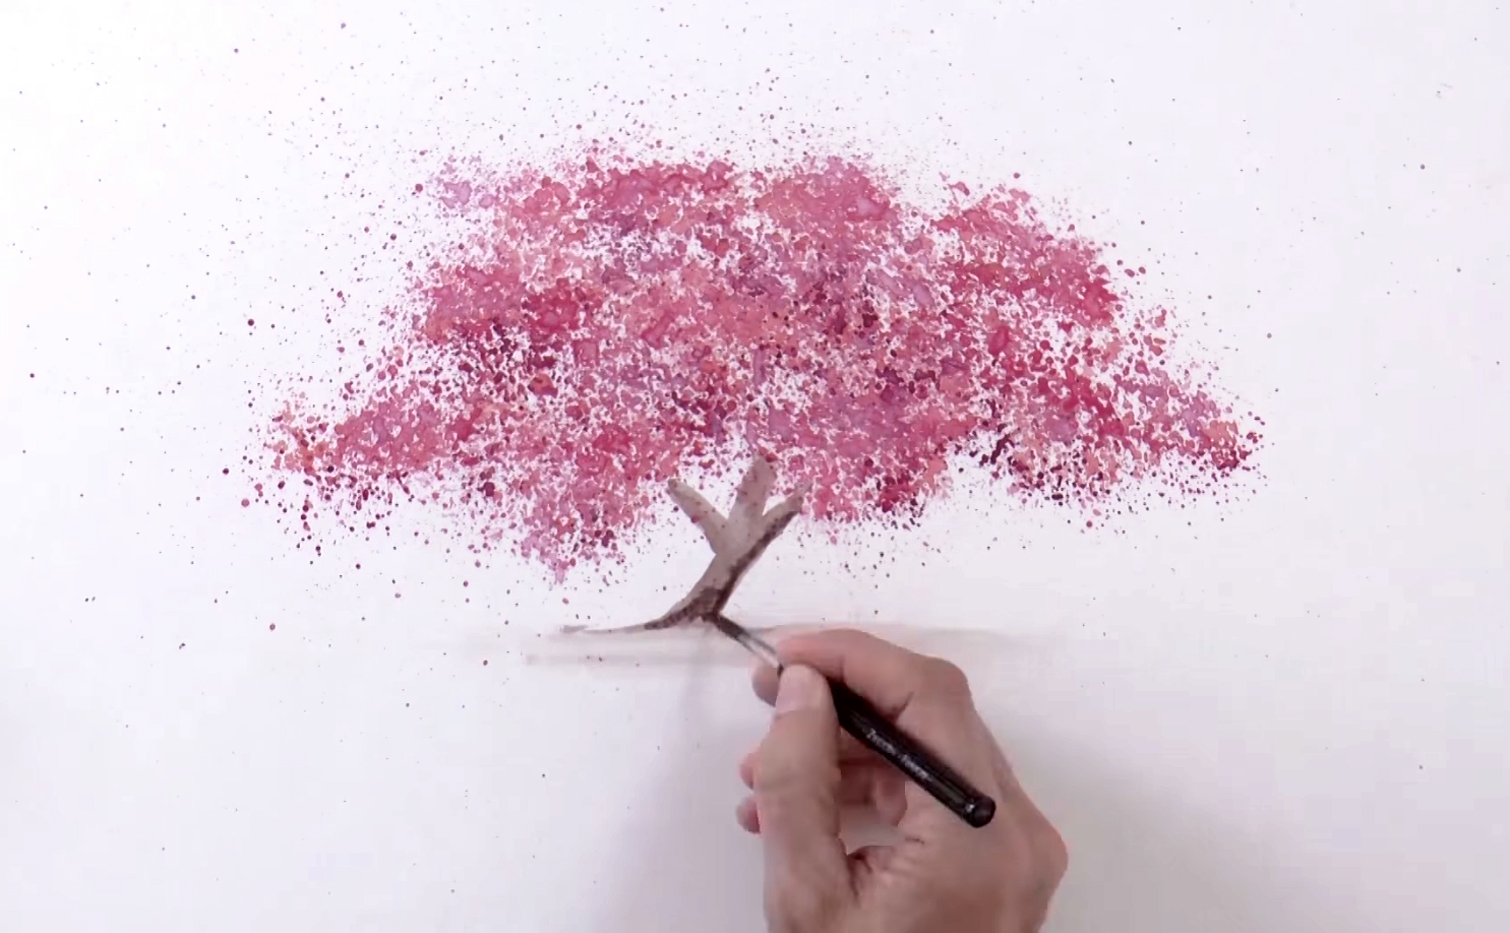 Add a fourth layer of paint splatter, this time mixing even more white paint into the pink mixture. Keep building the shape of the tree and keeping your splatters random. When you're done, wait for the paint to dry, then prep some Sepia Brown paint on your palette. Dilute it a bit so it's not too dark, and with the size 2 round brush, start painting in the tree trunk, branches, and a little bit of the dirt ground. You can vary the tones of brown through layering paint, or watering down the lighter areas, or even mixing different shades of brown and adding it to your painting.
Step 6:
 Add branches in the spaces between clusters of flowers, and switch to the size 00 round brush when you get to the tips of the branches (they should be found on the outer extremities of the tree). One useful tip for painting branches: start from the tree trunk, then imagine the branch coming out and stretching upwards and outwards. Follow the direction with your brush, and only put the brush to paper when you see an opening among the flowers. Follow it all the way to the end, where it tapers off. Also, remember that branches don't grow in one straight line; rather, they grow in several straight lines, or sometimes not even in a straight line at all. You can look at a picture of a tree without leaves for reference. Don't forget to add smaller twigs and branches that branch off from the main tree limbs.
Step 7:
 Finally, to make the branches look more integrated and less like they're sitting in front of the flowers, splatter a very light pink mixture of paint around the areas where the branches begin and end. Try not to overdo this as you still want to see the details; a little goes a long way. One final tip is that you don't have to use watercolor paint; you just need to water down the paint of your choice enough to create paint splatter. You can also try this technique for painting other trees, only instead of pink cherry blossoms, you can use varying shades of green for the leaves of any type of tree. Most importantly, have fun with creating "organized chaos", and keep experimenting for the best results! To learn more about Leonardo, check out his website. Here's his video of the entire painting from start-to-finish:


