Challenge yourself by learning how to paint an adorable fennec fox using watercolor paint through following Isabella Kung's step-by-step tutorial. Also available as a step-by-step video tutorial on Beeblys WatercolorPainting.com.
Materials used:
- Reference picture of a close-up of a fennec fox
- A book of Arches cold-pressed watercolor paper (140lb, size 9" x 12")
- Masking tape (width 1") or a wooden board (at least 9" x 12")
- HB pencil
- Painting palette for watercolor paints
- Two cups of water
- A towel or rag to dry off the brushes
- Tissue or paper towel
- Grumbacher Miskit Liquid Frisket 559 (or any masking fluid)
- Liquid soap
- Spray bottle filled with water
- Rubber cement pickup or a soft eraser
Paints
- Winsor & Newton's Professional Watercolors: Cadmium Orange
- Cadmium Red
- Rose Doré
- Naples Yellow
- Cerulean Blue
- Brown Madder
- Burnt Umber
- Perylene Violet
- Burnt Sienna
- Winsor Violet (Dioxazine Purple)
- Perylene Green
Brushes
- Utrecht: Synthetic round brush (size 2)
- Utrecht: Synthetic round brush (size 0)
- Escoda: Kolinsky Sable round brush (size 2)
- Escoda: Kolinsky Sable round brush (size 4)
- Escoda: Synthetic round brush (size 6)
- Escoda: Angular brush (size 10)
- Rosemary and Co.: Pure squirrel hair mop brush (½" cat's tongue/oval wash)
- Rosemary and Co.: Pure squirrel hair mop brush (1" cat's tongue/oval wash)
- Raphael: Synthetic round brush (size 1)
- Raphael: Synthetic round brush (size 12)
Step 1: Prepping Your Work
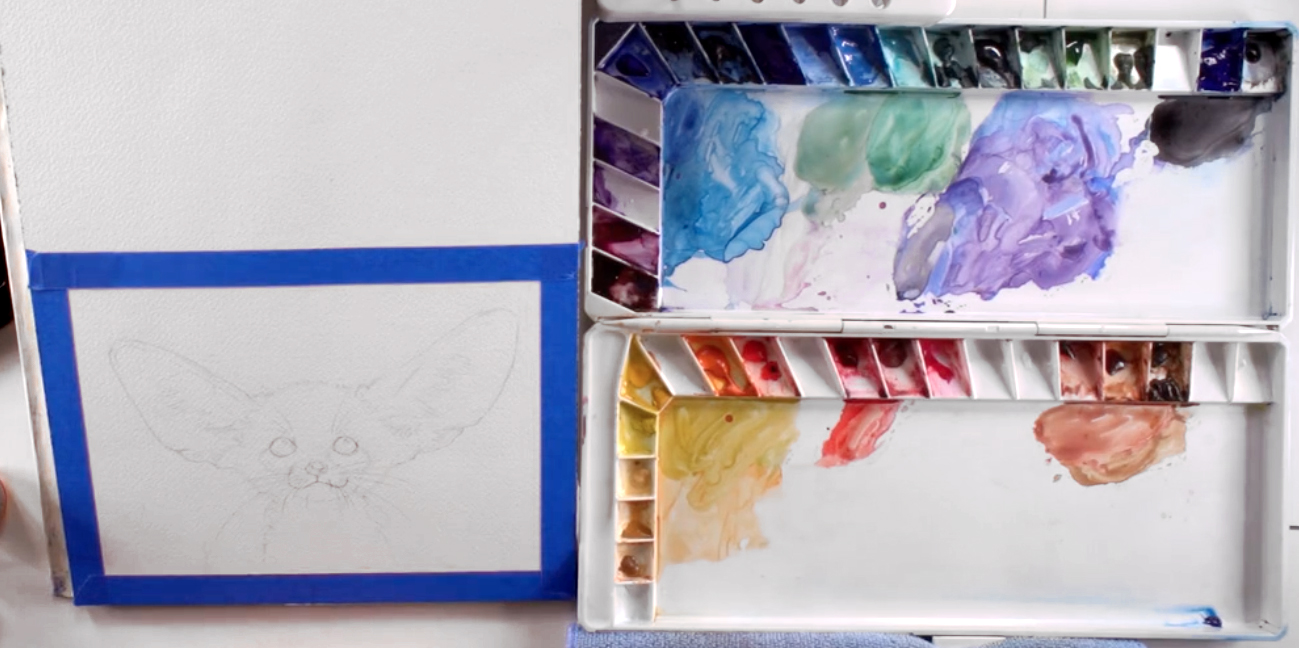 Tape a protective border around your watercolor paper to ensure a clean edge for your finished painting. If you have a wooden board for propping artwork, tape your paper to the board. Sketch out the basic outline of the fox using your reference image as a guide.
Step 2: Masking the White Highlights
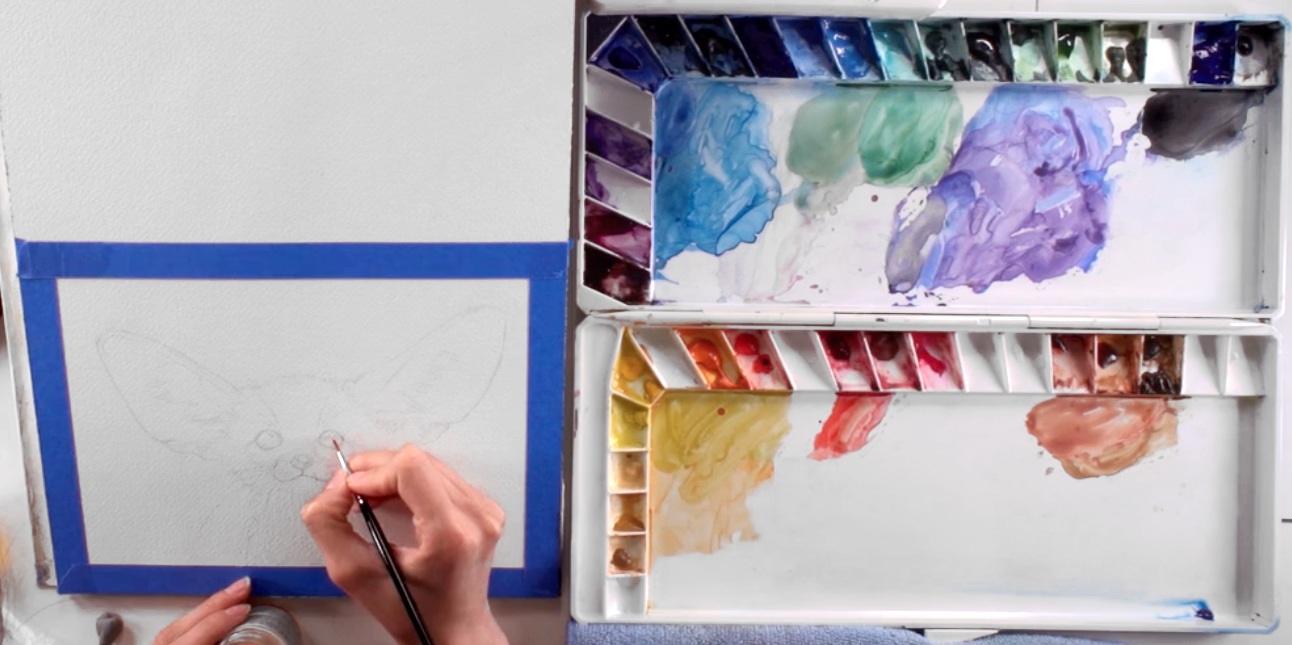 Taking the Utrecht synthetic brush (size 2), dip it in the liquid soap to create a protective layer on your brush and wipe off the excess with a tissue or paper towel. Next, dip it into the Grumbacher liquid frisket (or masking fluid) and carefully dot the eyes in the place where you want the highlights to appear. Once you are finished, dip the brush in the liquid soap again and wipe off with a paper towel. Allow the liquid frisket to dry on your paper before you begin painting.
Step 3: Prep Colors For the Wet-In-Wet Technique
 Using your reference image as a guide, determine the colors that you will need to use. Make sure you have all the colors prepped and pre-mixed with water in your palette by wetting them with the spray bottle before using the Rosemary & Co. squirrel hair mop brush (1") to dab the colors you need into the middle of your palette. Then, wet your watercolor paper with the spray bottle and spread the wash of water around with the Raphael synthetic round brush (size 12).
Step 4: Painting Light Colors First
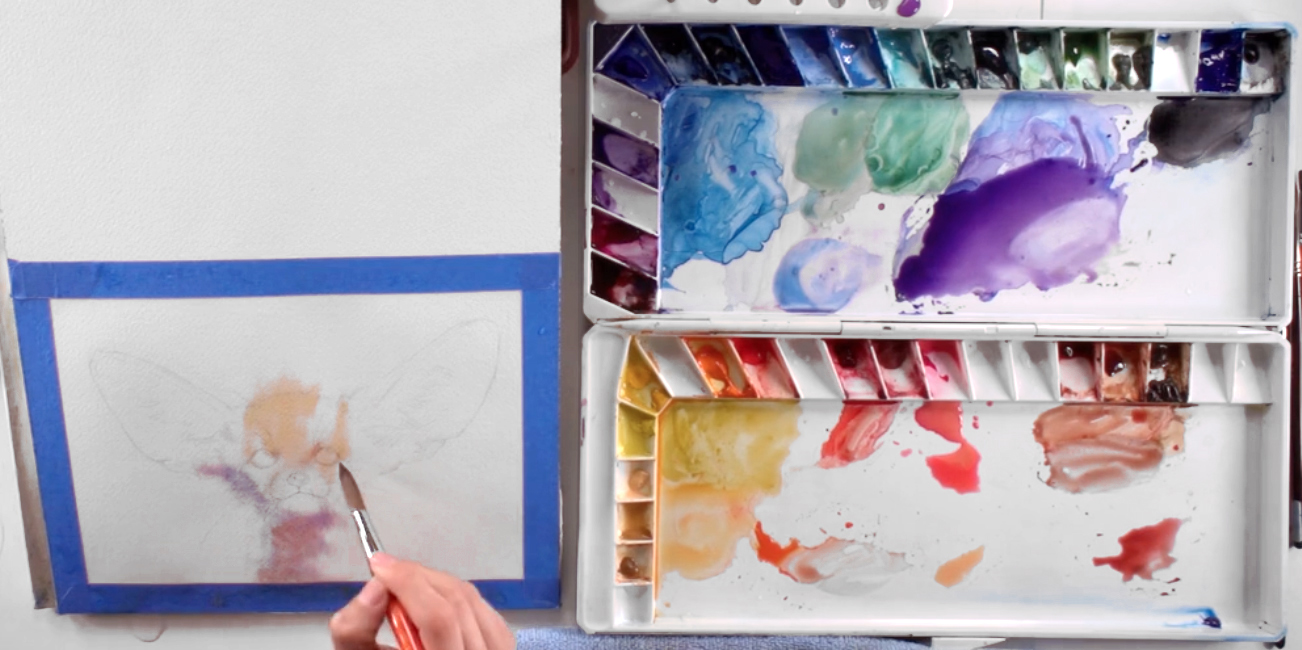 Using the same size 12 round brush, add the Cadmium Orange to the fox’s face to create the highlights on its forehead, around the eyes, and on its muzzle. Next, take the Perylene Violet, Cerulean Blue, and Brown Madder and apply them to the side of the fox’s face and on its neck. These are the foundations for the shadows. Allow the colors to bleed together across the page, using very few brush strokes.
Step 5: Keeping A Light Touch
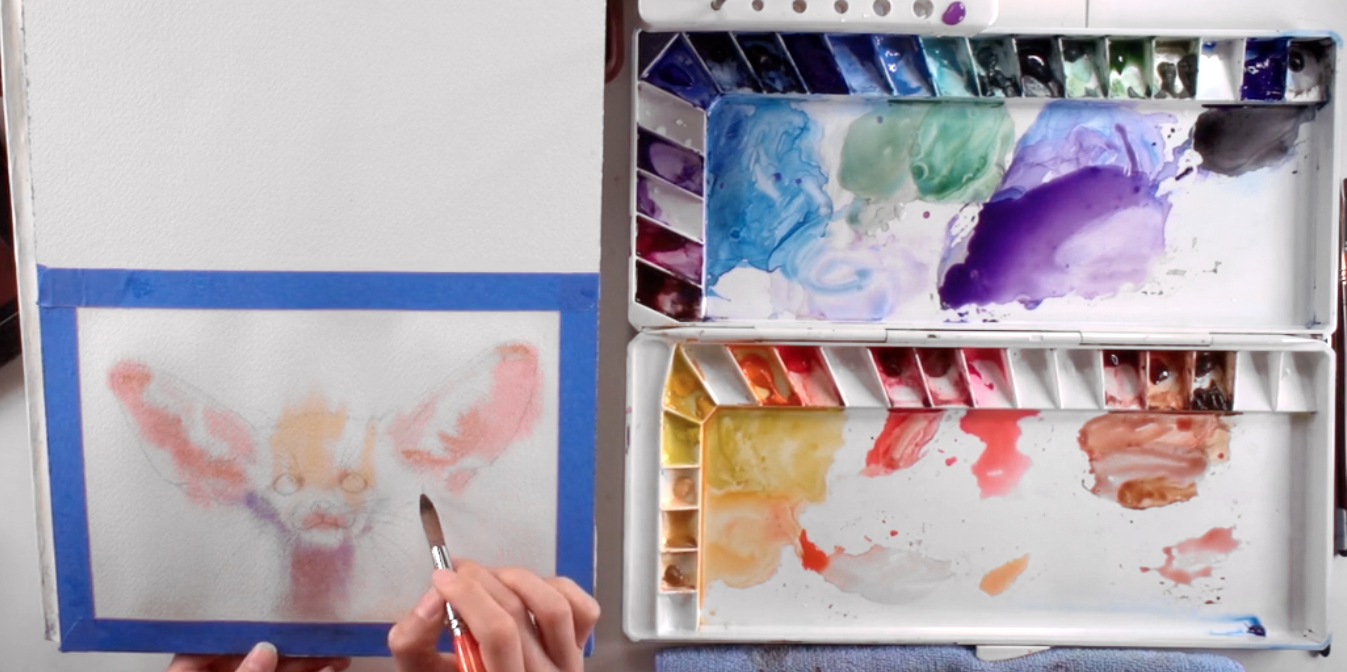 Next, begin adding the Rose Doré to the inside of the fox’s ears, the bottom of the neck, and around its mouth. Be careful not to use too much paint by adding more water to create a very light, delicate color. It’s okay if the color bleeds a little outside of your sketched lines - it will be covered up by the background color. Add touches of the Brown Madder and Burnt Umber to the muzzle, and the tips and inside of the ears. This first layer is a very flexible stage, but be careful to not overdo it. You do not want the colors to appear muddy. If you find that you made a mistake and need to lift any color out, use the Escoda angular brush (or a brush with stiff bristles) and a paper towel. Allow the first layer to dry.
Step 6: Adding a Background
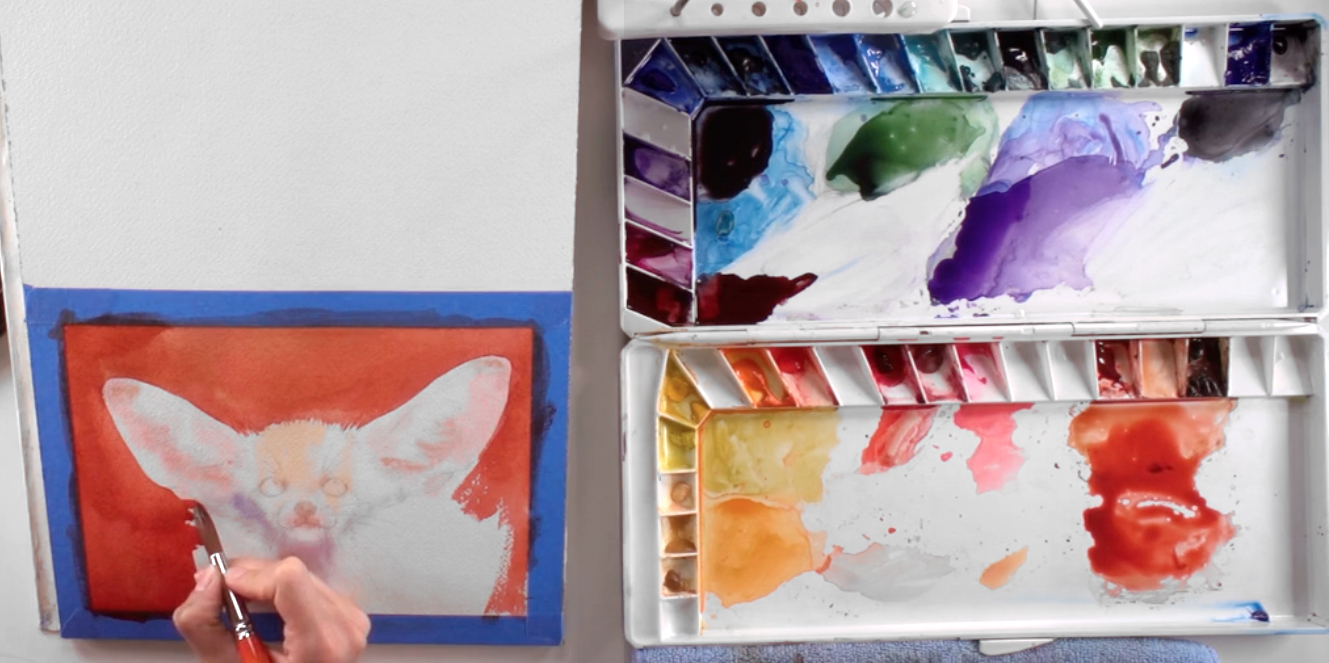 Once your first layer is dry, take your Raphael synthetic brush (size 12) and begin adding the Burnt Sienna to the background. Add water to the paint when you need to help spread it around. Once you get to the edges of the fox, you can switch to your squirrel hair mop brush (½") to carefully follow the outline of the fox. Switch between the two brushes as needed. The synthetic brush has firmer bristles, which will give you more control, while the squirrel hair brush will create very smooth brushstrokes. Be sure to alternate working both sides of the painting to ensure that they will dry at the same time.
Step 7: Adding the Illusion Of Fur
 Once you reach the areas that require the illusion of a furry texture, spread the hairs of your Raphael synthetic brush (size 12) to paint the negative shape of the hair. You can do this by flicking the brush towards the fox to achieve a furry effect.
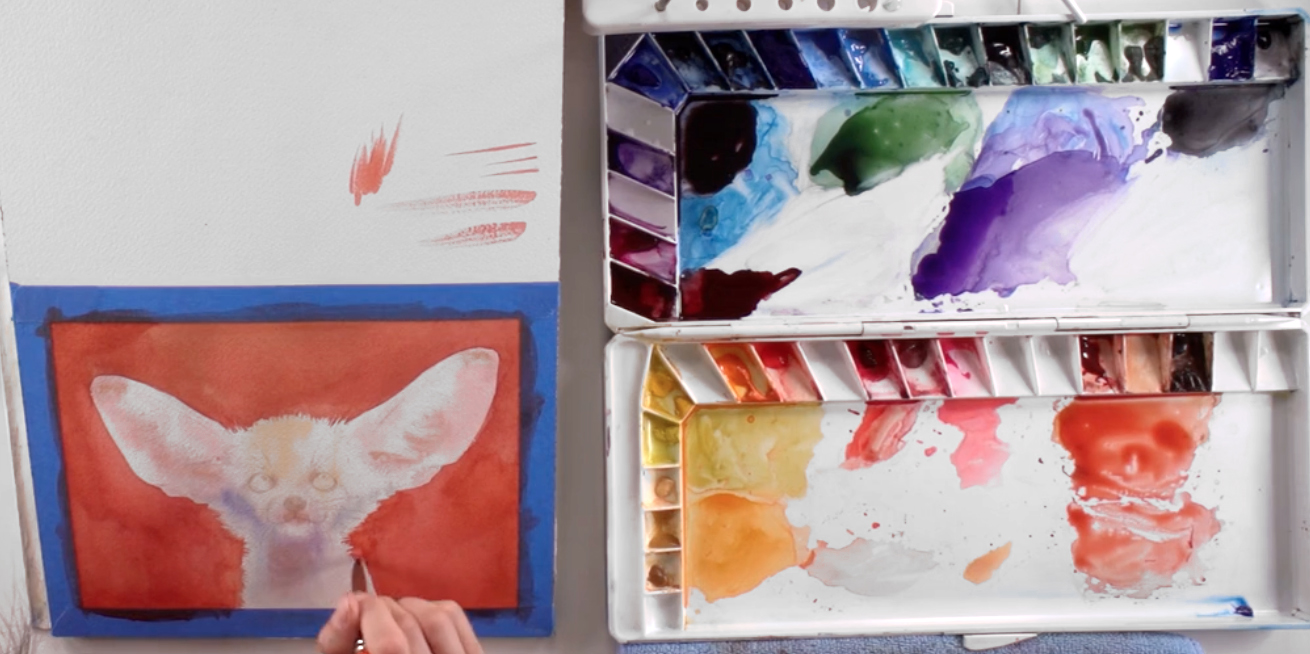
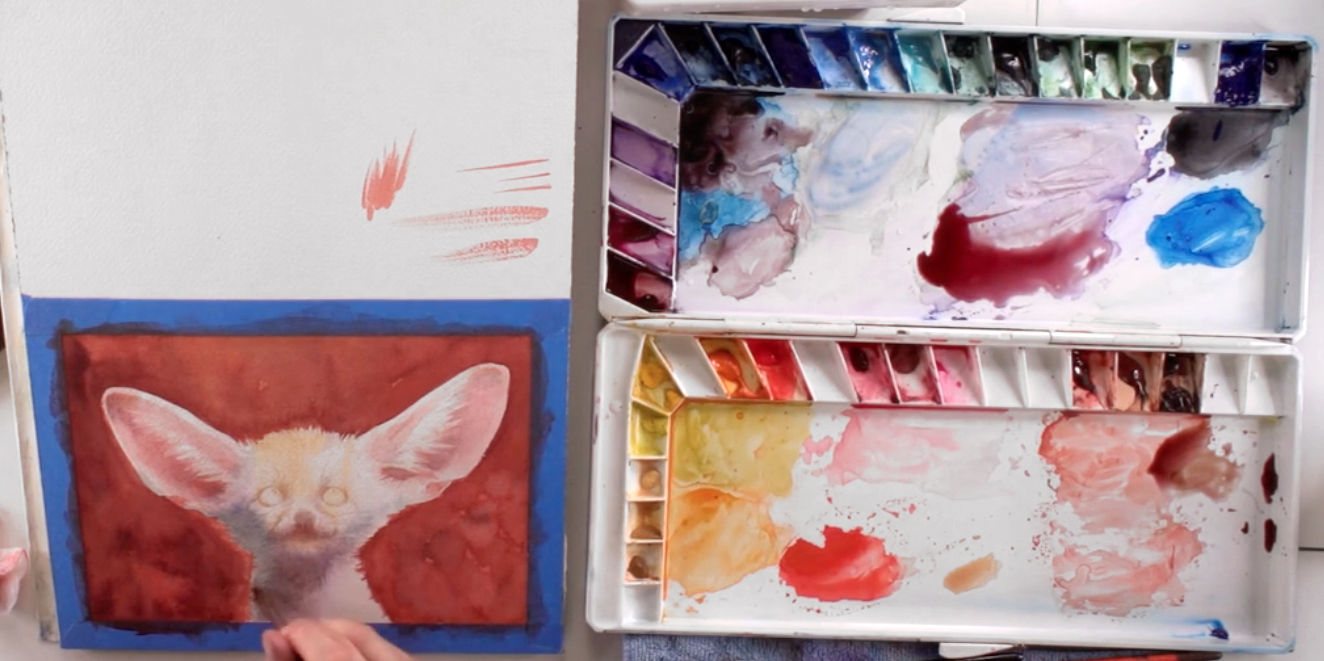
Step 8: Touching Up the Highlights
 Add some abstract texture to your background color with the Perylene Violet to create a more interesting painting. When you're satisfied, wait for the background to dry, and while you're doing so, feel free to slightly darken the highlight colors in the ears that you used in the first layer.
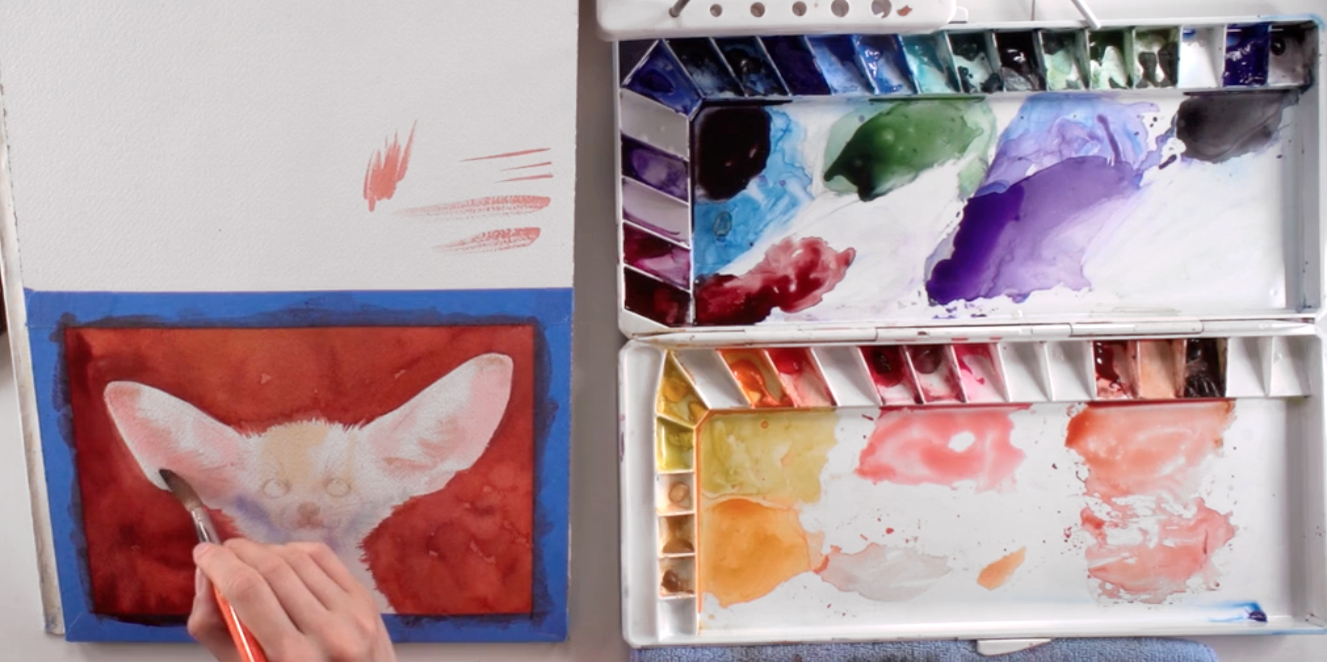
Step 9: Building Up Shadows
 Change out your dirty water and replace it with fresh water to prevent muddy colors. Using the synthetic size 12 brush, mix Cerulean Blue and Cadmium Orange and add it to the shadowed side of the fox’s face. Apply the paint using large brushstrokes. Next, mix Winsor Violet (Dioxazine) with Perylene Violet to expand the shadow under the chin and on the neck.
Step 10: Painting Ears and More Shadows
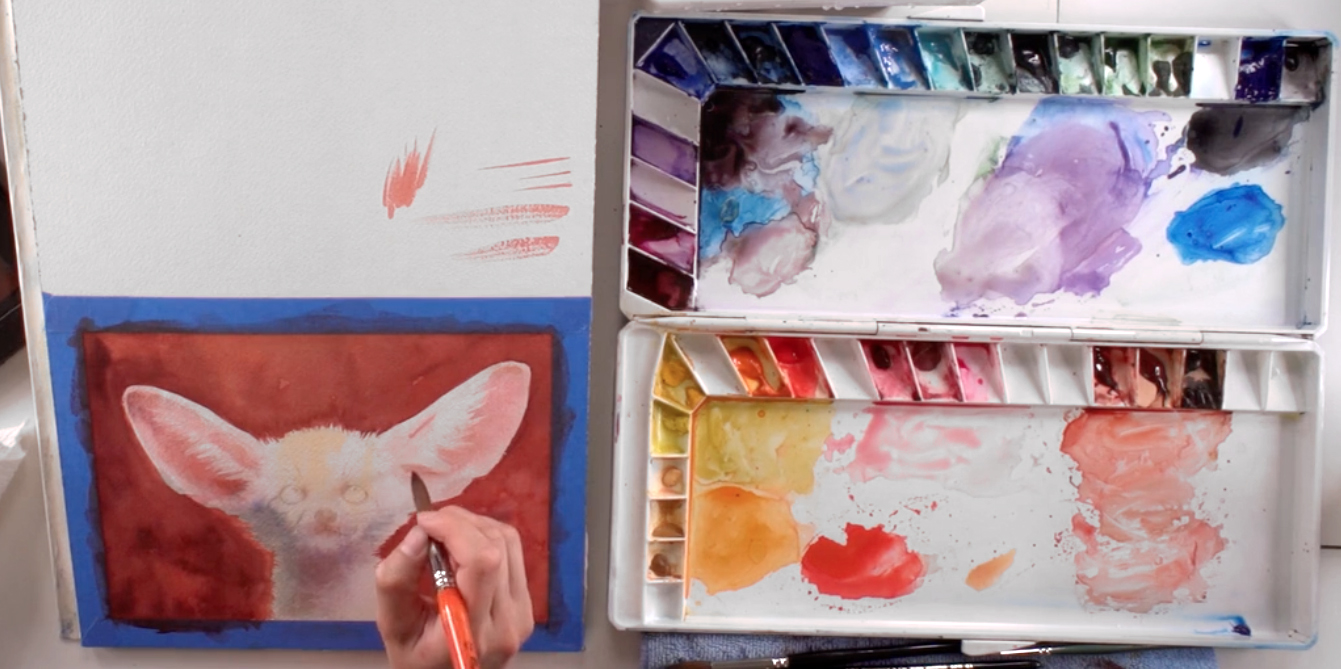 With the same size 12 brush, mix Rose Doré and Cadmium Red to create a darker pink color. Use it to touch up the inside of the ears. Next, mix the Burnt Sienna and Brown Madder, and use the mixture to further emphasize the dark area of the lower part of the inner ears. Mix Cerulean Blue with Cadmium Orange to reinforce the shadows of the outer edge of the ears, the side of the face, and on the neck. Soften any hard edges and blend with a clean, dry brush.
Step 11: A "Hairy" Situation
 Switching to the Escoda synthetic round brush (size 6), mix some Cadmium Orange with Naples Yellow, and lightly add this color to the fox’s forehead. Use a flicking motion with the same paint to create the texture for the hair. Use the same technique with the Perylene Violet to add fur next to the inner corners of the eyes, the muzzle, and the side of the face. This adds to the illusion of fur while also enhancing the shadows cast by each strand of fur, creating a greater sense of depth.
Step 12: Adding the Darkest Shadows
 Now it is time to go back into the darker shadows and add another layer using an even darker color. With the Escoda Kolinsky Sable round brush (size 4), mix Perylene Violet, Burnt Umber, and Cerulean Blue to create a dark, rich color. Add it to the nose, muzzle, chin, neck, and sides of the face. Use a clean, damp brush to soften the edges and blend. Refer to your reference image to determine what values to add and where. Use the Perylene Violet, Burnt Umber, and Cerulean Blue separately to deepen the color on the paper as needed.
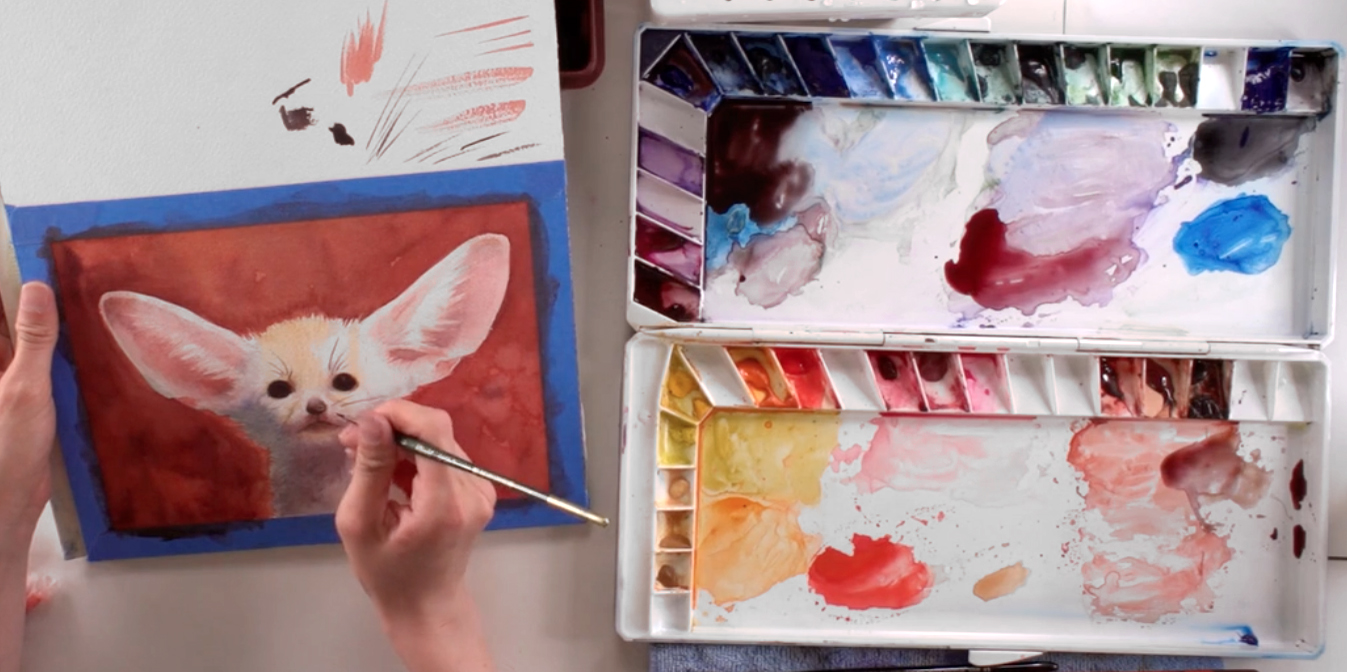
Step 13: Painting the Eyes, Nose, and Mouth
 Using the Raphael synthetic brush (size 1), mix Perylene Violet, Cerulean Blue, and Perylene Green to create a dark black-like color for the small details. Using black paint from the tube will only make the fox appear flat and lifeless. Carefully fill in the eyes with the mixed dark color. You can flip the painting upside down when you need more control over the brush. Next, lighten the color with water to paint the nose. Add a little more water to lighten the mixture even more for the lines of the mouth, the texture of the muzzle, the chin, and the hairs around the eyes.
Step 14: Whisking Whiskers
 Switch to the Utrecht synthetic brush (size 0) to paint the fine details of the whiskers with the dark color mixture. Use a flicking movement for your brushstroke to get thin, wispy lines. Turn your paper whenever you need to have better access.
Step 15: Removing the Masking Fluid
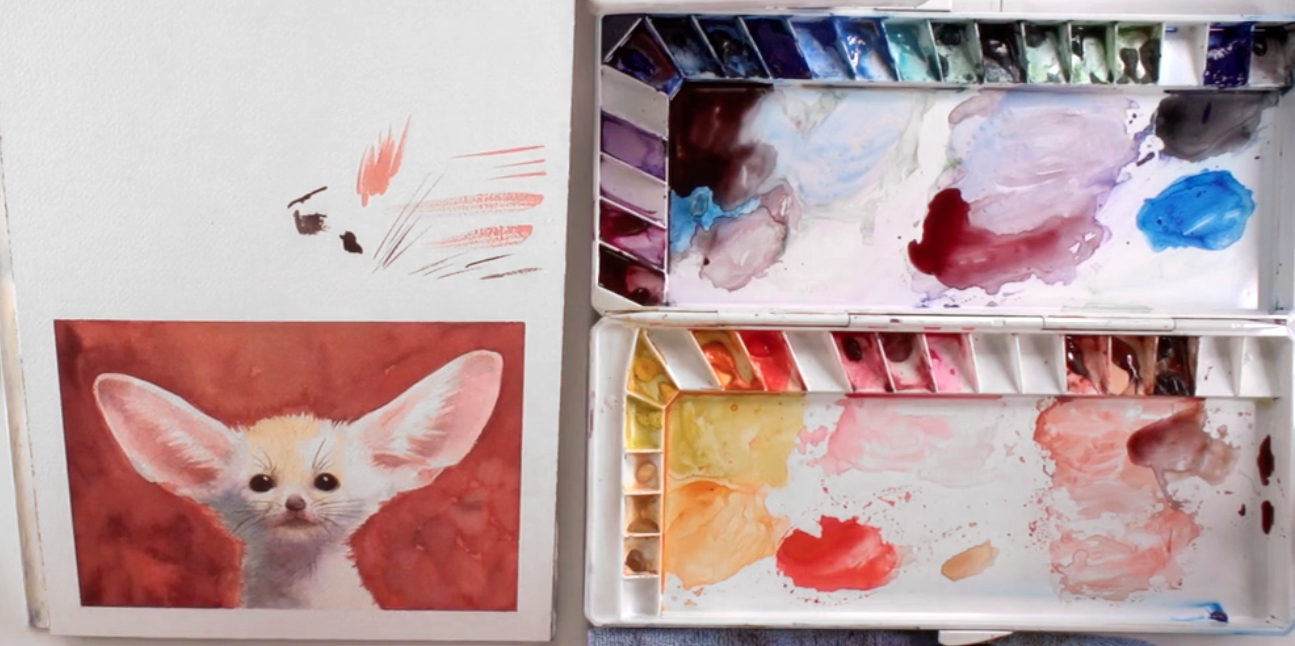 For the final step, once the eyes are dry, carefully remove the now dry masking fluid that you added at the very beginning of the painting with the rubber cement pickup. Allow the painting to dry completely before gently removing all the masking tape.


