Set-Up for this Watercolor Technique and Start
MATERIALS USED: Spray bottle of water, a clean sponge, Arches 140lb cold press watercolor paper, Grumbacher 1" flat red sable, and my trusty Kalish #8 Round Kolinsky Red Sable brush. COLORS USED (various manufacturers): Cadmium Yellow Medium, Alizarin Crimson, Cerulean Blue, Burnt Sienna, Phthalocyanine Green, Hooker's Green Dark, Sap Green, Lamp Black.  I start by spraying my mounted paper with water to saturate the surface.
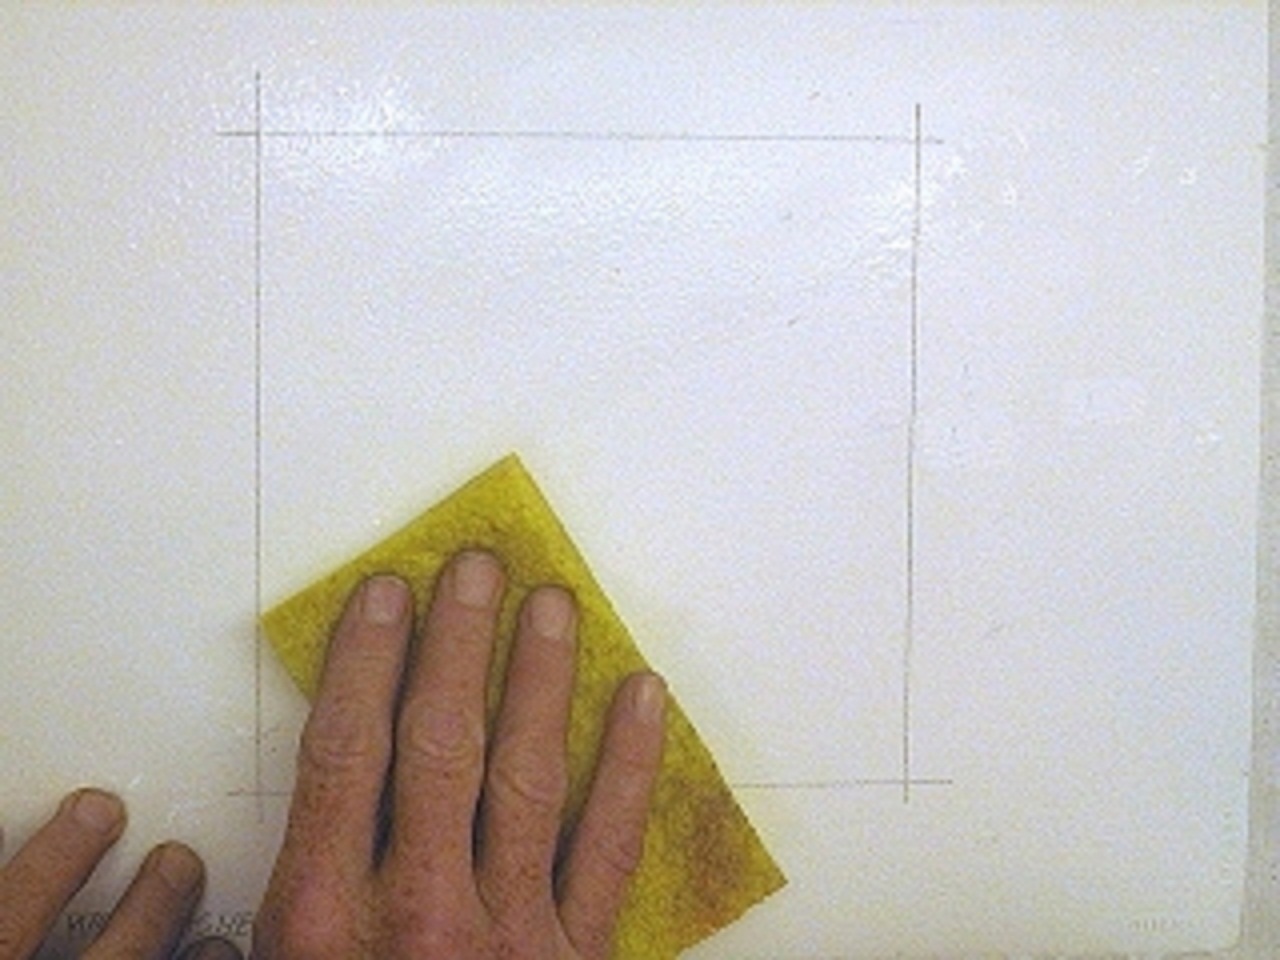
Even Out the Moisture
Using a CLEAN damp sponge, lightly smooth your paper and sponge off any excess water. Repeat until paper is evenly saturated, it with a dull satin finish. If your paper is shiny after soaking in the water, the paper is too wet. Wring out your clean sponge and smooth off the excess water.
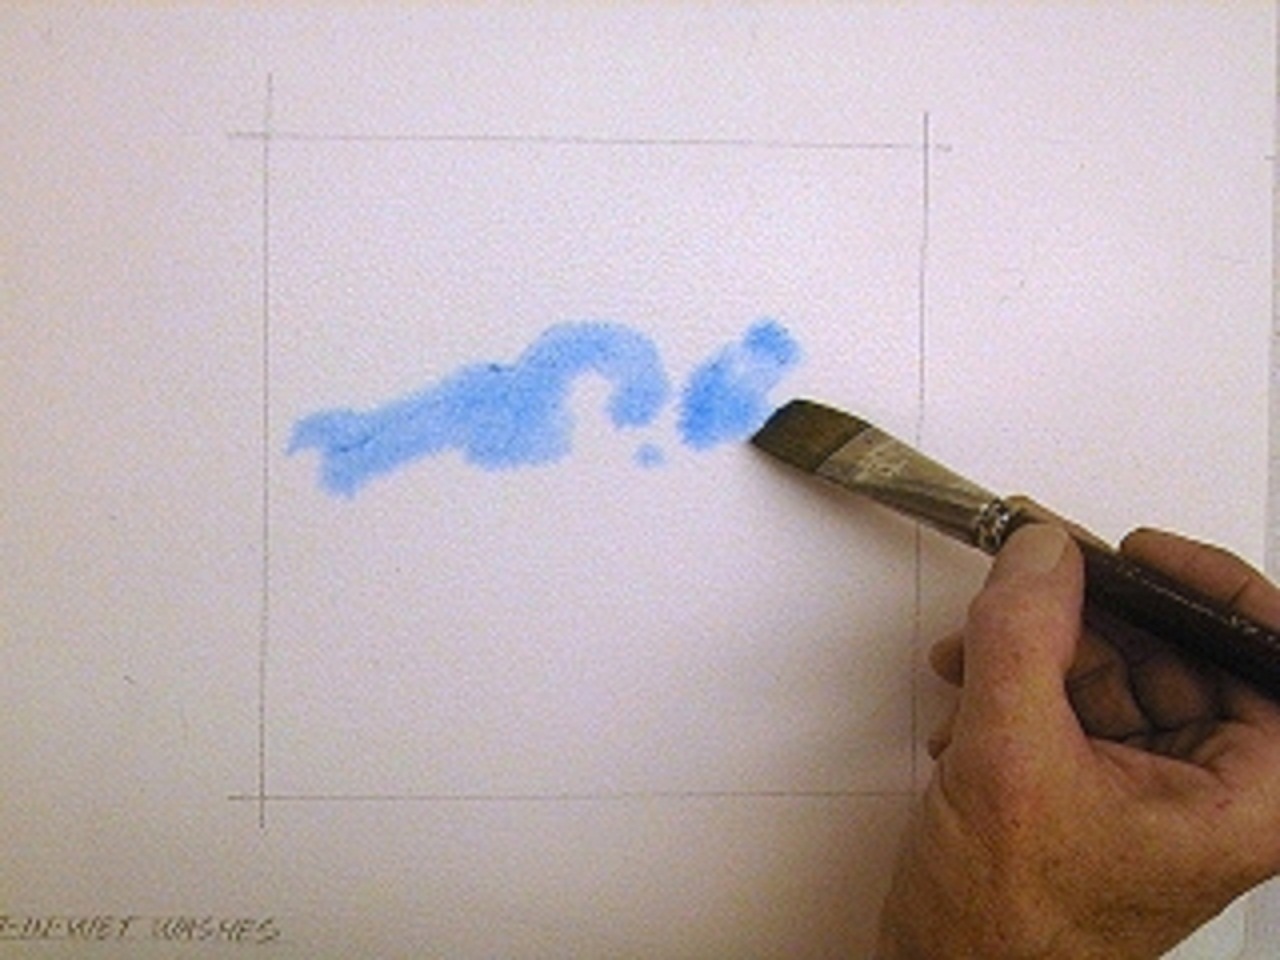
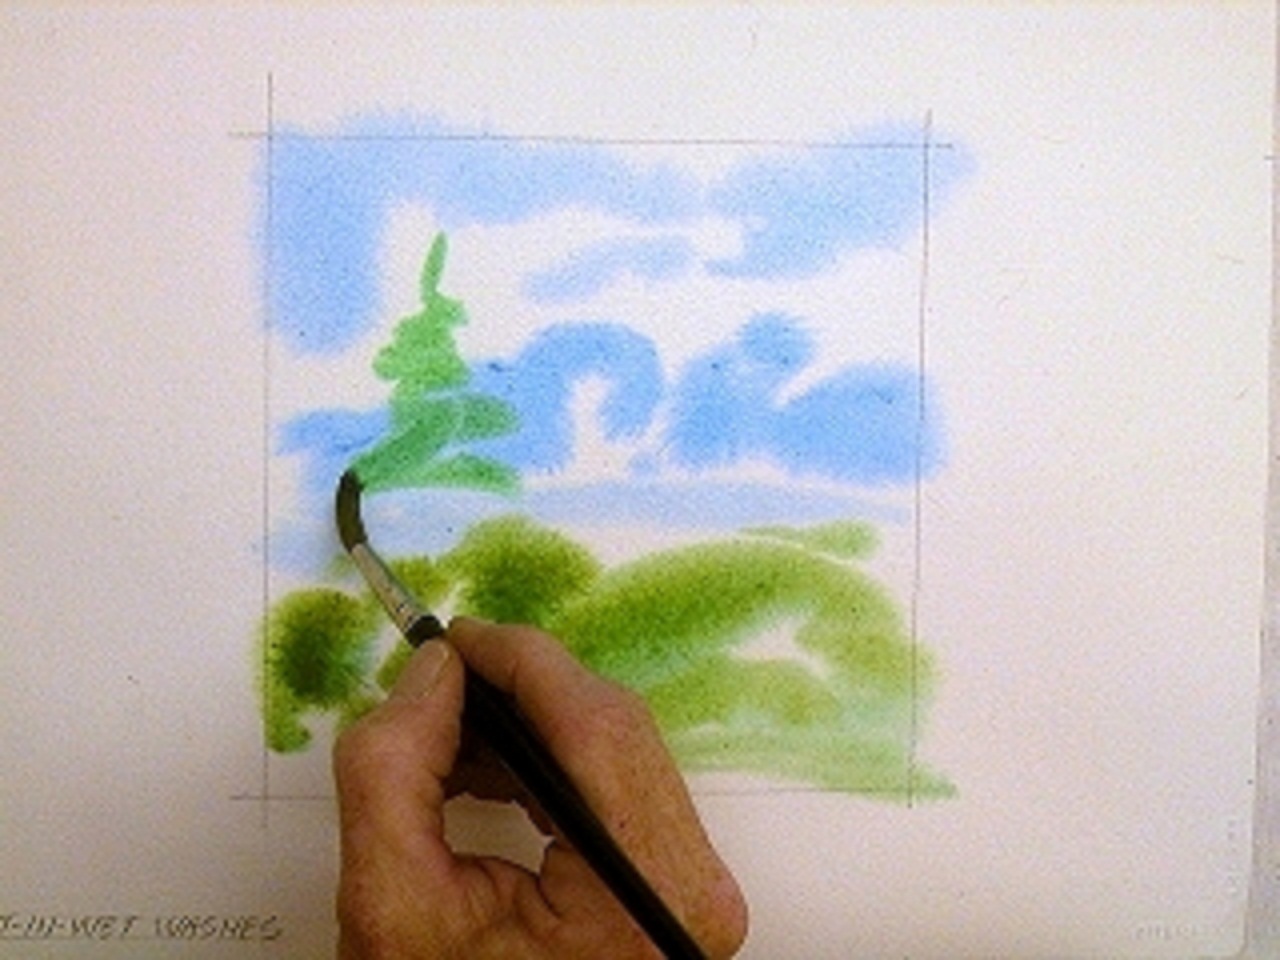
Where to Start?
Creating a landscape "on the fly", I decide to start with the sky. I mixed up some Cerulean Blue and used my 1" flat red sable to form the clouds. In a full wet-in-wet painting, it's easier to work from the background forward. Using a twisting motion, I start applying the sky washes in a calligraphic fashion trying for some interesting shapes.
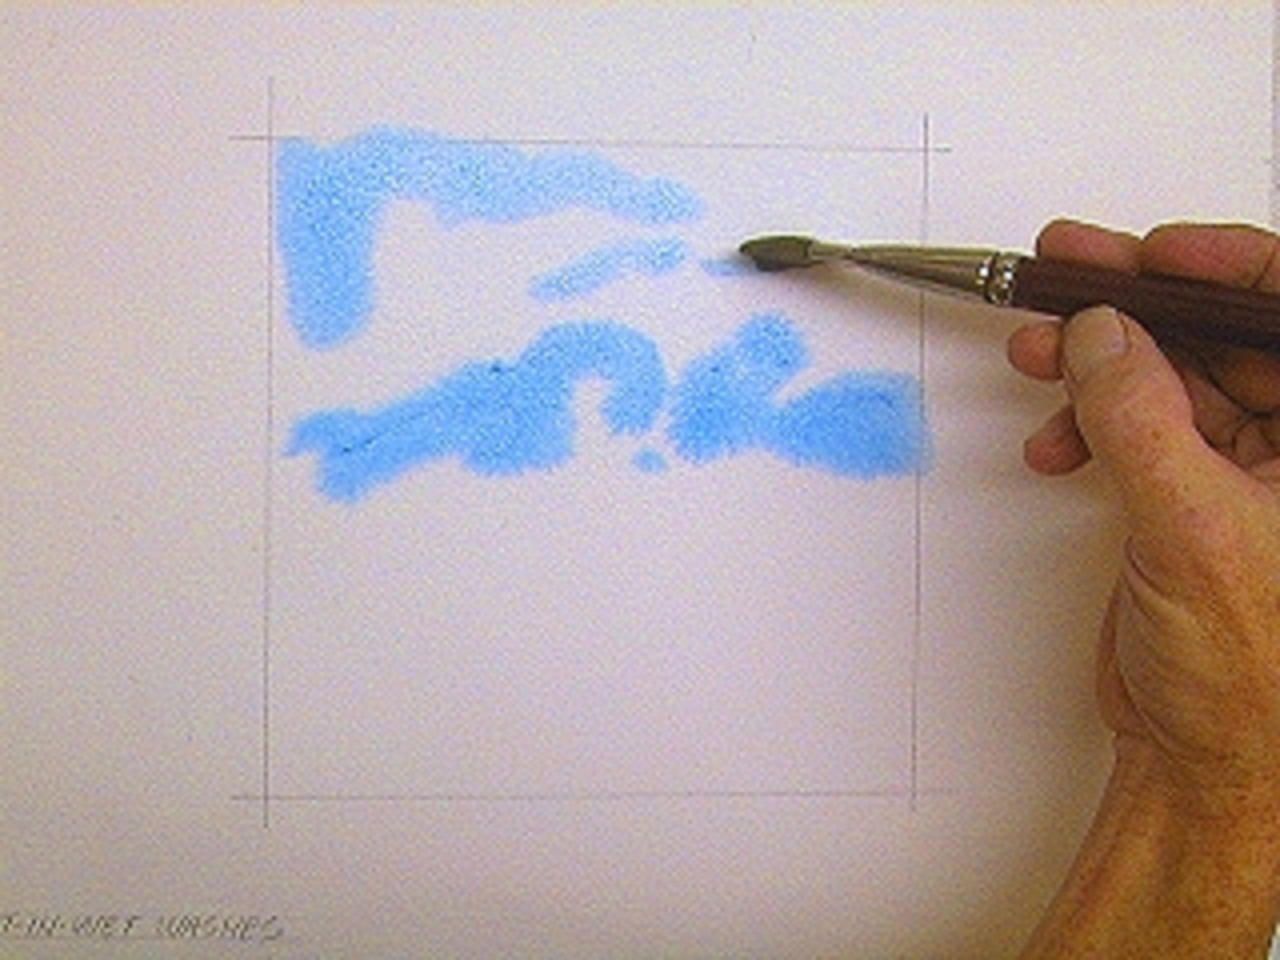
S'cuse Me, While I Kiss the Sky
I continue the sky area with the blue wash, making it look nice. The initial strokes you lay down in a wet-in-wet painting diffuse and disperse widely in and on the moist paper. Watch your strokes spread as you paint.
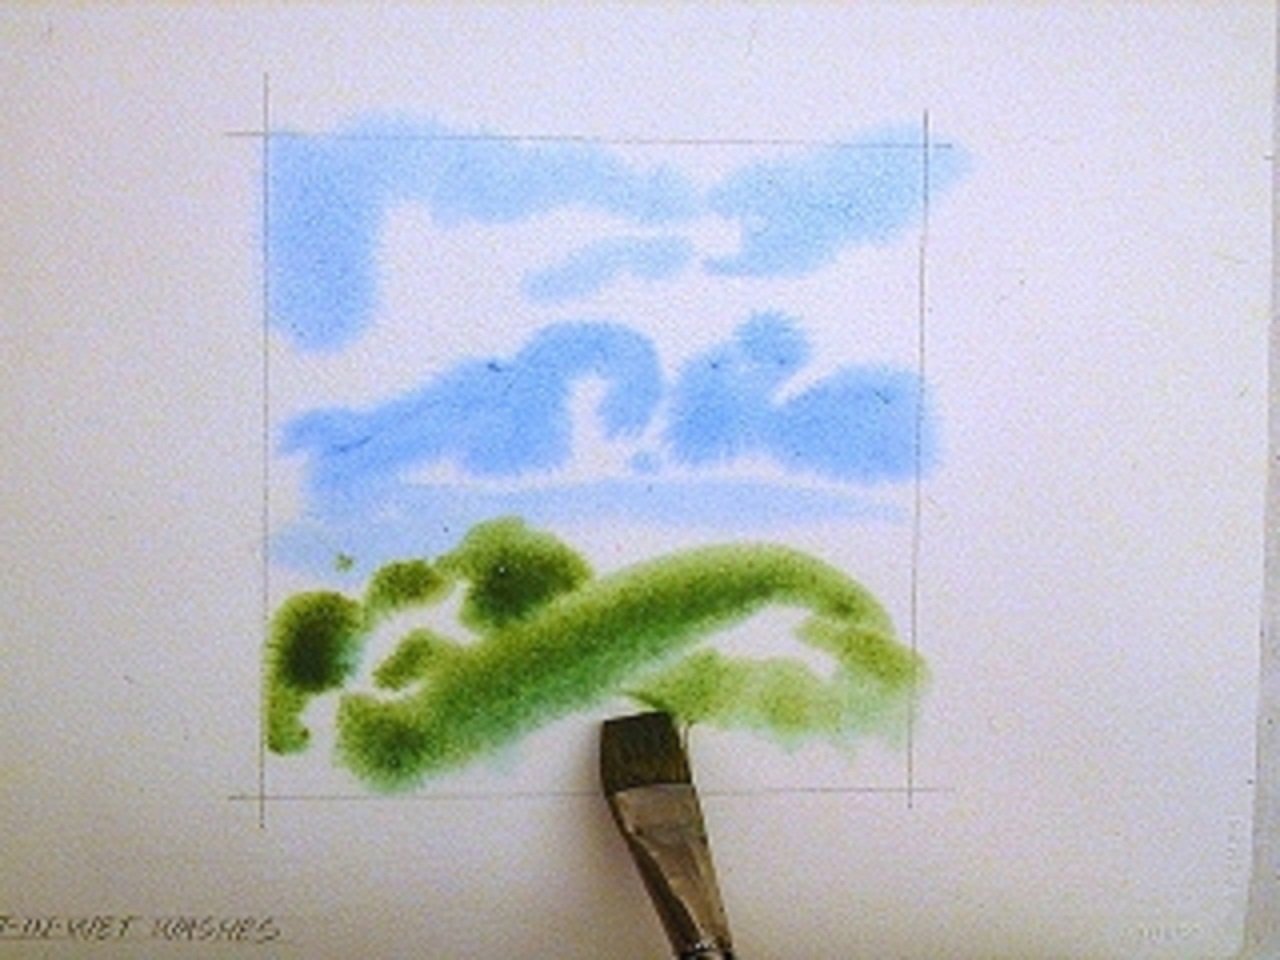
Well-Grounded Foreground
I wanted the foreground fairly diffused, so I quickly mixed up some Sap Green and a bit of Cadmium Yellow Medium and formed an interesting spread of wide strokes, which I finally decided looked like brush and bushes with some gaps for rocks. The foreground paint was a thicker wash than the first blue washes, and spread a little less initially. As the paper continues to dry, the painted strokes will spread less and less.
Adding a Little Form
I went to the palette and mixed some Phthalocyanine Green and Alizarin Crimson to get a grayish cool green. I started adding some suggestions of pine trees across the horizon using my #8 round red sable brush.
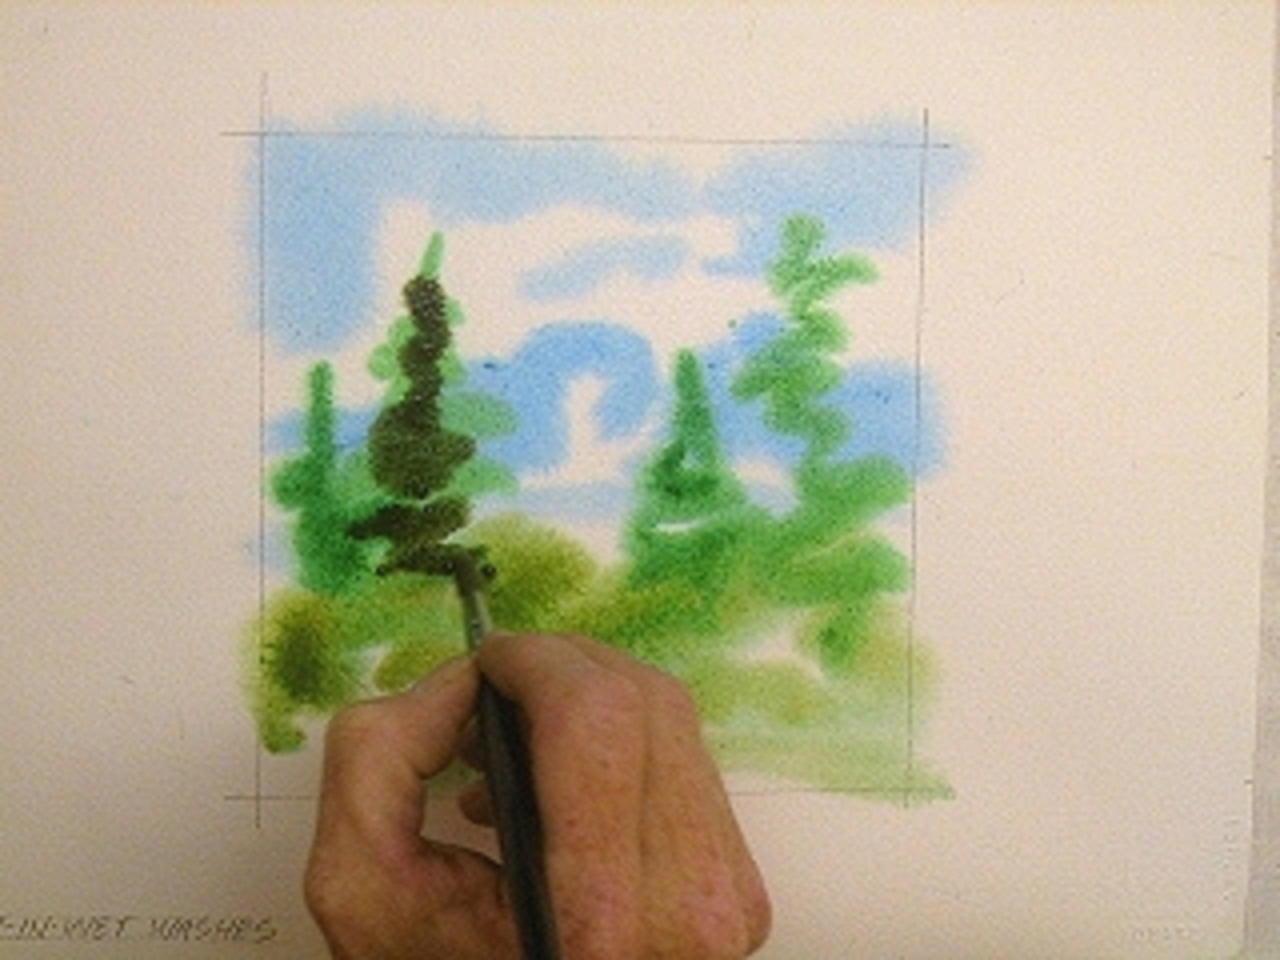
Intensifying the Structure
Having added the trees across the horizon, varying the intensity a bit as I went, I decided to use some darker accents to start pulling the design together. Using a straight heavy mixture of Hooker's Green Dark and my round brush, I picked out details and shapes to finish the tree line.
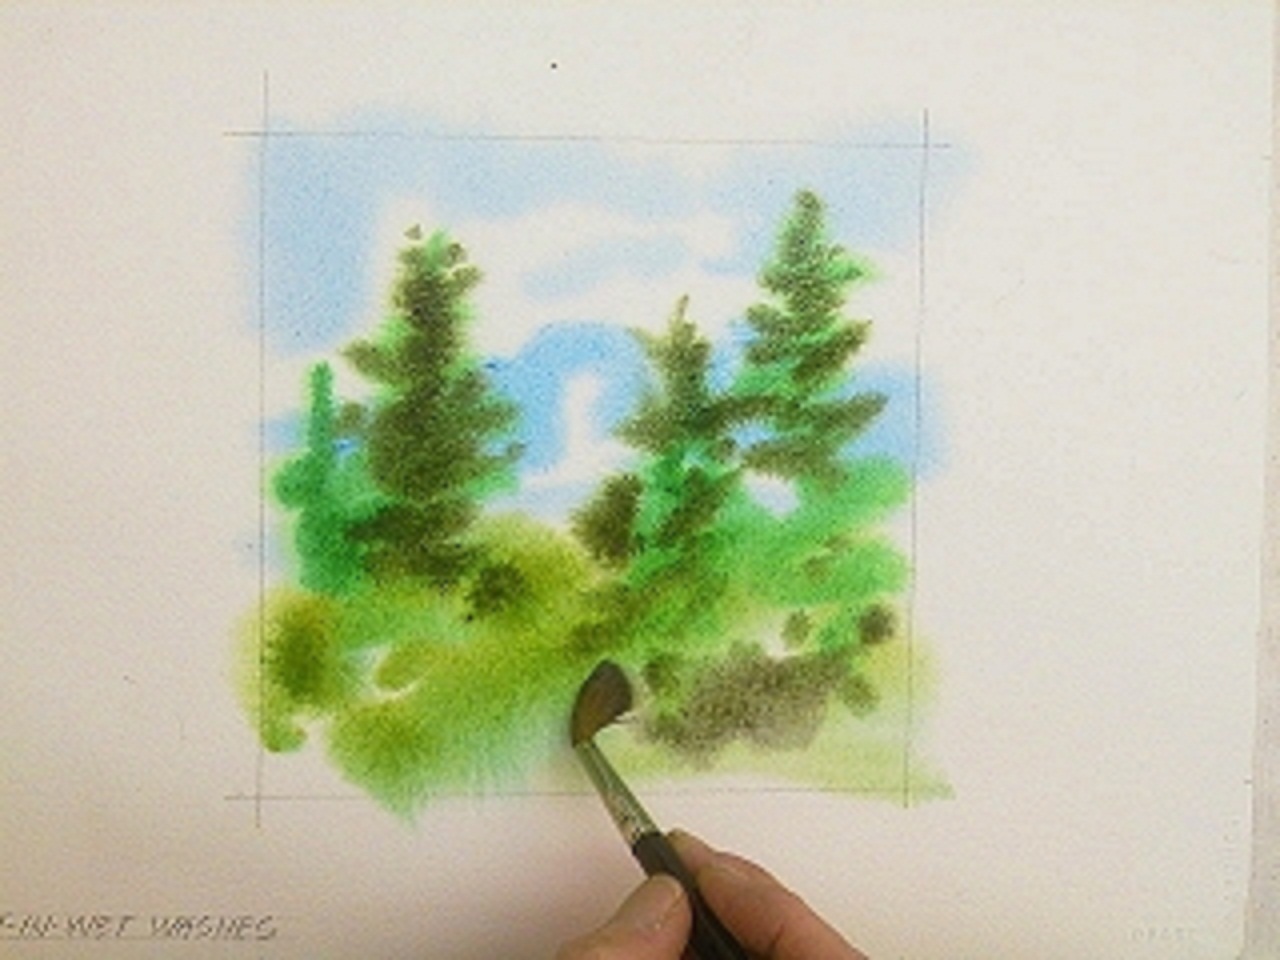
A Rock and a Hard Place...
To imply some rocks and such, I used a mixture of Lamp Black and a bit Burnt Sienna to create a light warm gray. I pulled the wash across the existing foreground wash with some white paper showing through. The warmer color helps to pull the foreground together and forward.
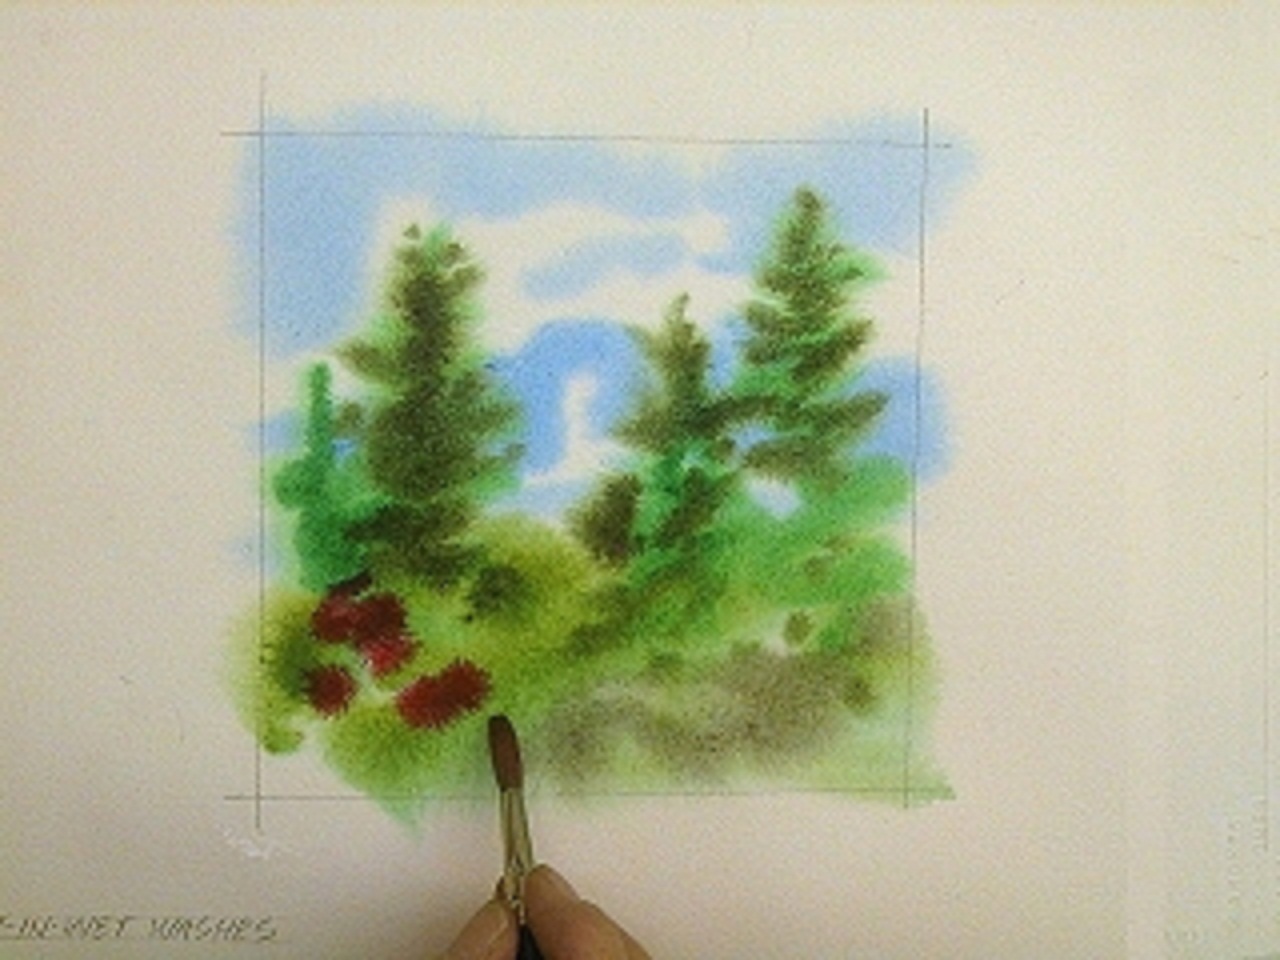
Making a Major Point
I liked the overall look but it needed some jarring accents to pull it off as an actual "painting." I used a thick mixture of Alizarin Crimson with a touch of Phthalocyanine Green to darken it. I started from the left adding some "florals" in the foreground area. Even as the red dots spread out, I could tell they would overpower the rest of the painting. I let the red spread a bit, then using a clean, rinsed and blotted #8 red sable brush, I lifted some light centers out of the red dots.
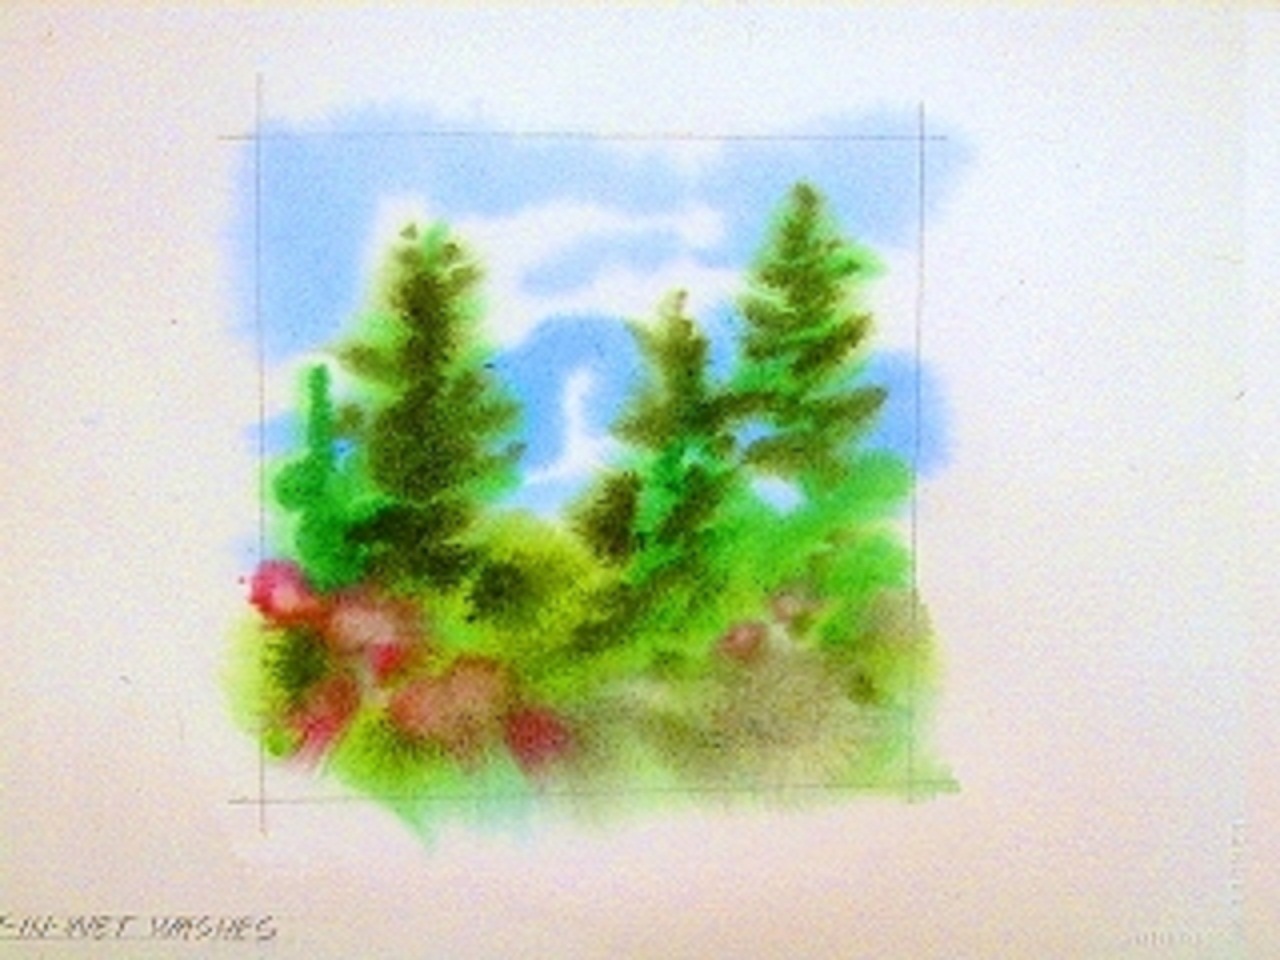
The Final Product
I then dripped a few drops of clean water in the center of a couple of the "florals" to let them spread and mingle with the surrounding colors. One of the hardest parts in working exclusively in this technique is knowing when to stop. You cannot get fine details initially and as you keep working the previous washes you've laid in continue to spread, mix, and mingle which may muddy some colors if you are not careful. Wet-in-wet watercolor technique is at times frustrating, but always exciting. There is host of hypnotic possibilities as the paint spreads and mingles organically on your wet paper.


