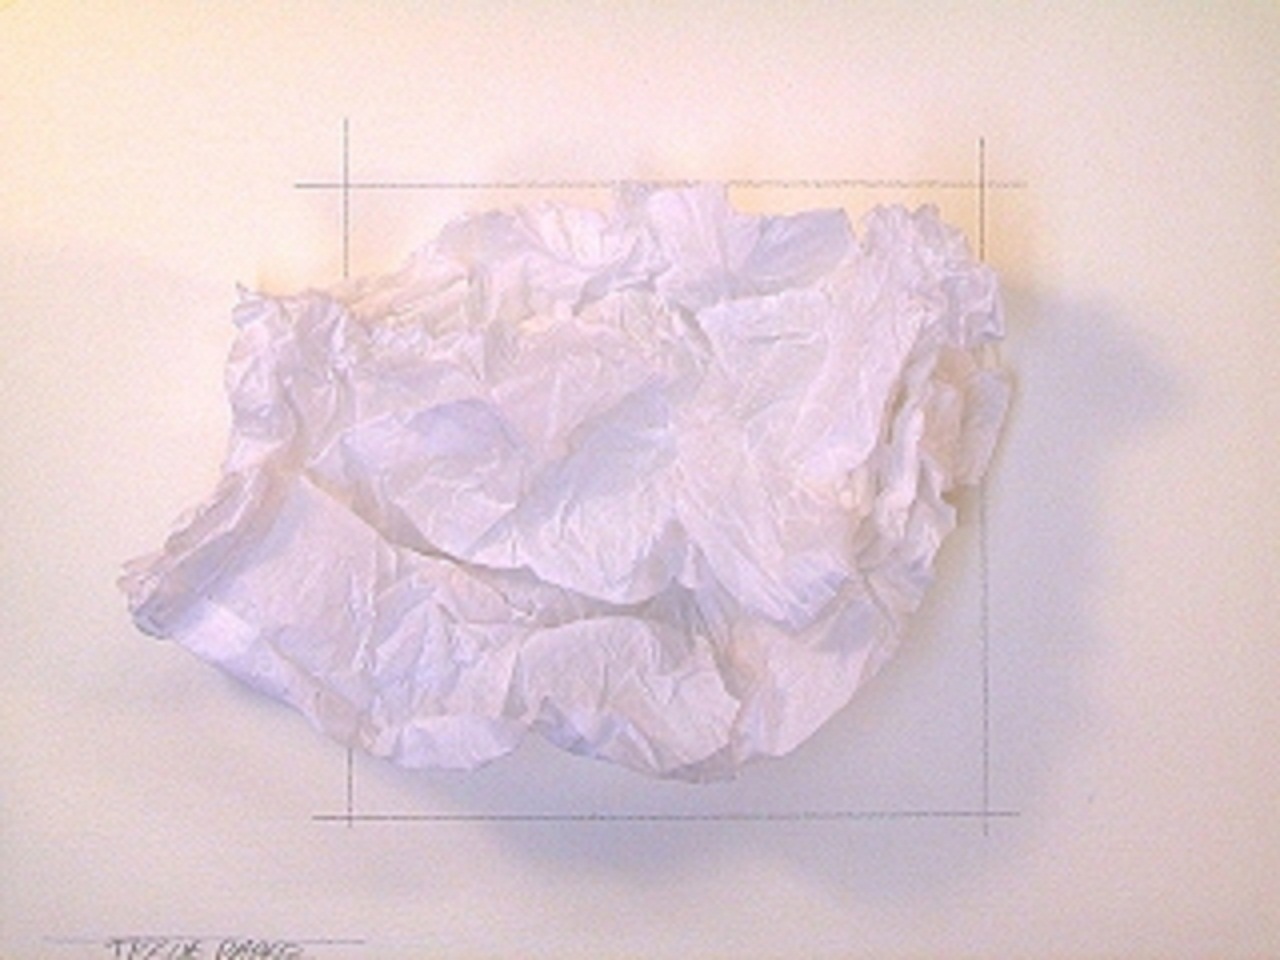
Materials and intentions
MATERIALS USED: Arches CP #140 watercolor paper, a 1½" Winsor & Newton Series 965 wash brush, a crumpled piece of white gift wrap tissue paper. COLORS USED: Permanent Rose, Alizarin Crimson, Sap Green. In this watercolor technique, I started by wadding up a single sheet of tissue paper and preparing washes of Sap Green, and a wash of Permanent Rose and Alizarin Crimson. I contemplated their fate.
Making a field of color
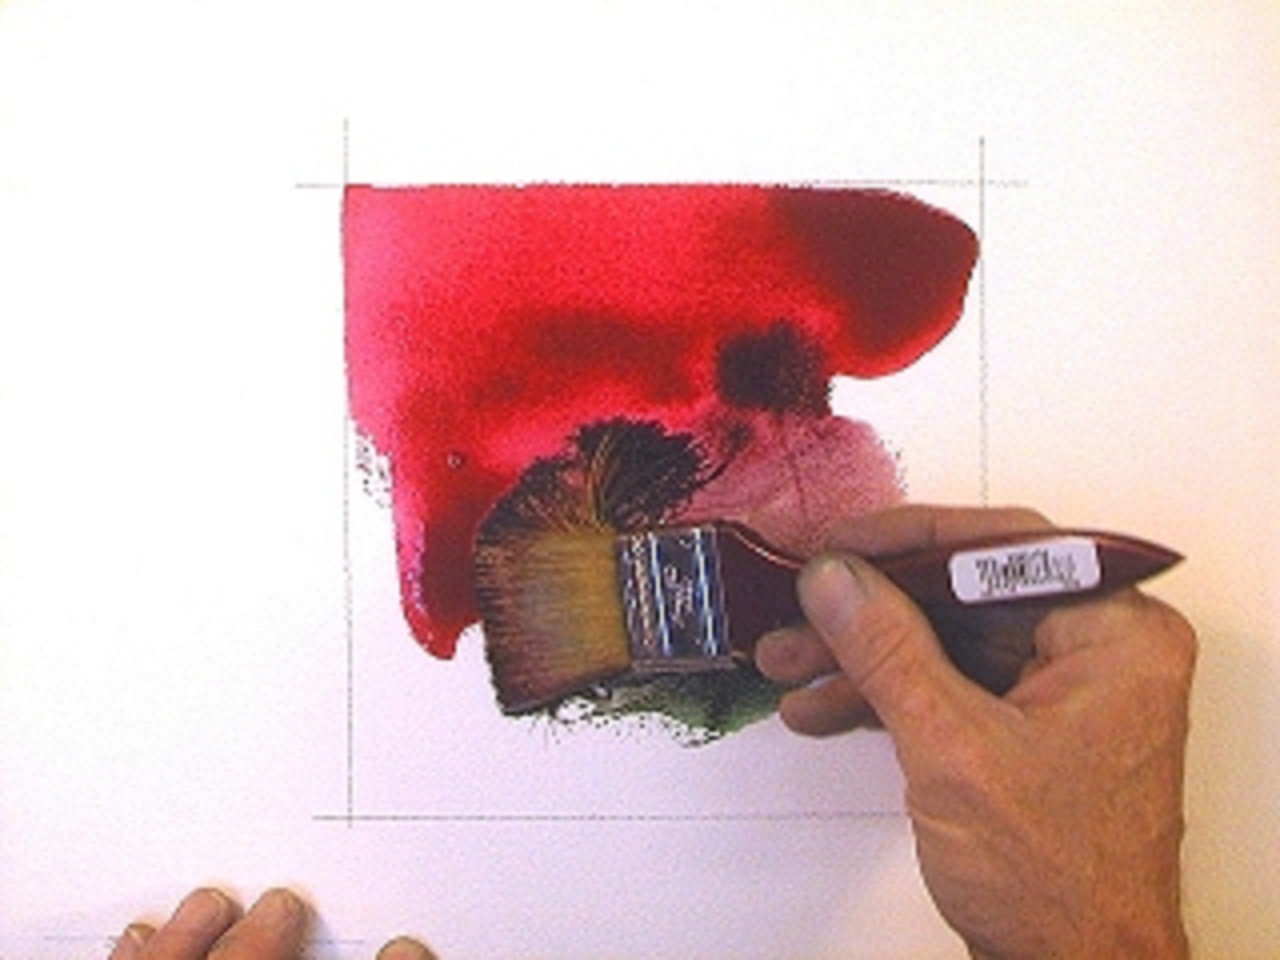
Using my 1½" wash brush I loaded it up with the previously mixed Permanent Rose and Alizarin Crimson. I proceed to lay washes and cut in the edges in with red. I dipped the corner of my (red) brush into some Sap Green and stabbed and mixed these two colors on the paper.

Before the big cover-up
I continued to scruff in the middle a bit and then thoroughly rinsed my brush. I finished painting the rest of the surface with a strong Sap Green wash intermixed with the reds from before. The surface is wet and saturated with watercolor paint in strong colors.
Clean that mess up!
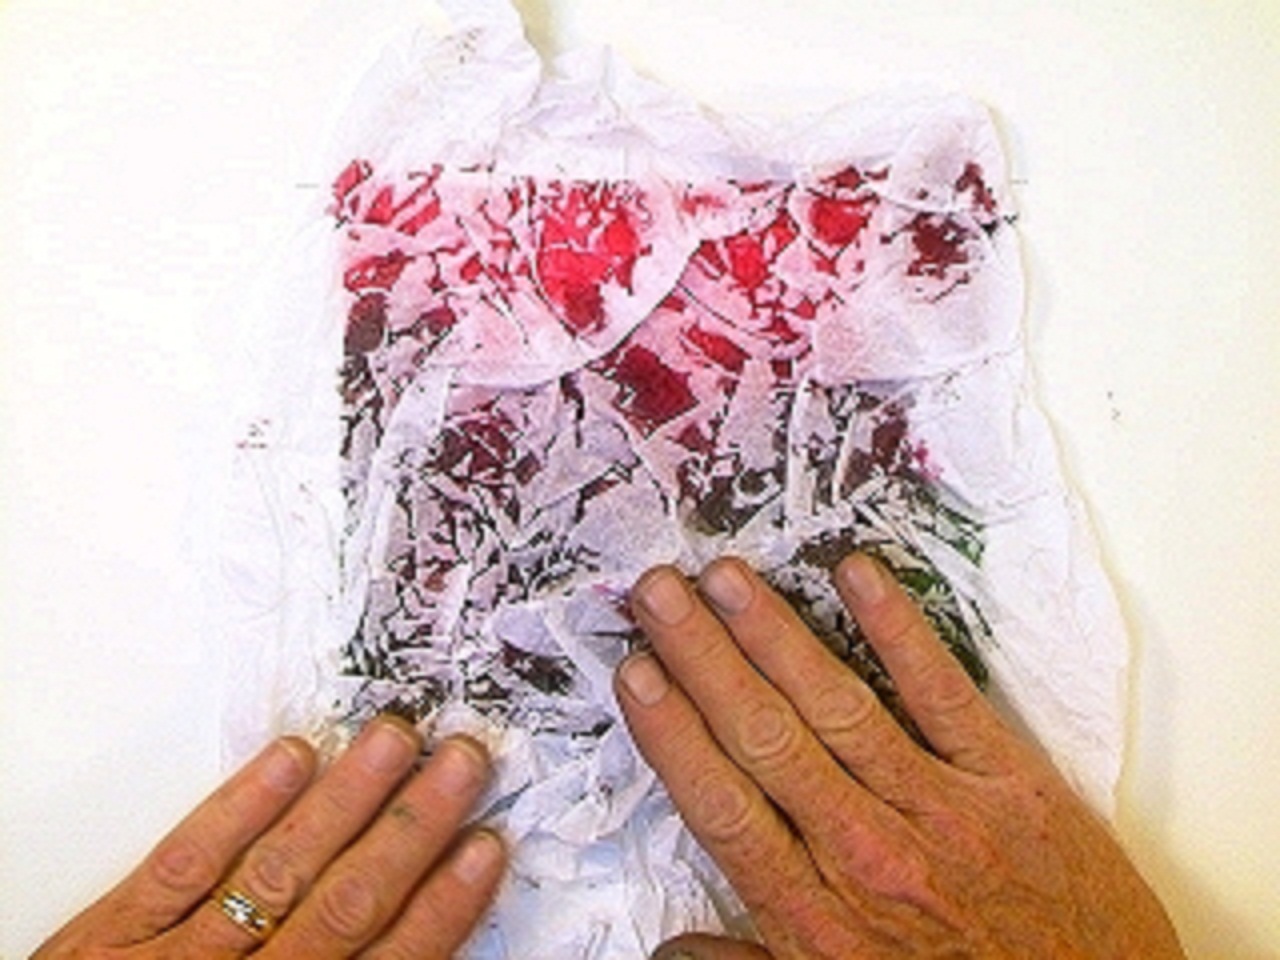
I spread the tissue out and shaped it into the approximate size I needed. Being careful to cover the entire area, I positioned the tissue over the wash and gentle pressed down with my palms. I did not press the tissue entriely flat, allowing the crinkles and creases to do their job. I set the example aside to dry, almost.
Tissue paper watercolor textures
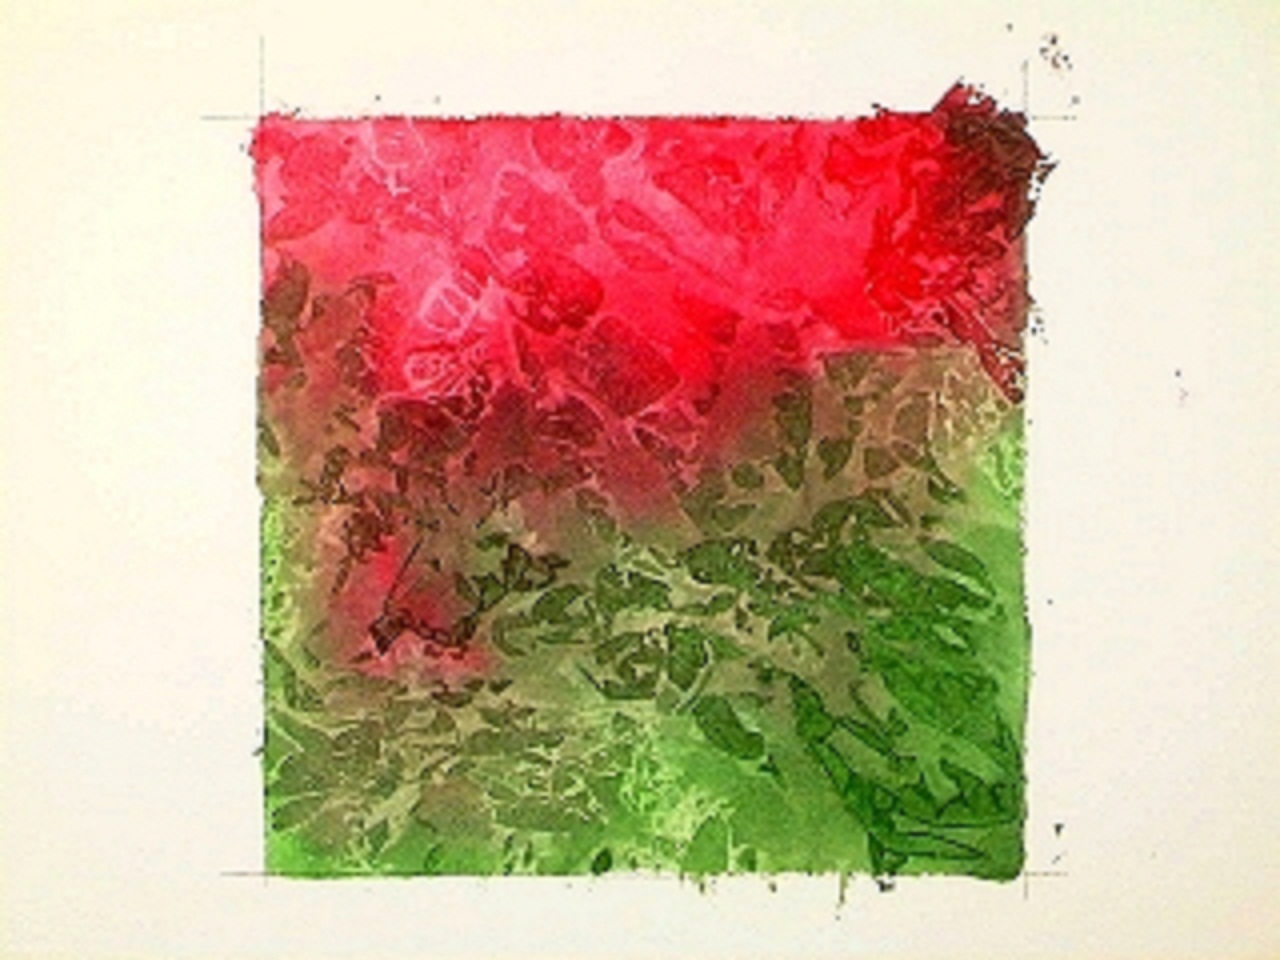
I knew that a couple of the pigments I used have high binder levels (see the salt tutorial) and the tissue paper could be glued to the painting if I let it dry completely. I lifted a corner to see if the design was set and gently pulled the tissue paper off to reveal the effect you see. Click image to enlarge.


