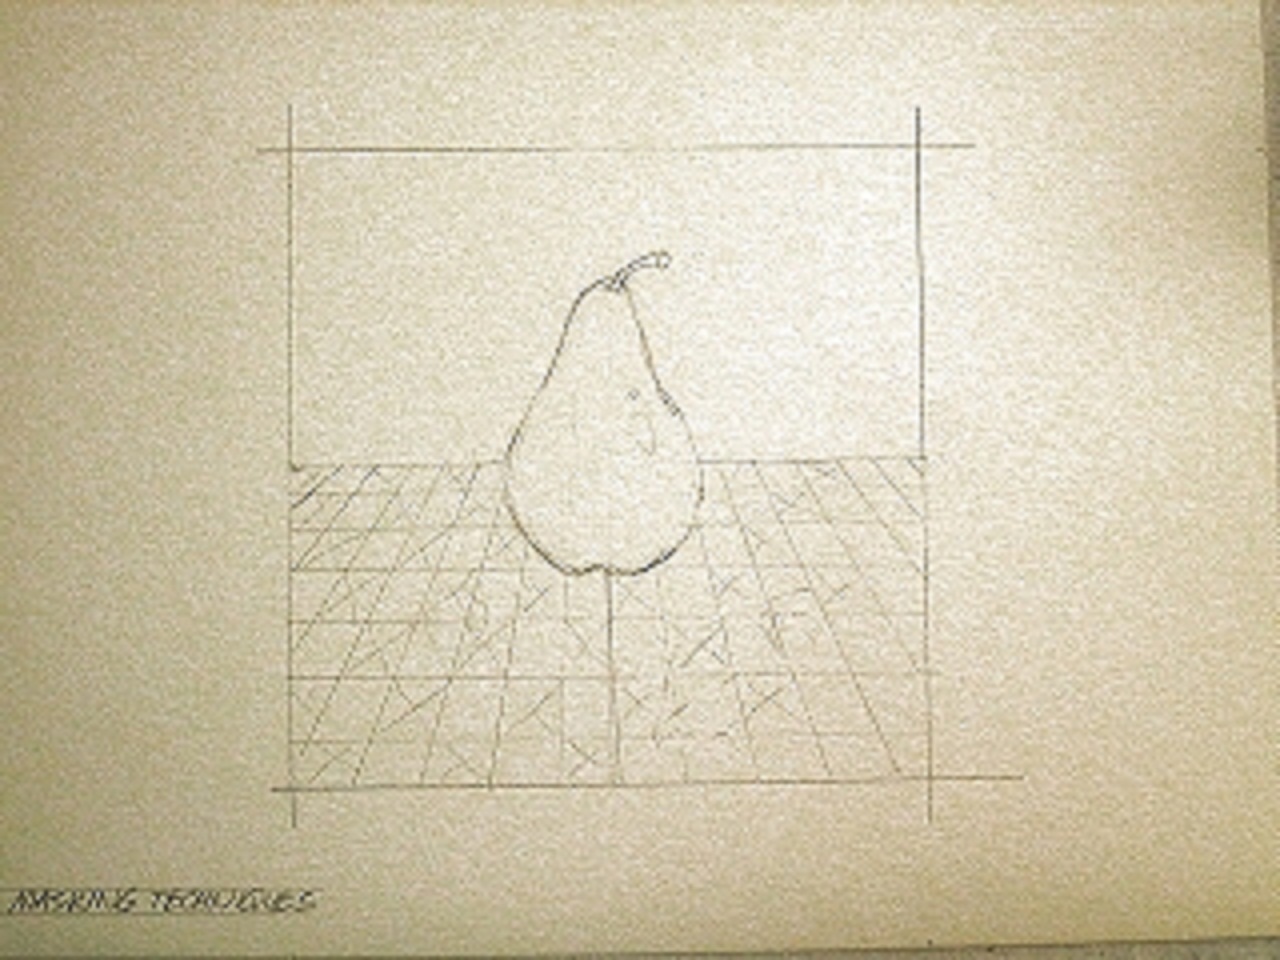
Materials and a Little Drawing
This tutorial shows the use of liquid frisket (a.k.a. masking fluid) to create light objects on a dark backgrounds and repetitive patterns. MATERIALS: Arches 140lb cold press watercolor paper, Incredible White Mask Liquid Frisket, masking tape, a #6 Liquitex synthetic Basic round (for frisket use only), Grumbacher 1" flat red sable, Kalish Kolinsky Red Sable #8 round, and a Kolonok #4 round Kolinsky red sable brush. Additionally: a hair dryer, a scrap of paper, and a square of artist's crepe rubber. COLORS (various brands): Cadmium Yellow Light, Cadmium Yellow Medium, Alizarin Crimson, Dioxazine Purple, Cobalt Blue, Phthalocyanine Blue, Phthalocyanine Green, Raw Umber, Burnt Sienna. Colors chosen are transparent and semi-transparent. A stark yellow pear on a dark background and checkered tablecloth became the subject matter. To help demonstrate this watercolor technique, I drew a simple composition in #2 pencil.
Protecting your Lights
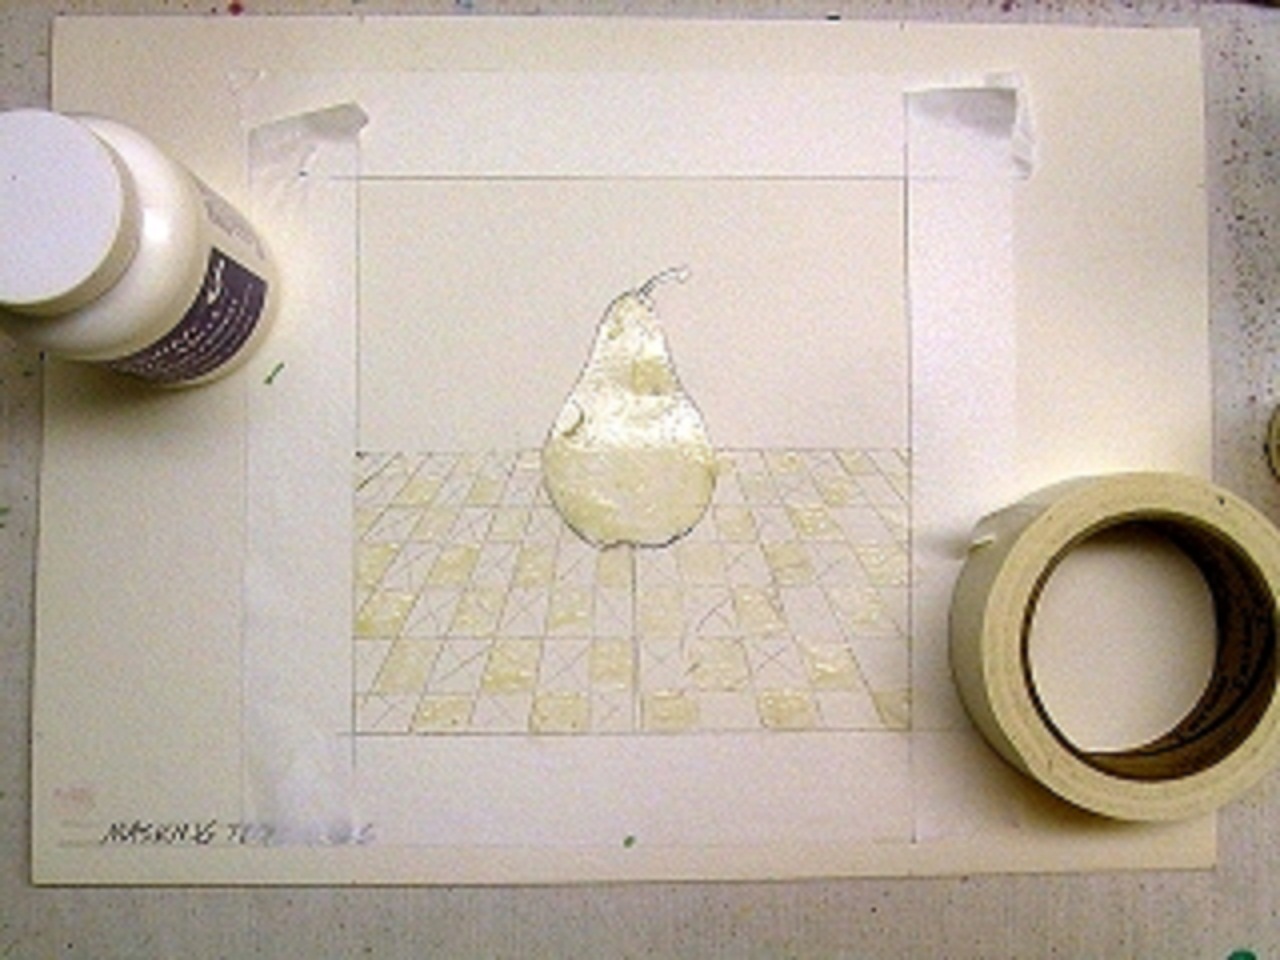
I started by stirring the liquid frisket. The solids tend to settle out if not used often enough. Dipping my already damp #6 synthetic round into the frisket, I used the scrap paper as a palette and smoothed my brush to a point. I then painted a layer of liquid frisket over the entire pear, stem and all. TIP: Do NOT use your sable brushes for frisket. It will ruin them by getting embedded in the hairs. Use a synthetic hair brush, moisten it before use. For even easier cleaning, use mild soapy water for wetting and rinsing your frisket brush.
Masking the Details
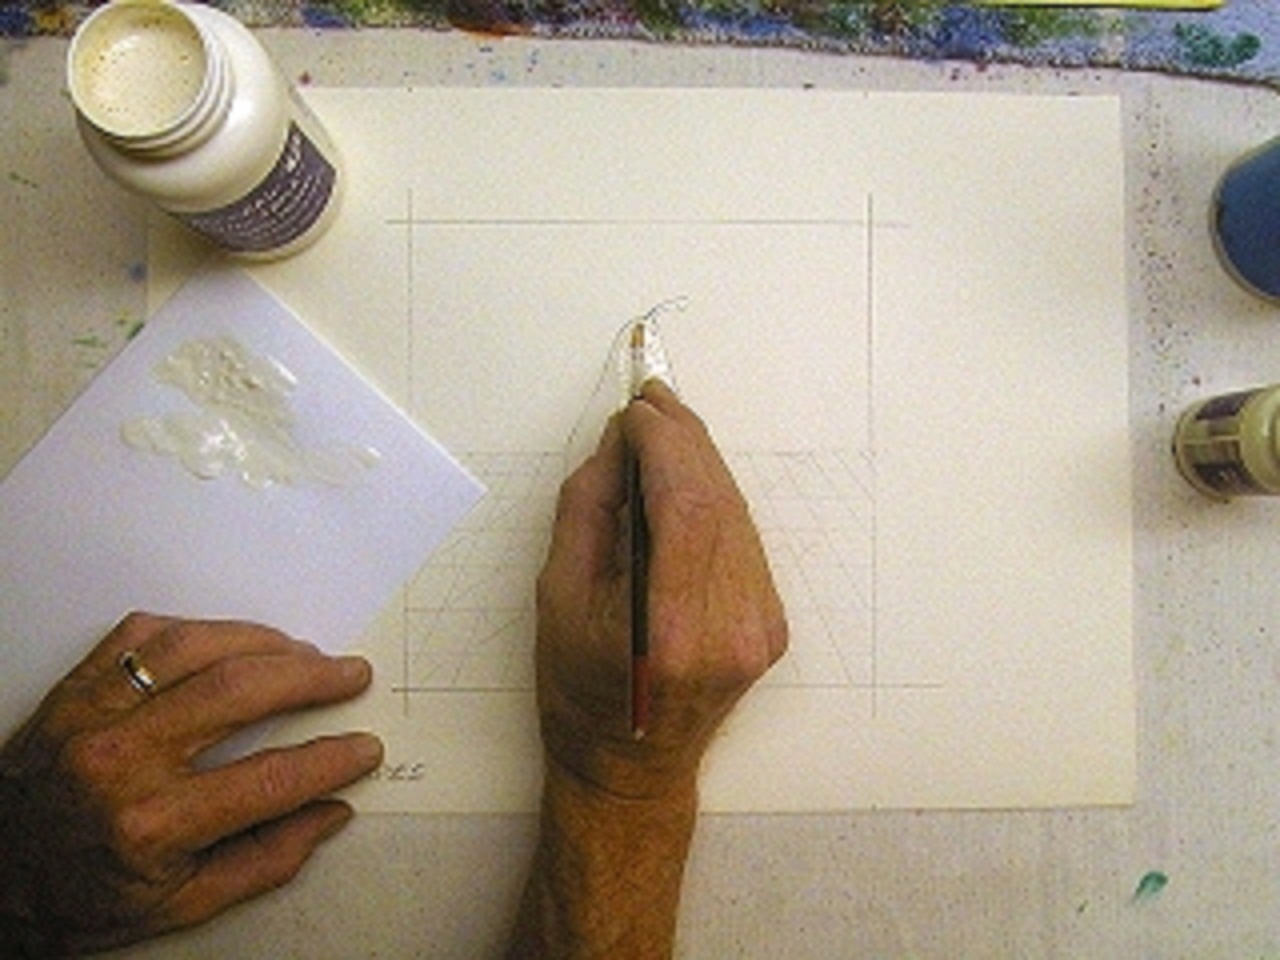
After the pear was masked, I decided which squares in the tablecloth pattern were white and proceeded to mask them all with frisket. Notice the "X" marks the spot in the squares to be dark. I taped off the edges of the entire painting with masking tape, gently smoothed the inside edges down and allowed the frisket time to dry.
It's Quicker Than You Think..
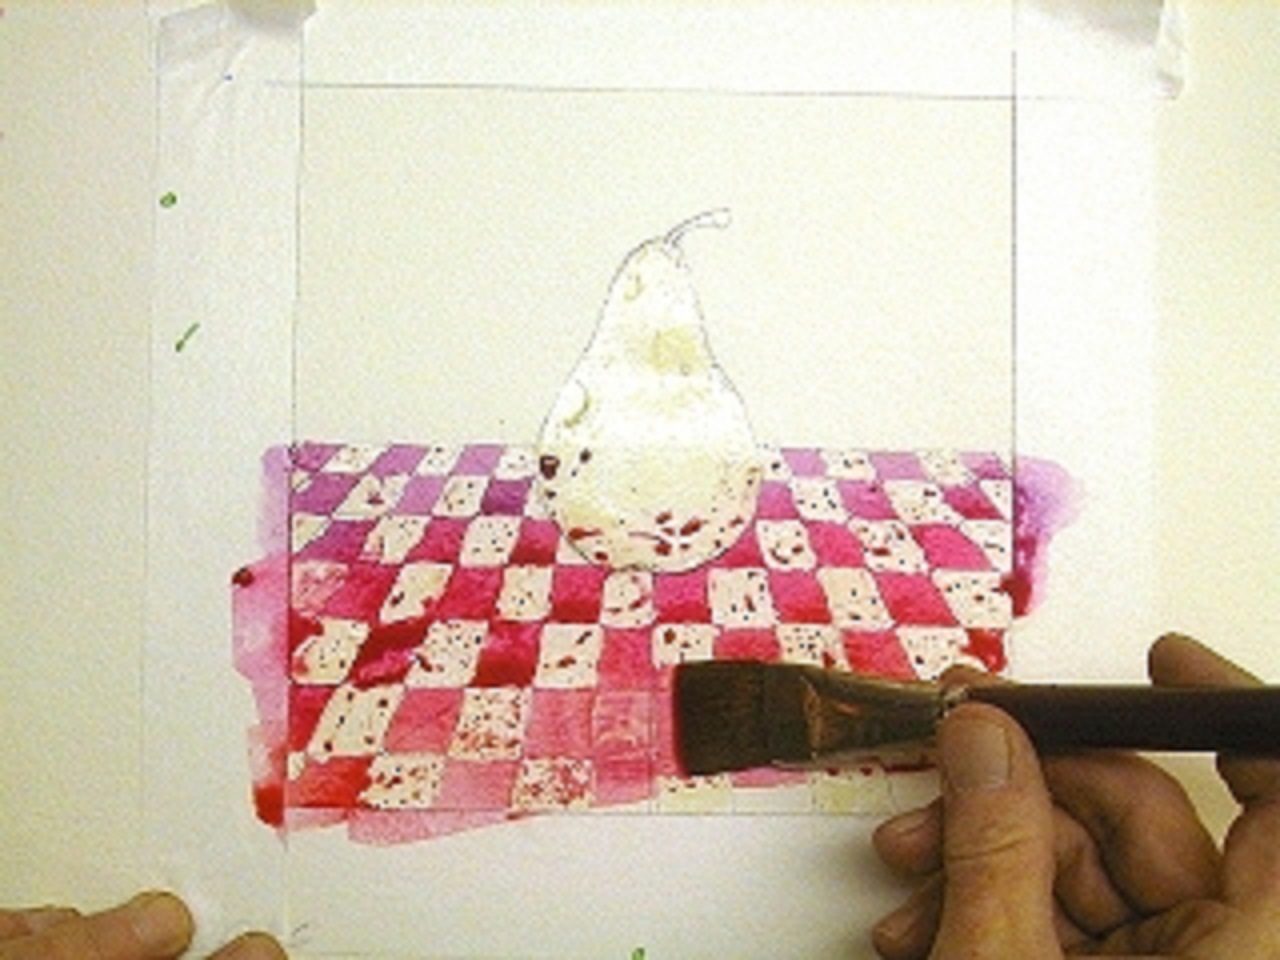
Using washes of Alizarin Crimson and Dioxazine Purple, I laid in the red squares of the tablecloth. I varied the color towards purple as the wash receded behind the pear, and graded the main red wash to a lighter red towards the foreground.
Dry It Up...Lay in the Background
After letting the first wash dry, I lightly mixed Phthalocycnine Green and Alizarin Crimson to form a dark murky blue-green color. With no background detail we'll rely on color and value instead. I washed in a dark, angled green area and added a touch of Phthalocyanine Blue before grading the wash to a lighter bluish green. I carefully cut in the line of the edge of the tablecloth.
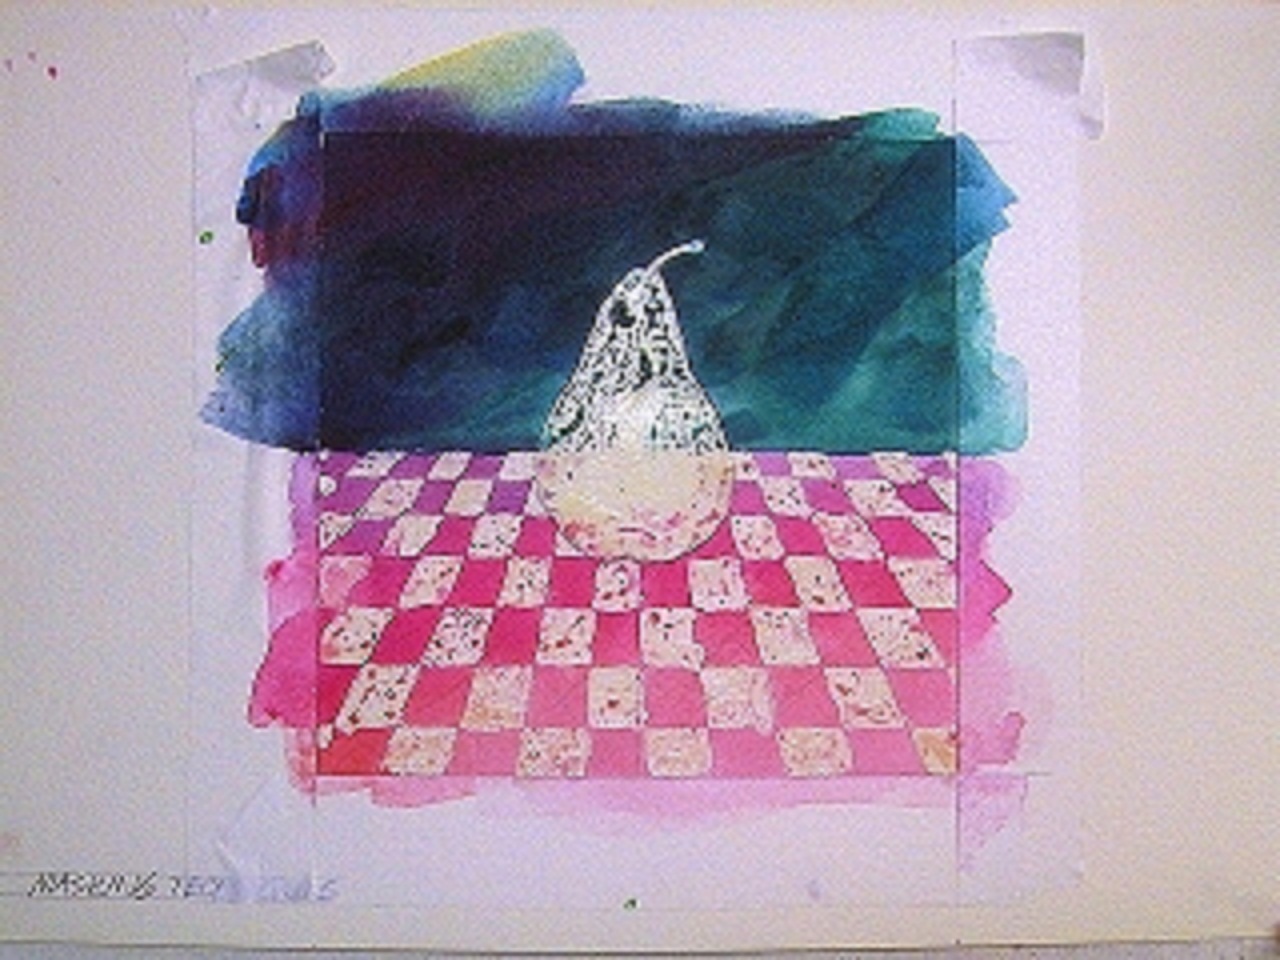
Underpainting Complete...Next, Drying Time
I finished off the background by mixing Alizarin into the Phthalocyanine Green to make a deep dark Maroon and blended into a shadowy upper left corner. At this point take a moist brush or tissue and carefully dab up any puddles of paint resting on the frisket. Allow painting to completely dry.
Removing the Mask...
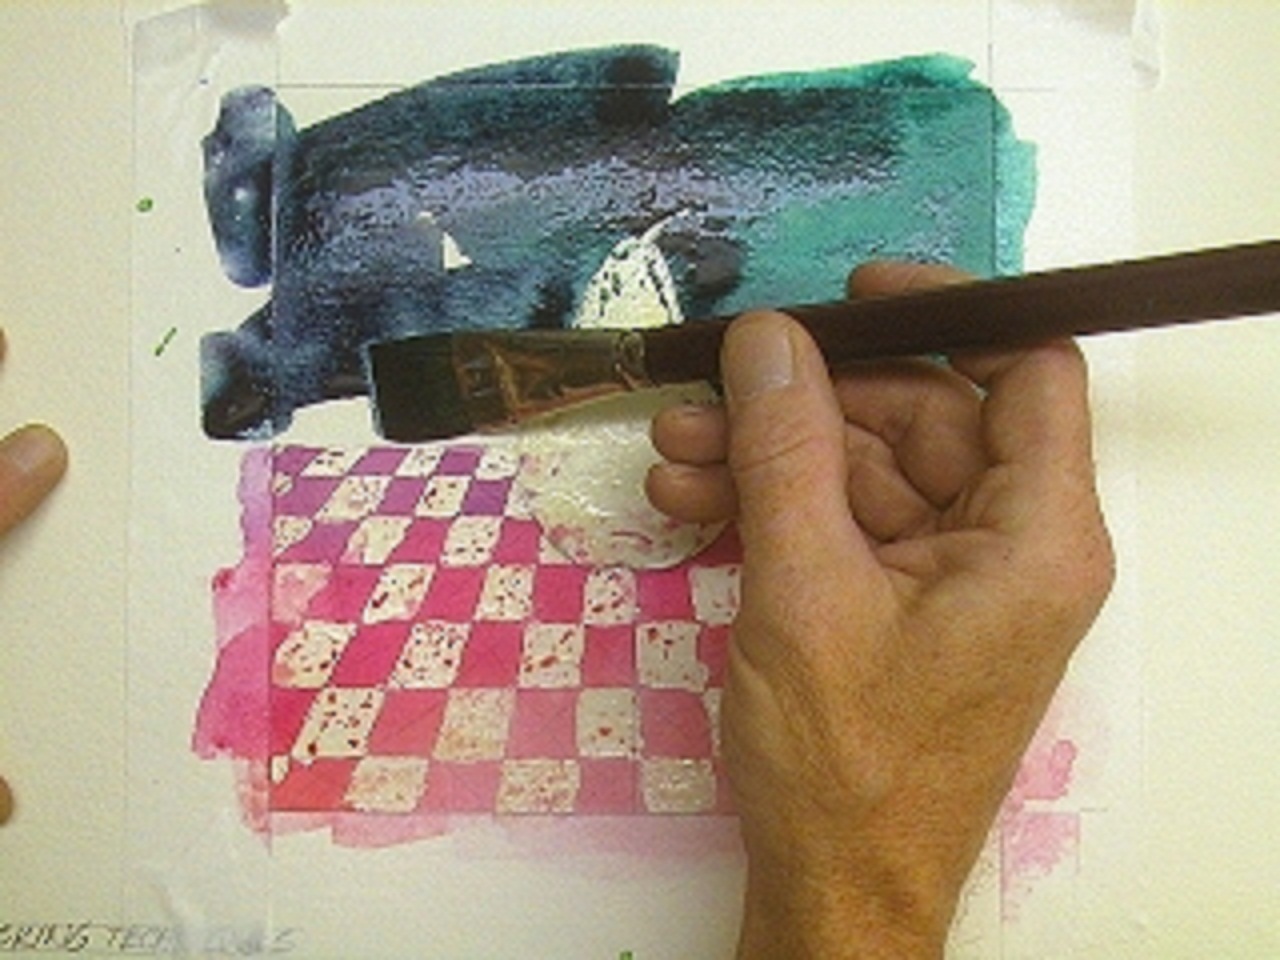
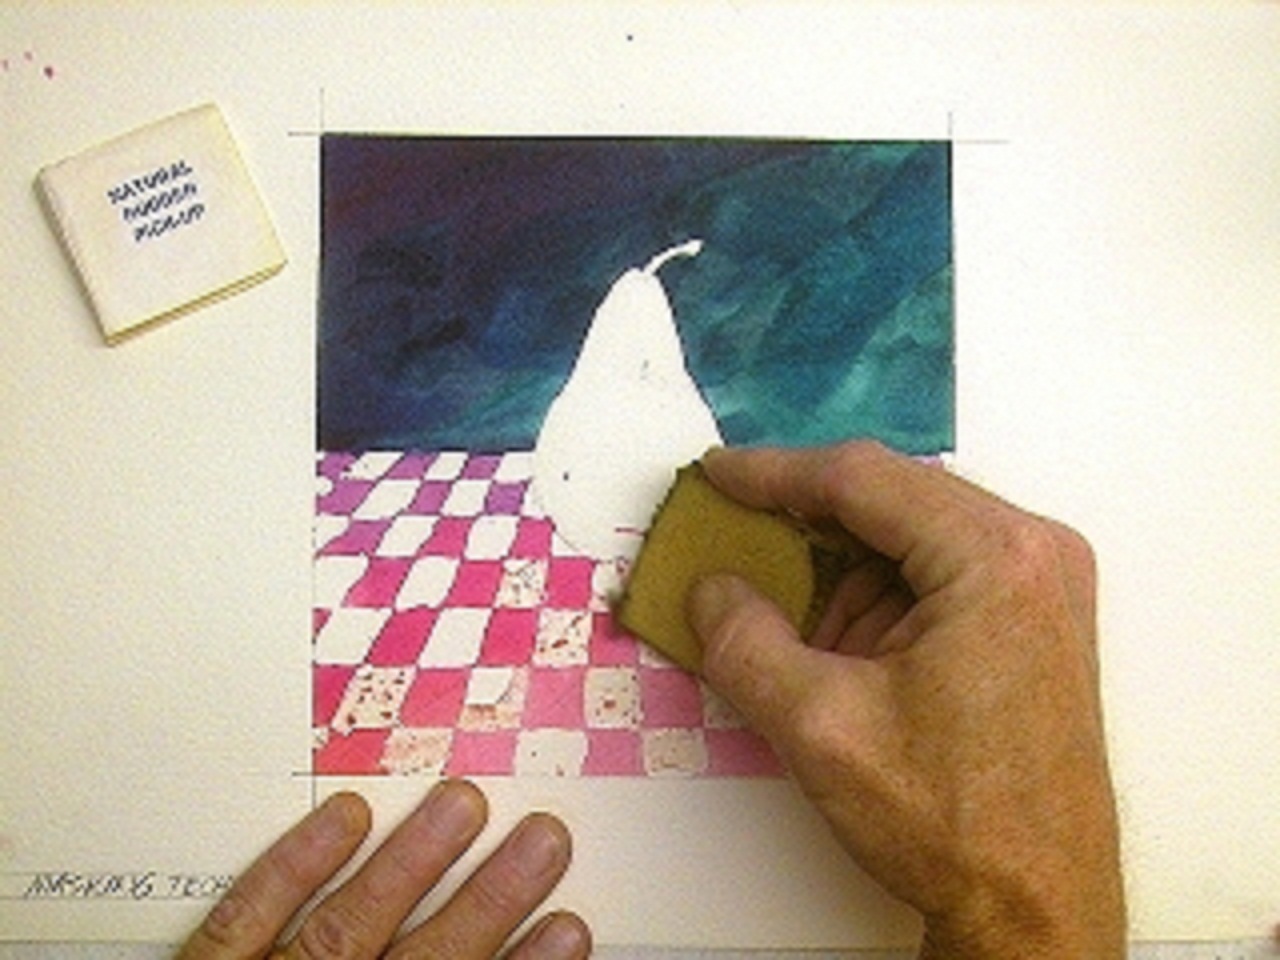
To remove dried liquid frisket, you need a Natural Rubber Pickup. They come in little squares in paper sleeves. They are made of a crepe, a crude rubber used for the soles of shoes. It has a high tack. Gently stroke the dried liquid frisket from the edge of the painted area into the masked area. I work in short strokes from top to bottom or left to right, pulling with an even light pressure. The rubber pickup will roll and pull up the dry liquid frisket. Do this carefully and remove all traces of frisket. If you can't find or don't have a rubber pickup, you can use your finger too - just remember to be gentle! If your paper is not totally dry, you can accidentally pull some paper fibers up with the frisket.
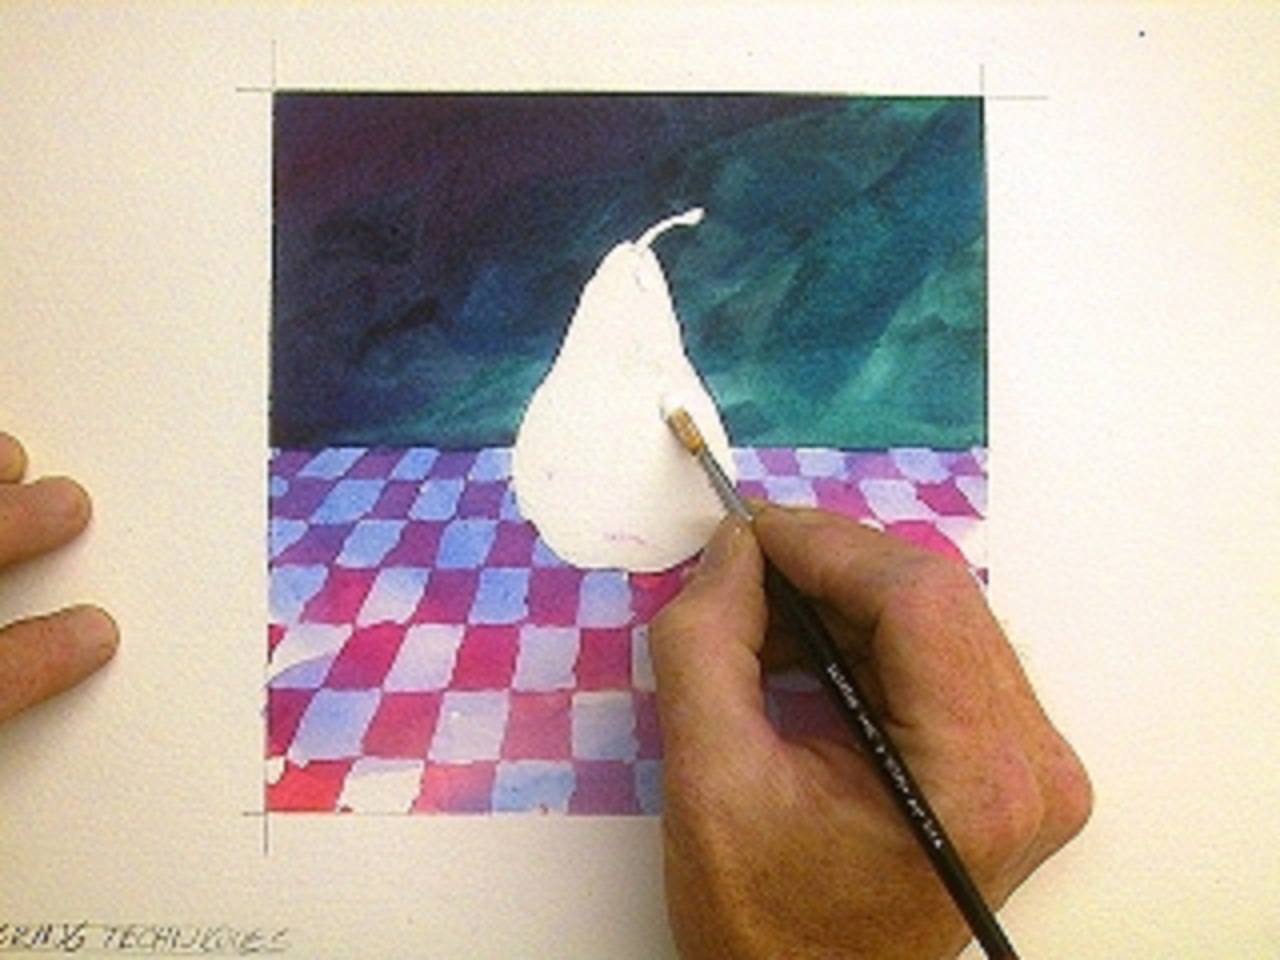
Adding an Illusion of Depth
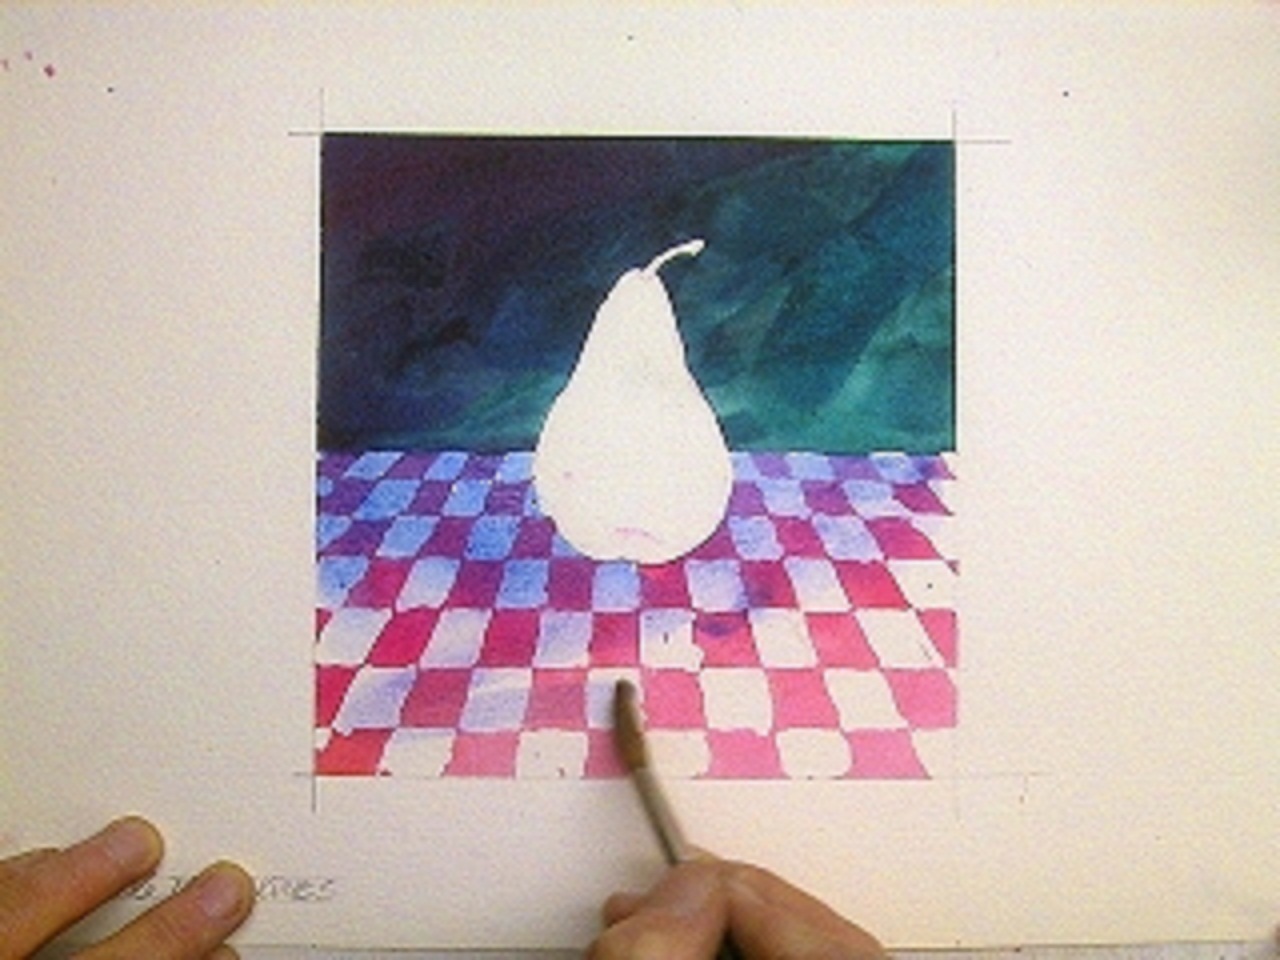
I wanted the covered tabletop to have a sense of depth and worked on the areas in shadow. Using my #8 red sable round brush, I loosely mixed Cobalt Blue, Phthalocyanine Blue, and Dioxazine purple in a couple areas of my palette. Varying the colors as I went, I graded the shadow areas from cooler richer blues to warmer lighter blues in the foreground.
Points of Light
After letting the last areas dry, I wanted to keep some highlights open on the pear before I continued. Using the #6 synthetic round brush, I covered a couple highlight areas on the right side of the pear and let it dry.

A Singular Pear
I started working on the pear by laying a light glaze of Cadmium Yellow Light (and Medium) over the entire pear shape. Adding tiny amounts of Raw Umber, Phthalocyanine Green, and Burnt Sienna I started modelling the form of the pear. I dropped dark "pin pricks" of the pear surface detail in with the tip of a #4 round red sable brush.
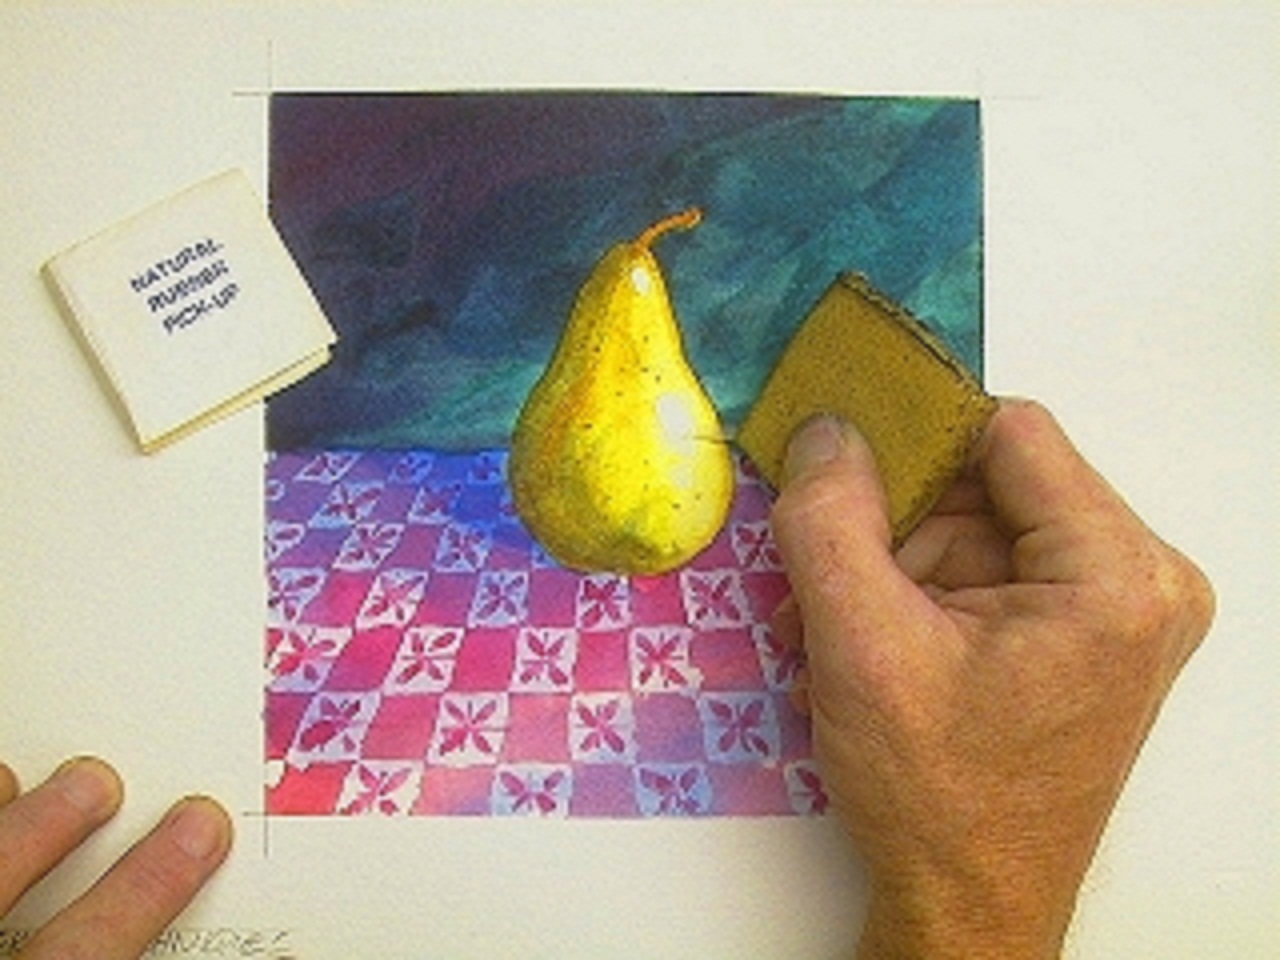
Final Strokes and Clean Up
I let the work on the pear dry, then continued modelling the shading on the pear. Using cool gray washes (Burnt Sienna and Phthalocyanine Blue), I further modelled the shadow side and other areas of the pear. The tablecloth needed to be more fully realized, so I devised a simple floral design over the "X" squares to pull it together. Using a #4 round red sable and Alizarin Crimson in varying values, I systematically painted the pattern on the cloth. After painting was complete, I let the painting dry again and removed the last of the frisket using the rubber pickup.
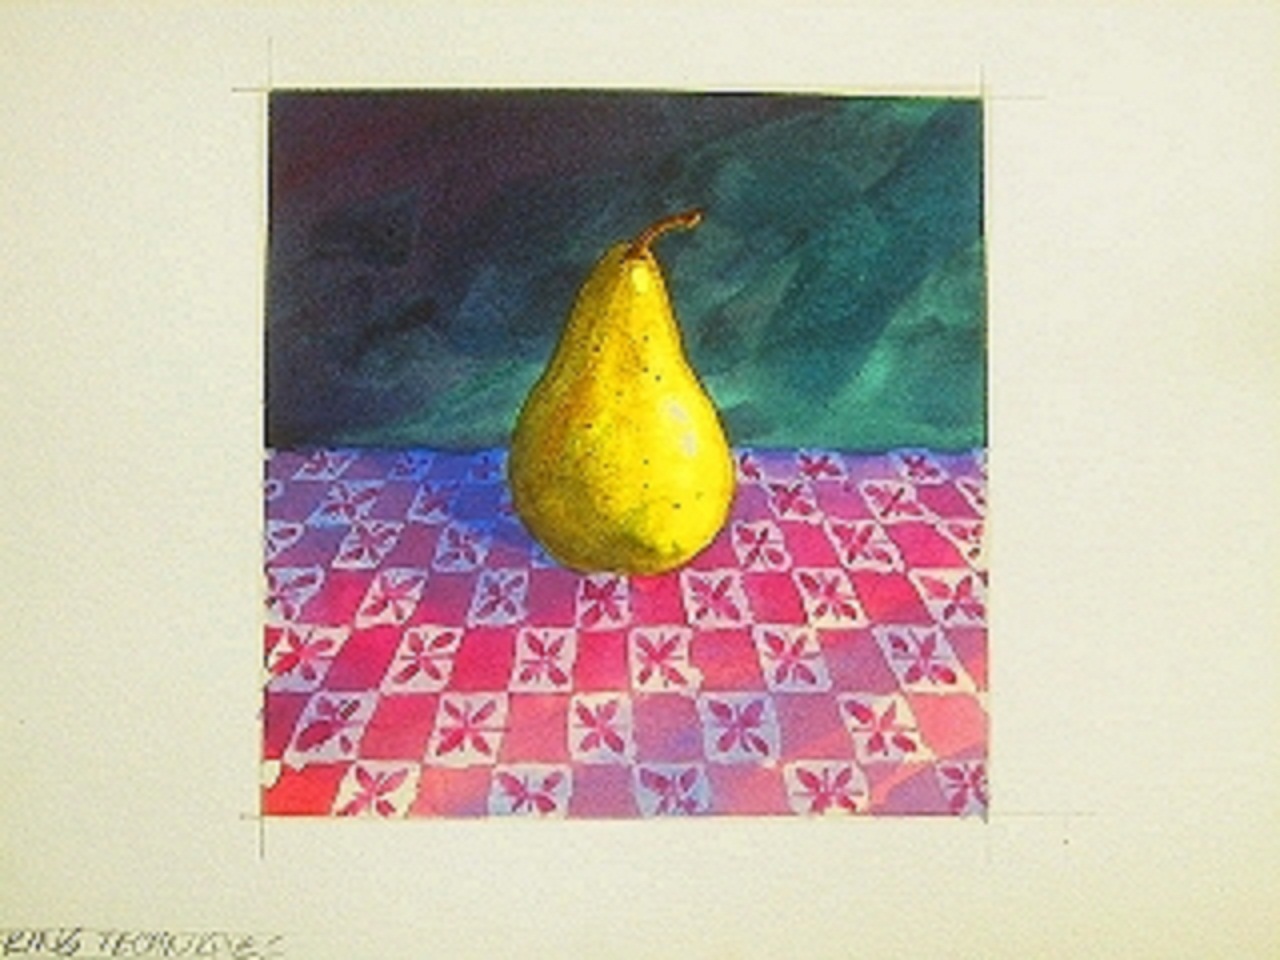
Final Example Painting
To clean up the finished painting, I used a kneaded eraser to remove most traces of the pencil drawing in the painting itself. Click the image to enlarge. Here we have a 7" square watercolor painting of a yellow pear on a red-checkered tablecloth painted using the Liquid Frisket and Masking Tape techniques. This tutorial uses a representational approach the the subject matter, pre-planning was needed to protect areas needed for later stages of the painting. More spontaneous approaches to masking are also viable alternatives. You can use liquid frisket on areas already painted for some amazing multi-layered effects. This works with varying degrees of success depending on the underlying pigments.


