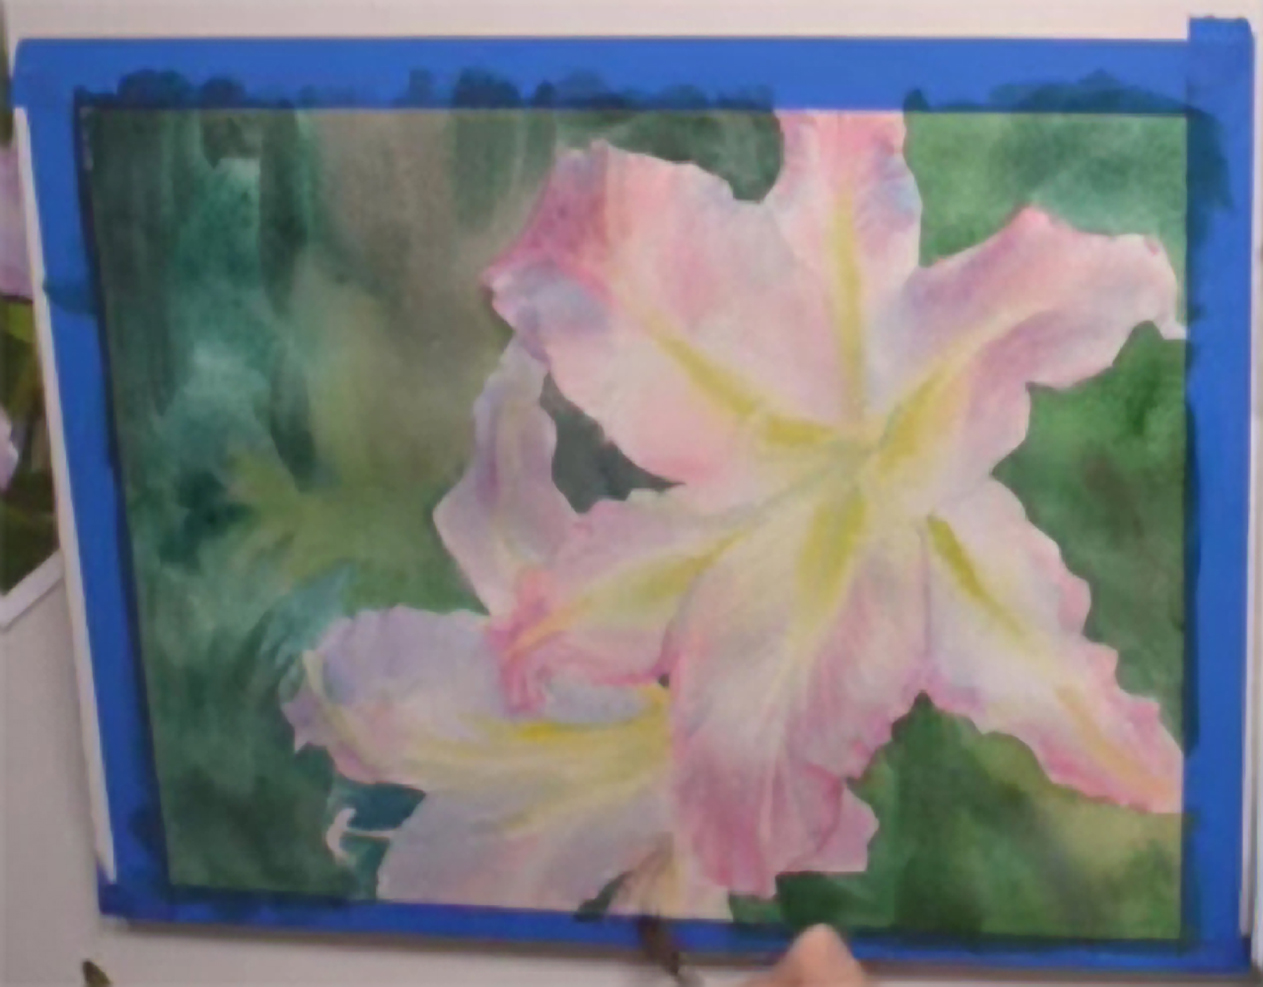
Here's a close-up of pink lily flowers painted with wet-on-wet, wet-on-dry and splattering techniques. Video coming soon.
Materials used:
Brushes
- Size 16, Princeton round synethic hair brush
- Size 7, Recap kolinsky hair brush
- Size 6, Escoda Reserve kolinsky hair brush
- Size 2, Raphael small synthetic brush
- Size 10, Escoda angular brush
- Rosemary and Company large squirrel hair brush
Paints
- Lemon Yellow
- Permanent Sap Green
- Cerulean Blue
- Purple Dioxide
- Permanent Purple
- Rose Tyran
- Orange
- Viridian
- Hookers Green
- Perylene Green
- Cobalt Blue
- Burnt Sienna
- Cadmium Red
- Crimson
- Cadmium Yellow
- Burnt Ombre
- Paper
- Arches 140 pound cold-pressed watercolor paper
Miscellaneous
- Masking tape
- Container of water
- Painter's palette
- Paper towels
- Towel
Step 1: Sketch and Dampen Paper
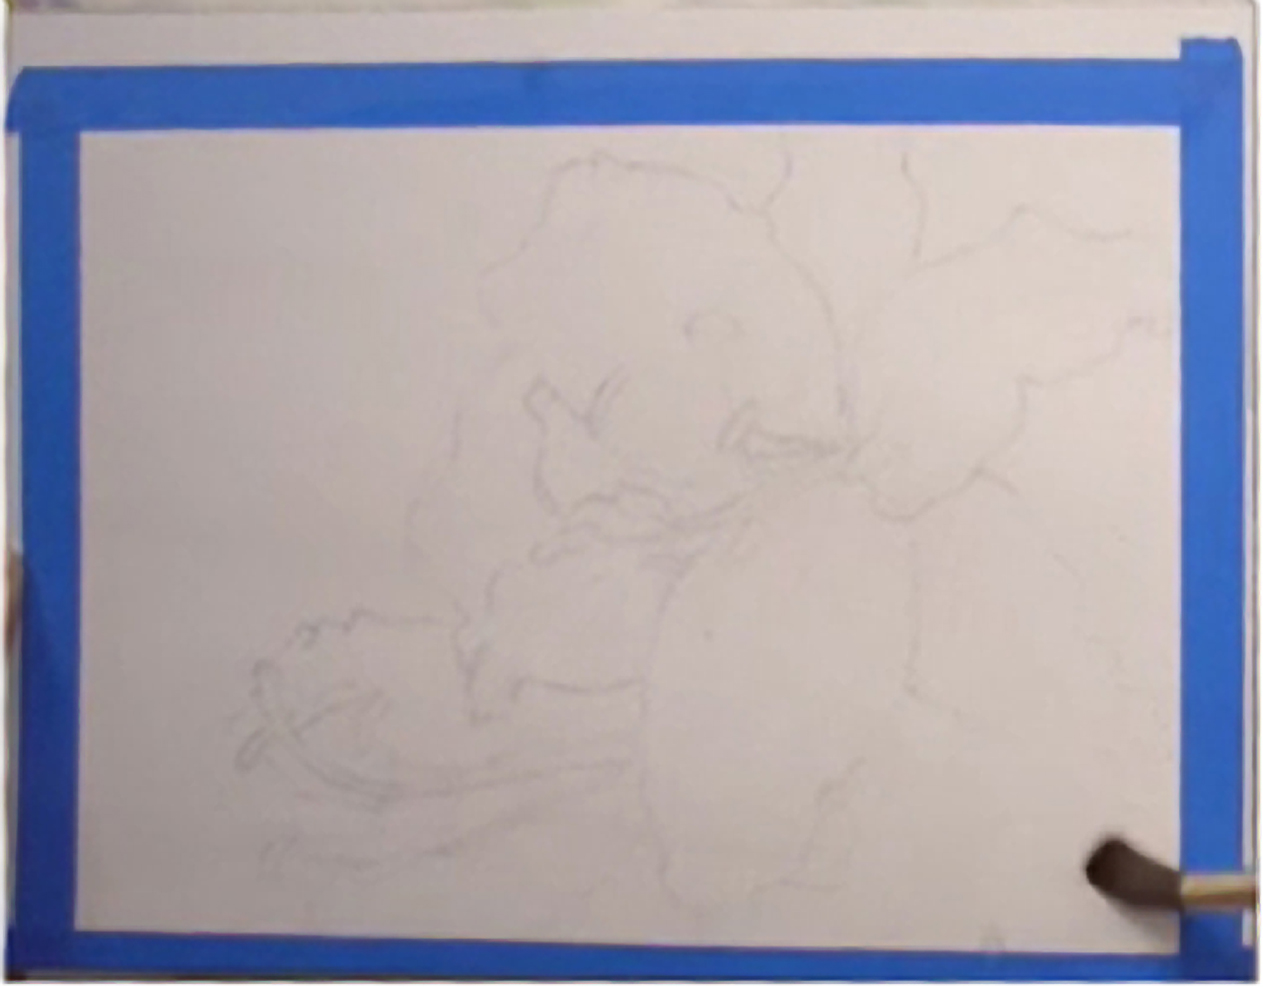 Border your paper with masking tape to protect the edges of your painting. Using your reference image, sketch out the basic outline of your lilies and determine what colors you will be using in the painting. For the first layer, prep your artist's pallet with Lemon Yellow, Permanent Sap Green, Cerulean Blue, Purple Dioxide, Permanent Purple, Rose Tyran, and Orange. Spray the paper with a water bottle and using the size 16 Princeton round brush, or similar large brush, spread the clean water around. Now you're ready to get started on first layer using a wet-on-wet technique.
Step 2: Painting Shapes Of Lighter Colors
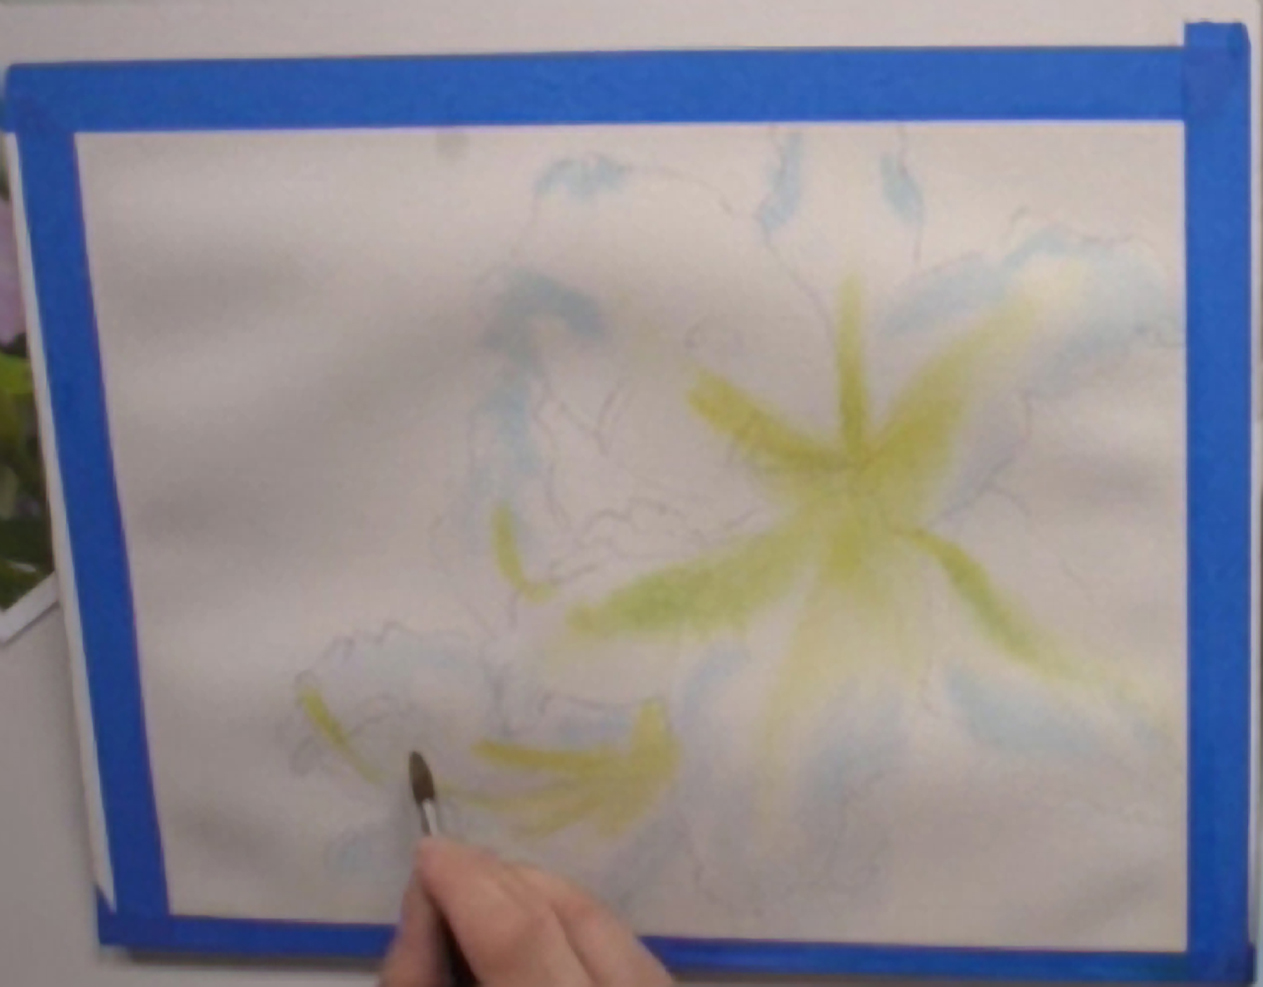 We are starting with the lighter colors first. Taking the size 7 kolinsky hair brush, add some Lemon Yellow and Sap Green to paint the shape of the highlights of the lilies. Using a clean wet brush or paper towel, you can lift out any unwanted bleeding. Tilt the painting to allow the colors to move around the paper. Next, add a light value of Cerulean Blue around the edges of the petals.
Step 3: Painting Shadows
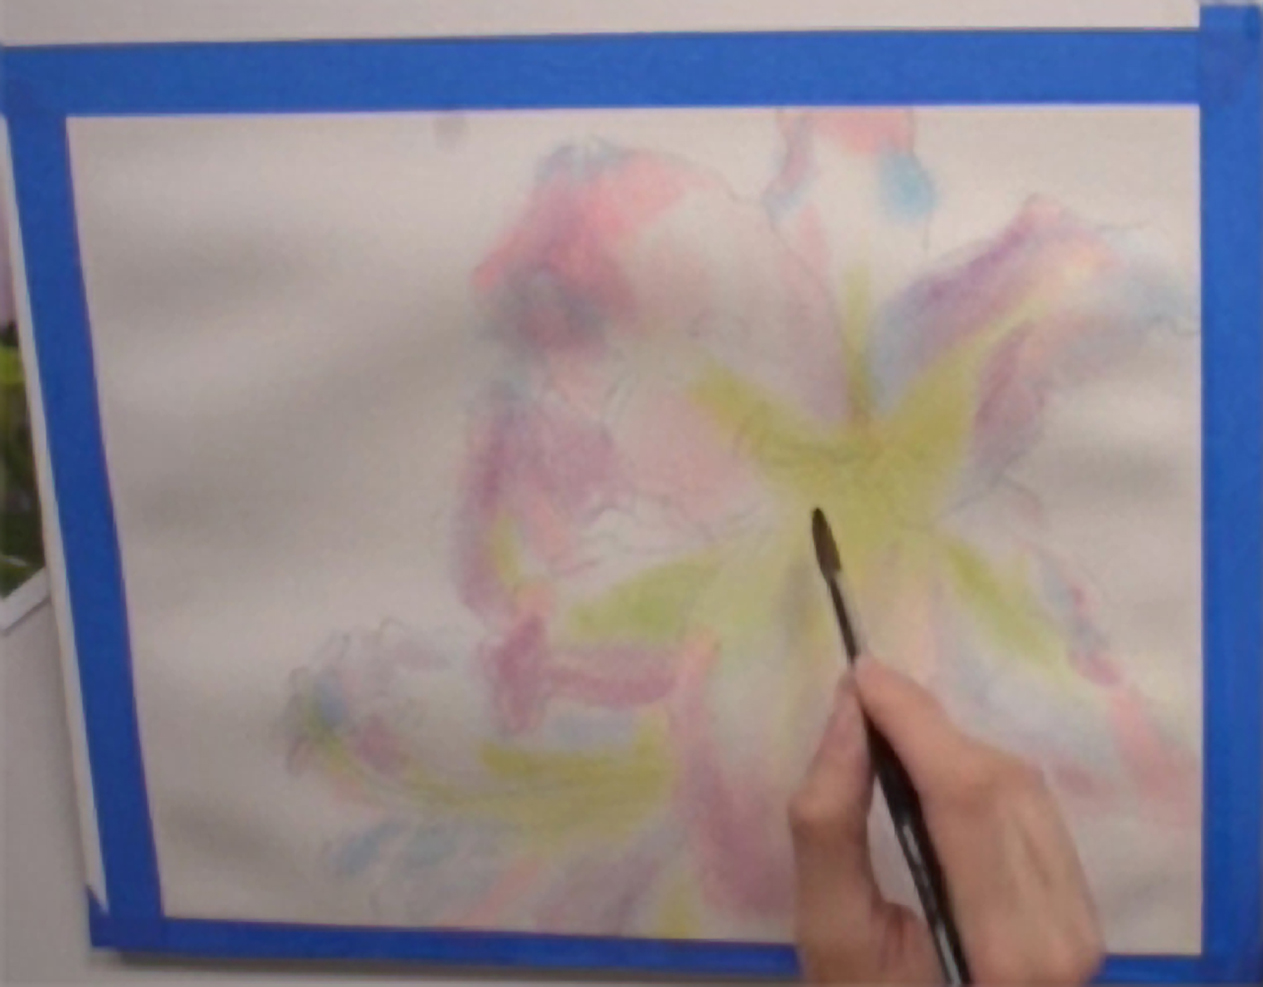 Next, mix some Rose Tyran and Orange to create a nice warm pink and add it to the edges of the flower petals and allow the Cerulean Blue and Rose Tyran to blend together. Once you have done that, add some Purple and more of the Cerulean Blue for initial shadowing, paying close attention to how the petals fold in and out and curve away from the light.
Step 4: Painting Petals And Stamens
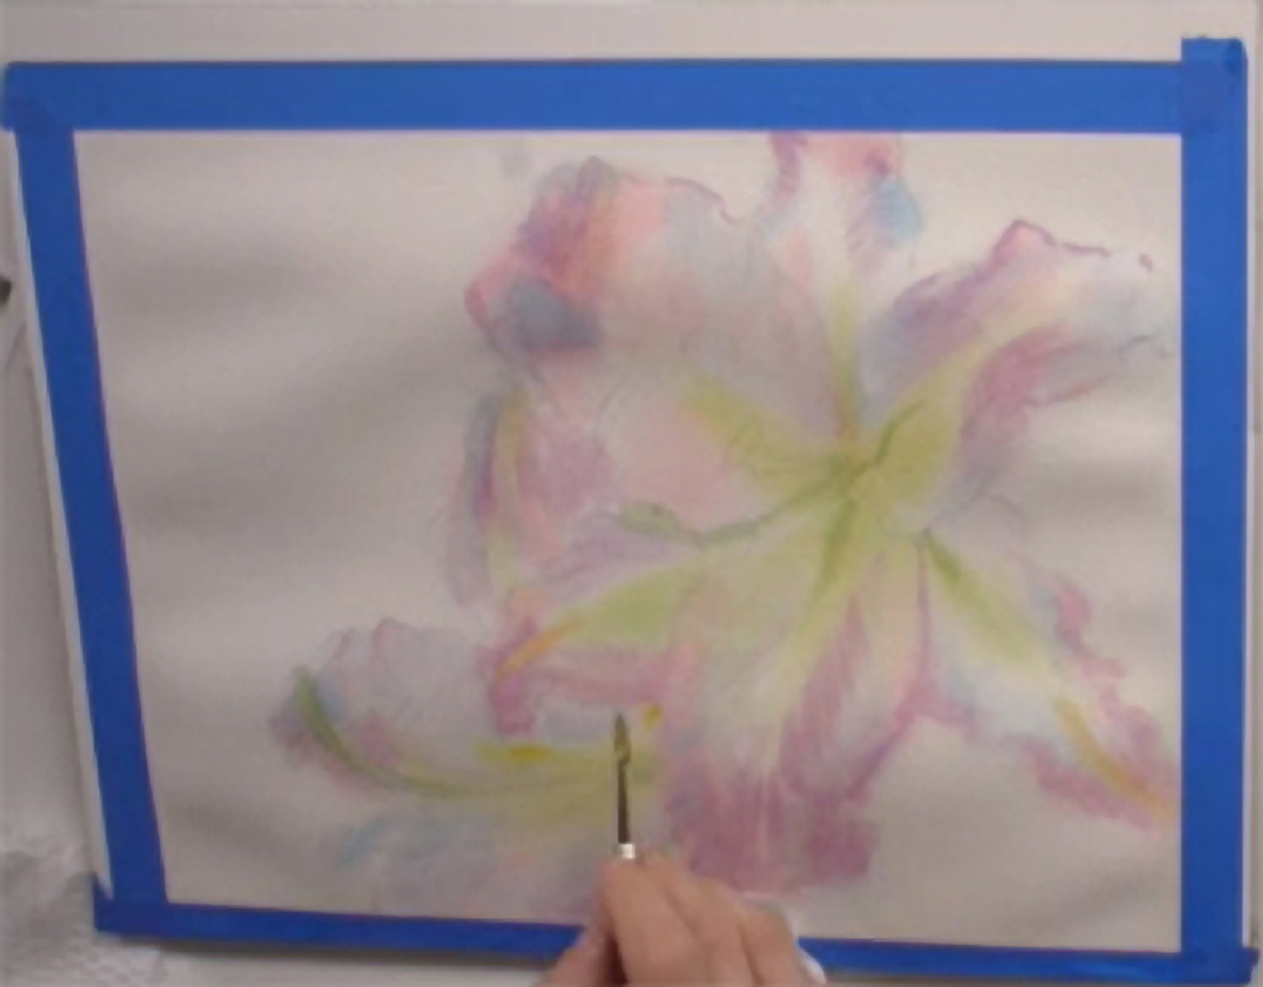 Use a damp paper towel to lift out any unwanted color to preserve the white of the paper for highlights. Mix some of the Orange and Lemon Yellow together and paint the center crease of the petals. Switch to the small size 2 Raphael brush, mix some of the Permanent Purple and Rose Tyran together and carefully add it to the edges of the petals. Then take some of the Sap Green and Lemon Yellow to paint the shapes of the stamens. Pay close attention to your reference image for color inspiration and overall contouring. Switch to the larger size 16 round brush to blend colors and soften edges as needed. Once the paper begins to dry and stops absorbing the pigment, finish up, and allow the first layer to completely dry.
Step 5: Painting The Background Layer
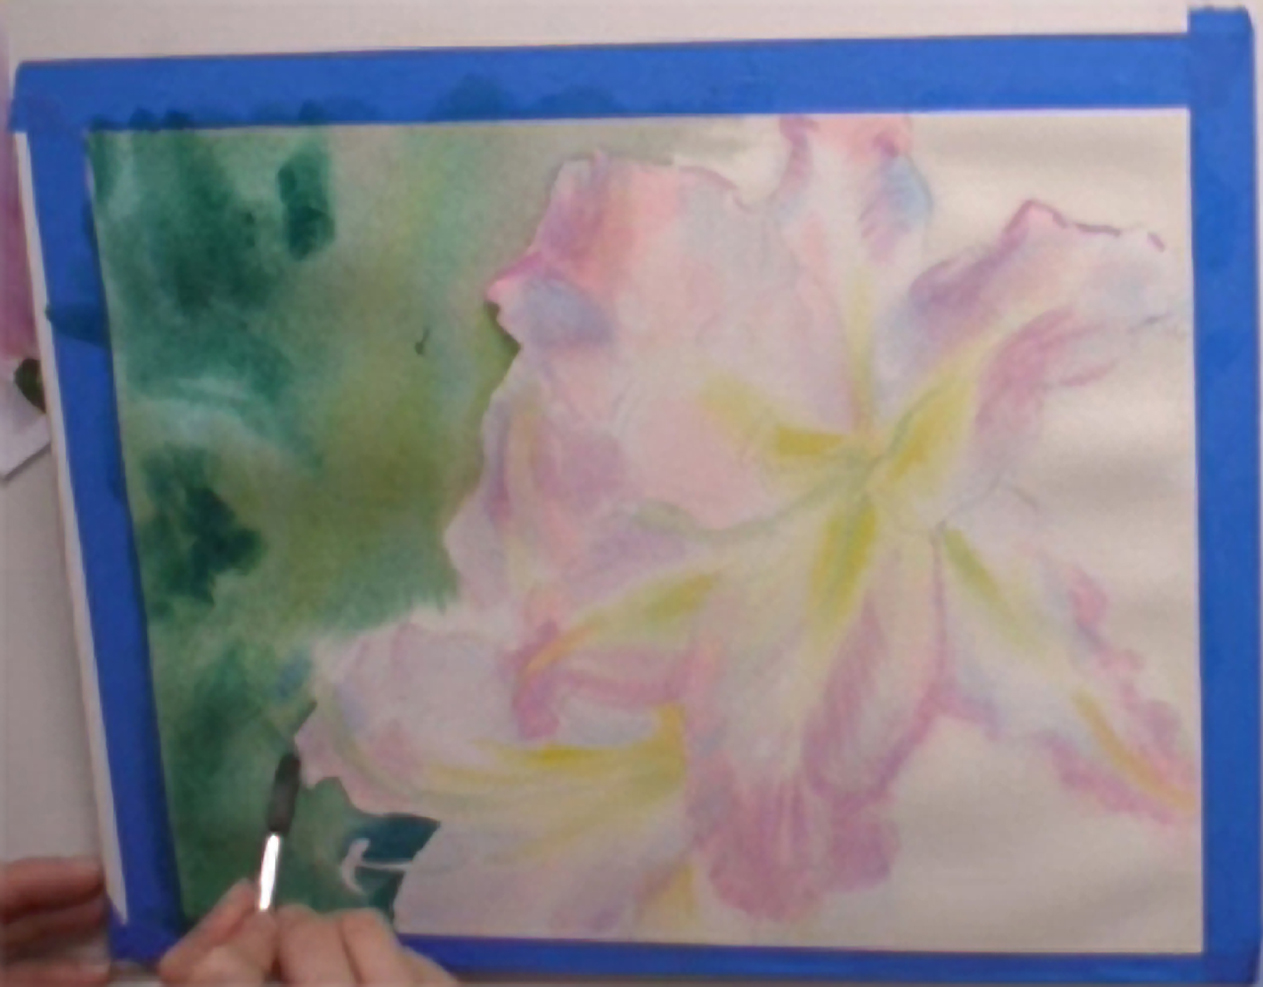 Once the first layer of the painting is dry, it's time to begin the second layer. Add Veridian, Hookers Green, Perylene Green, Cobalt Blue, Burnt Sienna to your pallet. With the Rosemary large squirrel hair brush, add clean water around the white areas and right along the outer edges of the lilies to prep the background of the lilies. With the size 7 brush begin dropping in mixes of Viridian, Hooker's Greens, Perylene Green, Lemon Yellow, and Cerulean Blue with a variety of brush strokes to create a textured effect. Mute the greens and other cooler colors with a little bit of Cadmium Red to create contrast. Switch to the large size 16 brush as needed to fill in the color.
Step 6: Hard Edges With Negative Painting
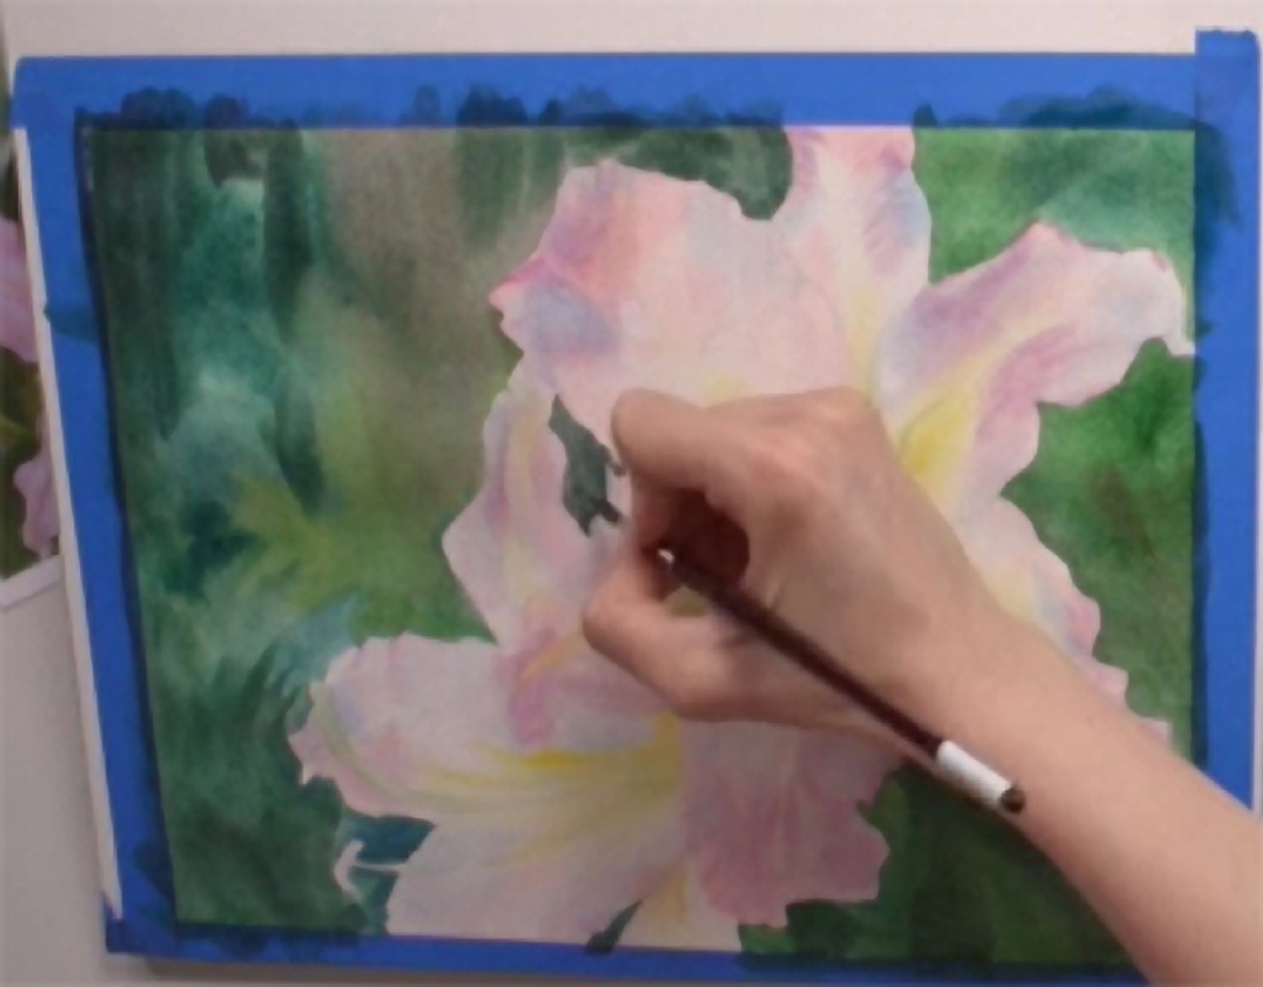 As you are painting the background, be sure to be very careful around the edges of the lily. Having a crisp, clean edge will really help make the lilies pop and help show off the curves and folds of the petals. Remember to paint the spaces in between the petals. Switch to the smaller Raphael size 2 brush to paint the finer shapes. Move the painting around to get to any hard to reach places.
Step 7: Painting Details With Wet-On-Dry Technique
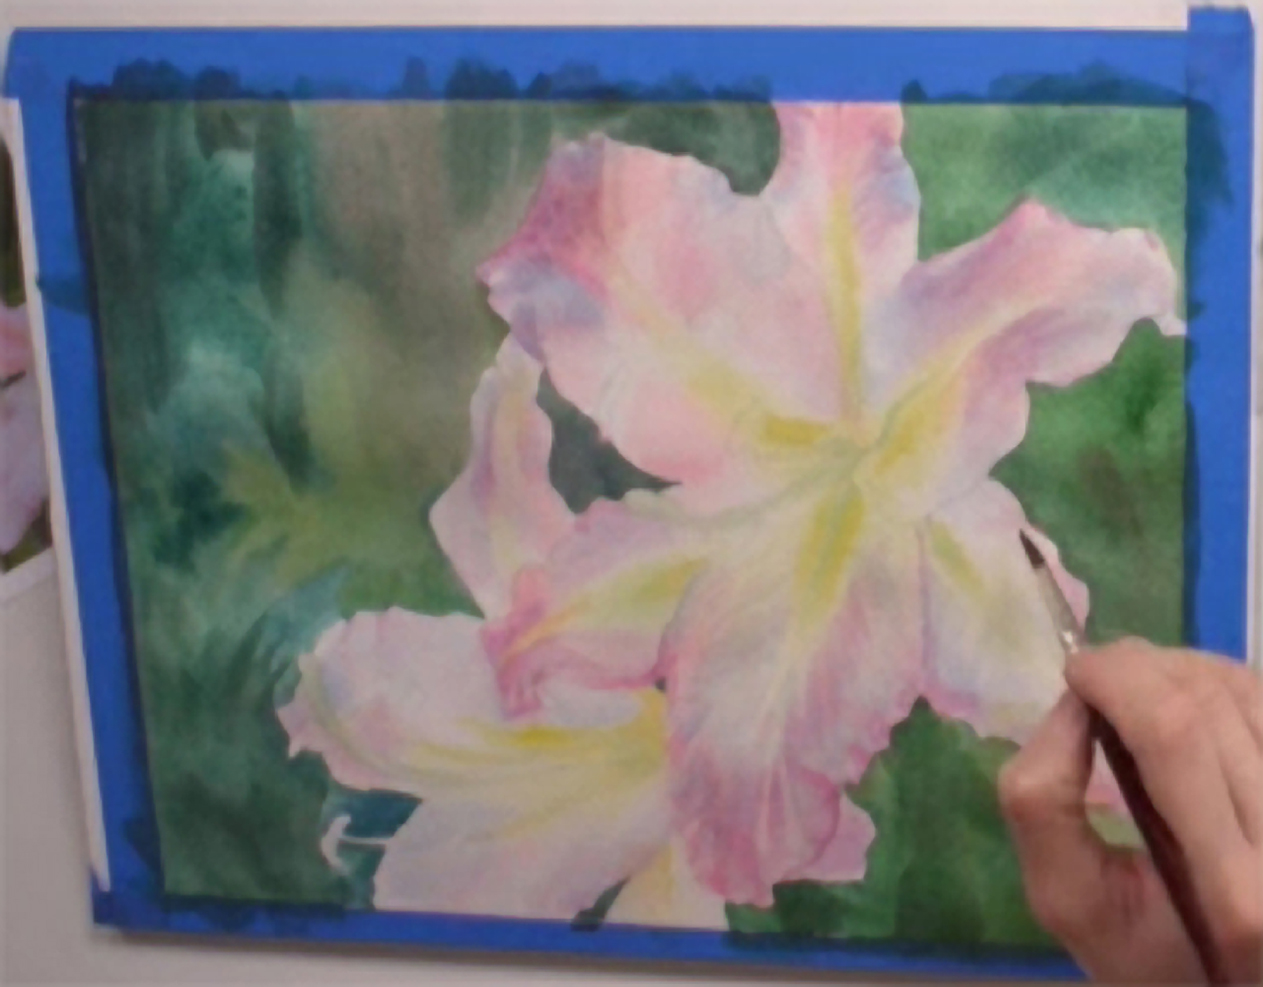 Once the background is complete, take a look at your reference image again. It's time to start working on adding details and values to the lilies with a wet-on-dry technique. Add Cobalt Blue and Burnt Sienna to your pallet. Taking the size 6 brush and size 7 brush add some Purple, Rose Tyrian, and Cerulean Blue to the edges and outer edges of the petals of the main flower in the foreground. Working one petal at a time, add to the first layer of color already on the paper and soften the edges as you go. Pay attention to shaping the petals. You want to bring out the illusion of the curving petals.
Step 8: Details For The Background Lily Flower
 Taking the size 6 brush, add some Lemon Yellow to enhance the yellow at the center of the flowers, which was already added in the first layer. Next, take your size 7 brush and lightly add some Cerulean Blue to the petals of the flower in the background to darken it and to help make the front lily pop. Soften the edges with a clean brush. This flower will be less detailed than the main lily in the foreground.
Step 9: Detailing The Petals Of The Background Lily
 Next add some Cadmium Red and Crimson to your pallet. Using the size 6 brush, splatter a mix of Cadmium Red and Crimson on the petals of the lily in the background. Allow this second layer to dry.
Step 10: Adding The Third Layer Of Paint
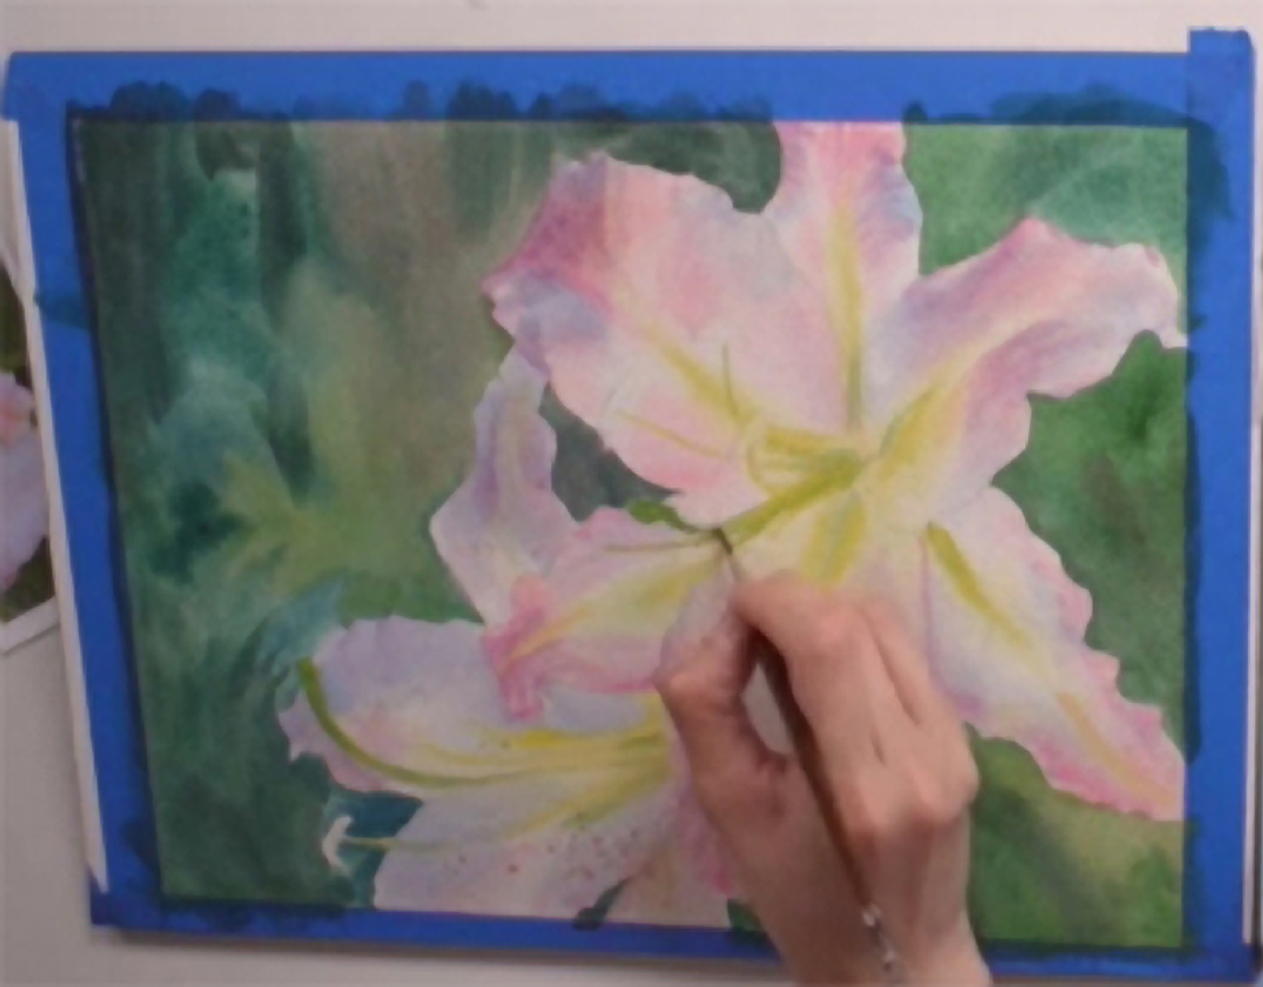 The third and final layer is where we add the final details of the painting. Add Cadmium Yellow and Burnt Umbre to your pallet. Mix the Lemon Yellow and Cadmium yellow and, with the size 7 brush, paint the shape of the center stamens. Switch to the Raphael size 2 brush and mix some Veridian and Sap Green to paint the tips of each stamen. Blend the green into the yellow of the stamen.
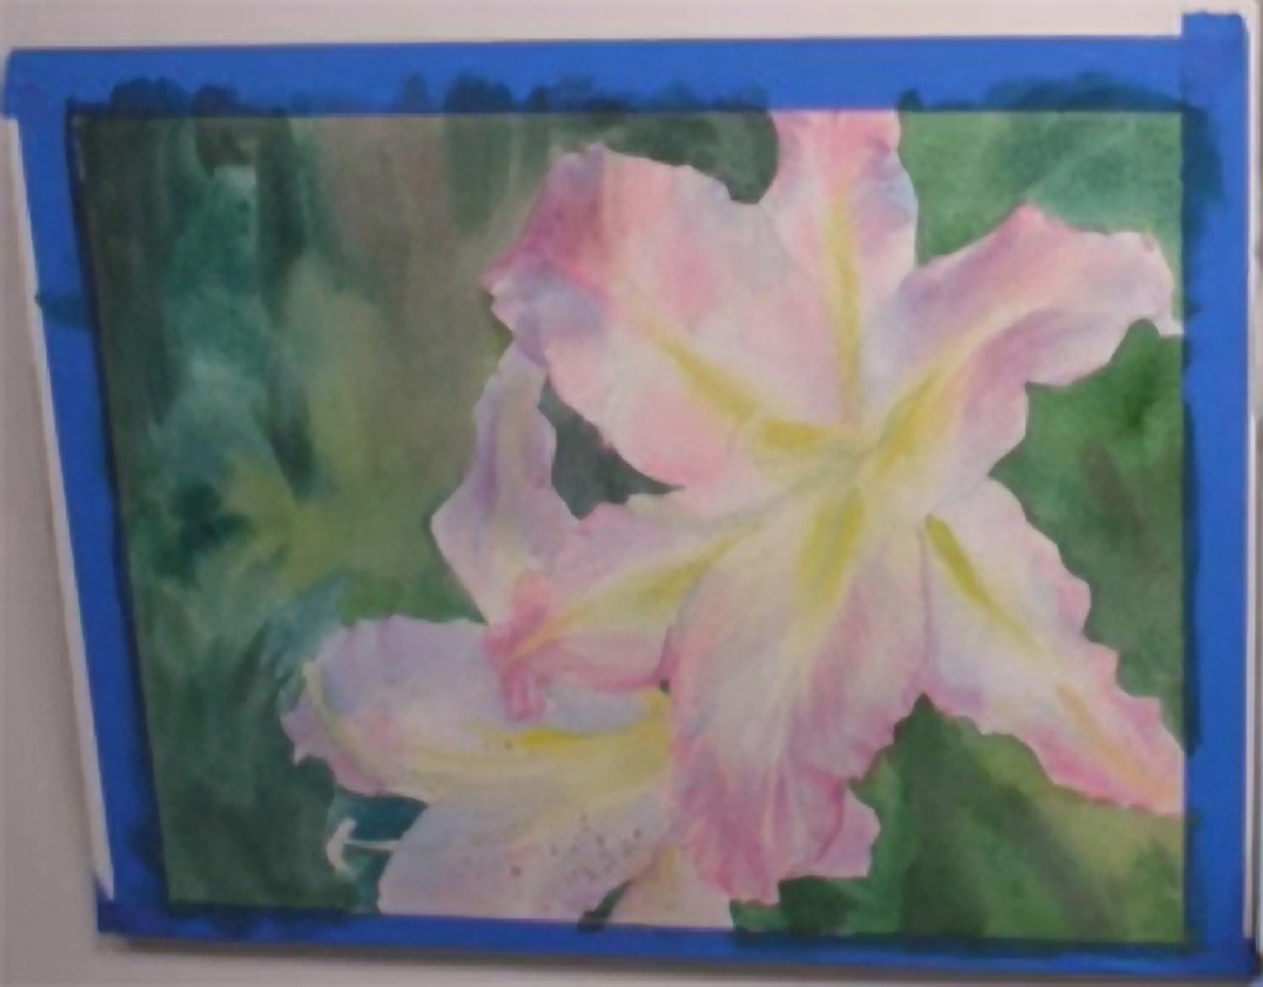
Step 11: Sharpening Edges And Adding Shadows
 To clean up some of the edges of the petals, mix some Purple and Rose Tyran and add it to the edging with the size 7 brush, sharpening different areas and darkening shadows. Use your reference image as a guide.
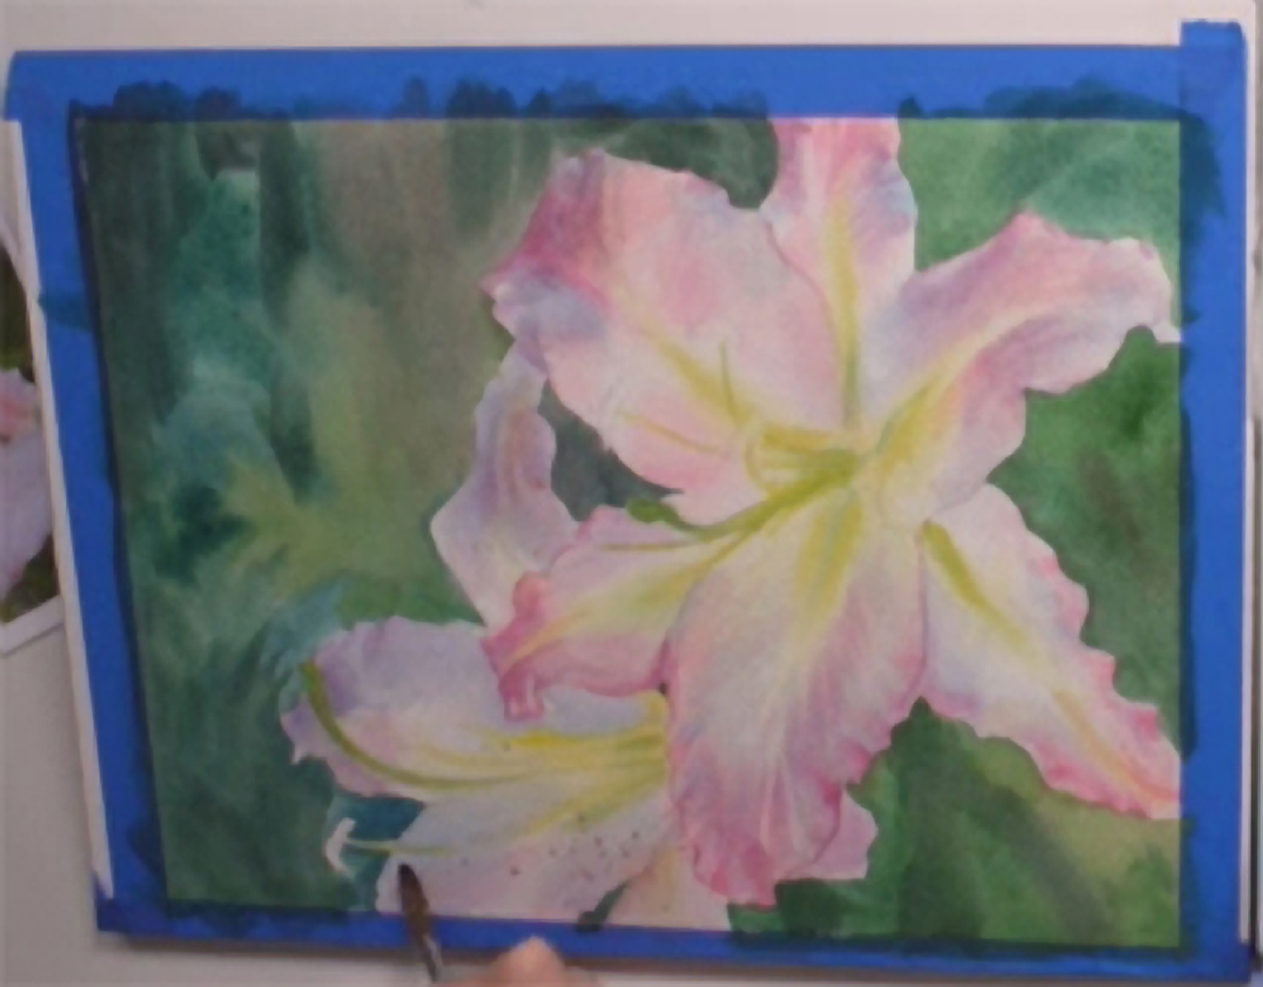
Step 12: All Done!
 (Click the painting for a large image) Final Touches: take some of the Cadmium Red and Crimson mix, adding a small amount of Burnt Sienna, and paint the tips of the stamens to create the pollen ends with the small size 2 brush. Next, with the same mix, splatter a light amount to create the spots on the petals. Allow the painting to dry. Remove the masking tape to reveal a clean edge.


